


原文链接:(更好排版、视频播放、社群交流、最新AI开源项目、AI工具分享都在这个公众号!)
最新开源!Cover Agent 自动生成代码!开源的Copilot!
🌟 Cover Agent是一个更广泛的实用程序套件的 ** 一部分 ** ,旨在自动为软件项目 创建单元测试 。利用先进的
生成式 AI 模型,它旨在简化和加快测试过程,确保高质量的软件开发,系统包含多个组件。
Github:https://github.com/Codium-ai/cover-agent/ _ _
Hello,大家好啊,我是Aitrainee,今天想讨论一下Cover-Agent — 介绍人工智能工具如何通过自动生成 高质量的单元测试
来改变你的开发工作流程。无论你是开发人员还是研究人员,Cover-Agent 都旨在简化你的编码流程并有效提高代码覆盖率。
这是个一两天前开源的新项目,我们知道现在Vscode、Pycharm这些IDE都有使用生成性AI工具比如ChatGPT、Claude自动生成代码的插件,这些插件有一个功能是增加代码覆盖率的测试。
然而,在实践中,生成的测试中只有很少一部分能符合要求。为了解决这个问题,Cover-Agent工具会不断生成和验证新的测试,直到达到设定的覆盖率目标。
尽管这个过程已经部分自动化,但仍需要改进,Cover-Agent团队希望该工具能更智能,自动为代码变更生成有价值的测试。
Cover Agent这个存储库包括了 Automated Unit Test Improvement using Large
Language Models at Meta 论文中描述的 TestGen-LLM 的首个已知实现。
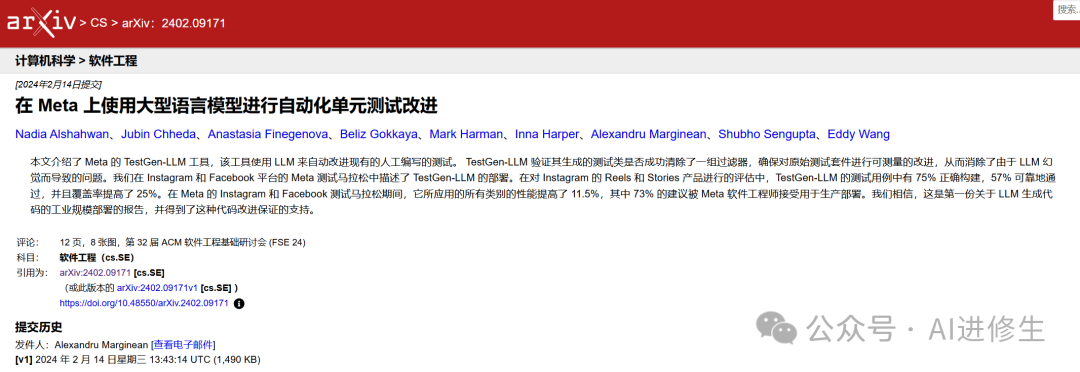
▲ 在 Meta 上使用大型语言模型进行自动化单元测试改进
Cover-Agent 可以通过终端运行,计划集成到流行的 CI 平台中。

系统包含多个组件:
-
1. 测试运行器: 执行命令或脚本以运行测试套件并生成代码覆盖率报告。
-
2. 覆盖率解析器: 验证随着测试的增加,代码覆盖率是否增加,确保新测试对整体测试效果有所贡献。
-
3. 提示构建器: 从代码库中收集必要数据并构建传递给大型语言模型(LLM)的提示。
-
4. AI 调用器: 与 LLM 交互,根据提供的提示生成测试。
我发现他们官网【另一个项目:PR-Agent:一款由人工智能驱动的 🤖 工具,用于自动进行 Pull
请求分析、反馈、建议等!💻🔍】做得是真炫啊,手动狗头.jpg(嘿嘿)
我们来看博主 WorldofAI 关于Cover-Agent的介绍视频
下面提供官方的 文档介绍、相关资源、部署教程 等,进一步支撑你的行动,以提升本文的帮助力。
 安装和使用
要求
开始之前,请确保您具备以下条件:
- • 在环境变量中设置了
OPENAI_API_KEY,这是调用 OpenAI API 所必需的。
如果直接从存储库运行,您还需要:
-
• 系统中安装了 Python。
-
• 安装了 Poetry 以管理 Python 包依赖。Poetry 的安装说明请参见 https://python-poetry.org/docs/。
独立运行时
Cover Agent 可以作为 Python Pip 包安装,也可以作为独立可执行文件运行。
Python Pip
要通过 GitHub 直接安装 Python Pip 包,请运行以下命令:
pip install git+https://github.com/Codium-ai/cover-agent.git
二进制文件
无需在系统上安装任何 Python 环境(例如在不包含 Python 的 Docker 容器中)即可运行二进制文件。您可以通过导航到项目的 发布页面
下载适用于您系统的版本。
存储库设置
运行以下命令安装所有依赖项并从源代码运行项目:
poetry install
运行代码
下载可执行文件或安装 Pip 包后,您可以运行 Cover Agent 来生成和验证单元测试。从命令行执行以下命令:
cover-agent \
  --source-file-path "<path_to_source_file>" \
  --test-file-path "<path_to_test_file>" \
  --code-coverage-report-path "<path_to_coverage_report>" \
  --test-command "<test_command_to_run>" \
  --test-command-dir "<directory_to_run_test_command>" \
  --coverage-type "<type_of_coverage_report>" \
  --desired-coverage <desired_coverage_between_0_and_100> \
  --max-iterations <max_number_of_llm_iterations> \
  --included-files "<optional_list_of_files_to_include>"
您可以使用此存储库中的示例项目来运行此代码作为测试。
按照位于 templated_tests/python_fastapi/ 目录中的 README.md
文件中的步骤操作,然后返回存储库根目录并运行以下命令,为 python fastapi 示例添加测试:
cover-agent \
  --source-file-path "templated_tests/python_fastapi/app.py" \
  --test-file-path "templated_tests/python_fastapi/test_app.py" \
  --code-coverage-report-path "templated_tests/python_fastapi/coverage.xml" \
  --test-command "pytest --cov=. --cov-report=xml --cov-report=term" \
  --test-command-dir "templated_tests/python_fastapi" \
  --coverage-type "cobertura" \
  --desired-coverage 70 \
  --max-iterations 10
对于 go 示例,请进入 templated_tests/go_webservice 目录,按照 README.md
设置项目。要使用覆盖率报告,您需要安装 gocov 和 gocov-xml 。运行以下命令安装这些工具:
go install github.com/axw/gocov/gocov@v1.1.0
go install github.com/AlekSi/gocov-xml@v1.1.0
然后运行以下命令:
cover-agent \
  --source-file-path "app.go" \
  --test-file-path "app_test.go" \
  --code-coverage-report-path "coverage.xml" \
  --test-command "go test -coverprofile=coverage.out && gocov convert coverage.out | gocov-xml > coverage.xml" \
  --test-command-dir $(pwd) \
  --coverage-type "cobertura" \
  --desired-coverage 70 \
  --max-iterations 1
尝试通过在此存储库的根目录运行以下命令,为此项目添加更多测试:
poetry run cover-agent \
  --source-file-path "cover_agent/main.py" \
  --test-file-path "tests/test_main.py" \
  --code-coverage-report-path "coverage.xml" \
  --test-command "poetry run pytest --junitxml=testLog.xml --cov=templated_tests --cov=cover_agent --cov-report=xml --cov-report=term --log-cli-level=INFO" \
  --coverage-type "cobertura" \
  --desired-coverage 70 \
  --max-iterations 1 \
  --model "gpt-4o"
注意:如果您使用的是 Poetry,则使用 poetry run cover-agent 命令,而不是 cover-agent 运行命令。
输出
一些调试文件将会在存储库本地输出(这些文件是 .gitignore 的一部分)
-
•
generated_prompt.md:发送到 LLM 的完整提示 -
•
run.log:转储到stdout的日志副本 -
•
test_results.html:包含以下内容的结果表:-
• 测试状态
-
• 失败原因(如果适用)
-
• 退出代码
-
•
stderr -
•
stdout -
• 生成的测试
-
使用其他 LLM
该项目使用 LiteLLM 与 OpenAI 和其他托管的 LLM 通信(支持至今 100 多种 LLM)。要使用除 OpenAI
默认模型之外的其他模型,您需要:
-
1. 按照 LiteLLM 说明 导出支持的 LLM 所需的任何环境变量。
-
2. 在调用 Cover Agent 时使用
--model选项调用模型名称。
例如(如 LiteLLM 快速入门指南 中所示):
export

 VERTEX_PROJECT="hardy-project"
export VERTEX_LOCATION="us-west"

cover-agent \
  ...
  --model "vertex_ai/gemini-pro"
开发
本节讨论此项目的开发。
版本控制
在合并到 main 分支之前,请确保手动增加存储库根目录中 cover_agent/version.txt 中的版本号。
运行测试
如上所述,运行 poetry install 命令以设置您的开发环境。
注意:对于旧版本的 Poetry,您可能需要包含 --dev 选项以安装开发依赖项。
设置好环境后,运行以下命令:
poetry run pytest --junitxml=testLog.xml --cov=templated_tests --cov=cover_agent --cov-report=xml --cov-report=term --log-cli-level=INFO
这还将生成 .github/workflows/ci_pipeline.yml 中生成的所有日志和输出报告。
参考链接:
[1]https://github.com/Codium-ai/cover-agent/
[2]https://www.codium.ai/blog/we-created-the-first-open-source-implementation-
of-metas-testgen-llm/
知音难求,自我修炼亦艰
抓住前沿技术的机遇,与我们一起成为创新的超级个体
(把握AIGC时代的个人力量)
**
**
— 完 —
** 点这里👇关注我,记得标星哦~ **
**
**
一键三连「分享」、「点赞」和「在看」
科技前沿进展日日相见 ~

预览时标签不可点
微信扫一扫
关注该公众号
轻触阅读原文

AI进修生
收藏


 1540
1540

 被折叠的 条评论
为什么被折叠?
被折叠的 条评论
为什么被折叠?
 到【灌水乐园】发言


