


使用arduino框架
在platformlo插件中新建项目,然后board选择 espressif esp32 dev module,framework选择 arduino就可以自动下载arduino环境了。
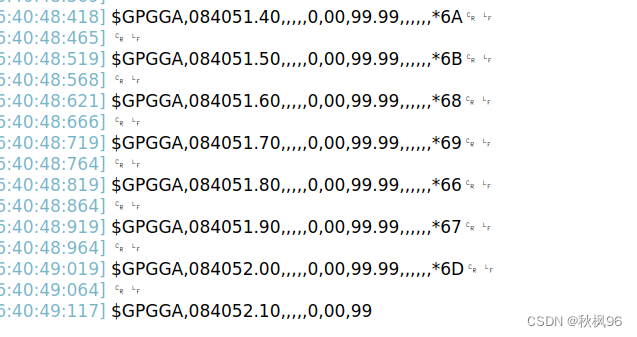
写一个程序测试一下,这段程序读取串口2的数据然后用串口0发送出去,这里串口2接的是一个gps模块
#include <Arduino.h>

String inputString = "";
bool stringComplete = false;

void setup() {
  Serial.begin(9600);
  Serial2.begin(9600);
}

void loop() {
  if (stringComplete) {
    Serial.println(inputString);
    inputString = "";
    stringComplete = false ;
  }
}

void serialEvent2(){
  while (Serial2.available()) {
    char inChar = (char)Serial2.read();
    inputString += inChar;
    if(inChar == '\n') {
      stringComplete = true ;
    }
  }
}
成功读取了gps的数据
ros2发布主题
需要在电脑端安装ros2与MicroXRCEAgent,可以参考这一篇文章https://blog.csdn.net/m0_58944591/article/details/134244456
下载micro_ros_platformio库,在打开的项目中修改platformio.ini文件,添加micro_ros_platformio库的地址,保存会自动下载
board_microros_transport = wifi
lib_deps =
	https://gitee.com/ohhuo/micro_ros_platformio.git
先测试一下功能,发布一个名为gps_publisher的主题,内容为"this is a gps data"
修改IPAddress agent_ip 为主机的ip地址,char ssid[]为要连接的wifi名,char psk[]为wifi密码
#include <Arduino.h>
#include <micro_ros_platformio.h>

#include <rcl/rcl.h>
#include <rclc/rclc.h>
#include <rclc/executor.h>

#include <std_msgs/msg/string.h>


rcl_publisher_t publisher;
std_msgs__msg__String msg;

rclc_executor_t executor;
rclc_support_t support;
rcl_allocator_t allocator;
rcl_node_t node;
rcl_timer_t timer;

#define RCCHECK(fn) { rcl_ret_t temp_rc = fn; if((temp_rc != RCL_RET_OK)){error_loop();}}
#define RCSOFTCHECK(fn) { rcl_ret_t temp_rc = fn; if((temp_rc != RCL_RET_OK)){}}

String inputString = "";
bool stringComplete = false;

// Error handle loop
void error_loop() {
  while(1) {
    delay(100);
  }
}

void timer_callback(rcl_timer_t * timer, int64_t last_call_time) {
  RCLC_UNUSED(last_call_time);
  if (timer != NULL) {
    RCSOFTCHECK(rcl_publish(&publisher, &msg, NULL));
    msg.data.data = "this is a gps data";
  }
}

void setup() {
  Serial.begin(9600);
  Serial2.begin(38400);
  IPAddress agent_ip(192, 168, 43, 101);
  size_t agent_port = 8888;

  char ssid[] = "MYHOST";
  char psk[]= "12345678";
  set_microros_wifi_transports(ssid, psk, agent_ip, agent_port);
  delay(2000);

  allocator = rcl_get_default_allocator();

  //create init_options
  RCCHECK(rclc_support_init(&support, 0, NULL, &allocator));

  // // create node
  RCCHECK(rclc_node_init_default(&node, "gps_node", "", &support));

  // create publisher
  RCCHECK(rclc_publisher_init_default(
    &publisher,
    &node,
    ROSIDL_GET_MSG_TYPE_SUPPORT(std_msgs, msg, String),
    "gps_publisher"));

  // create timer,
  const unsigned int timer_timeout = 1000;
  RCCHECK(rclc_timer_init_default(
    &timer,
    &support,
    RCL_MS_TO_NS(timer_timeout),
    timer_callback));

  // create executor
  RCCHECK(rclc_executor_init(&executor, &support.context, 1, &allocator));
  RCCHECK(rclc_executor_add_timer(&executor, &timer));
}

void loop() {
  delay(100);
  RCSOFTCHECK(rclc_executor_spin_some(&executor, RCL_MS_TO_NS(100)));
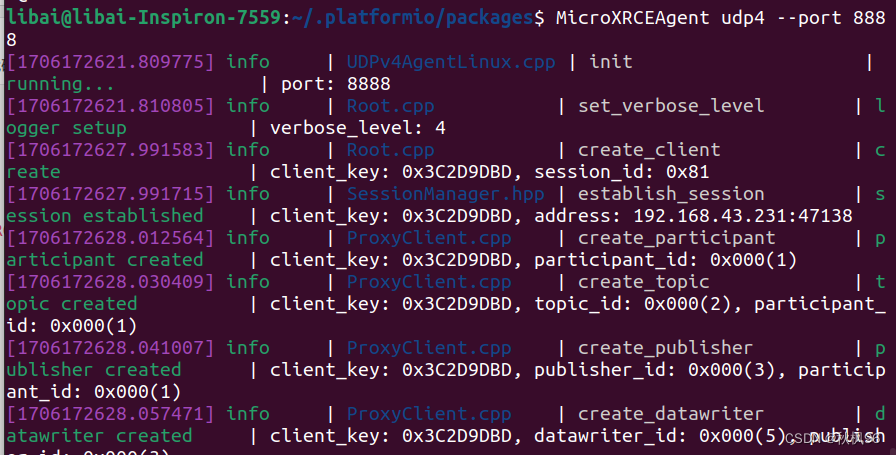
运行micro-ROS Agent
MicroXRCEAgent udp4 --port 8888
显示下面的内容就成功了
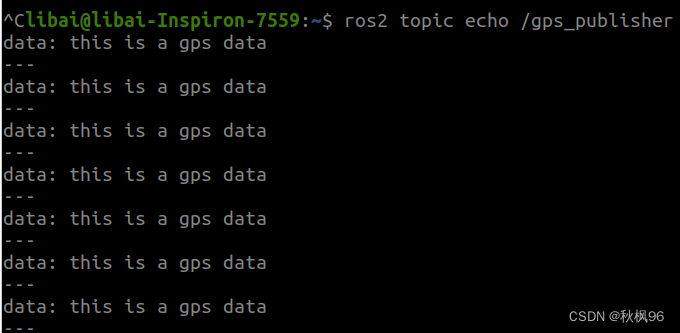
使用ros2 打印刚才发布的主题
ros2 topic echo /gps_publisher
通过ros2发布gps数据
完成以上两部分后只需要稍微修改以下程序就可以实现功能了
#include <Arduino.h>
#include <micro_ros_platformio.h>

#include <rcl/rcl.h>
#include <rclc/rclc.h>
#include <rclc/executor.h>

#include <std_msgs/msg/string.h>


rcl_publisher_t publisher;
std_msgs__msg__String msg;

rclc_executor_t executor;
rclc_support_t support;
rcl_allocator_t allocator;
rcl_node_t node;
rcl_timer_t timer;

#define RCCHECK(fn) { rcl_ret_t temp_rc = fn; if((temp_rc != RCL_RET_OK)){error_loop();}}
#define RCSOFTCHECK(fn) { rcl_ret_t temp_rc = fn; if((temp_rc != RCL_RET_OK)){}}

String inputString = "";
bool stringComplete = false;

// Error handle loop
void error_loop() {
  while(1) {
    delay(100);
  }
}

void timer_callback(rcl_timer_t * timer, int64_t last_call_time) {
  RCLC_UNUSED(last_call_time);
  if (timer != NULL) {
    if (stringComplete) {
      RCSOFTCHECK(rcl_publish(&publisher, &msg, NULL));
      Serial.println(inputString);
      msg.data.data =  (char *)inputString.c_str();
      stringComplete = false ;
    }
  }
}

void setup() {
  Serial.begin(9600);
  Serial2.begin(38400);
  IPAddress agent_ip(192, 168, 43, 101);
  size_t agent_port = 8888;

  char ssid[] = "MYHOST";
  char psk[]= "12345678";
  set_microros_wifi_transports(ssid, psk, agent_ip, agent_port);
  delay(2000);

  allocator = rcl_get_default_allocator();

  //create init_options
  RCCHECK(rclc_support_init(&support, 0, NULL, &allocator));

  // // create node
  RCCHECK(rclc_node_init_default(&node, "gps_node", "", &support));

  // create publisher
  RCCHECK(rclc_publisher_init_default(
    &publisher,
    &node,
    ROSIDL_GET_MSG_TYPE_SUPPORT(std_msgs, msg, String),
    "gps_publisher"));

  // create timer,
  const unsigned int timer_timeout = 500;
  RCCHECK(rclc_timer_init_default(
    &timer,
    &support,
    RCL_MS_TO_NS(timer_timeout),
    timer_callback));

  // create executor
  RCCHECK(rclc_executor_init(&executor, &support.context, 1, &allocator));
  RCCHECK(rclc_executor_add_timer(&executor, &timer));
}

void loop() {
  delay(100);
  RCSOFTCHECK(rclc_executor_spin_some(&executor, RCL_MS_TO_NS(100)));
}
void serialEvent2(){
    String str;
    while (Serial2.available()) {
      char inChar = (char)Serial2.read();
      str += inChar;
      if(inChar == '\n') {
        stringComplete = true ;
        inputString = str;
      }
    }
}
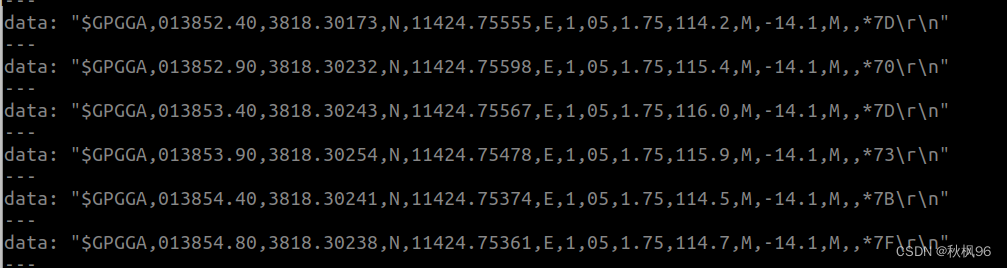
使用ros2 打印刚才发布gps数据主题
ros2 topic echo /gps_publisher
自定义接口
创建ros2的接口文件文件
mkdir interface/src
cd interface/src
ros2 pkg create --build-type ament_cmake my_interface
创建 srv msg 文件
mkdir srv msg
写入需要的内容,这里创建一个名为Cmd.srv的文件
cd srv
vim Cmd.srv
这里写上需求与响应中间用___隔开
int32 cmd
int32 value
---
int32 result
在CMakeLists.txt中增加下面内容
find_package(rosidl_default_generators REQUIRED)

rosidl_generate_interfaces(${PROJECT_NAME}
  "srv/Cmd.srv"
)
在package.xml中增加下面内容

```bash
<build_depend>rosidl_default_generators</build_depend>
<exec_depend>rosidl_default_runtime</exec_depend>
<member_of_group>rosidl_interface_packages</member_of_group>
然后退回到interface根目录,colcon build 编译
使用ros命令查看以下
. install/setup.bash
ros2 interface show my_interface/srv/Cmd

在ESP32的工作目录中新建extra_packages文件夹,将my_interface/src文件夹里的my_interface文件夹复制到里面,删除里面的.pio/libdeps/esp32dev/micro_ros_platformio/libmicroros文件夹,
最后编译,可以看到已经添加到接口文件了

添加include 就能使用定义的接口文件了
#include <my_interface/srv/cmd.h>


 1265
1265


 被折叠的 条评论
为什么被折叠?
被折叠的 条评论
为什么被折叠?
 到【灌水乐园】发言


