


Qwen-Agent是一个基于 Qwen 的指令跟随、工具使用、计划和记忆能力来开发 LLM 应用程序的框架。它还附带了一些示例应用程序,例如浏览器助手、代码解释器和自定义助手。
本篇文章主要看看怎么使用 Qwen-Agent。首先我们需要将 Qwen-Agent 安装好。
注:本篇内容大部分来自官方文档,主要目的做一下Qwen-Agent全局介绍,为后续Qwen-Agent内部代码实现阅读做一个全局性的了解。
安装
git clone https://github.com/QwenLM/Qwen-Agent.git cd Qwen-Agent pip install -e .
自定义智能体
Qwen-Agent 提供包括语言模型和提示词等原子级组件,及智能体等高级组件在内的多种组件。以下示例选取助理组件进行展示,阐述了如何整合自定义工具以及如何迅速开发出一个能够应用这些工具的代理程序。
`import json import os import json5 import urllib.parse from qwen_agent.agents import Assistant from qwen_agent.tools.base import BaseTool, register_tool ## 大语言模型定义 llm_cfg = { # Use the model service provided by DashScope: 'model': 'qwen-max', 'model_server': 'dashscope', # 'api_key': 'YOUR_DASHSCOPE_API_KEY', # It will use the `DASHSCOPE_API_KEY' environment variable if 'api_key' is not set here. # Use your own model service compatible with OpenAI API: # 'model': 'Qwen/Qwen2.5-7B-Instruct', # 'model_server': 'http://localhost:8000/v1', # api_base # 'api_key': 'EMPTY', # (Optional) LLM hyperparameters for generation: 'generate_cfg': { 'top_p': 0.8 } } system = 'According to the user\'s request, you first draw a picture and then automatically run code to download the picture ' + \ 'and select an image operation from the given document to process the image' # 工具定义 # Add a custom tool named my_image_gen: @register_tool('my_image_gen') class MyImageGen(BaseTool): description = 'AI painting (image generation) service, input text description, and return the image URL drawn based on text information.' parameters = [{ 'name': 'prompt', 'type': 'string', 'description': 'Detailed description of the desired image content, in English', 'required': True }] def call(self, params: str, **kwargs) -> str: prompt = json5.loads(params)['prompt'] prompt = urllib.parse.quote(prompt) return json.dumps( {'image_url': f'https://image.pollinations.ai/prompt/{prompt}'}, ensure_ascii=False) # Agent的定义 tools = ['my_image_gen', 'code_interpreter'] # code_interpreter is a built-in tool in Qwen-Agent bot = Assistant(llm=llm_cfg, system_message=system, function_list=tools, files=[os.path.abspath('doc.pdf')]) messages = [] while True: query = input('user question: ') messages.append({'role': 'user', 'content': query}) response = [] for response in bot.run(messages=messages): print('bot response:', response) messages.extend(response) `
上面的代码主要做了三件事:
-
大语言模型配置定义;
-
工具定义;
-
Agent的定义;
经过上面三步就可以完成一个小小的智能体了。
LLM 使用
目前,Qwen-Agent提供了Qwen的DashScope API和OpenAI API访问接口;Qwen-VL的DashScope API访问接口。均已经支持流式Function Calling。
两种使用方式
外部直接调用:
LLM统一使用get_chat_model(cfg: Optional[Dict] = None) -> BaseChatModel 接口来调用,参数传入LLM的配置文件, 配置文件格式如下:
-
model_type: 对应某个具体的llm类,是llm类注册的名字,即唯一ID。使用内置的dashscope和OpenAI API时,可以省略这个参数。外部注册的LLM类,需要传入这个参数来指定。
-
model:具体的模型名称
-
model_server:模型服务地址
-
generate_cfg:模型生成时候的参数
LLM类统一使用llm.chat(...) 接口生成回复,支持输入消息列表、函数等参数,具体参数列表详见BaseChatModel。 LLM完整使用样例见Function Calling。
from qwen_agent.llm import get_chat_model llm_cfg = { # Use the model service provided by DashScope: # 'model_type': 'qwen_dashscope', 'model': 'qwen-max', 'model_server': 'dashscope', # Use your own model service compatible with OpenAI API: # 'model': 'Qwen', # 'model_server': 'http://127.0.0.1:7905/v1', # (Optional) LLM hyper-paramters: 'generate_cfg': { 'top_p': 0.8 } } llm = get_chat_model(llm_cfg) messages = [{ 'role': 'user', 'content': "What's the weather like in San Francisco?" }] functions = [{ 'name': 'get_current_weather', 'description': 'Get the current weather in a given location', 'parameters': { 'type': 'object', 'properties': { 'location': { 'type': 'string', 'description': 'The city and state, e.g. San Francisco, CA', }, 'unit': { 'type': 'string', 'enum': ['celsius', 'fahrenheit'] }, }, 'required': ['location'], }, }] # 此处演示流式输出效果 responses = [] for responses in llm.chat(messages=messages, functions=functions, stream=True): print(responses)
Agent内部调用:
在Agent中,使用_call_llm(...) 函数调用LLM,每个Agent实例可以调用初始化给它的LLM,llm: Optional[Union[Dict, BaseChatModel]] = None。支持的传入类型包括:LLM配置文件或LLM对象。
注意,为了统一Agent的输出类型,Agent的 _call_llm(...) 接口默认使用流式生成方式访问LLM。
LLM 开发
Qwen-Agent提供了注册LLM的机制,在LLM 基类中,实现了统一的llm.chat(…)接口, 新注册的LLM仅需要实现特有的三个函数:
-
非流式生成接口
-
流式生成接口(如果LLM本身不支持流式生成,可以将非流式结果封装成生成器返回)
-
工具调用接口
其中,如果新注册的LLM不支持工具调用,可以继承Qwen-Agent中实现的BaseFnCallModel类, 这个类通过封装一个类似ReAct的工具调用Prompt,已经基于普通对话接口实现了Function Calling。
Tool 使用
两种使用方式
外部直接调用
Tool统一使用.call(params) 接口来调用,传入工具需要的参数,返回工具执行后的结果,返回的类型为Union[str, list, dict]。
例如,直接调用天气查询工具:
from qwen_agent.tools import AmapWeather tool = AmapWeather() res = tool.call(params = {'location': '海淀区'}) print(res)
Agent内部调用
在Agent中,使用_call_tool(...)函数调用工具,每个Agent实例可以调用初始化给它的工具列表function_list: Optional[List[Union[str, Dict, BaseTool]]] = None中的工具。 支持的传入类型包括:工具名、工具配置文件、或工具对象。例如code_interpreter、{'name': 'code_interpreter', 'timeout': 10}、 或CodeInterpreter()。
注意,为了方便将工具结果输入LLM,Agent的_call_tool(...)接口会将所有工具返回的结果转为str类型,具体见 Agent 类。
Tool 开发
Qwen-Agent提供了注册工具的机制,例如,下面我们注册一个自己的图片生成工具:
-
指定工具的name、description、和parameters,注意
@register_tool('my_image_gen')中的’my_image_gen’会被自动添加为这个类的.name属性,将作为工具的唯一标识。 -
实现
call(...)函数
import urllib.parse import json5 import json from qwen_agent.tools.base import BaseTool, register_tool # Add a custom tool named my_image_gen: @register_tool('my_image_gen') class MyImageGen(BaseTool): description = 'AI painting (image generation) service, input text description, and return the image URL drawn based on text information.' parameters = [{ 'name': 'prompt', 'type': 'string', 'description': 'Detailed description of the desired image content, in English', 'required': True }] def call(self, params: str, **kwargs) -> str: prompt = json5.loads(params)['prompt'] prompt = urllib.parse.quote(prompt) return json.dumps( {'image_url': f'https://image.pollinations.ai/prompt/{prompt}'}, ensure_ascii=False)
注册好的工具,就可以按照上文直接使用或添加到Agent里使用了。
如果不想使用注册方式,也可以直接定义工具类,然后传工具对象给Agent(没有注册的工具,不支持传工具名或配置文件)。
import urllib.parse import json5 import json from qwen_agent.tools.base import BaseTool class MyImageGen(BaseTool): name = 'my_image_gen' description = 'AI painting (image generation) service, input text description, and return the image URL drawn based on text information.' parameters = [{ 'name': 'prompt', 'type': 'string', 'description': 'Detailed description of the desired image content, in English', 'required': True }] def call(self, params: str, **kwargs) -> str: prompt = json5.loads(params)['prompt'] prompt = urllib.parse.quote(prompt) return json.dumps( {'image_url': f'https://image.pollinations.ai/prompt/{prompt}'}, ensure_ascii=False)
Agent 介绍
Agent 使用
Agent类是Qwen-Agent的一个上层接口,一个Agent对象集成了工具调用和LLM调用接口。 Agent接收一个消息列表输入,并返回一个消息列表的生成器,即流式输出的消息列表。
不同Agent类具有不同的工作流程,在agents目录提供了多个不同的基础的Agent子类, 例如ArticleAgent接收消息后,返回消息包含一篇文章;BasicDocQA返回消息包含文档问答的结果。 可以看出,这类Agent回复模式相对固定,使用场景也比较固定。
Assistant 类
提供了一个通用的Agent类:Assistant类,直接实例化这个类,可以解决大部分Single-Agent任务。 这个类的特点是:
-
支持角色扮演;
-
可以自动规划并调用工具;
-
接受输入文档,并采用内置的RAG策略解析文档。
例如在下面的例子中,通过指定LLM、工具列表、和角色指令来实例化了一个图片生成Agent, 即可开始和这个Agent交互。 从回复内容可以看出,在用户询问“a cute cat”后,这个Agent按照角色扮演的需求,自动规划并执行了绘图和代码工具,并参考给定文档对图片进行了翻转。
import os from qwen_agent.agents import Assistant llm_cfg = {'model': 'qwen-max'} tools = ['image_gen', 'amap_weather'] # image_gen and code_interpreter is a built-in tool in Qwen-Agent system = 'According to the user\'s request, you first draw a picture and then automatically run code to download the picture ' + \ 'and select an image operation from the given document to process the image' bot = Assistant(llm=llm_cfg, system_message=system, function_list=tools, files=[os.path.abspath('doc.pdf')]) messages = [{'role': 'user', 'content': 'a cute cat'}] for response in bot.run(messages=messages): print('bot response:', response) """Running results: [ {'role': 'assistant', 'content': '', 'function_call': {'name': 'my_image_gen', 'arguments': '{"prompt": "a cute cat"}'}}, {'role': 'function', 'content': '{"image_url": "https://image.pollinations.ai/prompt/a%20cute%20cat"}', 'name': 'my_image_gen'}, {'role': 'assistant', 'content': "Here is the image of a cute cat based on your description:\n\n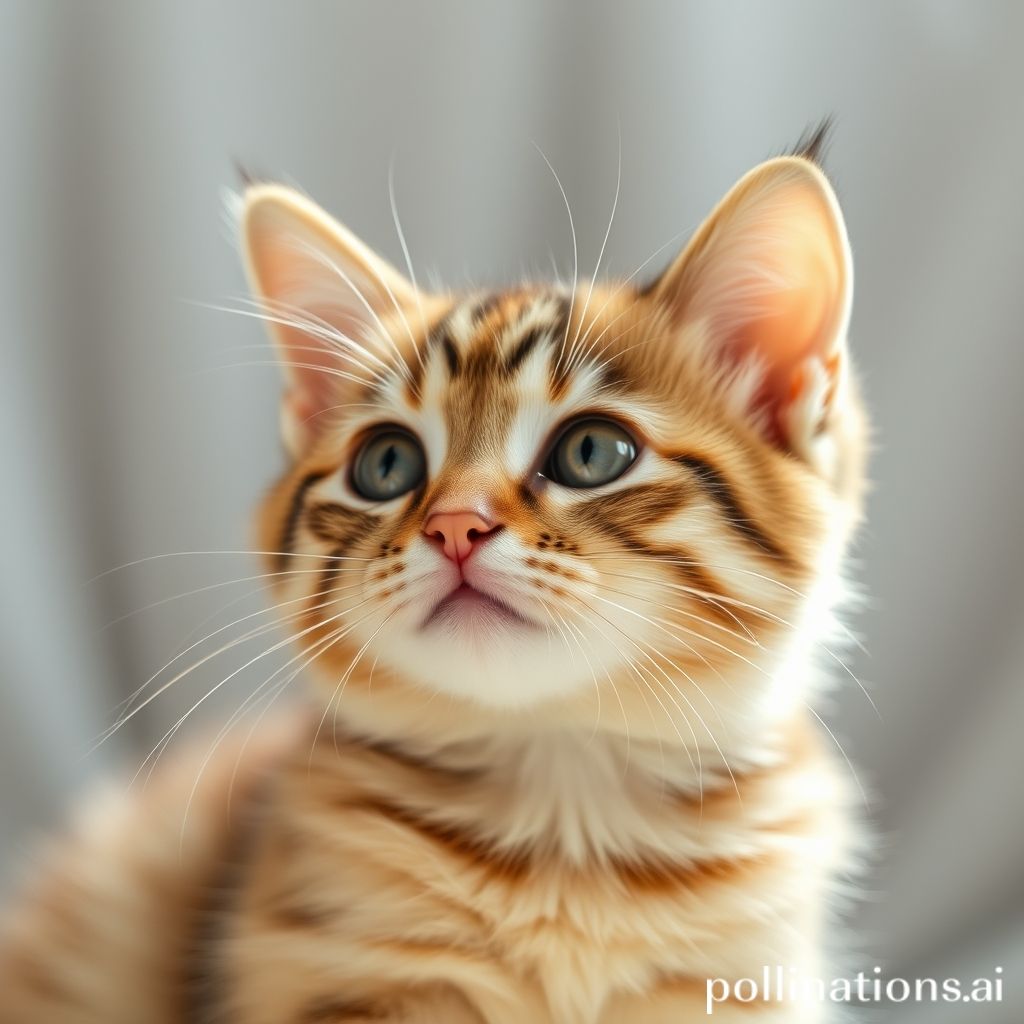\n\nNow, let's proceed with downloading this image and performing an operation such as flipping it."}, {'role': 'assistant', 'content': '', 'function_call': {'name': 'code_interpreter', 'arguments': '```py\nfrom PIL import Image\nimport requests\n\n# Downloading the cute cat image\nurl = "https://image.pollinations.ai/prompt/a%20cute%20cat"\nresponse = requests.get(url)\nwith open("cute_cat.jpg", \'wb\') as file:\n file.write(response.content)\n\n# Flipping the image horizontally\ndef flip_image_horizontally(filename):\n img = Image.open(filename)\n flipped_img = img.transpose(Image.FLIP_LEFT_RIGHT)\n flipped_img.save("flipped_cute_cat.jpg")\n return flipped_img\n\n# Performing the horizontal flip\nflipped_cat = flip_image_horizontally("cute_cat.jpg")\n```'}}, {'role': 'function', 'content': 'Finished execution.', 'name': 'code_interpreter'}, {'role': 'assistant', 'content': 'The image of the cute cat has been downloaded and flipped horizontally. The flipped image has been saved as "flipped_cute_cat.jpg". Since we\'re in a text-based environment, I can\'t display the actual image here, but you can check it out at the location where the script was executed.'} ] """
GroupChat 类
也提供了一个通用的Multi-Agent类:GroupChat类。 这个类管理一个Agent列表,并自动维护Agent的发言顺序。这个类的特点是:
-
接收外部输入后,自动协调内置Agent的发言顺序,并依次将发言内容返回给用户;
-
Human-in-the-loop: 将用户也定义为一个Agent,群聊会在必要时要求用户给予反馈;
-
用户可以随时打断群聊;
例如在下面的例子中,实例化一个五子棋群聊,其中真人用户下黑棋,并实例化白棋玩家和棋盘两个Agent作为NPC: 从结果可以看出,在用户小塘输入下棋位置<1,1>后,群聊先自动选择棋盘来更新;然后选择NPC小明发言;小明发言结束后棋盘再次更新;然后继续选择用户小塘发言,并等待用户输入。 然后用户小塘继续输入下棋位置<1,2>后,群聊又继续管理NPC发言…
"""A chess play game implemented by group chat""" from qwen_agent.agents import GroupChat from qwen_agent.llm.schema import Message # Define a configuration file for a multi-agent: # one real player, one NPC player, and one chessboard NPC_NAME = '小明' USER_NAME = '小塘' CFGS = { 'background': f'一个五子棋群组,棋盘为5*5,黑棋玩家和白棋玩家交替下棋,每次玩家下棋后,棋盘进行更新并展示。{NPC_NAME}下白棋,{USER_NAME}下黑棋。', 'agents': [{ 'name': '棋盘', 'description': '负责更新棋盘', 'instructions': '你扮演一个五子棋棋盘,你可以根据原始棋盘和玩家下棋的位置坐标,把新的棋盘用矩阵展示出来。棋盘中用0代表无棋子、用1表示黑棋、用-1表示白棋。用坐标<i,j>表示位置,i代表行,j代表列,棋盘左上角位置为<0,0>。', 'selected_tools': ['code_interpreter'] }, { 'name': NPC_NAME, 'description': '白棋玩家', 'instructions': '你扮演一个玩五子棋的高手,你下白棋。棋盘中用0代表无棋子、用1黑棋、用-1白棋。用坐标<i,j>表示位置,i代表行,j代表列,棋盘左上角位置为<0,0>,请决定你要下在哪里,你可以随意下到一个位置,不要说你是AI助手不会下!返回格式为坐标:\n<i,j>\n除了这个坐标,不要返回其他任何内容', }, { 'name': USER_NAME, 'description': '黑棋玩家', 'is_human': True }] } def app(): # Define a group chat agent from the CFGS bot = GroupChat(agents=CFGS, llm={'model': 'qwen-max'}) # Chat messages = [] while True: query = input('user question: ') messages.append(Message('user', query, name=USER_NAME)) response = [] for response in bot.run(messages=messages): print('bot response:', response) messages.extend(response) if __name__ == '__main__': app() """运行结果示例: user question: <1,1> bot response: [ Message({'role': 'assistant', 'content': '根据小塘的指令,他在棋盘的坐标 <1,1> 下了一枚黑棋。当前5x5棋盘的状态更新如下:\n\n```\n0 0 0 0 0\n0 1 0 0 0\n0 0 0 0 0\n0 0 0 0 0\n0 0 0 0 0\n```\n\n其中 (1, 1) 位置标记为1,表示此处是小塘下的黑棋。接下来轮到小明下白棋了。', 'name': '棋盘'}), Message({'role': 'assistant', 'content': '<0,1>', 'name': '小明'}), Message({'role': 'assistant', 'content': '根据小明的指令,他在棋盘的坐标 <0,1> 下了一枚白棋。当前5x5棋盘的状态更新如下:\n\n```\n0 -1 0 0 0\n0 1 0 0 0\n0 0 0 0 0\n0 0 0 0 0\n0 0 0 0 0\n```\n\n其中 (0, 1) 位置标记为-1,表示此处是小明下的白棋。现在轮到小塘下黑棋了。', 'name': '棋盘'}) ] user question: <1,2> bot response: [ Message({'role': 'assistant', 'content': '根据小塘的指令,他在棋盘的坐标 <1,2> 下了一枚黑棋。当前5x5棋盘的状态更新如下:\n\n```\n0 -1 0 0 0\n0 1 1 0 0\n0 0 0 0 0\n0 0 0 0 0\n0 0 0 0 0\n```\n\n其中 (1, 2) 位置标记为1,表示此处是小塘下的黑棋。现在轮到小明下白棋了。', 'name': '棋盘'}), Message({'role': 'assistant', 'content': '<2,0>', 'name': '小明'}), Message({'role': 'assistant', 'content': '根据小明的指令,他在棋盘的坐标 <2,0> 下了一枚白棋。当前5x5棋盘的状态更新如下:\n\n```\n0 -1 0 0 0\n0 1 1 0 0\n-1 0 0 0 0\n0 0 0 0 0\n0 0 0 0 0\n```\n\n其中 (2, 0) 位置标记为-1,表示此处是小明下的白棋。现在轮到小塘下黑棋了。', 'name': '棋盘'}) ] """
Agent 开发
由于我们的一个Agent类定义为一种处理消息的工作流,因此,我们可以较灵活的开发特定的Agent类。 通过查看Agent基类,可以看出,我们开发一个Agent子类时,只需要实现._run(self, messages: List[Message], lang: str = 'en', **kwargs) -> Iterator[List[Message]]函数, 它接收一个消息列表输入,并返回一个消息列表迭代器。
在开发过程中,可以使用_call_llm(...) 和_call_tool(...) 函数来调用LLM或Tool,也可以嵌套使用其他Agent,例如使用Assistant.run(...) 来直接利用Assistant的Tool/LLM规划能力。
嵌套开发
例如,在下面的例子中,我希望可以定制一个看图写作Agent,这个Agent只需要接收一个图片URL,就可以自动写出一篇作文: 在这个Agent中,我嵌套了一个image_agent,它使用Qwen-VL模型帮我理解图片内容, 然后也嵌套了一个writing_agent,它负责学习写作技巧并帮我写一篇作文。
注意:这只是看图写作Agent的其中一种实现方式,也可以使用其他方式来达成, 例如直接只使用一个image_agent来完成图片理解和写作。 但这种嵌套多个Agent合作的好处是,每个Agent可以使用独立的Prompt、工具和LLM,实现每个环节的最佳效果。
import copy from typing import Dict, Iterator, List, Optional, Union from qwen_agent import Agent from qwen_agent.agents import Assistant from qwen_agent.llm import BaseChatModel from qwen_agent.llm.schema import ContentItem, Message from qwen_agent.tools import BaseTool class VisualStorytelling(Agent): """Customize an agent for writing story from pictures""" def __init__(self, function_list: Optional[List[Union[str, Dict, BaseTool]]] = None, llm: Optional[Union[Dict, BaseChatModel]] = None): super().__init__(llm=llm) # Nest one vl assistant for image understanding self.image_agent = Assistant(llm={'model': 'qwen-vl-max'}) # Nest one assistant for article writing self.writing_agent = Assistant( llm=self.llm, function_list=function_list, system_message='你扮演一个想象力丰富的学生,你需要先理解图片内容,根据描述图片信息以后,' + '参考知识库中教你的写作技巧,发挥你的想象力,写一篇800字的记叙文', files=['https://www.jianshu.com/p/cdf82ff33ef8']) def _run(self, messages: List[Message], lang: str = 'zh', max_ref_token: int = 4000, **kwargs) -> Iterator[List[Message]]: """Define the workflow""" assert isinstance(messages[-1]['content'], list) and any([ item.image for item in messages[-1]['content'] ]), 'This agent requires input of images' # Image understanding new_messages = copy.deepcopy(messages) new_messages[-1]['content'].append( ContentItem(text='请详细描述这张图片的所有细节内容')) response = [] for rsp in self.image_agent.run(new_messages): yield response + rsp response.extend(rsp) new_messages.extend(rsp) # Writing article new_messages.append(Message('user', '开始根据以上图片内容编写你的记叙文吧!')) for rsp in self.writing_agent.run(new_messages, lang=lang, max_ref_token=max_ref_token, **kwargs): yield response + rsp
非嵌套开发
在这个例子中,我们使用基础的_call_llm(...) 函数来调用LLM或Tool。
这个DocQA实现的一个工作流为:将给定的参考资料拼接到内置的Prompt中,并作为System Message,然后调用LLM生成返回结果。
import copy from typing import Iterator, List from qwen_agent import Agent from qwen_agent.llm.schema import CONTENT, ROLE, SYSTEM, Message PROMPT_TEMPLATE_ZH = """ 请充分理解以下参考资料内容,组织出满足用户提问的条理清晰的回复。 #参考资料: {ref_doc} """ PROMPT_TEMPLATE_EN = """ Please fully understand the content of the following reference materials and organize a clear response that meets the user's questions. # Reference materials: {ref_doc} """ PROMPT_TEMPLATE = { 'zh': PROMPT_TEMPLATE_ZH, 'en': PROMPT_TEMPLATE_EN, } class DocQA(Agent): def _run(self, messages: List[Message], knowledge: str = '', lang: str = 'en', **kwargs) -> Iterator[List[Message]]: messages = copy.deepcopy(messages) system_prompt = PROMPT_TEMPLATE[lang].format(ref_doc=knowledge) if messages[0][ROLE] == SYSTEM: messages[0][CONTENT] += system_prompt else: messages.insert(0, Message(SYSTEM, system_prompt)) return self._call_llm(messages=messages)
使用_call_llm(…)和_call_tool(…)函数组合来调用LLM和Tool的例子,可以参考ReActChat和Assistant的实现。
如何学习大模型 AI ?
由于新岗位的生产效率,要优于被取代岗位的生产效率,所以实际上整个社会的生产效率是提升的。
但是具体到个人,只能说是:
“最先掌握AI的人,将会比较晚掌握AI的人有竞争优势”。
这句话,放在计算机、互联网、移动互联网的开局时期,都是一样的道理。
我在一线互联网企业工作十余年里,指导过不少同行后辈。帮助很多人得到了学习和成长。
我意识到有很多经验和知识值得分享给大家,也可以通过我们的能力和经验解答大家在人工智能学习中的很多困惑,所以在工作繁忙的情况下还是坚持各种整理和分享。但苦于知识传播途径有限,很多互联网行业朋友无法获得正确的资料得到学习提升,故此将并将重要的AI大模型资料包括AI大模型入门学习思维导图、精品AI大模型学习书籍手册、视频教程、实战学习等录播视频免费分享出来。

第一阶段(10天):初阶应用
该阶段让大家对大模型 AI有一个最前沿的认识,对大模型 AI 的理解超过 95% 的人,可以在相关讨论时发表高级、不跟风、又接地气的见解,别人只会和 AI 聊天,而你能调教 AI,并能用代码将大模型和业务衔接。
- 大模型 AI 能干什么?
- 大模型是怎样获得「智能」的?
- 用好 AI 的核心心法
- 大模型应用业务架构
- 大模型应用技术架构
- 代码示例:向 GPT-3.5 灌入新知识
- 提示工程的意义和核心思想
- Prompt 典型构成
- 指令调优方法论
- 思维链和思维树
- Prompt 攻击和防范
- …
第二阶段(30天):高阶应用
该阶段我们正式进入大模型 AI 进阶实战学习,学会构造私有知识库,扩展 AI 的能力。快速开发一个完整的基于 agent 对话机器人。掌握功能最强的大模型开发框架,抓住最新的技术进展,适合 Python 和 JavaScript 程序员。
- 为什么要做 RAG
- 搭建一个简单的 ChatPDF
- 检索的基础概念
- 什么是向量表示(Embeddings)
- 向量数据库与向量检索
- 基于向量检索的 RAG
- 搭建 RAG 系统的扩展知识
- 混合检索与 RAG-Fusion 简介
- 向量模型本地部署
- …
第三阶段(30天):模型训练
恭喜你,如果学到这里,你基本可以找到一份大模型 AI相关的工作,自己也能训练 GPT 了!通过微调,训练自己的垂直大模型,能独立训练开源多模态大模型,掌握更多技术方案。
到此为止,大概2个月的时间。你已经成为了一名“AI小子”。那么你还想往下探索吗?
- 为什么要做 RAG
- 什么是模型
- 什么是模型训练
- 求解器 & 损失函数简介
- 小实验2:手写一个简单的神经网络并训练它
- 什么是训练/预训练/微调/轻量化微调
- Transformer结构简介
- 轻量化微调
- 实验数据集的构建
- …
第四阶段(20天):商业闭环
对全球大模型从性能、吞吐量、成本等方面有一定的认知,可以在云端和本地等多种环境下部署大模型,找到适合自己的项目/创业方向,做一名被 AI 武装的产品经理。
- 硬件选型
- 带你了解全球大模型
- 使用国产大模型服务
- 搭建 OpenAI 代理
- 热身:基于阿里云 PAI 部署 Stable Diffusion
- 在本地计算机运行大模型
- 大模型的私有化部署
- 基于 vLLM 部署大模型
- 案例:如何优雅地在阿里云私有部署开源大模型
- 部署一套开源 LLM 项目
- 内容安全
- 互联网信息服务算法备案
- …
学习是一个过程,只要学习就会有挑战。天道酬勤,你越努力,就会成为越优秀的自己。
如果你能在15天内完成所有的任务,那你堪称天才。然而,如果你能完成 60-70% 的内容,你就已经开始具备成为一名大模型 AI 的正确特征了。
这份完整版的大模型 AI 学习资料已经上传CSDN,朋友们如果需要可以微信扫描下方CSDN官方认证二维码免费领取【保证100%免费】


 3351
3351

 被折叠的 条评论
为什么被折叠?
被折叠的 条评论
为什么被折叠?
 到【灌水乐园】发言


