


文章目录
前言
本文主要实现在python中运用vtk库显示在SolidWorks中创建的装配体,并可以用鼠标和键盘与装配体进行一些简单的交互。所以在看本文之前你需要掌握一些SolidWorks的基本知识,以及VTK的一些知识。
一、事前准备
1.vtk库的安装
方法一:
看一下这篇博客,详细介绍了VTK库的安装。网址: http://t.csdn.cn/8G62D
方法二:
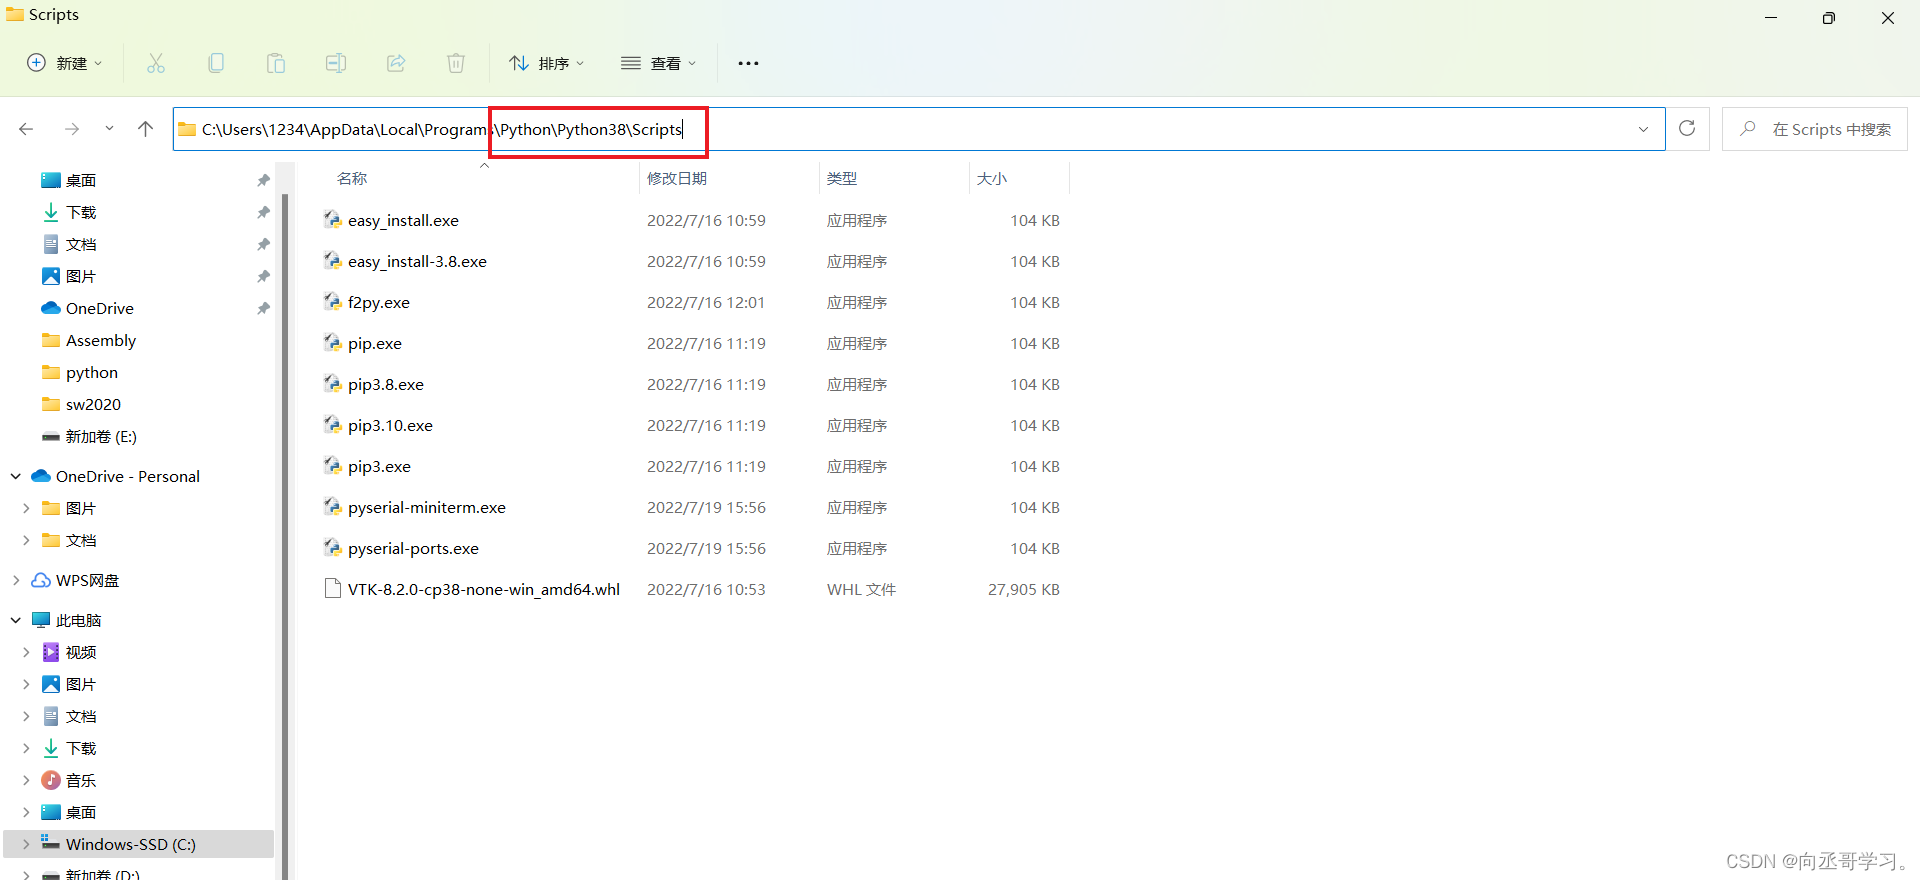
如果下载了pip安装包,可以在命令行里下载。
第一步:找到该文件夹位置(红色框部分,其他可能不一样),并且复制路径。
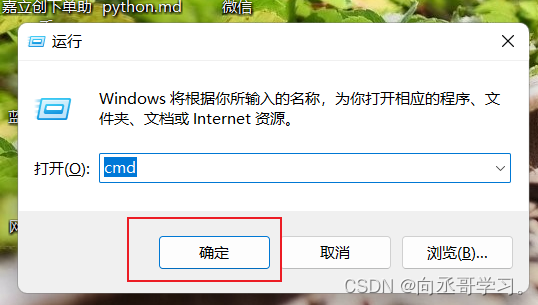
第二步:win+r打开命令行,点击确定。
第三步:输入如下:

第四步:输入pip3 install vtk(可以试一下如果成功会有success的提示,不行再用方法一)

2.SolidWorks学习
可以根据软件里面本身自带的文档学习,也可在b站上找视频学习,根据适合自己的来选择,要重点学习草图绘制,凸台拉伸,拉伸切除,建立点,坐标系,装配体等。
3.在SolidWorks创建装配体并导出STL文件
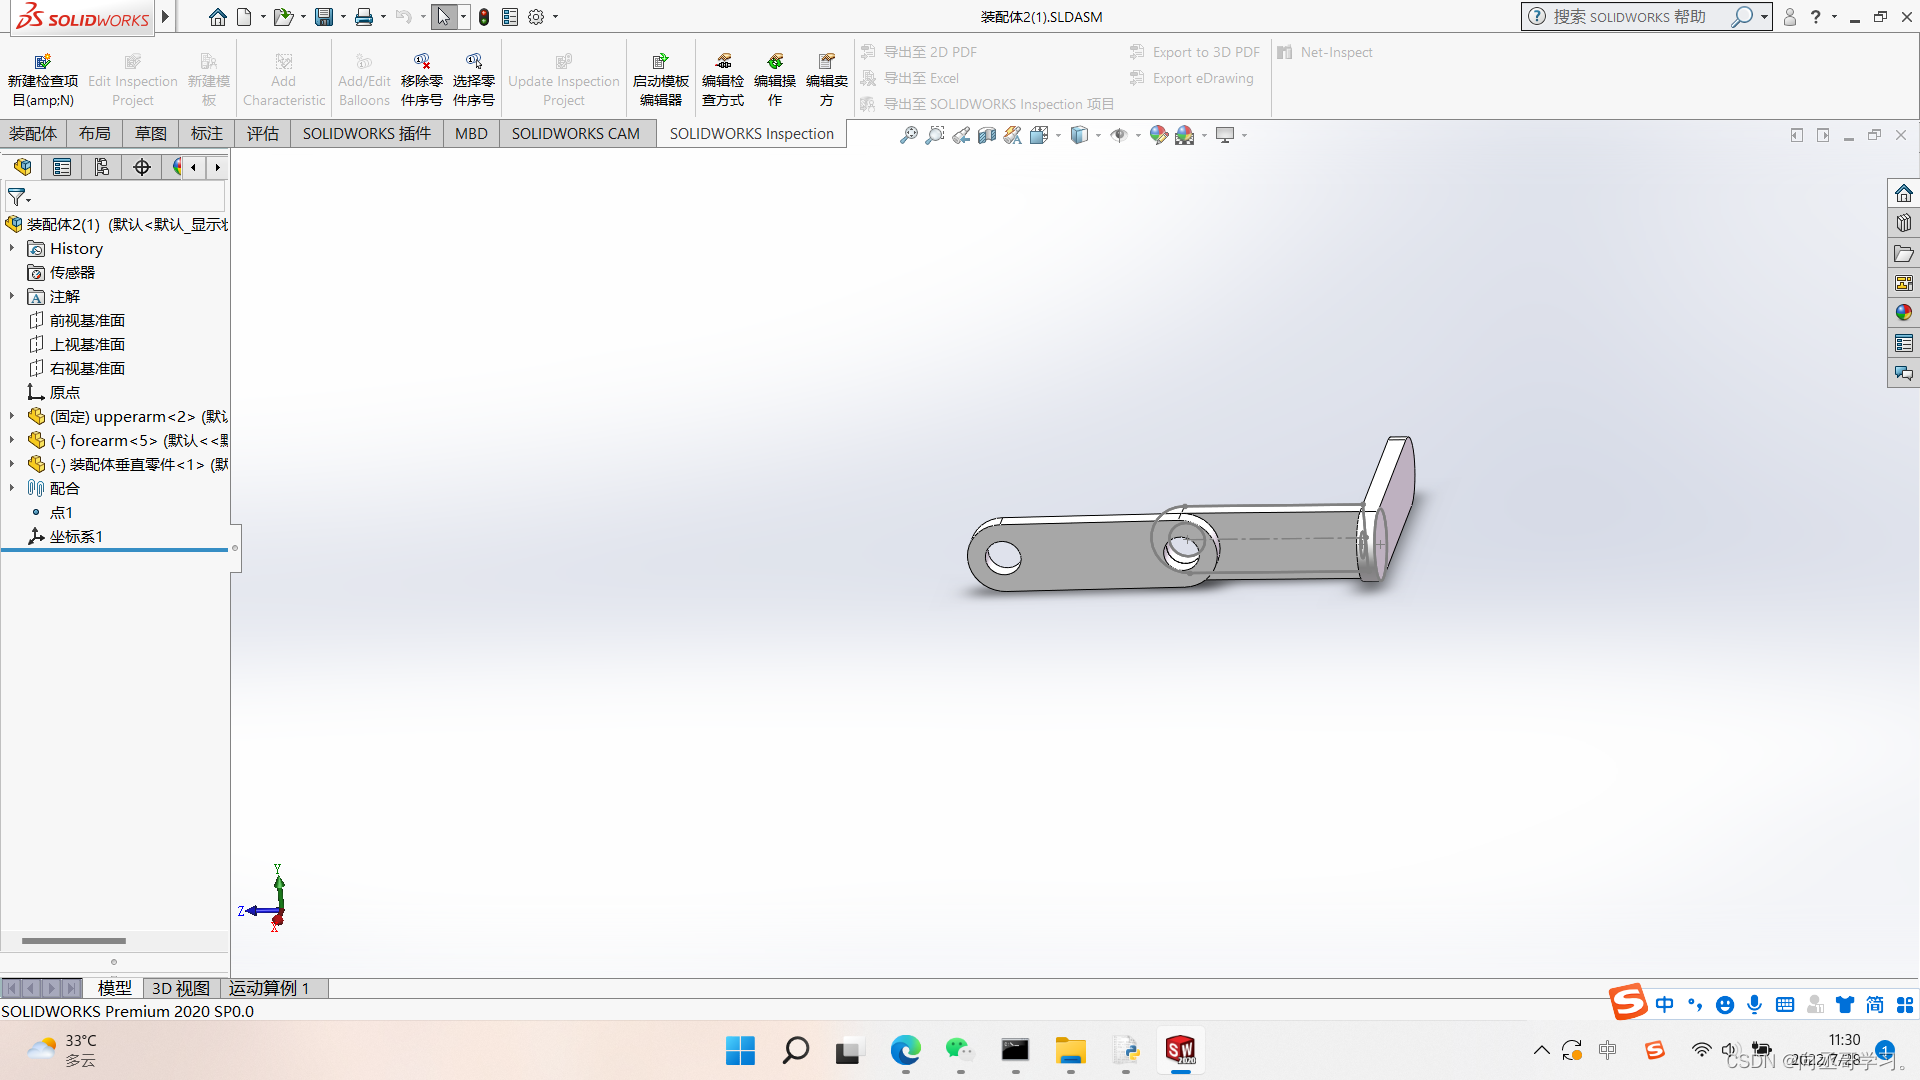
1.装配体完成后如图所示:
2.需要自己手动给装配体建立原点以及坐标系
操作如下:(红色框记部分)建立坐标系时首先要在原点处绘制三条直线,以便构造坐标轴时可以选择x,y,z。

本人坐标系如下: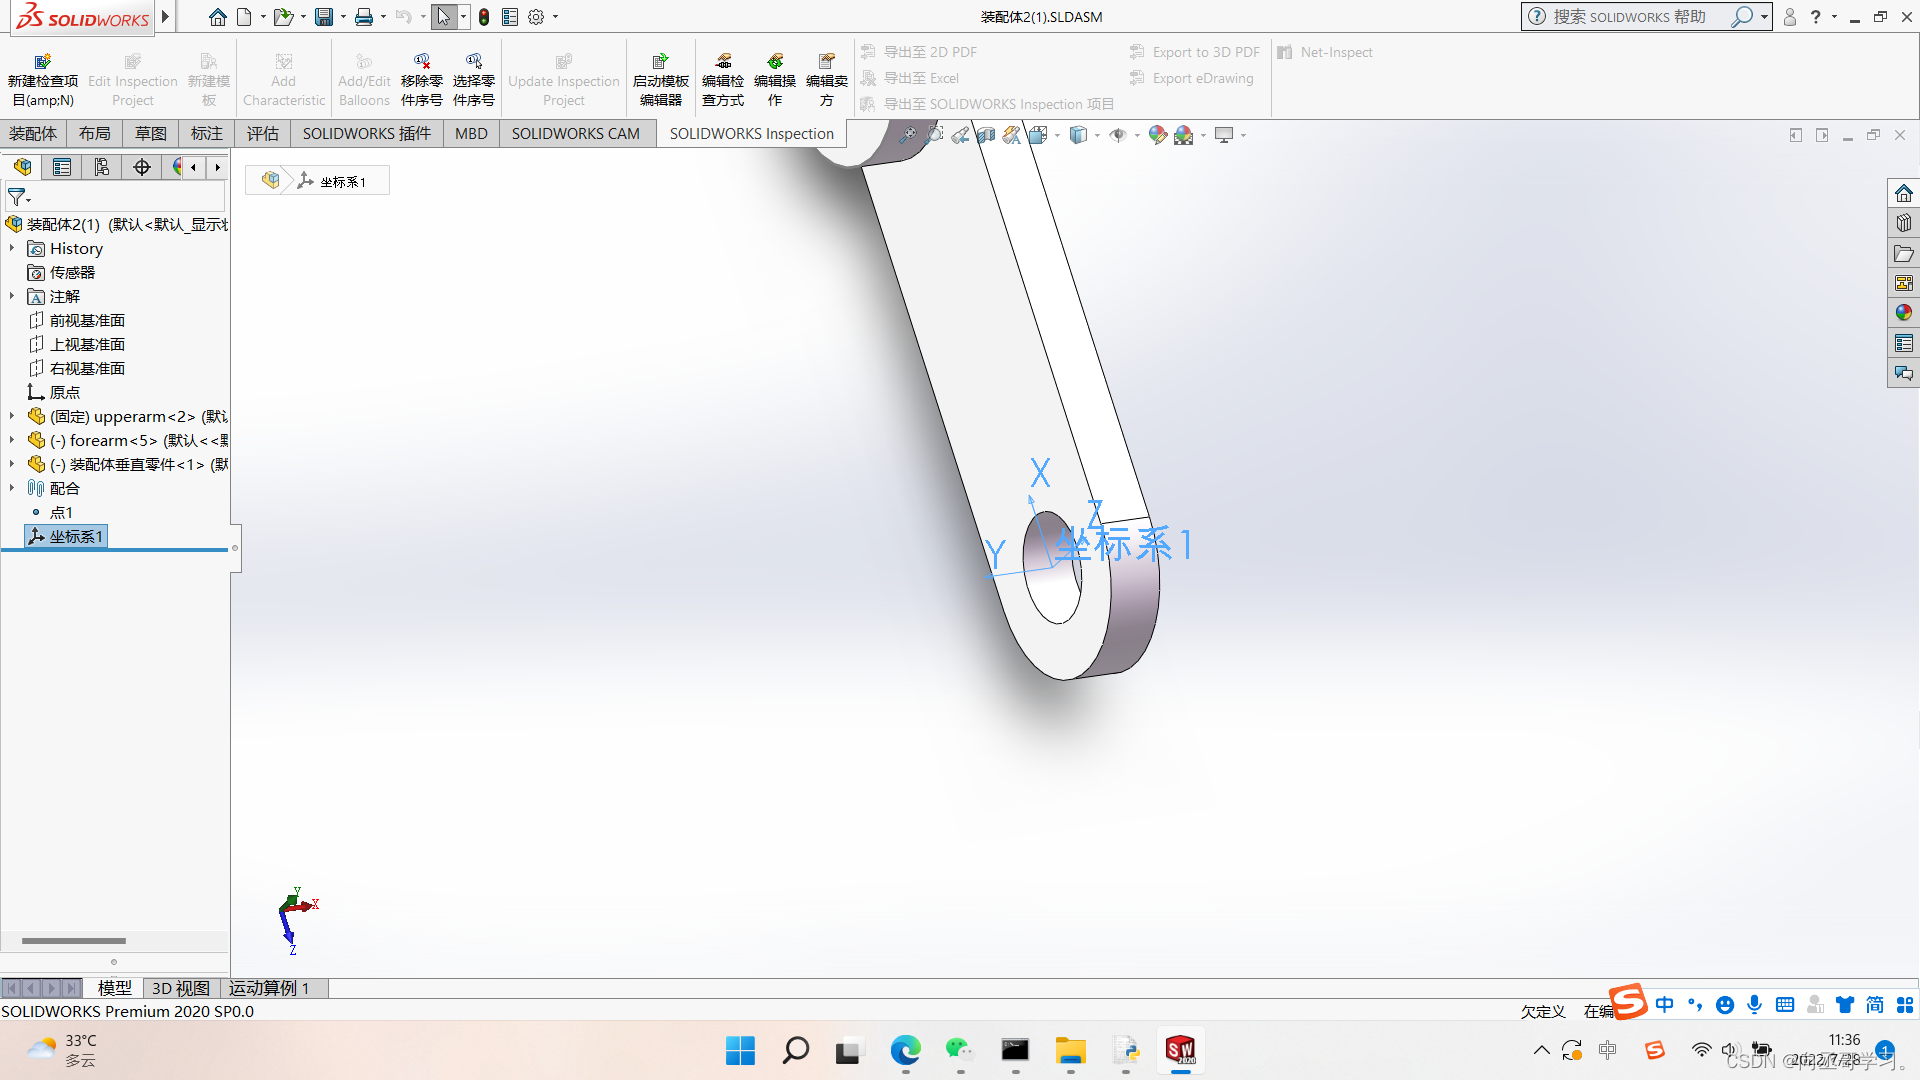
然后按照如下操作导出三个STL文件:
在文件中选择另存为,选好文件夹,然后在保存类型中选择STL格式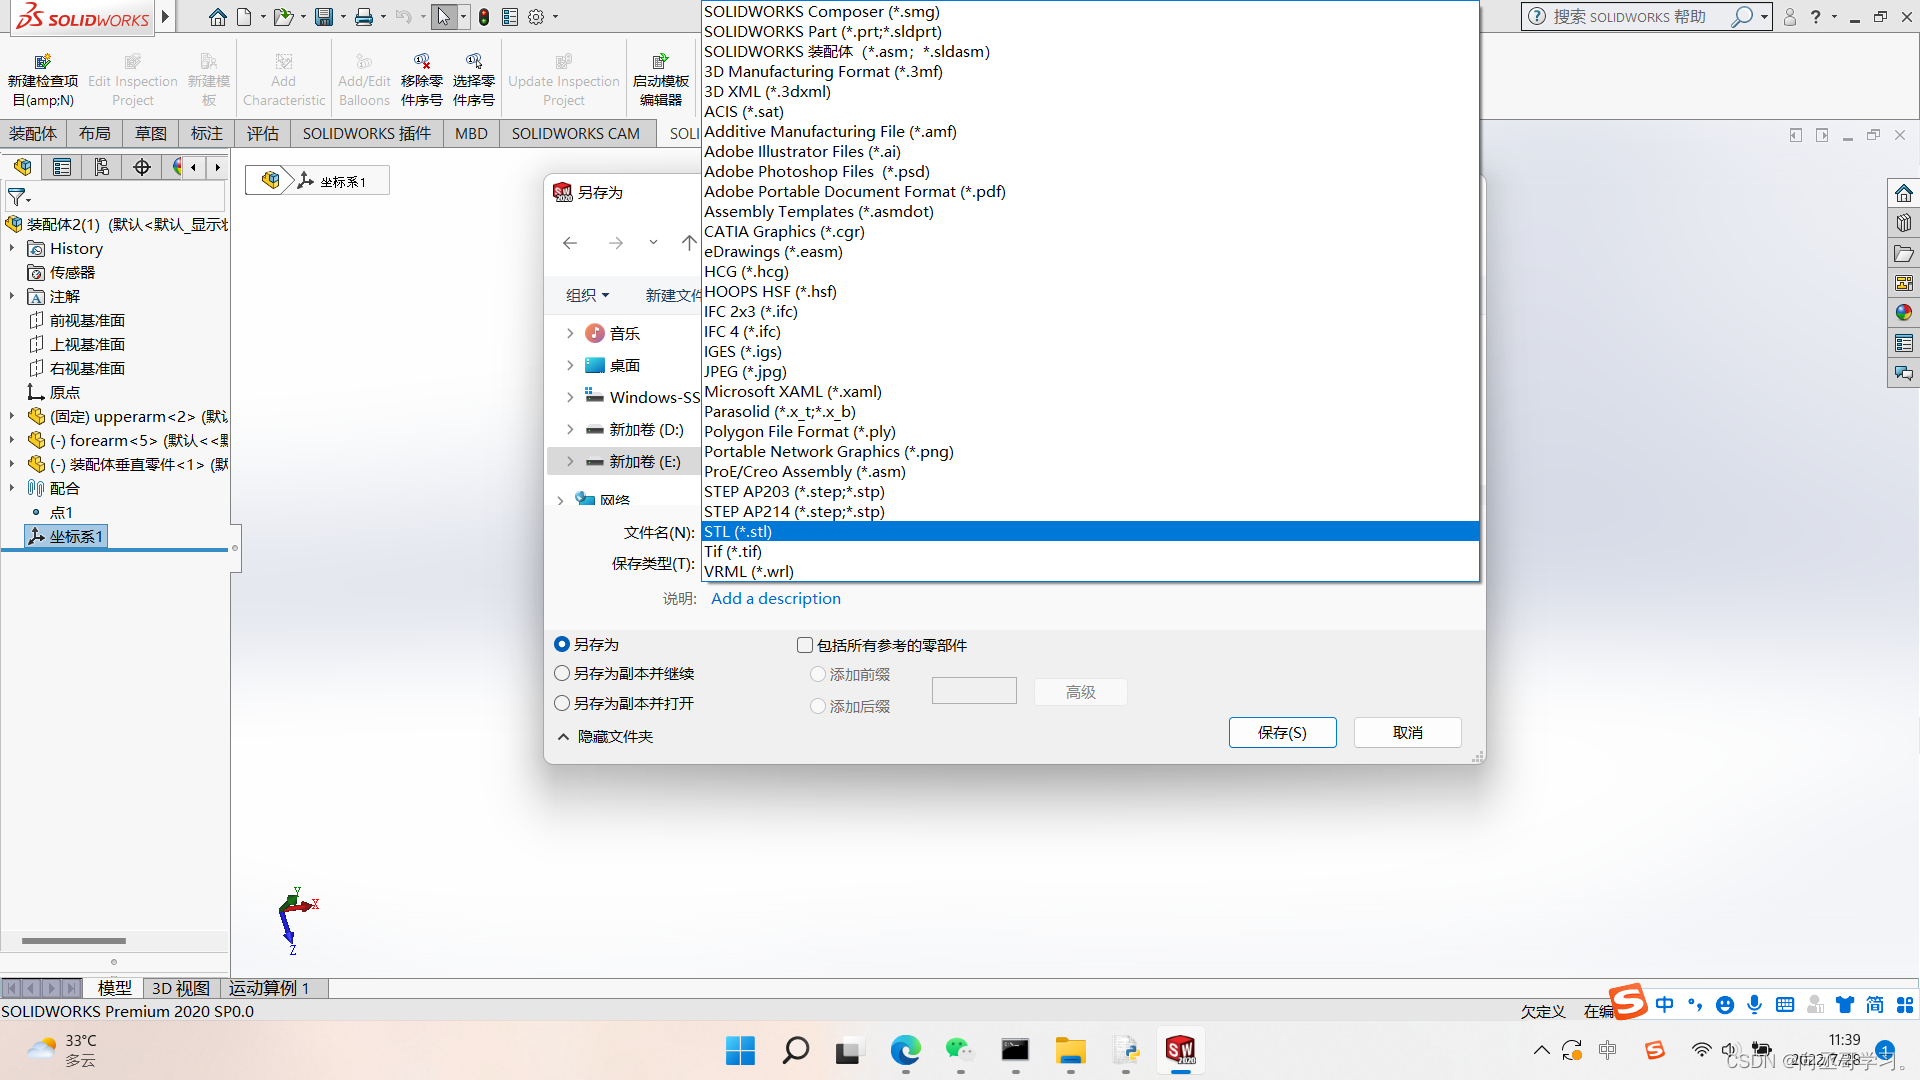
然后按如下红色框框选择:(坐标系要选择自己建立的坐标系)
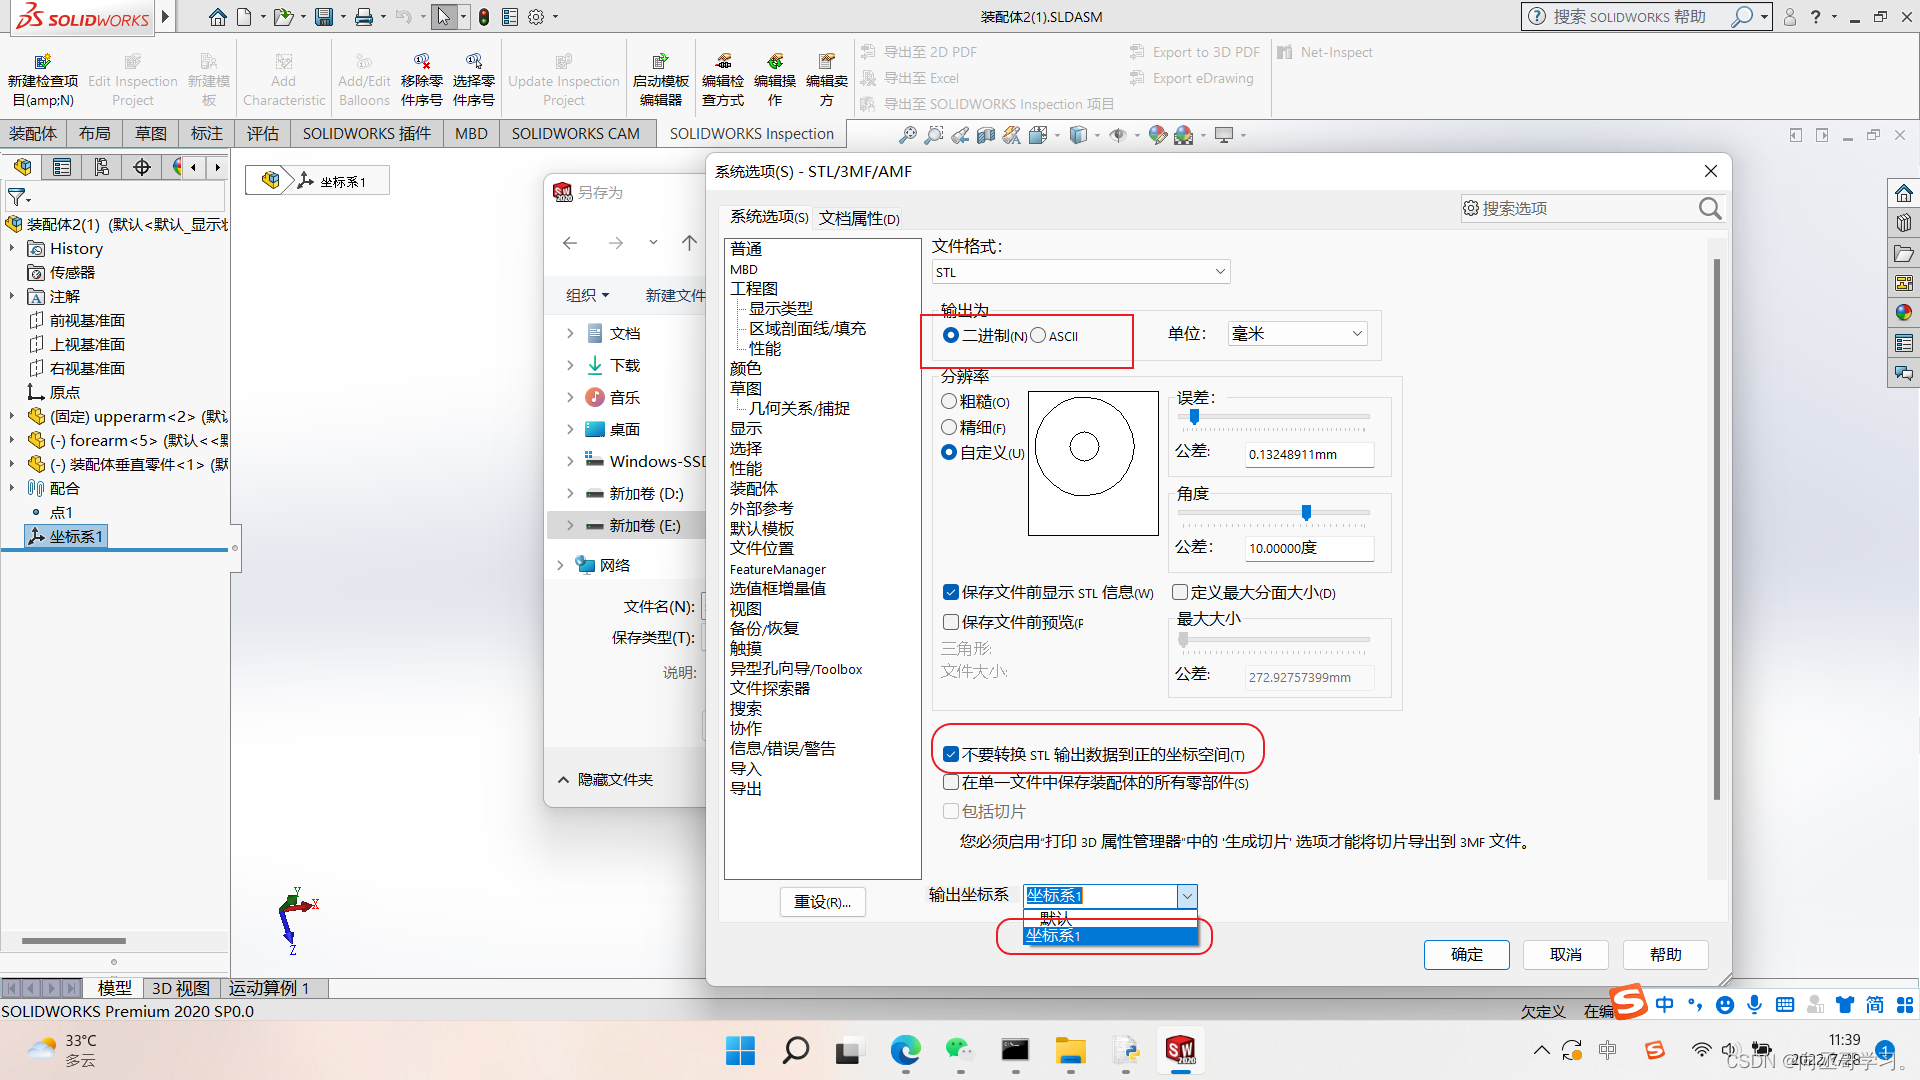
选择确定后,再在之前的窗口选择保存。
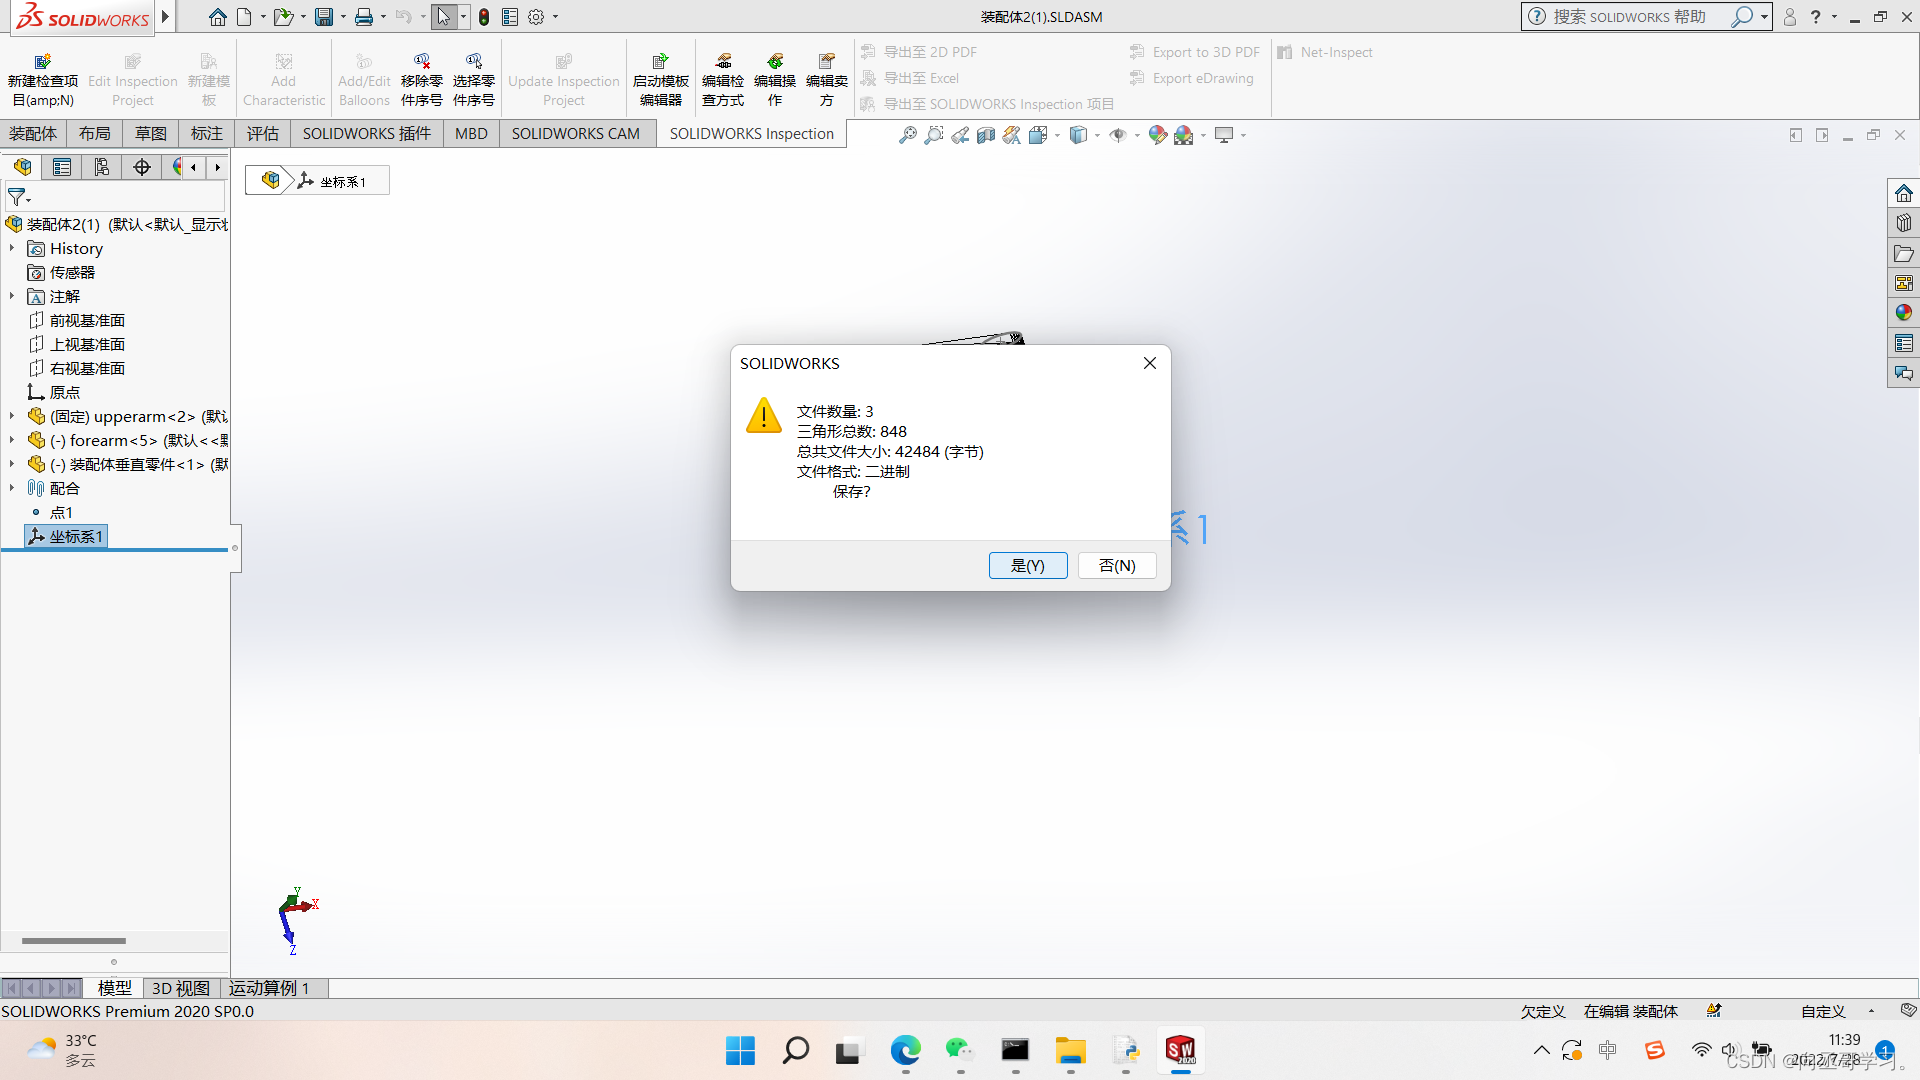
然后在如下跳出的界面选择确定。
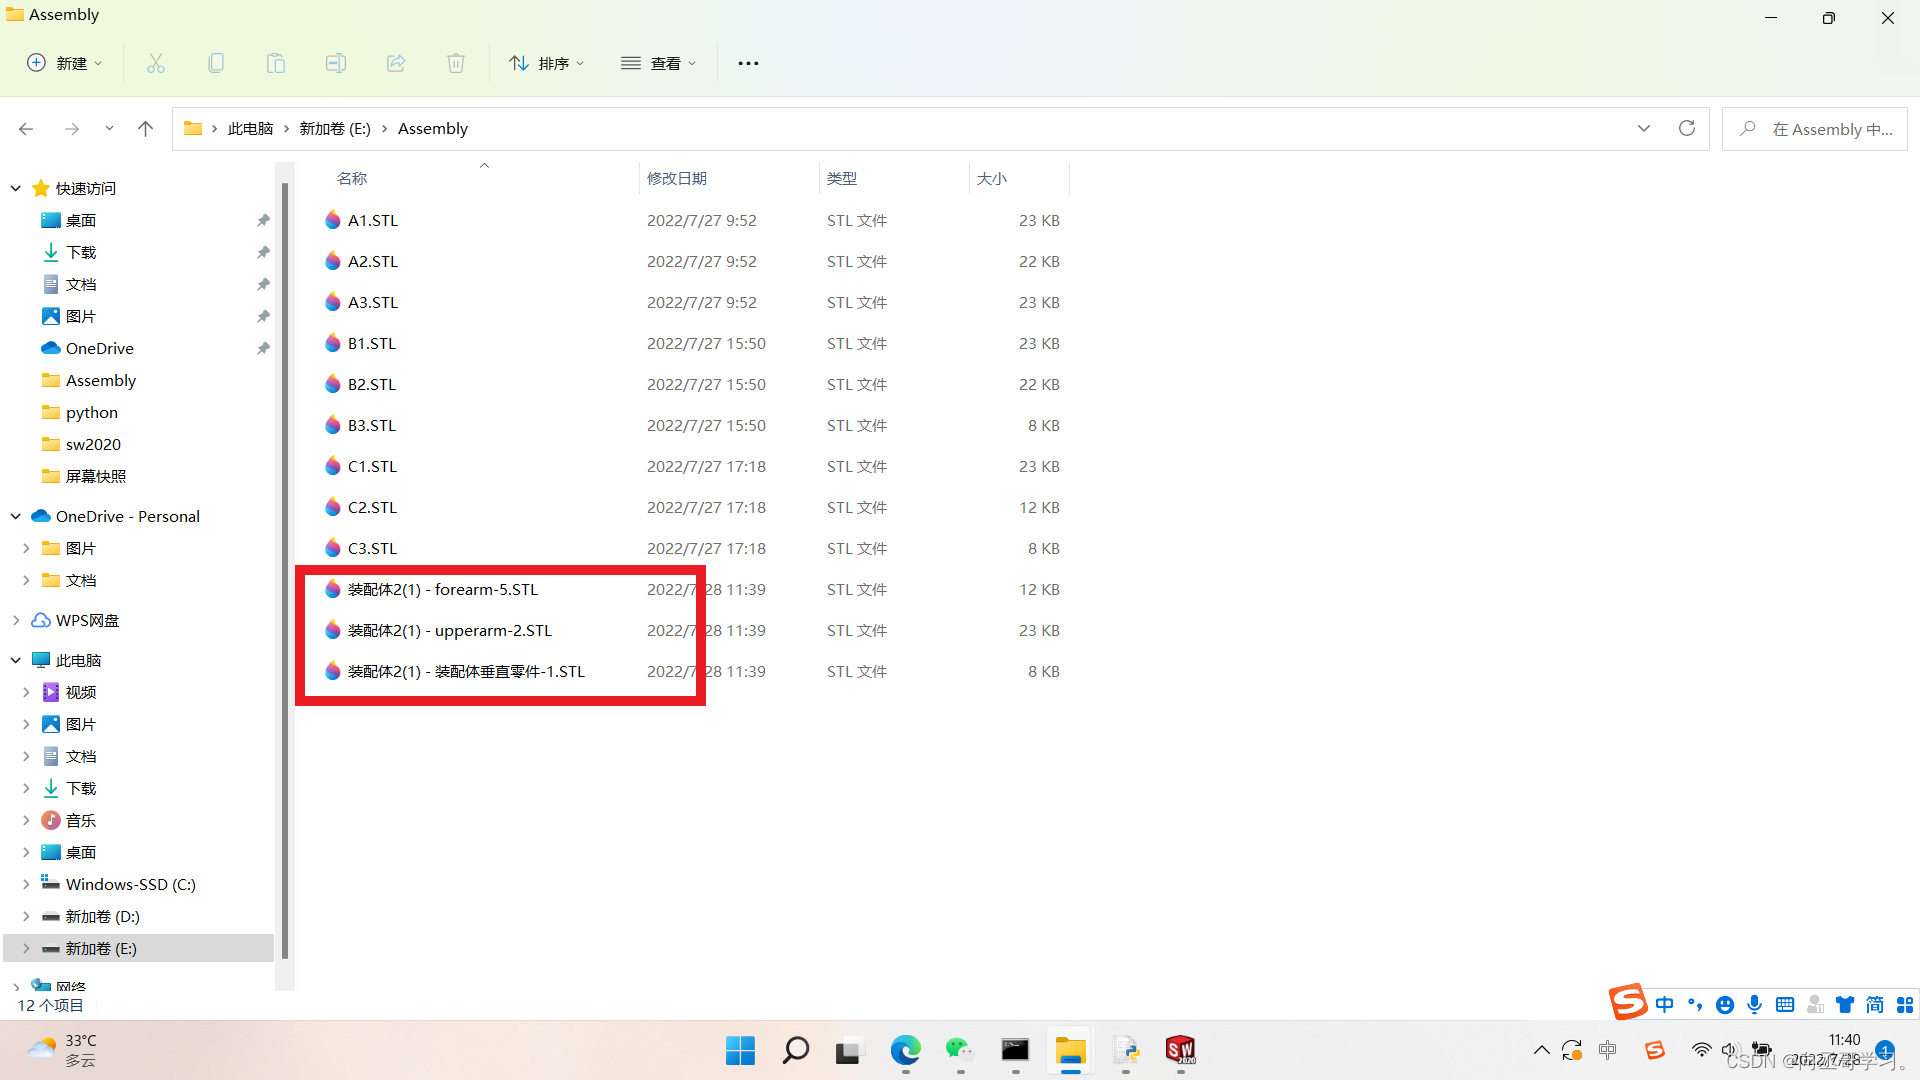
打开保存的文件夹可以看到三个STL文件(之后记得改成英文名):
二、Python代码解读
1.源代码
我写的代码是以《使用VTK与Python实现机械臂三维模型可视化》这篇文章中的代码为基础增添和修改的,附以网址:https://www.cnblogs.com/21207-iHome/p/6430549.html。
完整代码如下(示例):
#!/usr/bin/env python

import vtk
import math
from vtk.util.colors import *

filenames = ["E:\Assembly\C1.stl","E:\Assembly\C2.stl","E:\Assembly\C3.stl"]
dt = 1.0        # degree step in rotation旋转步长
angle = [0, 0,0]  # shoulder and elbow joint angle 肩肘关节角度

renWin = vtk.vtkRenderWindow()

joint1= vtk.vtkAssembly()
joint2= vtk.vtkAssembly()
joint3= vtk.vtkAssembly()

actor  = list() # the list of links

# Customize vtkInteractorStyleTrackballCamera
class MyInteractor(vtk.vtkInteractorStyleTrackballCamera):
    def __init__(self,parent=None):
        self.AddObserver("CharEvent",self.OnCharEvent)
        self.AddObserver("KeyPressEvent",self.OnKeyPressEvent)
    #覆盖当前处理轨迹球或操纵杆样式的默认键操作
    #按下ASCII键时触发OnChar。这里处理一些基本的按键
    def OnCharEvent(self,obj,event):
        pass

    def OnKeyPressEvent(self,obj,event):
        global angle
        # Get the compound key strokes for the event
        #获取事件的复合键笔划
        key = self.GetInteractor().GetKeySym()
        # Output the key that was pressed()
        #输出按下的键
        #print "Pressed: " , key
        # Handle an arrow key(处理箭头键)
        if(key == "4"):
            joint1.RotateY(-dt)
            angle[0]=angle[0]+ dt
            if angle[0] >= 360.0:
                angle[0] -= 360.0
            print("first is :",angle[0])
        if(key == "1"):
            joint1.RotateY(+dt)
            angle[0]=angle[0] - dt
            if angle[0] <= 0.0:
                angle[0] += 360.0
            print("first is :",angle[0])

        if(key == "5"):
            joint2.RotateY(-dt)
            angle[1]=angle[1]+ dt
            if angle[1] >= 360.0:
                angle[1] -= 360.0
            print("Second is :",angle[1])
        if(key == "2"):
            joint2.RotateY(+dt)
            angle[1]=angle[1] - dt
            if angle[1] <= 0.0:
                angle[1] += 360.0
            print("Second is :",angle[1])

        if(key == "6"):
            joint3.RotateX(-dt)
            angle[2]=angle[2]+ dt
            if angle[2] >= 360.0:
                angle[2] -= 360.0
            print("third is :",angle[2])
        if(key == "3"):
            joint3.RotateX(+dt)
            angle[2] = angle[2]-dt
            if angle[2] <= 0.0:
                angle[2] += 360.0
            print("third is :",angle[2])
        #要求此RenderWindow拥有的每个渲染器渲染其图像并同步此过程
        # Ask each renderer owned by this RenderWindow to render its image and synchronize this process
        renWin.Render()
        return


def LoadSTL(filename):
    reader = vtk.vtkSTLReader()
    reader.SetFileName(filename)
    mapper = vtk.vtkPolyDataMapper() #将多边形数据映射到图形基元
    mapper.SetInputConnection(reader.GetOutputPort())
    actor = vtk.vtkLODActor()
    actor.SetMapper(mapper)
    return actor   #表示渲染场景中的实体


def CreateCoordinates():#坐标
    # create coordinate axes in the render window
    axes = vtk.vtkAxesActor()
    #在 3 个维度中设置轴的总长度
    axes.SetTotalLength(100, 100, 100)  # Set the total length of the axes in 3 dimensions

    # Set the type of the shaft to a cylinder:0, line:1, or user defined geometry.
    #设置轴类型
    axes.SetShaftType(0)

    axes.SetCylinderRadius(0.02) #设置圆柱半径
    axes.GetXAxisCaptionActor2D().SetWidth(0.03)
    axes.GetYAxisCaptionActor2D().SetWidth(0.03)
    axes.GetZAxisCaptionActor2D().SetWidth(0.03)
    return axes


def CreateGround():
    # create plane source
    plane = vtk.vtkPlaneSource()
    plane.SetXResolution(50)
    plane.SetYResolution(50)
    plane.SetCenter(0,0,0)
    plane.SetNormal(0,0,1)

    # mapper
    mapper = vtk.vtkPolyDataMapper()
    mapper.SetInputConnection(plane.GetOutputPort())

    # actor
    actor = vtk.vtkActor()
    actor.SetMapper(mapper)
    actor.GetProperty().SetRepresentationToWireframe()
    #actor.GetProperty().SetOpacity(0.4)  # 1.0 is totally opaque and 0.0 is completely transparent
    actor.GetProperty().SetColor(light_grey)

    transform = vtk.vtkTransform()
    transform.Scale(2000,2000, 1)#规模
    actor.SetUserTransform(transform)

    return actor


def CreateScene():
    #创建渲染窗口和渲染器
    ren = vtk.vtkRenderer()
    #renWin = vtk.vtkRenderWindow()
    renWin.AddRenderer(ren)

    #创建渲染窗口间执行器
    iren = vtk.vtkRenderWindowInteractor()
    iren.SetRenderWindow(renWin)
    style = MyInteractor()
    style.SetDefaultRenderer(ren)
    iren.SetInteractorStyle(style)
    for id, file in enumerate(filenames):
        actor.append(LoadSTL(file))
        #actor[id].GetProperty().SetColor(blue)
        r = vtk.vtkMath.Random(.4, 1.0)
        g = vtk.vtkMath.Random(.4, 1.0)
        b = vtk.vtkMath.Random(.4, 1.0)
        if id==0 :
            actor[id].GetProperty().SetDiffuseColor(r, g, b)
        elif id==1:
            actor[id].GetProperty().SetDiffuseColor(0.0, 0.0, 1.0)
        else:
            actor[id].GetProperty().SetDiffuseColor(1.0, 0.0, 1.0)
        actor[id].GetProperty().SetDiffuse(.8)#光漫反射光系数
        actor[id].GetProperty().SetSpecular(.5)#镜反光系数
        actor[id].GetProperty().SetSpecularColor(1.0,1.0,1.0) #镜反射光系数
        actor[id].GetProperty().SetSpecularPower(30.0)#镜面指数
    joint1.AddPart(actor[0])
    joint1.AddPart(joint2)
    joint2.AddPart(actor[1])
    joint2.AddPart(joint3)
    joint3.AddPart(actor[2])

        # Add the actors to the scene

        #ren.AddActor(actor[id])

    #还要设置组件在空间中的原点,位置和方向
    joint1.SetOrigin(0, 0, 0) # 这是所有旋转发生的点
    joint2.SetOrigin(100,0,0)
    joint3.SetOrigin(205,0,0)

    ren.AddActor(joint1)

    # Add coordinates 坐标
    axes = CreateCoordinates()
    ren.AddActor(axes)

    # Add ground
    ground = CreateGround()
    ren.AddActor(ground)

    # Set background color
    ren.SetBackground(.2, .2, .2)

    # Set window size
    renWin.SetSize(600, 600)

    #设置摄像机以获取场景的特定视图
    camera = vtk.vtkCamera()
    camera.SetFocalPoint(300, 0, 0)
    camera.SetPosition(300, -400, 350)
    camera.ComputeViewPlaneNormal()
    camera.SetViewUp(0, 1, 0)
    camera.Zoom(0.4)
    ren.SetActiveCamera(camera)

    # Enable user interface interactor
    iren.Initialize()
    iren.Start()


if __name__ == "__main__":
    CreateScene()
2.代码运行后的显示窗口以及动画演示
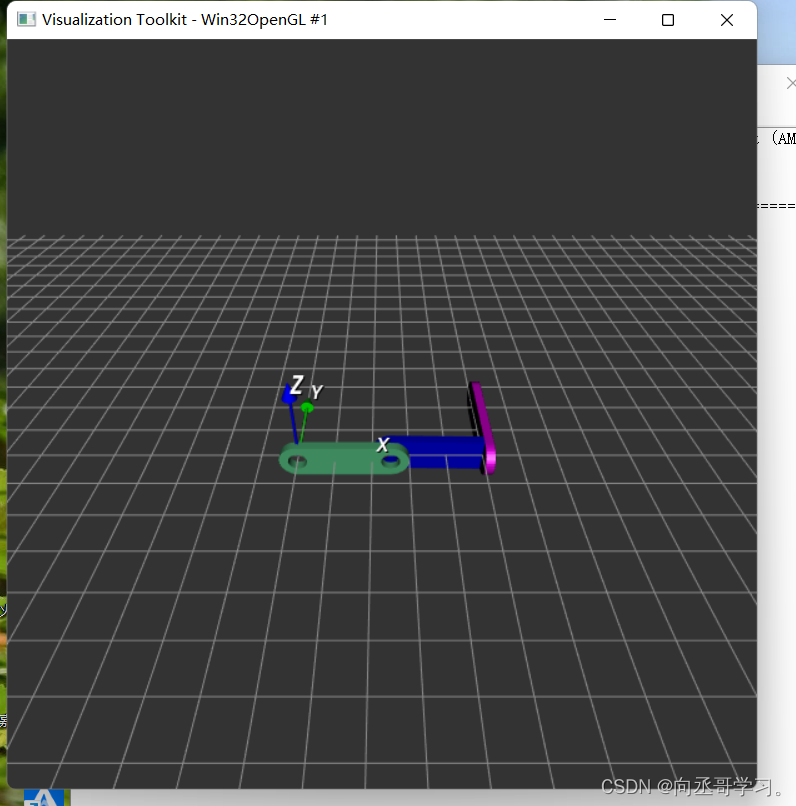
按住对应控制角度的按键使零件转动:
装配体动画演示
3.分函数块讲解
本人是python小白,如有解读错误望加以指正。
1.一些库以及定义
import vtk
import math
from vtk.util.colors import *
 #装配体的STL文件路径以及名称
filenames = ["E:\Assembly\C1.stl","E:\Assembly\C2.stl","E:\Assembly\C3.stl"]

dt = 1.0        # degree step in rotation旋转步长
angle = [0, 0,0]  # shoulder and elbow joint angle 肩肘关节角度

renWin = vtk.vtkRenderWindow()#vtk绘制窗口
joint1= vtk.vtkAssembly()#组件1
joint2= vtk.vtkAssembly()#组件2
joint3= vtk.vtkAssembly()#组件3
actor  = list() # the list of links(即c1,c2,c3STL文件)
2.由以下语句知道首先进入CreateScene()函数。
if __name__ == "__main__":
    CreateScene()
3.CreateScene()函数
def CreateScene():
    #1.创建渲染窗口和渲染器(VTK知识)
    ren = vtk.vtkRenderer()
    renWin.AddRenderer(ren)
    # Create a renderwindowinteractor
    #2.创建渲染窗口间执行器
    iren = vtk.vtkRenderWindowInteractor()
    iren.SetRenderWindow(renWin)
    style = MyInteractor()#调用MyInteractor()函数
    style.SetDefaultRenderer(ren)
    iren.SetInteractorStyle(style)
    #3.读入STL文件
    for id, file in enumerate(filenames):
        #append用法即在列表中增加元素
        #意思就是为actor()增加元素(三个STL文件)
        actor.append(LoadSTL(file))
        #LoadSTL(file)返回actor[0],actor[1],actor[2]
        #actor[id].GetProperty().SetColor(blue)
        #给三给零件附上不同颜色区分
        r = vtk.vtkMath.Random(.4, 1.0)#0.4~1.0中的随机值
        g = vtk.vtkMath.Random(.4, 1.0)
        b = vtk.vtkMath.Random(.4, 1.0)
        if id==0 :
            actor[id].GetProperty().SetDiffuseColor(r, g, b)
        elif id==1:
            actor[id].GetProperty().SetDiffuseColor(0.0, 0.0, 1.0)
        else:
            actor[id].GetProperty().SetDiffuseColor(1.0, 0.0, 1.0)
        actor[id].GetProperty().SetDiffuse(.8)#光漫反射光系数
        actor[id].GetProperty().SetSpecular(.5)#镜反光系数
        actor[id].GetProperty().SetSpecularColor(1.0,1.0,1.0) #镜反射光系数
        actor[id].GetProperty().SetSpecularPower(30.0)#镜面指数
    #4.装配体分配成员
    joint1.AddPart(actor[0])#组件一包含actor[0]和joint2即c1,c2,c3
    joint1.AddPart(joint2)
    joint2.AddPart(actor[1])#组件二包含actor[1]和joint3即c2,c3
    joint2.AddPart(joint3)
    joint3.AddPart(actor[2])#组件二包含actor[2]即c3

    #5.还要设置组件在空间中的原点,位置和方向
    joint1.SetOrigin(0, 0, 0) # 组件一的旋转中心(原点)
    joint2.SetOrigin(100,0,0)#组件二旋转中心(距离根据零件长达大小而定)
    joint3.SetOrigin(205,0,0)
    ren.AddActor(joint1)#在窗口添加组件一(即让三个零件显示出来)
    # 6.Add coordinates 设置坐标
    axes = CreateCoordinates()#调用CreateCoordinates()函数
    ren.AddActor(axes)#在窗口绘制坐标
    # 7.Add ground(设置地面)
    ground = CreateGround()
    ren.AddActor(ground)#在窗口绘制坐标
    # Set background color设置背景颜色
    ren.SetBackground(.2, .2, .2)

    # 8.Set window size设置显示窗口大小
    renWin.SetSize(600, 600)

    # 9.Set up the camera to get a particular view of the scene
    #设置摄像机以获取场景的特定视图
    camera = vtk.vtkCamera()
    camera.SetFocalPoint(300, 0, 0)
    camera.SetPosition(300, -400, 350)
    camera.ComputeViewPlaneNormal()
    camera.SetViewUp(0, 1, 0)
    camera.Zoom(0.4)
    ren.SetActiveCamera(camera)

    # 10.启动用户界面交互器
    iren.Initialize()#初始化
    iren.Start()#交互开始
4.MyInteractor()
# Customize vtkInteractorStyleTrackballCamera
class MyInteractor(vtk.vtkInteractorStyleTrackballCamera):
    def __init__(self,parent=None):
        self.AddObserver("CharEvent",self.OnCharEvent)
        self.AddObserver("KeyPressEvent",self.OnKeyPressEvent)
    #覆盖当前处理轨迹球或操纵杆样式的默认键操作
    #按下ASCII键时触发OnChar。这里处理一些基本的按键
    def OnCharEvent(self,obj,event):
        pass
    def OnKeyPressEvent(self,obj,event):
        global angle#角度全局变量
        #获取事件的复合键笔划
        key = self.GetInteractor().GetKeySym()
        if(key == "4"):
            joint1.RotateY(-dt) #组件一以y轴为对称轴旋转(-dt角度)
            angle[0]=angle[0]+ dt #第一个零件旋转角度
            if angle[0] >= 360.0:
                angle[0] -= 360.0
            print("first is :",angle[0])
        if(key == "1"):
            joint1.RotateY(+dt)
            angle[0]=angle[0] - dt
            if angle[0] <= 0.0:
                angle[0] += 360.0
            print("first is :",angle[0])
        if(key == "5"):
            joint2.RotateY(-dt)#组件二以y轴为对称轴旋转(-dt角度)
            angle[1]=angle[1]+ dt#第二个零件旋转角度
            if angle[1] >= 360.0:
                angle[1] -= 360.0
            print("Second is :",angle[1])
        if(key == "2"):
            joint2.RotateY(+dt)
            angle[1]=angle[1] - dt
            if angle[1] <= 0.0:
                angle[1] += 360.0
            print("Second is :",angle[1])

        if(key == "6"):
            joint3.RotateX(-dt) #组件三以x轴为对称轴旋转(-dt角度)
            angle[2]=angle[2]+ dt#第三个零件旋转角度
            if angle[2] >= 360.0:
                angle[2] -= 360.0
            print("third is :",angle[2])
        if(key == "3"):
            joint3.RotateX(+dt)
            angle[2] = angle[2]-dt
            if angle[2] <= 0.0:
                angle[2] += 360.0
            print("third is :",angle[2])
        #要求此RenderWindow拥有的每个渲染器渲染其图像并同步此过程
        renWin.Render()
        return
5.LoadSTL(filename)
def LoadSTL(filename):
    reader = vtk.vtkSTLReader()#读取stl文件
    reader.SetFileName(filename)#文件名
    mapper = vtk.vtkPolyDataMapper() #将多边形数据映射到图形基元
    mapper.SetInputConnection(reader.GetOutputPort())
    actor = vtk.vtkLODActor()
    actor.SetMapper(mapper)
    return actor   # 表示渲染场景中的实体
6.CreateCoordinates():
def CreateCoordinates():
    # create coordinate axes in the render window
    axes = vtk.vtkAxesActor()
    #在 3 个维度中设置轴的总长度
    axes.SetTotalLength(100, 100, 100)
    # Set the type of the shaft to a cylinder:0, line:1, or user defined geometry.
    #设置坐标轴轴类型
    axes.SetShaftType(0) #圆柱形
    axes.SetCylinderRadius(0.02) #设置圆柱半径
    axes.GetXAxisCaptionActor2D().SetWidth(0.03)
    axes.GetYAxisCaptionActor2D().SetWidth(0.03)
    axes.GetZAxisCaptionActor2D().SetWidth(0.03)
    return axes
7.CreateGround():
def CreateGround():
    # create plane source
    plane = vtk.vtkPlaneSource()
    plane.SetXResolution(50)
    plane.SetYResolution(50)
    plane.SetCenter(0,0,0)#设置地面中心坐标原点
    plane.SetNormal(0,0,1)#设置平面的法向量

    # mapper映射
    mapper = vtk.vtkPolyDataMapper()
    mapper.SetInputConnection(plane.GetOutputPort())

    # actor
    actor = vtk.vtkActor()
    actor.SetMapper(mapper)
    actor.GetProperty().SetRepresentationToWireframe()
    #actor.GetProperty().SetOpacity(0.4)  # 1.0 is totally opaque and 0.0 is completely transparent
    actor.GetProperty().SetColor(light_grey)

    transform = vtk.vtkTransform()
    transform.Scale(2000,2000, 1)#规模
    actor.SetUserTransform(transform)

    return actor
总结
耐点心,霸点蛮。


 600
600


 被折叠的 条评论
为什么被折叠?
被折叠的 条评论
为什么被折叠?
 到【灌水乐园】发言


