


文章目录
一、话题、服务编程
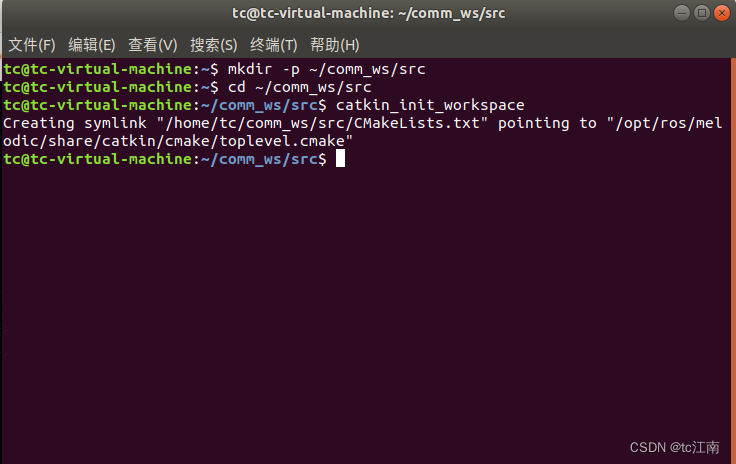
1、创建工作空间
mkdir -p ~/comm_ws/src
cd ~/comm_ws/src
catkin_init_workspace
1、编译工作环境
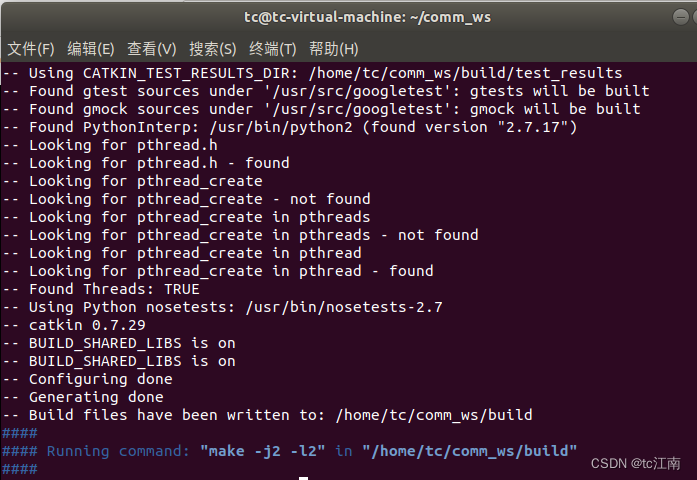
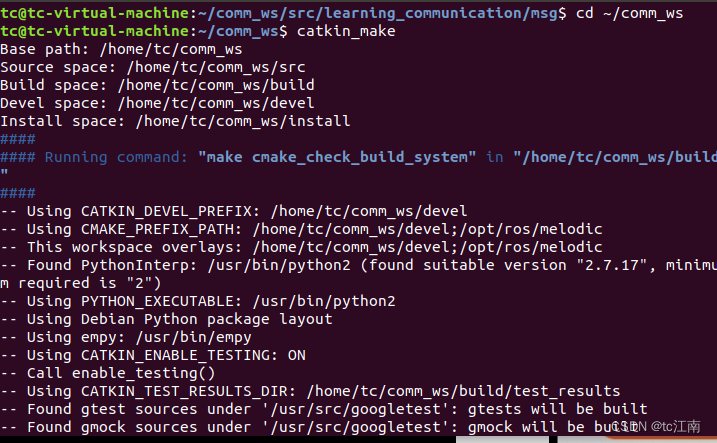
cd ..
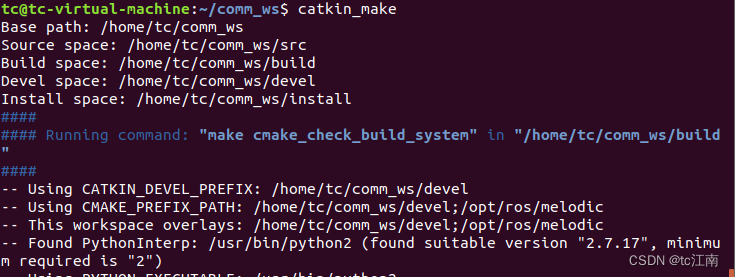
catkin_make
然后,设置环境变量


创建功能包
cd ~/comm_ws/src
catkin_create_pkg learning_communication std_msgs rospy roscpp

编译
cd ..
catkin_make
source ~/comm_ws/devel/setup.bash

2、话题编程
1、建立发起者
创建

编辑

#include"ros/ros.h"
#include"std_msgs/String.h"
//接收到订阅的消息,会进入消息的回调函数
void chatterCallback(const std_msgs::String::ConstPtr& msg)
{
	//将接收到的消息打印处理
	ROS_INFO("I heard:{%s}",msg->data.c_str());
}
int main(int argc,char **argv)
{
	//初始化ROS节点
	ros::init(argc,argv,"listener");
	//创建节点句柄
	ros::NodeHandle n;
	//创建一个Subscriber,订阅名为chatter的topic,注册回调函数chatterCallback
	ros::Subscriber sub=n.subscribe("chatter",1000,chatterCallback);
	//循环等待回调函数
	ros::spin();
	return 0;
}
2、创建订阅者
创建

编辑

#include"ros/ros.h"
#include"std_msgs/String.h"
//接收到订阅的消息,会进入消息的回调函数
void chatterCallback(const std_msgs::String::ConstPtr& msg)
{
	//将接收到的消息打印处理
	ROS_INFO("I heard:{%s}",msg->data.c_str());
}
int main(int argc,char **argv)
{
	//初始化ROS节点
	ros::init(argc,argv,"listener");
	//创建节点句柄
	ros::NodeHandle n;
	//创建一个Subscriber,订阅名为chatter的topic,注册回调函数chatterCallback
	ros::Subscriber sub=n.subscribe("chatter",1000,chatterCallback);
	//循环等待回调函数
	ros::spin();
	return 0;
}
3、设置CMakeLists.txt文件
add_executable(talker src/talker.cpp)
target_link_libraries(talker ${catkin_LIBRARIES})

add_executable(listener src/listener.cpp)
target_link_libraries(listener ${catkin_LIBRARIES})
编译

4、运行可执行文件
source devel/setup.bash
5、自定义话题
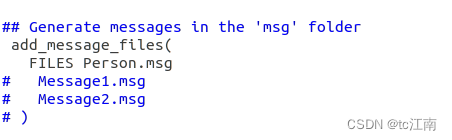
定义msg文件
mkdir ~/comm_ws/src/learning_communication/msg
cd ~/comm_ws/src/learning_communication/msg
vim Person.msg
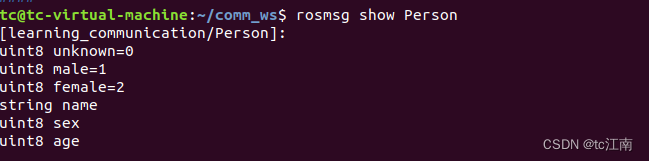
加入下列内容
string name
uint8 sex
uint8 age

uint8 unknown=0
uint8 male=1
uint8 female=2
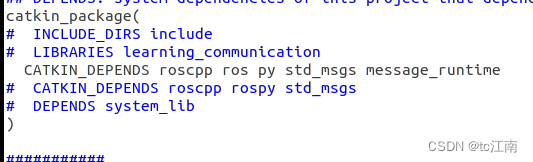
在package.xml中添加功能包依赖
<build_depend>message_generation</build_depend>
<exec_depend>message_runtime</exec_depend>
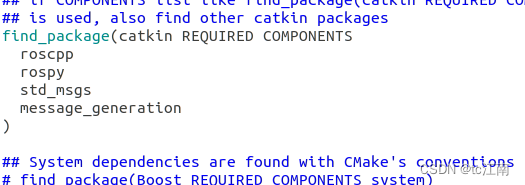
然后修改CMakeLists.txt

编译
查看自定义消息
rosmsg show Person
3、服务编程
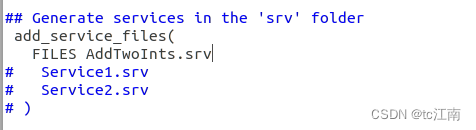
1、定义srv文件
mkdir ~/comm_ws/src/learning_communication/srv
cd ~/comm_ws/src/learning_communication/srv
vim AddTwoInts.srv
输入以下内容
int64 a
int64 b
---
int64 sum
2、创建服务器

输入server.cpp
#include<ros/ros.h>
#include"learning_communication/AddTwoInts.h"
//service回调函数,输入参数req,输出参数res
bool add(learning_communication::AddTwoInts::Request &req,learning_communication::AddTwoInts::Response &res)
{
	//将输入的参数中的请求数据相加,结果放到应答变量中
	res.sum=req.a+req.b;
	ROS_INFO("request: x=%1d,y=%1d",(long int)req.a,(long int)req.b);
	ROS_INFO("sending back response:[%1d]",(long int)res.sum);
	return true;
}
int main(int argc,char **argv)
{
	//ROS节点初始化
	ros::init(argc,argv,"add_two_ints_server");
	//创建节点句柄
	ros::NodeHandle n;
	//创建一个名为add_two_ints的server,注册回调函数add()
	ros::ServiceServer service=n.advertiseService("add_two_ints",add);
	//循环等待回调函数
	ROS_INFO("Ready to add two ints.");
	ros::spin();
	return 0;
}
再输入client.cpp
#include<cstdlib>
#include<ros/ros.h>
#include"learning_communication/AddTwoInts.h"
int main(int argc,char **argv)
{
	//ROS节点初始化
	ros::init(argc,argv,"add_two_ints_client");
	//从终端命令行获取两个加数
	if(argc!=3)
	{
		ROS_INFO("usage:add_two_ints_client X Y");
		return 1;
	}
	//创建节点句柄
	ros::NodeHandle n;
	//创建一个client,请求add_two_ints_service
	//service消息类型是learning_communication::AddTwoInts
	ros::ServiceClient client=n.serviceClient<learning_communication::AddTwoInts>("add_two_ints");
	//创建learning_communication::AddTwoInts类型的service消息
	learning_communication::AddTwoInts srv;
	srv.request.a=atoll(argv[1]);
	srv.request.b=atoll(argv[2]);
	//发布service请求,等待加法运算的应答请求
	if(client.call(srv))
	{
		ROS_INFO("sum: %1d",(long int)srv.response.sum);
	}
	else
	{
		ROS_INFO("Failed to call service add_two_ints");
		return 1;
	}
	return 0;
}
设置CMakeList.txt
add_executable(server src/server.cpp)
target_link_libraries(server ${catkin_LIBRARIES})
add_dependencies(server ${PROJECT_NAME}_gencpp)

add_executable(client src/client.cpp)
target_link_libraries(client ${catkin_LIBRARIES})
add_dependencies(client ${PROJECT_NAME}_gencpp)


编译
3、运行文件
roscore
rosrun learning_communication server
rosrun learning_communication client 整数 整数
二、ROS动作编程
1、创建turtleMove.cpp

输入以下代码:
/*
   此程序通过通过动作编程实现由client发布一个目标位置
   然后控制Turtle运动到目标位置的过程
 */
#include <ros/ros.h>
#include <actionlib/server/simple_action_server.h>
#include "learning_communication/TurtleMoveAction.h"
#include <turtlesim/Pose.h>
#include <turtlesim/Spawn.h>
#include <geometry_msgs/Twist.h>

typedef actionlib::SimpleActionServer<learning_communication::TurtleMoveAction> Server;

struct Myturtle
{
    float x;
    float y;
    float theta;
}turtle_original_pose,turtle_target_pose;

ros::Publisher turtle_vel;

void posecallback(const turtlesim::PoseConstPtr& msg)
{
  ROS_INFO("Turtle1_position:(%f,%f,%f)",msg->x,msg->y,msg->theta);
  turtle_original_pose.x=msg->x;
  turtle_original_pose.y=msg->y;
  turtle_original_pose.theta=msg->theta;
 }

// 收到action的goal后调用该回调函数
void execute(const learning_communication::TurtleMoveGoalConstPtr& goal, Server* as)
{
    learning_communication::TurtleMoveFeedback feedback;

    ROS_INFO("TurtleMove is working.");
    turtle_target_pose.x=goal->turtle_target_x;
    turtle_target_pose.y=goal->turtle_target_y;
    turtle_target_pose.theta=goal->turtle_target_theta;

    geometry_msgs::Twist vel_msgs;
    float break_flag;

    while(1)
    {
        ros::Rate r(10);

        vel_msgs.angular.z = 4.0 * (atan2(turtle_target_pose.y-turtle_original_pose.y,
                                   turtle_target_pose.x-turtle_original_pose.x)-turtle_original_pose.theta);
        vel_msgs.linear.x = 0.5 * sqrt(pow(turtle_target_pose.x-turtle_original_pose.x, 2) +
                                      pow(turtle_target_pose.y-turtle_original_pose.y, 2));
        break_flag=sqrt(pow(turtle_target_pose.x-turtle_original_pose.x, 2) +
                                        pow(turtle_target_pose.y-turtle_original_pose.y, 2));
        turtle_vel.publish(vel_msgs);

        feedback.present_turtle_x=turtle_original_pose.x;
        feedback.present_turtle_y=turtle_original_pose.y;
        feedback.present_turtle_theta=turtle_original_pose.theta;
        as->publishFeedback(feedback);
        ROS_INFO("break_flag=%f",break_flag);
        if(break_flag<0.1) break;
        r.sleep();
    }
        // 当action完成后,向客户端返回结果
        ROS_INFO("TurtleMove is finished.");
        as->setSucceeded();
}

int main(int argc, char** argv)
{
    ros::init(argc, argv, "TurtleMove");
    ros::NodeHandle n,turtle_node;
    ros::Subscriber sub = turtle_node.subscribe("turtle1/pose",10,&posecallback); //订阅小乌龟的位置信息
    turtle_vel = turtle_node.advertise<geometry_msgs::Twist>("turtle1/cmd_vel",10);//发布控制小乌龟运动的速度
    // 定义一个服务器
        Server server(n, "TurtleMove", boost::bind(&execute, _1, &server), false);
        // 服务器开始运行
        server.start();
        ROS_INFO("server has started.");
    ros::spin();

    return 0;
}
2、创建turtleMoveClient.cpp
输入以下代码:
#include <actionlib/client/simple_action_client.h>
#include "learning_communication/TurtleMoveAction.h"
#include <turtlesim/Pose.h>
#include <turtlesim/Spawn.h>
#include <geometry_msgs/Twist.h>

typedef actionlib::SimpleActionClient<learning_communication::TurtleMoveAction> Client;

struct Myturtle
{
    float x;
    float y;
    float theta;
}turtle_present_pose;

// 当action完成后会调用该回调函数一次
void doneCb(const actionlib::SimpleClientGoalState& state,
        const learning_communication::TurtleMoveResultConstPtr& result)
{
    ROS_INFO("Yay! The TurtleMove is finished!");
    ros::shutdown();
}

// 当action激活后会调用该回调函数一次
void activeCb()
{
    ROS_INFO("Goal just went active");
}

// 收到feedback后调用该回调函数
void feedbackCb(const learning_communication::TurtleMoveFeedbackConstPtr& feedback)
{
    ROS_INFO(" present_pose : %f  %f  %f", feedback->present_turtle_x,
                   feedback->present_turtle_y,feedback->present_turtle_theta);
}

int main(int argc, char** argv)
{
    ros::init(argc, argv, "TurtleMove_client");

    // 定义一个客户端
    Client client("TurtleMove", true);

    // 等待服务器端
    ROS_INFO("Waiting for action server to start.");
    client.waitForServer();
    ROS_INFO("Action server started, sending goal.");

    // 创建一个action的goal
    learning_communication::TurtleMoveGoal goal;
    goal.turtle_target_x = 1;
    goal.turtle_target_y = 1;
    goal.turtle_target_theta = 0;

    // 发送action的goal给服务器端,并且设置回调函数
    client.sendGoal(goal,  &doneCb, &activeCb, &feedbackCb);

    ros::spin();

    return 0;
}
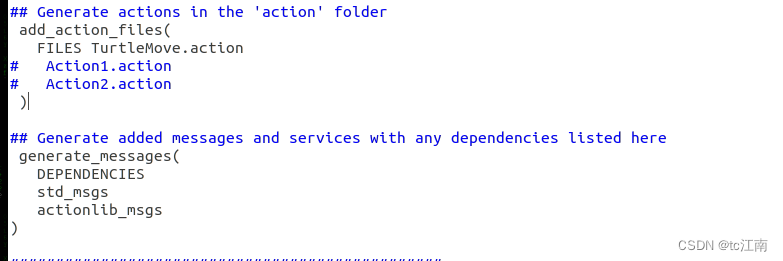
3、创建action文件夹和action文件

在新创建的TurtleMove.action中,输入
# Define the goal
float64 turtle_target_x  # Specify Turtle's target position
float64 turtle_target_y
float64 turtle_target_theta
---
# Define the result
float64 turtle_final_x
float64 turtle_final_y
float64 turtle_final_theta
---
# Define a feedback message
float64 present_turtle_x
float64 present_turtle_y
float64 present_turtle_theta
4、修改CMake文件
add_executable(turtleMoveClient src/turtleMoveClient.cpp)
target_link_libraries(turtleMoveClient ${catkin_LIBRARIES})
add_dependencies(turtleMoveClient ${PROJECT_NAME}_gencpp)
add_executable(turtleMove src/turtleMove.cpp)
target_link_libraries(turtleMove ${catkin_LIBRARIES})
add_dependencies(turtleMove ${PROJECT_NAME}_gencpp)

5、修改package.xml文件
<build_depend>message_generation</build_depend>
<build_depend>actionlib</build_depend>
<build_depend>actionlib_msgs</build_depend>
<exec_depend>message_runtime</exec_depend>
<exec_depend>actionlib</exec_depend>
<exec_depend>actionlib_msgs</exec_depend>
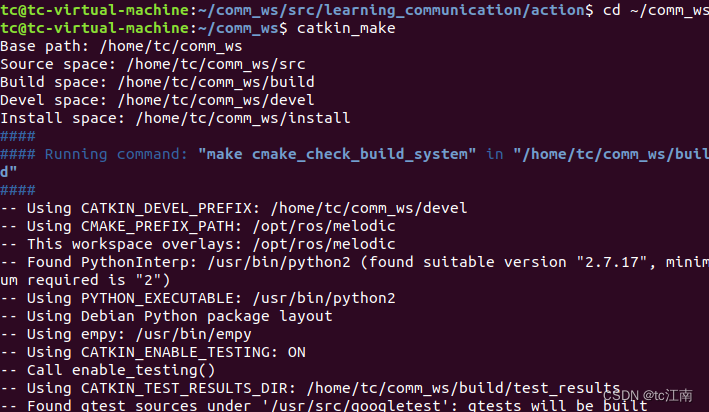
6、编译
7、运行
roscore
rosrun turtlesim turtlesim_node
rosrun learning_communication turtleMove
rosrun learning_communication turtleMoveClient
三、分布式通信
1、查看ip
ifconfig
2、主机操作
1、开启ros
roscore
export ROS_IP=xxx.xxx.xxx							#本机IP
export ROS_MASTER_URI=http://xxx.xxx.xxx:11311/		#主机IP
rosrun turtlesim turtlesim_node
source ~/.bashrc
2、从机
export ROS_IP=X.X.X.X 						#本机ip
export ROS_MASTER_URI=http://x.x.x.x:11311	#主机IP
source ~/.bashrc
rosrun turtlesim turtle_teleop_key
就可以在从机上控制小海龟了。
四、总结
通过本次学习,对于分布式通信和ROS通信编程有了更好的理解。


 1599
1599


 被折叠的 条评论
为什么被折叠?
被折叠的 条评论
为什么被折叠?
 到【灌水乐园】发言


