


vscode 方便的配置
消除include的报错/ vscode引入第三方库
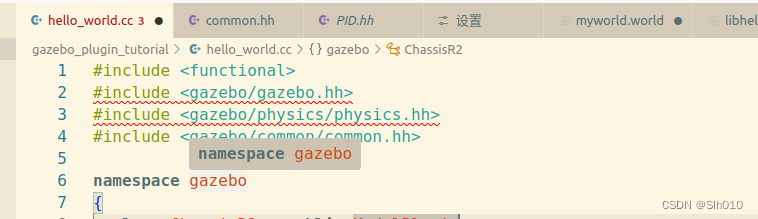
使用第三方库无法打开文件怎么办?
1.搜索库文件路径
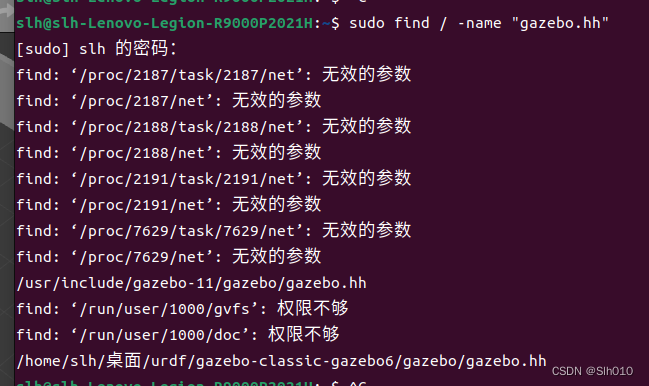
使用 sudo find / -name " gazebo.hh "
找到在 /usr/include/gazebo-11 路径下
2.配置vscod
打开vscod c/c++插件的扩展设置
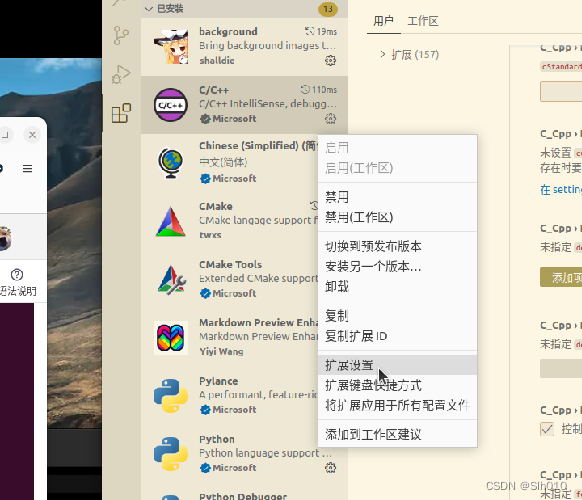
找到
default:include path选项
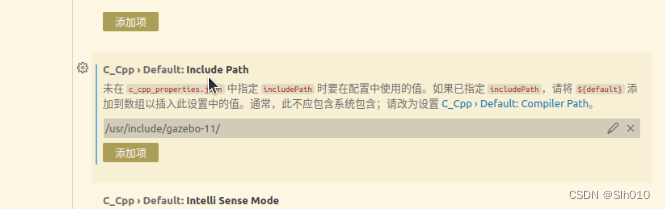
输入 /usr/include/gazebo-11
python launch 的代码模板设置
在使用 Python 版的 launch 文件时,涉及的 API 众多,为了提高编码效率可以在 VScode 中设置 launch 文件的代码模板,将 VScode 的配置文件 python.json 修改
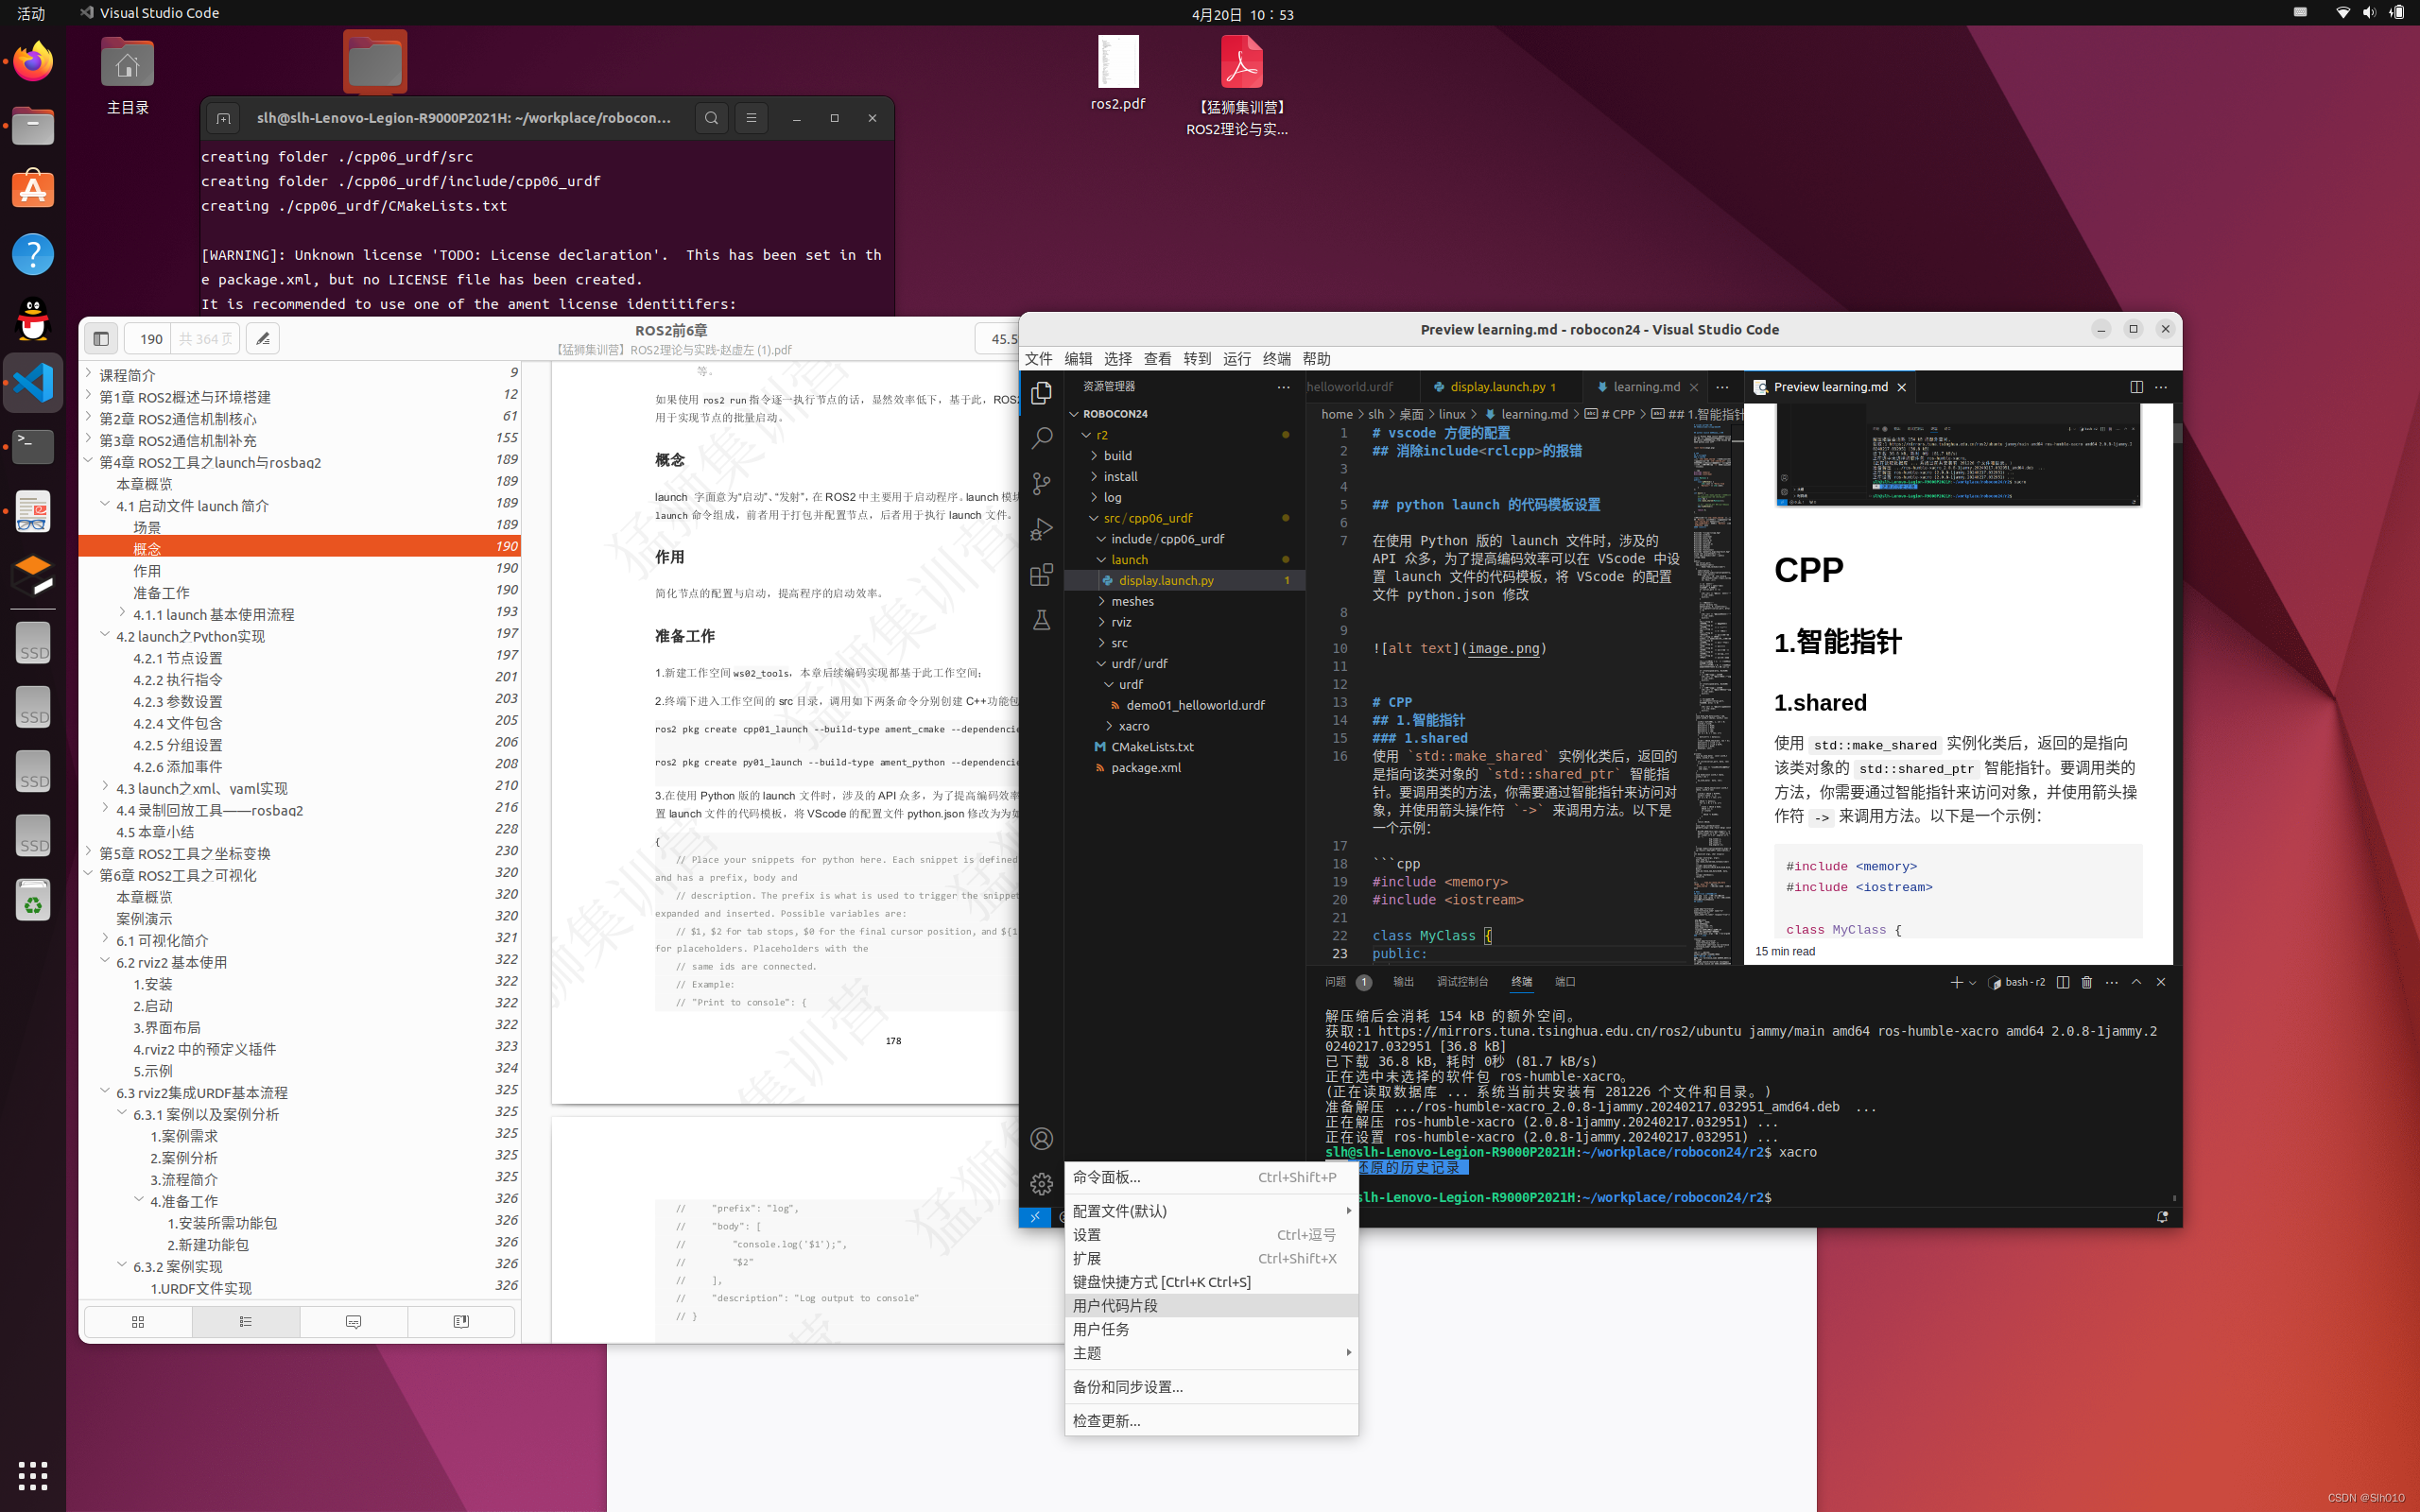
搜索找到python.json
修改为:
{
// Place your snippets for python here. Each snippet is defined under a snippet name and has a prefix, body and
// description. The prefix is what is used to trigger the snippet and the body will be expanded and inserted. Possible variables are:
// $1, $2 for tab stops, $0 for the final cursor position, and ${1:label}, ${2:another} for placeholders. Placeholders with the
// same ids are connected.
// Example:
// "Print to console": {
// "prefix": "log",
// "body": [
// "console.log('$1');",
// "$2"
// ],
// "description": "Log output to console"
// }
"ros2 node": {
"prefix": "ros2_node_py",
"body": [
"\"\"\" ",
"需求:",
"流程:",
"1.导包;",
"2.初始化 ROS2 客户端;",
"3.自定义节点类;",
" ",
"4.调用 spain 函数,并传入节点对象;",
"5.资源释放。 ",
"",
"",
"\"\"\"",
"# 1.导包;",
"import rclpy",
"from rclpy.node import Node",
"",
"# 3.自定义节点类;",
"class MyNode(Node):",
"def __init__(self):",
" super().__init__(\"mynode_node_py\")",
"",
"def main():",
"# 2.初始化 ROS2 客户端;",
"rclpy.init()",
"# 4.调用 spain 函数,并传入节点对象;",
"rclpy.spin(MyNode())",
"# 5.资源释放。 ",
"rclpy.shutdown()",
"",
"if __name__ == '__main__':",
"main()",
],
"description": "ros2 node"
},
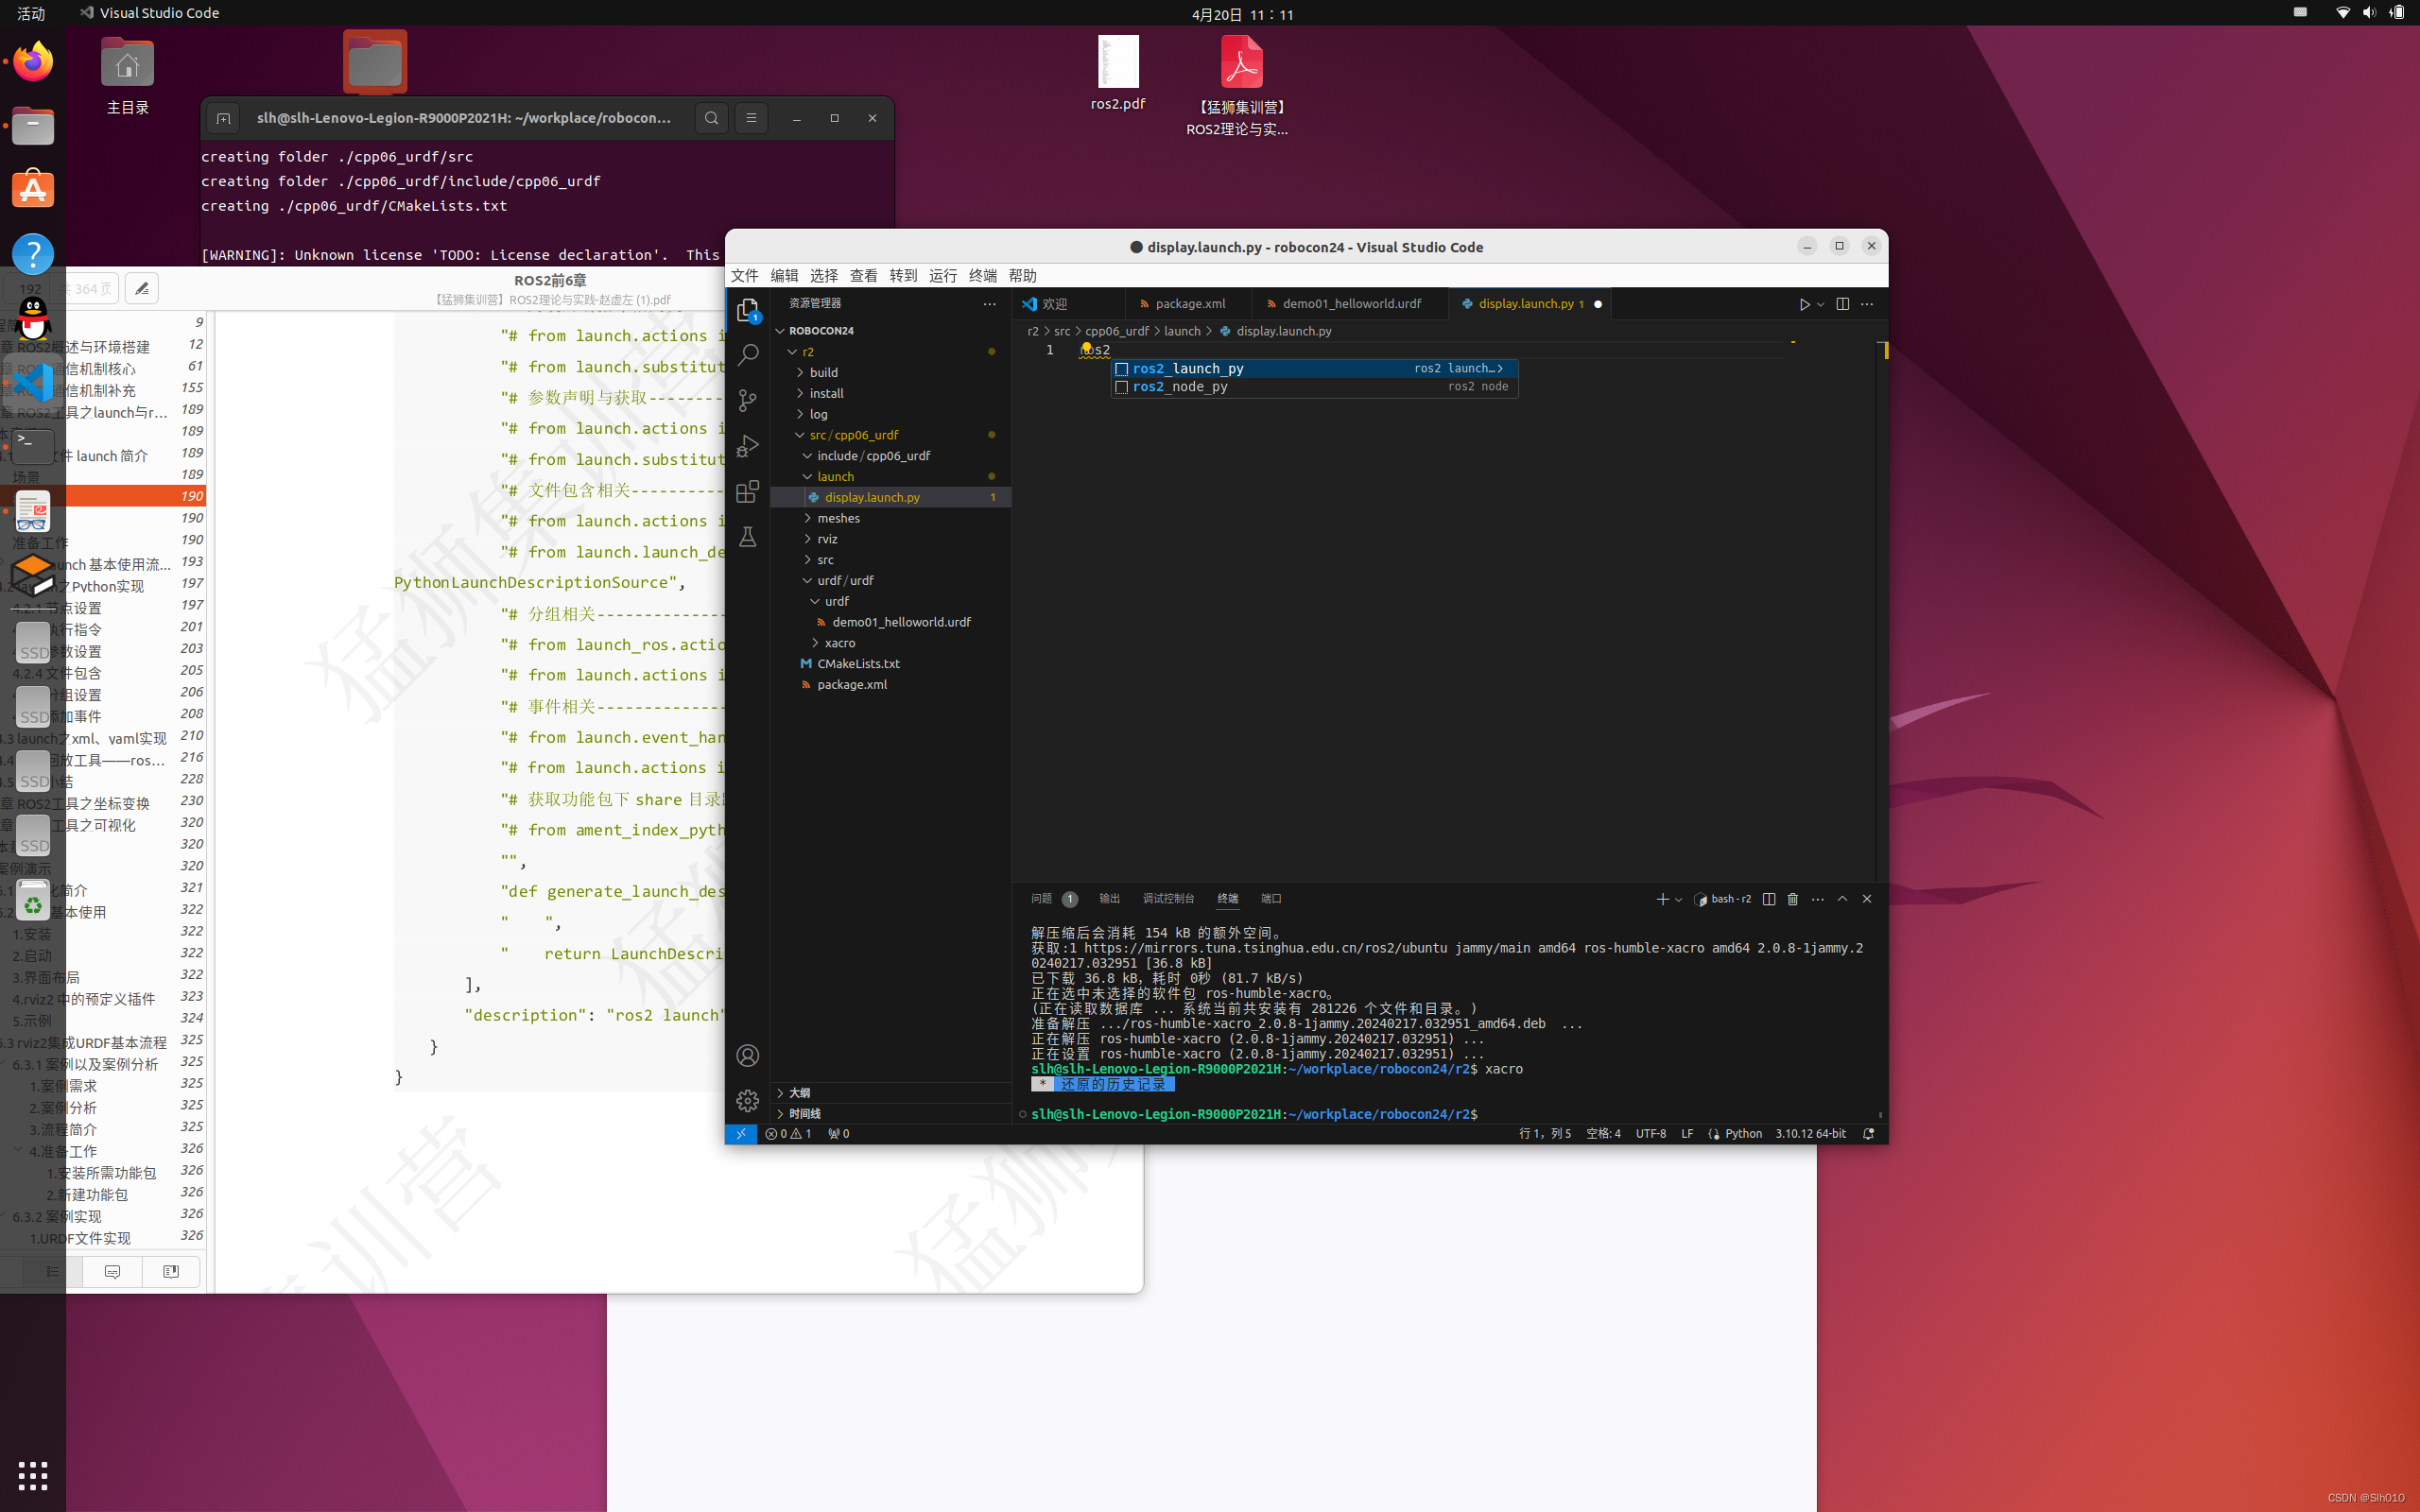
"ros2 launch py": {
"prefix": "ros2_launch_py",
"body": [
"from launch import LaunchDescription",
"from launch_ros.actions import Node",
"# 封装终端指令相关类--------------",
"# from launch.actions import ExecuteProcess",
"# from launch.substitutions import FindExecutable",
"# 参数声明与获取-----------------",
"# from launch.actions import DeclareLaunchArgument",
"# from launch.substitutions import LaunchConfiguration",
"# 文件包含相关-------------------",
"# from launch.actions import IncludeLaunchDescription",
"# from launch.launch_description_sources import PythonLaunchDescriptionSource",
"# 分组相关----------------------",
"# from launch_ros.actions import PushRosNamespace",
"# from launch.actions import GroupAction",
"# 事件相关----------------------",
"# from launch.event_handlers import OnProcessStart, OnProcessExit",
"# from launch.actions import ExecuteProcess, RegisterEventHandler,LogInfo",
"# 获取功能包下 share 目录路径-------",
"# from ament_index_python.packages import get_package_share_directory",
"",
"def generate_launch_description():",
" ",
" return LaunchDescription([])"
],
"description": "ros2 launch"
}s
}
CPP
1.智能指针
1.shared
使用 std::make_shared 实例化类后,返回的是指向该类对象的 std::shared_ptr 智能指针。要调用类的方法,你需要通过智能指针来访问对象,并使用箭头操作符 -> 来调用方法。以下是一个示例:
#include <memory>
#include <iostream>

class MyClass {
public:
    void myMethod() {
        std::cout << "Hello from MyClass!" << std::endl;
    }
};

int main() {
    // 使用 std::make_shared 实例化类,并返回指向该类对象的 shared_ptr
    auto obj = std::make_shared<MyClass>();

    // 通过 shared_ptr 调用对象的方法
    obj->myMethod();

    return 0;
}
在这个示例中,std::make_shared 用于实例化 MyClass 类,并返回一个指向该对象的 std::shared_ptr。然后,我们使用 obj->myMethod() 来调用 MyClass 类的 myMethod 方法
ros2应用
#include "rclcpp/rclcpp.hpp"
#include <cstdio>
#include <iostream>
#include <fcntl.h>
#include <unistd.h>
#include <cstring>
#include <termios.h>
#include <memory>
#include <chrono>
#include <functional>
#include "geometry_msgs/msg/twist.hpp"
using std::placeholders::_1;
class Cmd_velSubscriber : public rclcpp::Node
{
public:
  int serial_port;
  Cmd_velSubscriber()
      : Node("Cmd_velSubscriber")
  {
    subscription_ = this->create_subscription<geometry_msgs::msg::Twist>(
        "cmd_vel", 10, std::bind(&Cmd_velSubscriber::topic_callback, this, _1));

      // 打开串口设备
      serial_port = open("/dev/ttyUSB0", O_RDWR);
      if (serial_port == -1)
      {
        std::cerr << "无法打开串口设备" << std::endl;
        exit(1);
      }

      // 配置串口属性
      struct termios tty;
      memset(&tty, 0, sizeof(tty));
      if (tcgetattr(serial_port, &tty) != 0)
      {
        std::cerr << "无法获取串口属性" << std::endl;
        exit(1);
      }
      tty.c_cflag &= ~PARENB;        // 无奇偶校验
      tty.c_cflag &= ~CSTOPB;        // 1 位停止位
      tty.c_cflag |= CS8;            // 8 位数据位
      tty.c_cflag &= ~CRTSCTS;       // 禁用硬件流控
      tty.c_cflag |= CREAD | CLOCAL; // 允许读取,并使本地连接
      tty.c_lflag &= ~ICANON;        // 禁用标准模式
      tty.c_lflag &= ~ECHO;          // 禁用回显
      tty.c_lflag &= ~ECHOE;         // 禁用回车删掉
      tty.c_lflag &= ~ECHONL;        // 禁用新行回显
      tty.c_oflag &= ~OPOST;         // 禁用输出处理

      tty.c_cc[VMIN] = 1;  // 非规范模式下的最小字节数
      tty.c_cc[VTIME] = 0; // 非规范模式下的超时时间(以 0.1 秒为单位)

      if (cfsetospeed(&tty, B115200) != 0)
      { // 设置波特率为 115200
        std::cerr << "无法设置输出波特率" << std::endl;
        exit(1);
      }
      if (cfsetispeed(&tty, B115200) != 0)
      { // 设置波特率为 115200
        std::cerr << "无法设置输入波特率" << std::endl;
        exit(1);
      }

      // 应用新的设置
      if (tcsetattr(serial_port, TCSANOW, &tty) != 0)
      {
        std::cerr << "无法应用新的串口设置" << std::endl;
        exit(1);
      }
  }
  void Send_Cmd_Data(uint8_t cmd, const uint8_t *datas, uint8_t len)
  {
    uint8_t buf[300], i, cnt = 0;
    uint16_t crc16;
    buf[cnt++] = 0xA5;
    buf[cnt++] = 0x5A;
    buf[cnt++] = len;
    buf[cnt++] = cmd;
    for (i = 0; i < len; i++)
    {
      buf[cnt++] = datas[i];
    }
    crc16 = CRC16_Check(buf, len + 4);
    buf[cnt++] = crc16 >> 8;
    buf[cnt++] = crc16 & 0xFF;
    buf[cnt++] = 0xFF;
    Send(buf, cnt);
  }

private:
  void my_send_data(  const uint8_t *data, uint8_t len)
  {
    if (write(serial_port, data, len) < 0)
   {
     std::cerr << "发送数据时发生错误" << std::endl;
   }
  }
  void Send(const uint8_t *data, uint8_t len )
  {
    my_send_data(  data, len);
  }


  uint16_t CRC16_Check(const uint8_t *data, uint8_t len)
  {
    uint16_t CRC16 = 0xFFFF;
    uint8_t state, i, j;
    for (i = 0; i < len; i++)
    {
      CRC16 ^= data[i];
      for (j = 0; j < 8; j++)
      {
        state = CRC16 & 0x01;
        CRC16 >>= 1;
        if (state)
        {
          CRC16 ^= 0xA001;
        }
      }
    }
    return CRC16;
  }
  void topic_callback(const geometry_msgs::msg::Twist &msg) const
  {
    RCLCPP_INFO(this->get_logger(), "I heard:linear.x='%.2f'  linear.y='%.2f' linear.z='%.2f' angular.z='%.2f' ",
                msg.linear.x,
                msg.linear.y,
                msg.linear.z,
                msg.angular.z);
  }
  rclcpp::Subscription<geometry_msgs::msg::Twist>::SharedPtr subscription_;
};
int main(int argc, char *argv[])
{
  rclcpp::init(argc, argv);
  auto node_my = std::make_shared<Cmd_velSubscriber>();
  rclcpp::spin(node_my);
  uint8_t data[5]={0x10,0x78,0x20,0x35,0x71};
  node_my->Send_Cmd_Data(0x00, data, 5);
  rclcpp::shutdown();
  return 0;
}
其中 node_my->Send_Cmd_Data(0x00, data, 5)就是通过make_shared实现类的实例化 后调用类的方法
ROS2
查看ros2 安装的功能包
ros2 pkg list //列出全部功能包
ros2 pkg list |grep -i xxx //如果有输出则xxx功能包安装了已经
Launch
<node pkg="turtlesim" exec="turtlesim_node" name="t1" namespace="t1_ns"
 exec_name="t1_label" respawn="true"/>
pkg:功能包猛
exec:可执行文件;
name:节点名称;
namespace:命名空间;
exec_name:流程标签;
respawn:节点关闭后是否重启集
args:调用指令时的参数列表;
ros_args:相当于args 前缀 --ros-args。
执行命令
<launch>
  <node pkg="turtlesim" exec="turtlesim_node" />
  <executable cmd="ros2 run turtlesim turtlesim_node" output="both" >
</launch>
cmd:被执行的命令;
output:日志输出目的地设置。
参数设置 动态传参
需求:启动 turtlesim_node 节点时,可以动态设置背景色
在 cpp01_launch/launch/xml 目录下新建 xml03_args.launch.xml 文件,输入如下内容:
<launch>
  <arg name="bg_r" default="255"/>
  <arg name="bg_b" default="255"/>
  <arg name="bg_g" default="255"/>
  <node pkg="turtlesim" exec="turtlesim_node">
    <param name="background_r" value="$(var bg_r)" />
    <param name="background_g"  value="$(var bg_g)" />
    <param name="background_b" value="$(var bg_b)" />
  </node>
</launch>
name:参数名称;
default:参数默认值。
参数的调用语法为:
$(var 参数名称)。
在ros2 cpp中使用ros::param::get("~usb_number",usb_number);
使用
串口通信并且打包
1.面相过程tx
#include <cstdio>
#include <iostream>
#include <fcntl.h>
#include <unistd.h>
#include <cstring>
#include <termios.h>
#include <memory>
#include <chrono>
#include <functional>
#include "geometry_msgs/msg/twist.hpp"


// uint16_t CRC16_Check(const uint8_t *data, uint8_t len);
// void Send_Cmd_Data(uint8_t cmd, const uint8_t *datas, uint8_t len, int serial_port);
// void my_send_data(int serial_port, const uint8_t *data, uint8_t len);

// int main(int argc, char **argv)
// { // 创建节点
//   rclcpp::init(argc, argv);
//   auto node = rclcpp::Node::make_shared("send_data_usart");
//   // 输出文本
//   RCLCPP_INFO(node->get_logger(), "\n----------start send_data-------------\n ");

//   // 打开串口设备
//   int serial_port = open("/dev/ttyUSB0", O_RDWR);
//   if (serial_port == -1)
//   {
//     std::cerr << "无法打开串口设备" << std::endl;
//     return 1;
//   }

//   // 配置串口属性
//   struct termios tty;
//   memset(&tty, 0, sizeof(tty));
//   if (tcgetattr(serial_port, &tty) != 0)
//   {
//     std::cerr << "无法获取串口属性" << std::endl;
//     return 1;
//   }
//   tty.c_cflag &= ~PARENB;        // 无奇偶校验
//   tty.c_cflag &= ~CSTOPB;        // 1 位停止位
//   tty.c_cflag |= CS8;            // 8 位数据位
//   tty.c_cflag &= ~CRTSCTS;       // 禁用硬件流控
//   tty.c_cflag |= CREAD | CLOCAL; // 允许读取,并使本地连接
//   tty.c_lflag &= ~ICANON;        // 禁用标准模式
//   tty.c_lflag &= ~ECHO;          // 禁用回显
//   tty.c_lflag &= ~ECHOE;         // 禁用回车删掉
//   tty.c_lflag &= ~ECHONL;        // 禁用新行回显
//   tty.c_oflag &= ~OPOST;         // 禁用输出处理

//   tty.c_cc[VMIN] = 1;  // 非规范模式下的最小字节数
//   tty.c_cc[VTIME] = 0; // 非规范模式下的超时时间(以 0.1 秒为单位)

//   if (cfsetospeed(&tty, B115200) != 0)
//   { // 设置波特率为 115200
//     std::cerr << "无法设置输出波特率" << std::endl;
//     return 1;
//   }
//   if (cfsetispeed(&tty, B115200) != 0)
//   { // 设置波特率为 115200
//     std::cerr << "无法设置输入波特率" << std::endl;
//     return 1;
//   }

//   // 应用新的设置
//   if (tcsetattr(serial_port, TCSANOW, &tty) != 0)
//   {
//     std::cerr << "无法应用新的串口设置" << std::endl;
//     return 1;
//   }

//   uint8_t data[20] = {0xA7,0x6A,0x01,0xff,0x35,0x16,0xeb,0x7f,0xef};
//   //my_send_data(serial_port, data, 5);
//   //uint8_t data[3] = { 0x21};
//   //write(serial_port, &data, 10);
//   Send_Cmd_Data(0x00, data, 9, serial_port);
//   //write(serial_port, "\n\r", 3);
//   // 关闭串口设备
//   close(serial_port);
//   return 0;
// }

// void my_send_data(int serial_port, const uint8_t *data, uint8_t len)
// {
//   if (write(serial_port, data, len) < 0)
//  {
//    std::cerr << "发送数据时发生错误" << std::endl;
//  }
// }

// // void Send(const uint8_t *data, uint8_t len, int serial_port)
// // {
// //   for (uint8_t i = 0; i < len; i++)
// //   {
// //     my_send_data(serial_port, (data + i), 1); // 发送一个字节
// //   }
// // }
// void Send(const uint8_t *data, uint8_t len, int serial_port)
// {
//   my_send_data(serial_port, data, len);
// }

// void Send_Cmd_Data(uint8_t cmd, const uint8_t *datas, uint8_t len, int serial_port)
// {
//   uint8_t buf[300], i, cnt = 0;
//   uint16_t crc16;
//   buf[cnt++] = 0xA5;
//   buf[cnt++] = 0x5A;
//   buf[cnt++] = len;
//   buf[cnt++] = cmd;
//   for (i = 0; i < len; i++)
//   {
//     buf[cnt++] = datas[i];
//   }
//   crc16 = CRC16_Check(buf, len + 4);
//   buf[cnt++] = crc16 >> 8;
//   buf[cnt++] = crc16 & 0xFF;
//   buf[cnt++] = 0xFF;
// Send(buf, cnt, serial_port);
// }

// uint16_t CRC16_Check(const uint8_t *data, uint8_t len)
// {
//   uint16_t CRC16 = 0xFFFF;
//   uint8_t state, i, j;
//   for (i = 0; i < len; i++)
//   {
//     CRC16 ^= data[i];
//     for (j = 0; j < 8; j++)
//     {
//       state = CRC16 & 0x01;
//       CRC16 >>= 1;
//       if (state)
//       {
//         CRC16 ^= 0xA001;
//       }
//     }
//   }
//   return CRC16;
// }
2.面相过程rx
#include <cstdio>
#include <iostream>
#include <fcntl.h>
#include <unistd.h>
#include <cstring>
#include <termios.h>
#include "rclcpp/rclcpp.hpp"
#include <iomanip>//测试使用
uint16_t CRC16_Check(const uint8_t *data, uint8_t len);
void Receive(uint8_t bytedata);
int main(int argc, char **argv)
{
  rclcpp::init(argc, argv);
  auto node = rclcpp::Node::make_shared("receive_data_usart");
  // 输出文本
  RCLCPP_INFO(node->get_logger(), "\n----------start receive_data-------------\n ");

  //   // 打开串口设备
  int serial_port = open("/dev/ttyUSB0", O_RDWR);
  if (serial_port == -1)
  {
    std::cerr << "无法打开串口设备" << std::endl;
    return 1;
  }

  // 配置串口属性
  struct termios tty;
  memset(&tty, 0, sizeof(tty));
  if (tcgetattr(serial_port, &tty) != 0)
  {
    std::cerr << "无法获取串口属性" << std::endl;
    return 1;
  }
  tty.c_cflag &= ~PARENB;        // 无奇偶校验
  tty.c_cflag &= ~CSTOPB;        // 1 位停止位
  tty.c_cflag |= CS8;            // 8 位数据位
  tty.c_cflag &= ~CRTSCTS;       // 禁用硬件流控
  tty.c_cflag |= CREAD | CLOCAL; // 允许读取,并使本地连接

  tty.c_cc[VMIN] = 1;  // 非规范模式下的最小字节数
  tty.c_cc[VTIME] = 0; // 非规范模式下的超时时间(以 0.1 秒为单位)

  if (cfsetospeed(&tty, B115200) != 0)
  { // 设置波特率为 115200
    std::cerr << "无法设置输出波特率" << std::endl;
    return 1;
  }
  if (cfsetispeed(&tty, B115200) != 0)
  { // 设置波特率为 115200
    std::cerr << "无法设置输入波特率" << std::endl;
    return 1;
  }

  // 应用新的设置
  if (tcsetattr(serial_port, TCSANOW, &tty) != 0)
  {
    std::cerr << "无法应用新的串口设置" << std::endl;
    return 1;
  }

  // 接收数据
  uint8_t receive_data;
  ssize_t bytes_read;
  while (true)
  {
    bytes_read = read(serial_port, &receive_data, sizeof(receive_data));
    if (bytes_read < 0)
    {
      std::cerr << "读取数据时发生错误" << std::endl;
      break;
    }
    else if (bytes_read == 0)
    {
      std::cerr << "未收到数据" << std::endl;
     // continue;
      break;
    }
    Receive(receive_data);
    // 处理接收到的数据

    //std::cout << "hex: " << std::hex << static_cast<int>(receive_data) << std::endl;
    //std::cout << std::hex << std::setw(2) << std::setfill('0') << static_cast<int>(receive_data) << " ";
  }

  // 关闭串口设备
  close(serial_port);
  return 0;
}
uint16_t CRC16_Check(const uint8_t *data, uint8_t len)
{
  uint16_t CRC16 = 0xFFFF;
  uint8_t state, i, j;
  for (i = 0; i < len; i++)
  {
    CRC16 ^= data[i];
    for (j = 0; j < 8; j++)
    {
      state = CRC16 & 0x01;
      CRC16 >>= 1;
      if (state)
      {
        CRC16 ^= 0xA001;
      }
    }
  }
  return CRC16;
}
// 数据帧解析   自己写
void Data_Analysis(uint8_t cmd, const uint8_t *datas, uint8_t len)
{
  switch (cmd)
  {
  case 0x00:
    // 解析命令1的数据
    // 这里可以根据具体情况进行相应的操作
    //------------------------------------------------测试代码---------------------------------------------------
    for (uint8_t i = 0; i < len; i++)
    {
      std::cout << "hex:"<<std::hex << static_cast<int>(*datas) << " ";
      datas++;
    }
    std::cout << std::endl;
    //-----------------------------------------------------------------------------------------------------------
    break;
  case 0x01:
    // 解析命令2的数据
    break;
    // 添加更多命令的解析逻辑...
  default:
    // 未知命令,进行错误处理或者忽略
    std::cerr << "Unknown command: " << cmd << std::endl;
    break;
  }
}
void Receive(uint8_t bytedata)
{

  static uint8_t step = 0; // 状态变量初始化为0 在函数中必须为静态变量
  static uint8_t cnt = 0, Buf[300], len, cmd, *data_ptr;
  static uint16_t crc16;
  // 进行数据解析 状态机
  switch (step)
  {
  case 0: // 接收帧头1状态
    if (bytedata == 0xA5)
    {
      step++;
      cnt = 0;
      Buf[cnt++] = bytedata;
    }
    break;
  case 1: // 接收帧头2状态
    if (bytedata == 0x5A)
    {
      step++;
      Buf[cnt++] = bytedata;
    }
    else if (bytedata == 0xA5)
    {
      step = 1;
    }
    else
    {
      step = 0;
    }
    break;
  case 2: // 接收数据长度字节状态
    step++;
    Buf[cnt++] = bytedata;
    len = bytedata;
    break;
  case 3: // 接收命令字节状态
    step++;
    Buf[cnt++] = bytedata;
    cmd = bytedata;
    data_ptr = &Buf[cnt]; // 记录数据指针首地址
    if (len == 0)
      step++; // 数据字节长度为0则跳过数据接收状态
    break;
  case 4: // 接收len字节数据状态
    Buf[cnt++] = bytedata;
    if (data_ptr + len == &Buf[cnt]) // 利用指针地址偏移判断是否接收完len位数据
    {
      step++;
    }
    break;
  case 5: // 接收crc16校验高8位字节
    step++;
    crc16 = bytedata;
    break;
  case 6: // 接收crc16校验低8位字节
    crc16 <<= 8;
    crc16 += bytedata;
    if (crc16 == CRC16_Check(Buf, cnt)) // 校验正确进入下一状态
    {
      step++;
    }
    else if (bytedata == 0xA5)
    {
      step = 1;
    }
    else
    {
      step = 0;
    }
    break;
  case 7:                 // 接收帧尾
    if (bytedata == 0xFF) // 帧尾接收正确
    {
      Data_Analysis(cmd, data_ptr, len); // 数据解析
      step = 0;
    }
    else if (bytedata == 0xA5)
    {
      step = 1;
    }
    else
    {
      step = 0;
    }
    break;
  default:
    step = 0;
    break; // 多余状态 正常情况下不可能出现
  }
}
话题通信
标准消息std::msgs
发布
#include<functional>
#include<memory>
#include<string>
#include<chrono>
#include"std_msgs/msg/string.hpp"
#include"rclcpp/rclcpp.hpp"

using namespace std::chrono_literals;
/* This example creates a subclass of Node and uses std::bind() to register a
* member function as a callback from the timer. */
class MinimalPublisher : public rclcpp::Node
{
public:
MinimalPublisher()
: Node("minimal_publisher"), count_(0)
{
publisher_ = this->create_publisher<std_msgs::msg::String>("topic", 10);
timer_ = this->create_wall_timer(
500ms, std::bind(&MinimalPublisher::timer_callback, this));
}
private:
void timer_callback()
{
auto message = std_msgs::msg::String();
message.data = "Hello, world! " + std::to_string(count_++);
RCLCPP_INFO(this->get_logger(), "Publishing: '%s'", message.data.c_str());
publisher_->publish(message);
}
rclcpp::TimerBase::SharedPtr timer_;
rclcpp::Publisher<std_msgs::msg::String>::SharedPtr publisher_;
size_t count_;
};
接收
MARKDOWN
代码块
代码块使用 ```前后包裹
linux
CMAKE
LINUX
.dep格式文安装
sudo dpkg -i 文件名.dep


 502
502


 被折叠的 条评论
为什么被折叠?
被折叠的 条评论
为什么被折叠?
 到【灌水乐园】发言


