


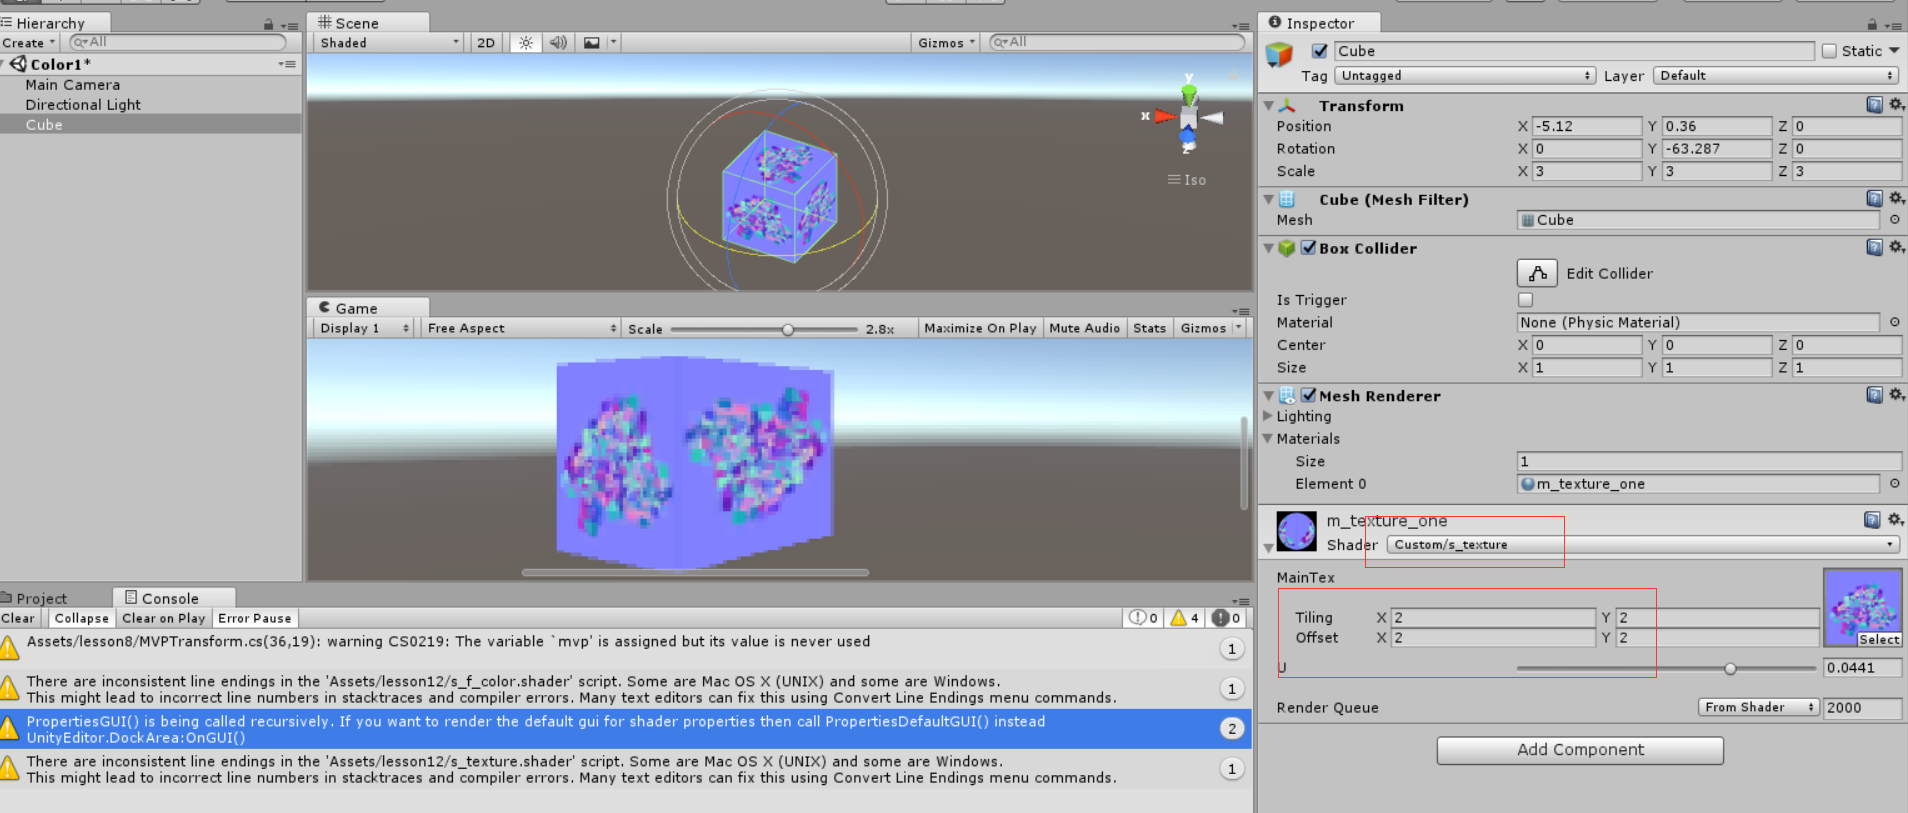
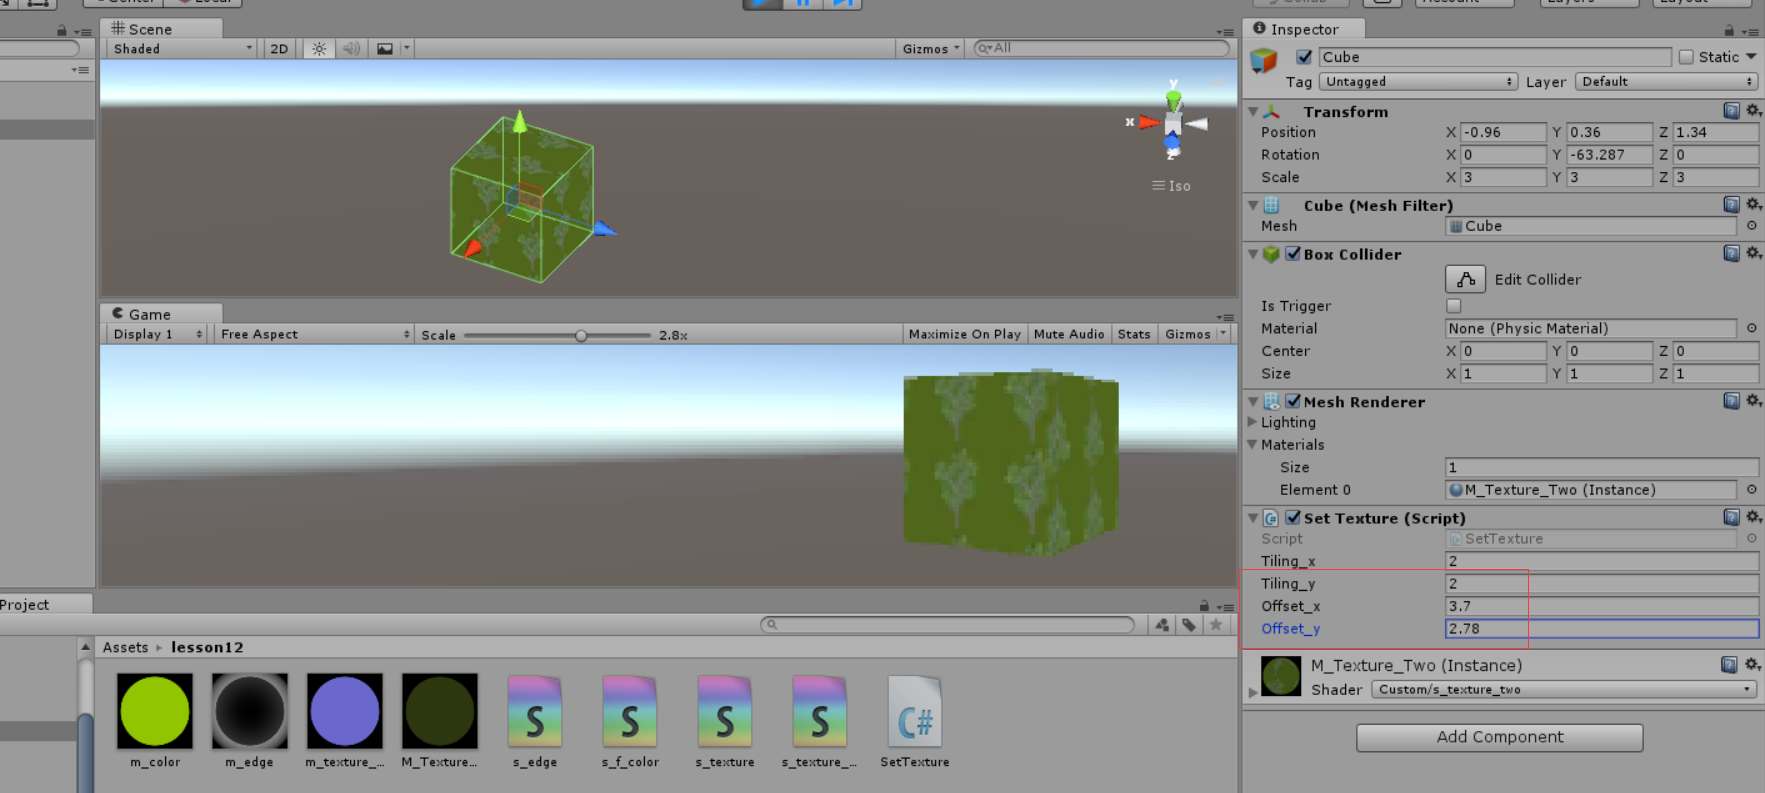
1、Tiling:x:在x上的平铺数 y:在y方向的平铺数
Offset: x:在x方向上的偏移量 y:在y方向的偏移量
使用自定义的着色器,并没有进行平铺
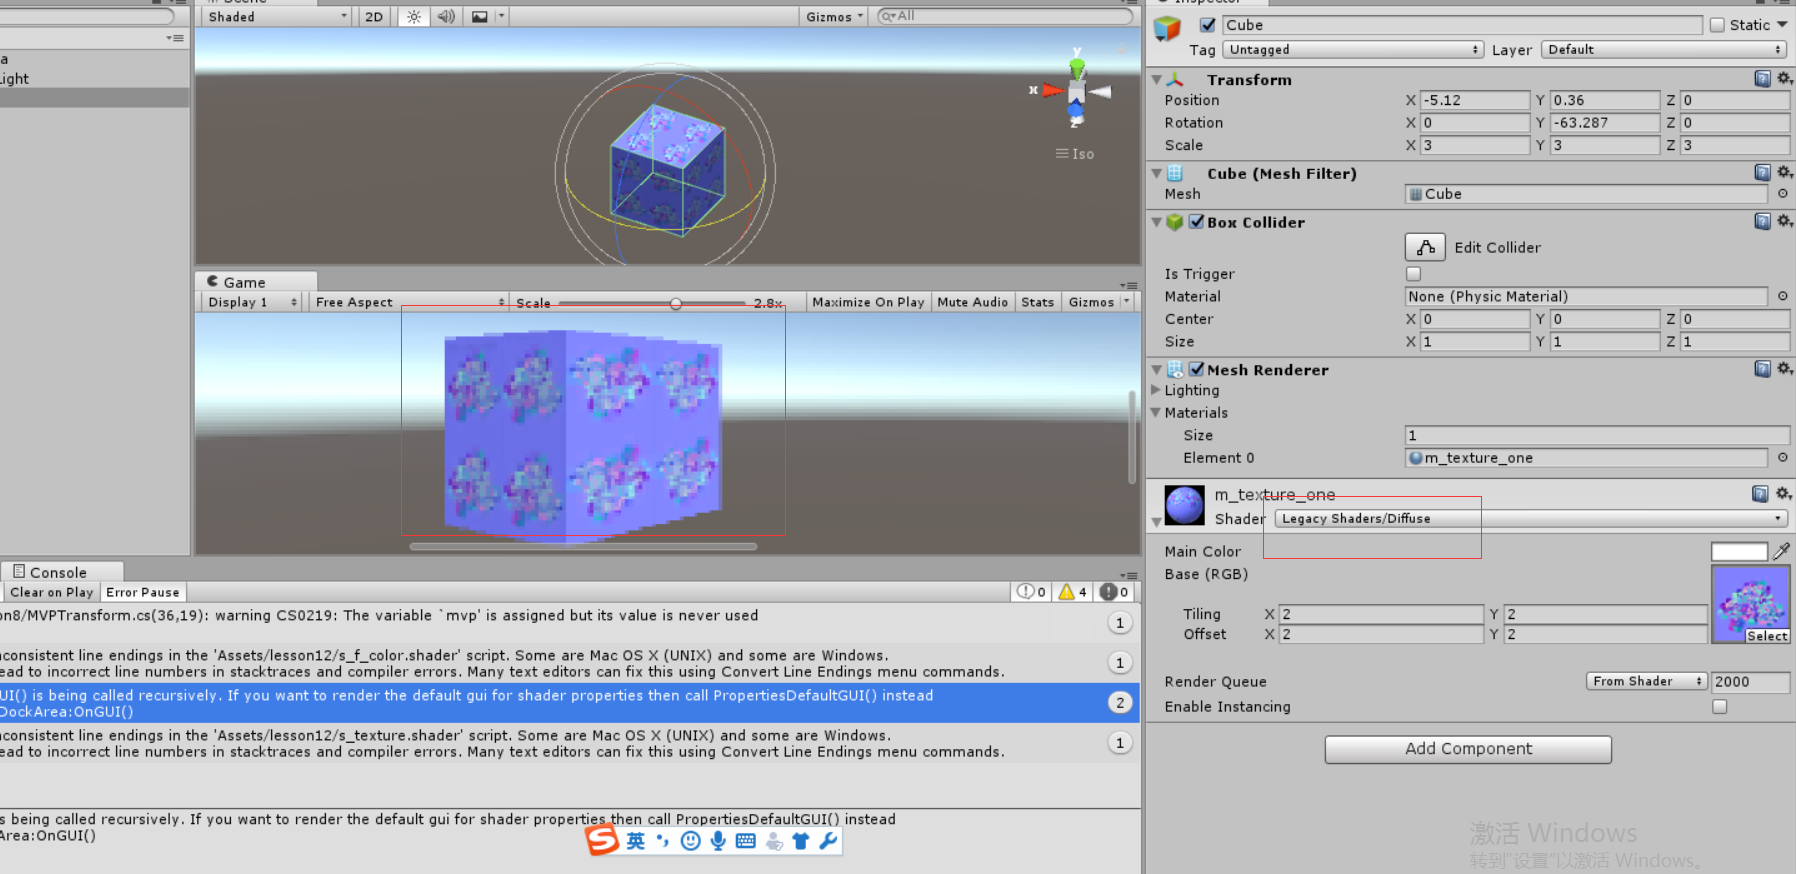
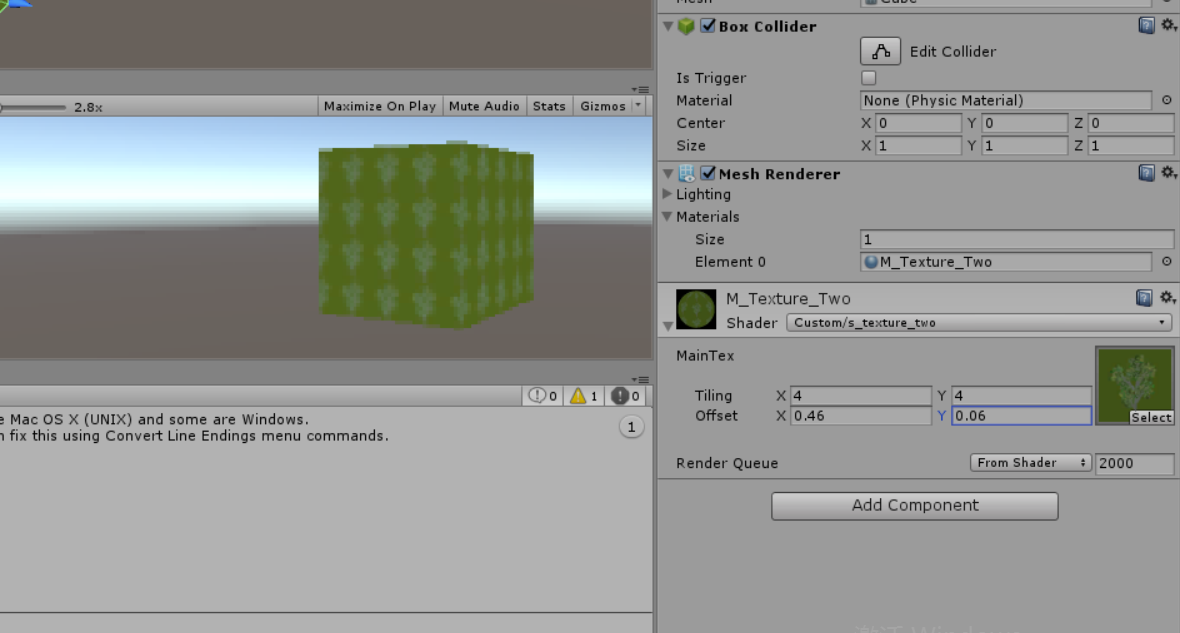
改为系统默认的着色器,立方体进行了平铺
2、平铺texture
Shader "Custom/s_texture_two" {

	Properties{
		_MainTex("MainTex", 2D) = ""{}
	}
		SubShader{
		pass {
		CGPROGRAM
		#pragma vertex vert
		#pragma fragment frag
		#include "unitycg.cginc"


		float tiling_x;
		float tiling_y;
		float offset_x;
		float offset_y;

		sampler2D _MainTex;

		struct v2f {
			float4 pos:POSITION;
			float2 uv:TEXCOORD0;
		};


		v2f vert(appdata_base v) {
			v2f o;
			o.pos = mul(UNITY_MATRIX_MVP,v.vertex);
			o.uv = v.texcoord.xy;
			o.uv.x *= tiling_x;
			o.uv.y *= tiling_y;
			return o;
		}

		fixed4 frag(v2f IN) :COLOR{
			fixed4 color = tex2D(_MainTex,IN.uv);
			return color;
		}
		ENDCG
	}
	}
}
using System.Collections;
using System.Collections.Generic;
using UnityEngine;

public class SetTexture : MonoBehaviour {

    public float tiling_x;
    public float tiling_y;

    public float offset_x;
    public float offset_y;

	// Use this for initialization
	void Start () {

    }

	// Update is called once per frame
	void Update () {
        //给参数赋值
        GetComponent<Renderer>().material.SetFloat("tiling_x", tiling_x);
        GetComponent<Renderer>().material.SetFloat("tiling_y", tiling_y);
        GetComponent<Renderer>().material.SetFloat("offset_x", offset_x);
        GetComponent<Renderer>().material.SetFloat("offset_y", offset_y);
    }
}
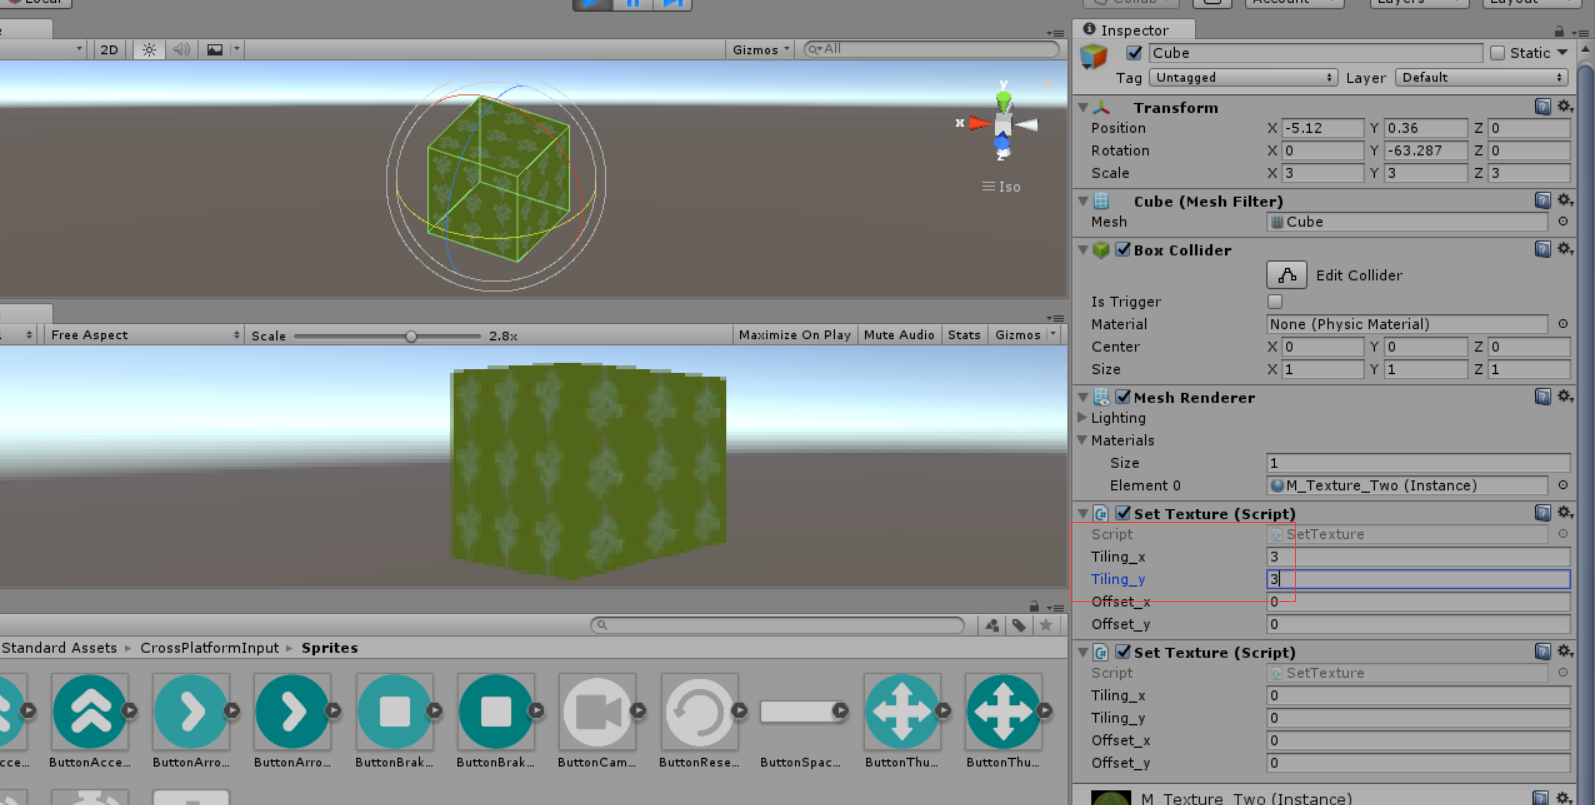
渲染后的效果:
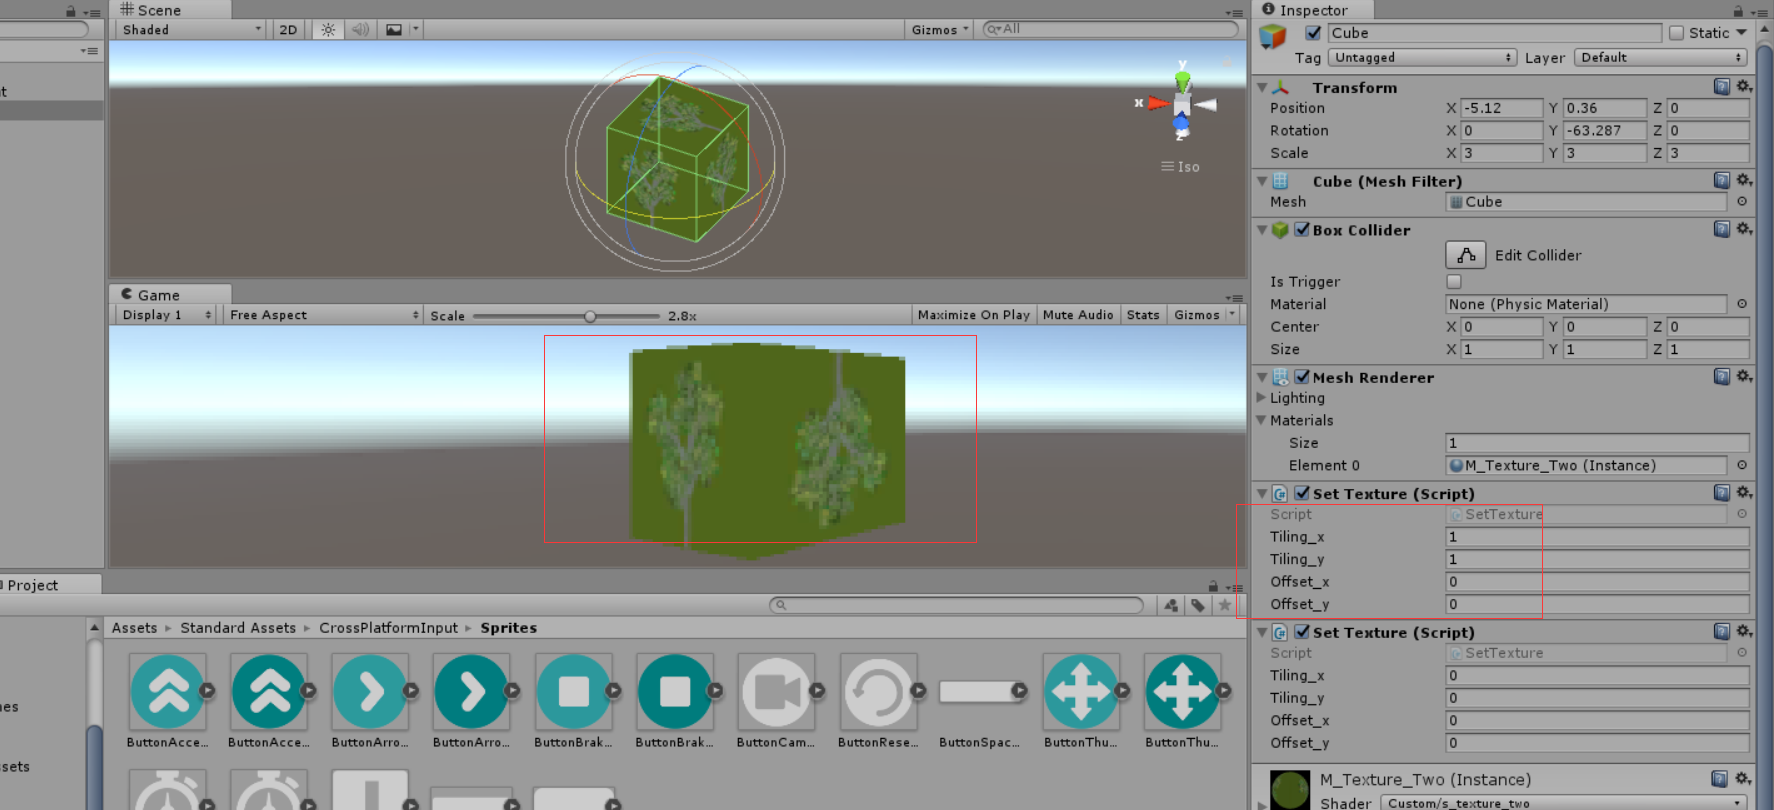
修改tiling x、y的值可以修改平铺的cube中的texture
3、偏移
Shader "Custom/s_texture_two" {

	Properties{
		_MainTex("MainTex", 2D) = ""{}
	}
		SubShader{
		pass {
		CGPROGRAM
#pragma vertex vert
#pragma fragment frag
#include "unitycg.cginc"


			float tiling_x;
		float tiling_y;
		float offset_x;
		float offset_y;

		sampler2D _MainTex;

		struct v2f {
			float4 pos:POSITION;
			float2 uv:TEXCOORD0;
		};


		v2f vert(appdata_base v) {
			v2f o;
			o.pos = mul(UNITY_MATRIX_MVP,v.vertex);
			o.uv = v.texcoord.xy;
			//平铺
			o.uv.x *= tiling_x;
			o.uv.y *= tiling_y;
			//位移
			o.uv.x += offset_x;
			o.uv.y += offset_y;
			return o;
		}

		fixed4 frag(v2f IN) :COLOR{
			fixed4 color = tex2D(_MainTex,IN.uv);
		return color;
		}
			ENDCG
	}
	}
}
using System.Collections;
using System.Collections.Generic;
using UnityEngine;

public class SetTexture : MonoBehaviour {

    public float tiling_x;
    public float tiling_y;

    public float offset_x;
    public float offset_y;

	// Use this for initialization
	void Start () {

    }

	// Update is called once per frame
	void Update () {
        //给参数赋值
        GetComponent<Renderer>().material.SetFloat("tiling_x", tiling_x);
        GetComponent<Renderer>().material.SetFloat("tiling_y", tiling_y);
        GetComponent<Renderer>().material.SetFloat("offset_x", offset_x);
        GetComponent<Renderer>().material.SetFloat("offset_y", offset_y);
    }
}
4、使用系统默认的值_MainTex_ST
Shader "Custom/s_texture_two" {

	Properties{
		_MainTex("MainTex", 2D) = ""{}
	}
		SubShader{
		pass {
		CGPROGRAM
#pragma vertex vert
#pragma fragment frag
#include "unitycg.cginc"


			float tiling_x;
		float tiling_y;
		float offset_x;
		float offset_y;

		sampler2D _MainTex;
		//unity总是会帮我们传递这样一个值
		float4 _MainTex_ST;

		struct v2f {
			float4 pos:POSITION;
			float2 uv:TEXCOORD0;
		};


		v2f vert(appdata_base v) {
			v2f o;
			o.pos = mul(UNITY_MATRIX_MVP,v.vertex);
			o.uv = v.texcoord.xy*_MainTex_ST.xy + _MainTex_ST.zw;


			//o.uv = v.texcoord.xy;
			//平铺
			//o.uv.x *= tiling_x;
			//o.uv.y *= tiling_y;
			//位移
			//o.uv.x += offset_x;
			//o.uv.y += offset_y;
			return o;
		}

		fixed4 frag(v2f IN) :COLOR{
			fixed4 color = tex2D(_MainTex,IN.uv);
		return color;
		}
			ENDCG
	}
	}
}
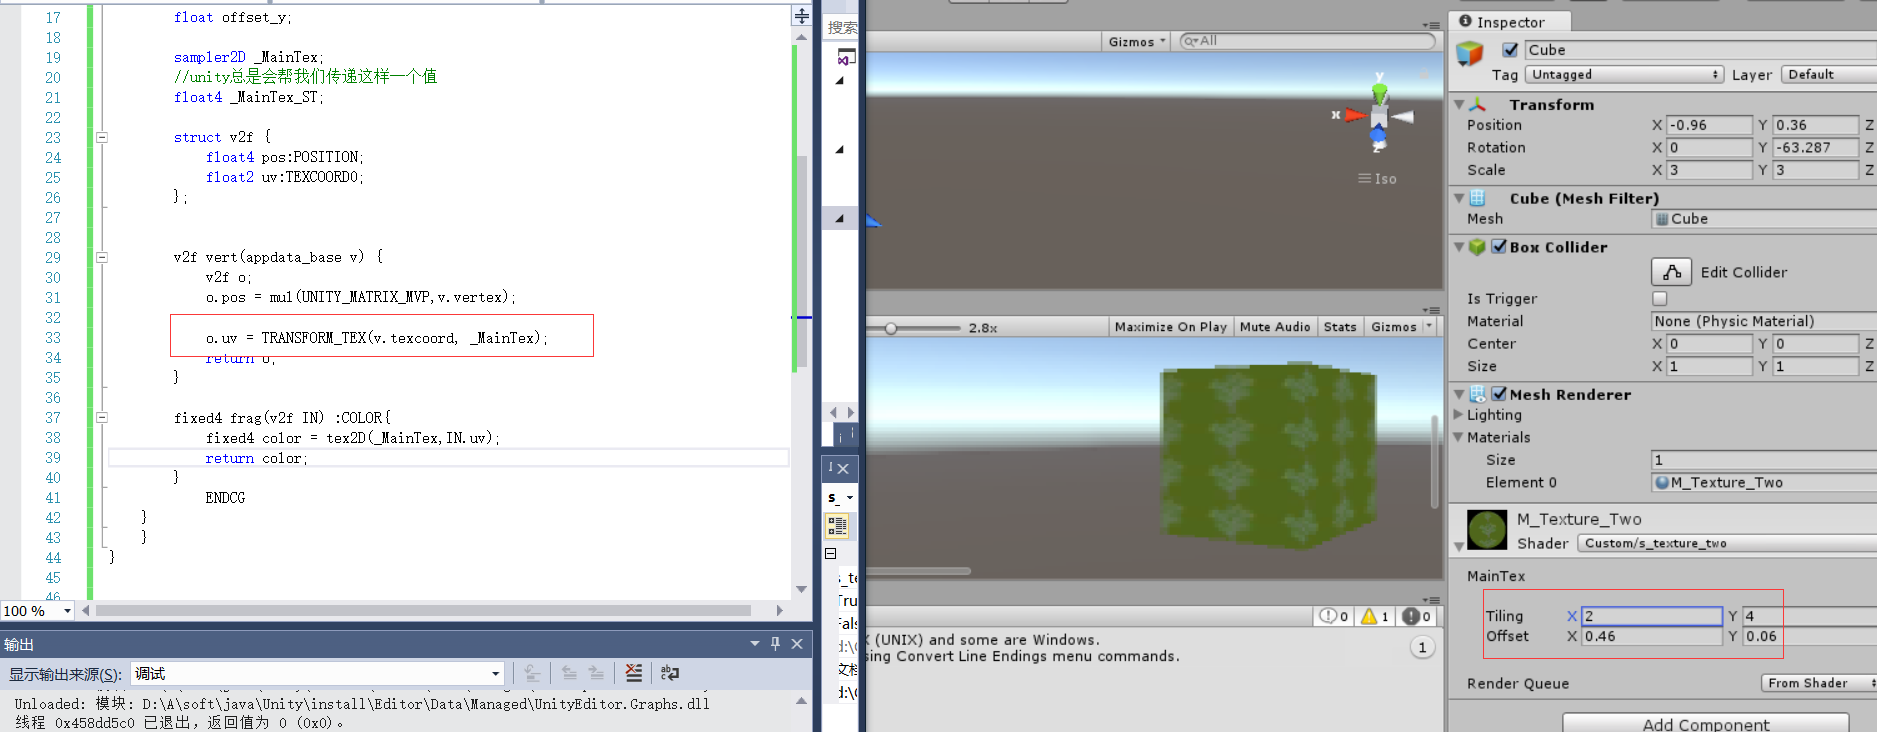
5、使用宏
Shader "Custom/s_texture_two" {

	Properties{
		_MainTex("MainTex", 2D) = ""{}
	}
		SubShader{
		pass {
		CGPROGRAM
#pragma vertex vert
#pragma fragment frag
#include "unitycg.cginc"


			float tiling_x;
		float tiling_y;
		float offset_x;
		float offset_y;

		sampler2D _MainTex;
		//unity总是会帮我们传递这样一个值
		float4 _MainTex_ST;

		struct v2f {
			float4 pos:POSITION;
			float2 uv:TEXCOORD0;
		};


		v2f vert(appdata_base v) {
			v2f o;
			o.pos = mul(UNITY_MATRIX_MVP,v.vertex);

			o.uv = TRANSFORM_TEX(v.texcoord, _MainTex);
			return o;
		}

		fixed4 frag(v2f IN) :COLOR{
			fixed4 color = tex2D(_MainTex,IN.uv);
			return color;
		}
			ENDCG
	}
	}
}
6、
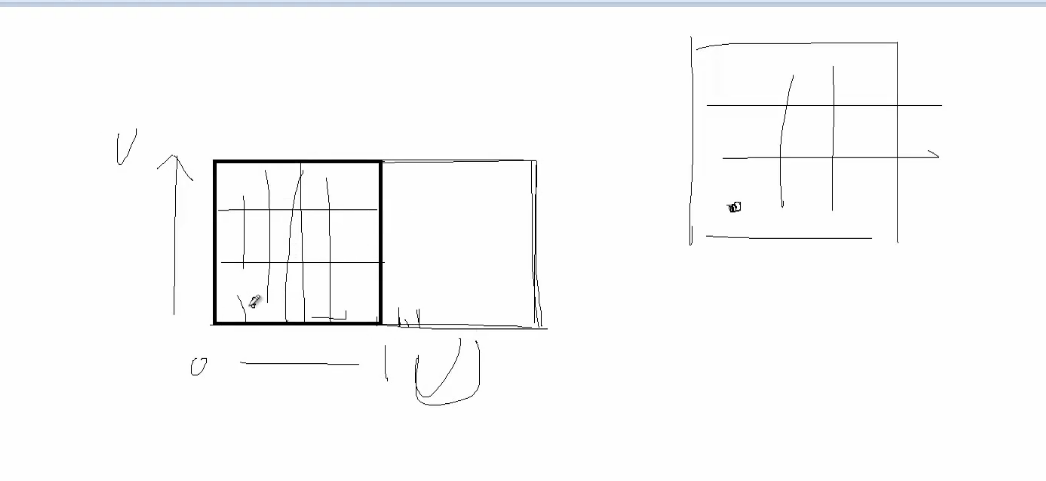
注:
1、uv平铺可以简单地理解为几个页面的相乘


 662
662


 被折叠的 条评论
为什么被折叠?
被折叠的 条评论
为什么被折叠?
 到【灌水乐园】发言


