


C/C++编程-分层模块化-封装和注册的实现
思想
类似于C++的对象概念,Device是基对象(父对象),然后和timer的具体对象信息包装一起,绑定一起走。以便以后操作实现。将额外包装的“用户操作信息”和“子对象信息”也这样包装绑定在一起,然后通过register函数将“用户操作信息”对“子对象信息”赋值,即为注册。
因为“用户信息“对应APP,是供APP层使用的。所以以后APP层调用Decvice,可以直接通过”子对象信息“来实现。实现注册、检查等函数。,即为初始化函数。
实现逻辑图
具体的功能函数实现逻辑

分层实现逻辑
- 分层实现逻辑图
代码实例(RT_THREAD)
hwtimer.h
struct rt_hwtimer_ops
{
    void (*init)(struct rt_hwtimer_device *timer, rt_uint32_t state);
    rt_err_t (*start)(struct rt_hwtimer_device *timer, rt_uint32_t cnt, rt_hwtimer_mode_t mode);
    void (*stop)(struct rt_hwtimer_device *timer);
    rt_uint32_t (*count_get)(struct rt_hwtimer_device *timer);
    rt_err_t (*control)(struct rt_hwtimer_device *timer, rt_uint32_t cmd, void *args);
};
drv_hwtimer.c
static const struct rt_hwtimer_ops _ops =
{
    .init = timer_init,
    .start = timer_start,
    .stop = timer_stop,
    .count_get = timer_counter_get,
    .control = timer_ctrl,
};
||
v
typedef struct rt_hwtimer_device
{
    struct rt_device parent;
    const struct rt_hwtimer_ops *ops;
    const struct rt_hwtimer_info *info;

    rt_int32_t freq;                /* counting frequency set by the user */
    rt_int32_t overflow;            /* timer overflows */
    float period_sec;
    rt_int32_t cycles;              /* how many times will generate a timeout event after overflow */
    rt_int32_t reload;              /* reload cycles(using in period mode) */
    rt_hwtimer_mode_t mode;         /* timing mode(oneshot/period) */
} rt_hwtimer_t;
||
V
drv_hwtimer.c
struct stm32_hwtimer
{
    rt_hwtimer_t time_device;
    TIM_HandleTypeDef    tim_handle;
    IRQn_Type tim_irqn;
    char *name;
};
static struct stm32_hwtimer stm32_hwtimer_obj[] =
{
#ifdef BSP_USING_TIM1
    TIM1_CONFIG,
#endif
......

#ifdef BSP_USING_TIM6
    TIM6_CONFIG,
#endif
......
}
||
V
drv_hwtimer.c
static int stm32_hwtimer_init(void)
{
    int i = 0;
    int result = RT_EOK;

    for (i = 0; i < sizeof(stm32_hwtimer_obj) / sizeof(stm32_hwtimer_obj[0]); i++)
    {
        stm32_hwtimer_obj[i].time_device.info = &_info;
        stm32_hwtimer_obj[i].time_device.ops  = &_ops;
        if (rt_device_hwtimer_register(&stm32_hwtimer_obj[i].time_device, stm32_hwtimer_obj[i].name, &stm32_hwtimer_obj[i].tim_handle) == RT_EOK)
        {
            LOG_D("%s register success", stm32_hwtimer_obj[i].name);
        }
        else
        {
            LOG_E("%s register failed", stm32_hwtimer_obj[i].name);
            result = -RT_ERROR;
        }
    }

    return result;
}
INIT_BOARD_EXPORT(stm32_hwtimer_init);
其中,最开始的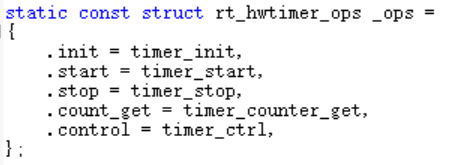
具体实现函数代码如下:
。。。。。。
static void timer_stop(rt_hwtimer_t *timer)
{
    TIM_HandleTypeDef *tim = RT_NULL;

    RT_ASSERT(timer != RT_NULL);

    tim = (TIM_HandleTypeDef *)timer->parent.user_data;

    /* stop timer */
    HAL_TIM_Base_Stop_IT(tim);

    /* set tim cnt */
    __HAL_TIM_SET_COUNTER(tim, 0);
}

。。。。。。。
static rt_uint32_t timer_counter_get(rt_hwtimer_t *timer)
{
    TIM_HandleTypeDef *tim = RT_NULL;

    RT_ASSERT(timer != RT_NULL);

    tim = (TIM_HandleTypeDef *)timer->parent.user_data;

    return tim->Instance->CNT;
}
。。。。。。
解耦
我时常在想到底什么算是真正的程序解耦。两个模块如果没有任何联系,那么他们是怎么组合到一起的,又是如何交互信息呢?
见的越多,越总结出这样一个结论。原来,越是把需要交互的信息,集中通过** “common端口” 交互,就越是解耦。那么这个 “common端口” **就大有讲究了,因为它是解耦的设计目标,关键点啊!那么有哪些,如果按“江湖地位”排排座次,又是如何的呢?
1,字符串 --> 名字(端口名字、设备名字)
2,文件 --> 其实还是一种名字,只不过是文件名字,不同之处在于,一个文件就是一个解耦的模块,更加直观了。linux就是这样的啊!嘿嘿。
|* 可接受的大众越多,说明这个** common端口**设计的越好。大众都熟知,自然感觉不到陌生这是你设计的,上面两个就有这效果*|
3,全局变量
4,接口函数


 217
217


 被折叠的 条评论
为什么被折叠?
被折叠的 条评论
为什么被折叠?
 到【灌水乐园】发言


