


convert_bfm_data.py
(transfer original BFM09 to our face model)
Scipy是世界上著名的Python开源科学计算库,建立在Numpy之上。它增加的功能包括数值积分、最优化、统计和一些专用函数。 SciPy函数库在NumPy库的基础上增加了众多的数学、科学以及工程计算中常用的库函数。例如线性代数、常微分方程数值求解、信号处理、图像处理、稀疏矩阵等等。
BFM模型介绍官网
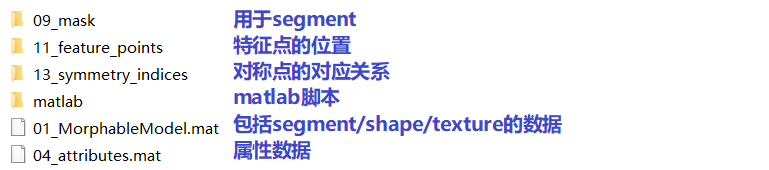
01_MorphableModel.mat(数据主体)
BFM模型由53490个3D顶点构成。也就是其shape/texture的数据长度为160470(53490*3),因为其排列方式如下:
shape: x_1, y_1, z_1, x_2, y_2, z_2, ..., x_{53490}, y_{53490}, z_{53490}
texture: r_1, g_1, b_1, r_2, g_2, b_2, ..., r_{53490}, g_{53490}, b_{53490}

segbin:是segment binary,用热点法标注属于面部哪一部分。
不同恒等式的面可以由199个主分量组成线性组合。
% Generate a random head
alpha = randn(msz.n_shape_dim, 1);
beta  = randn(msz.n_tex_dim, 1);
shape  = coef2object( alpha, model.shapeMU, model.shapePC, model.shapeEV );
tex    = coef2object( beta,  model.texMU,   model.texPC,   model.texEV );
模型的使用步骤: 加载模型 -> 形成一个随机的头 -> 渲染它 -> 保存成相应的格式
为了增加模型的灵活性,我们独立处理面部的四个部分。每个部分定义在一个掩码(每个顶点索引)中。(对应09_mask)

基本原理
目标shape或者texture都可以通过如下式子得到:
obj = average + pc * (coeficient .* pcVariance)
其中系数(coeficient)是变量,其余均是数据库里的常量,其是一个199维(对应199个PC)的向量。
BFM数据集的使用可以参照该博客:BFM使用 - 获取平均脸模型的68个特征点坐标

将脸部模型裁剪对齐脸部地标,其中只包含35709个顶点。
from scipy.io import loadmat,savemat
import numpy as np
from array import array

# load expression basis
def LoadExpBasis():
	n_vertex = 53215
	#标准的bfm模型包含顶点个数为53490个.
	#表情系数(来自Exp_Pca.bin)只针对53215个顶点有参数
	#不含脖子的模型顶点个数为35709个.
	Expbin = open('BFM/Exp_Pca.bin','rb')
	#这里使用的是Exp_Pca.bin(表情基)文件里的表情系数, 这个表情系数是从 Facewarehouse 数据集中提取的,为29维,形状参数为199维.
	exp_dim = array('i')
	#[python3.9新特性](https://docs.python.org/3/library/array.html)  'i'表示signed int
	exp_dim.fromfile(Expbin,1)
	#array.fromfile(f, n)  Read n items (as machine values) from the file object f and append them to the end of the array.
	expMU = array('f') #float
	expPC = array('f')
	expMU.fromfile(Expbin,3*n_vertex)
	expPC.fromfile(Expbin,3*exp_dim[0]*n_vertex)

	expPC = np.array(expPC)
	expPC = np.reshape(expPC,[exp_dim[0],-1])
	expPC = np.transpose(expPC)

	expEV = np.loadtxt('BFM/std_exp.txt')

	return expPC,expEV

# transfer original BFM09 to our face model
def transferBFM09():
	original_BFM = loadmat('BFM/01_MorphableModel.mat')
	shapePC = original_BFM['shapePC'] # shape basis
	shapeEV = original_BFM['shapeEV'] # corresponding eigen value
	shapeMU = original_BFM['shapeMU'] # mean face
	texPC = original_BFM['texPC'] # texture basis
	texEV = original_BFM['texEV'] # eigen value
	texMU = original_BFM['texMU'] # mean texture
	#上面都是保存一些BFM形状和纹理属性

	expPC,expEV = LoadExpBasis()
	#保存BFM文件的表情属性

	# transfer BFM09 to our face model

	idBase = shapePC*np.reshape(shapeEV,[-1,199])
	idBase = idBase/1e5 # unify the scale to decimeter
	idBase = idBase[:,:80] # use only first 80 basis

	exBase = expPC*np.reshape(expEV,[-1,79])
	exBase = exBase/1e5 # unify the scale to decimeter
	exBase = exBase[:,:64] # use only first 64 basis

	texBase = texPC*np.reshape(texEV,[-1,199])
	texBase = texBase[:,:80] # use only first 80 basis

	# our face model is cropped align face landmarks which contains only 35709 vertex.
	# original BFM09 contains 53490 vertex, and expression basis provided by JuYong contains 53215 vertex.
	# thus we select corresponding vertex to get our face model.

	index_exp = loadmat('BFM/BFM_front_idx.mat')
	index_exp = index_exp['idx'].astype(np.int32) - 1 #starts from 0 (to 53215)

	index_shape = loadmat('BFM/BFM_exp_idx.mat')
	index_shape = index_shape['trimIndex'].astype(np.int32) - 1 #starts from 0 (to 53490)
	index_shape = index_shape[index_exp]


	idBase = np.reshape(idBase,[-1,3,80])
	idBase = idBase[index_shape,:,:]
	idBase = np.reshape(idBase,[-1,80])

	texBase = np.reshape(texBase,[-1,3,80])
	texBase = texBase[index_shape,:,:]
	texBase = np.reshape(texBase,[-1,80])

	exBase = np.reshape(exBase,[-1,3,64])
	exBase = exBase[index_exp,:,:]
	exBase = np.reshape(exBase,[-1,64])

	meanshape = np.reshape(shapeMU,[-1,3])/1e5
	meanshape = meanshape[index_shape,:]
	meanshape = np.reshape(meanshape,[1,-1])

	meantex = np.reshape(texMU,[-1,3])
	meantex = meantex[index_shape,:]
	meantex = np.reshape(meantex,[1,-1])

	# other info contains triangles, region used for computing photometric loss,
	# region used for skin texture regularization, and 68 landmarks index etc.
	other_info = loadmat('BFM/facemodel_info.mat')
	frontmask2_idx = other_info['frontmask2_idx']
	skinmask = other_info['skinmask']
	keypoints = other_info['keypoints']
	point_buf = other_info['point_buf']
	tri = other_info['tri']
	tri_mask2 = other_info['tri_mask2']

	# save our face model
	savemat('BFM/BFM_model_front.mat',{'meanshape':meanshape,'meantex':meantex,'idBase':idBase,'exBase':exBase,'texBase':texBase,'tri':tri,'point_buf':point_buf,'tri_mask2':tri_mask2\
		,'keypoints':keypoints,'frontmask2_idx':frontmask2_idx,'skinmask':skinmask})

if __name__ == '__main__':
    transferBFM09()
fit.py
face_alignment库
这篇讲解很好
根据这里的源码,可以看到get_landmarks_from_image函数的返回值。
def get_landmarks_from_image(self, image_or_path, detected_faces=None, return_bboxes=False,
                                 return_landmark_score=False):
        """Predict the landmarks for each face present in the image.
        This function predicts a set of 68 2D or 3D images, one for each image present.
        If detect_faces is None the method will also run a face detector.
         Arguments:
            image_or_path {string or numpy.array or torch.tensor} -- The input image or path to it.
        Keyword Arguments:
            detected_faces {list of numpy.array} -- list of bounding boxes, one for each face found
            in the image (default: {None})
            return_bboxes {boolean} -- If True, return the face bounding boxes in addition to the keypoints.
            return_landmark_score {boolean} -- If True, return the keypoint scores along with the keypoints.
        Return:
            result:
                1. if both return_bboxes and return_landmark_score are False, result will be:
                    landmark
                2. Otherwise, result will be one of the following, depending on the actual value of return_* arguments.
                    (landmark, landmark_score, detected_face)
                    (landmark, None,           detected_face)
                    (landmark, landmark_score, None         )
        """
fit.py里面的代码
#图片的宽和高的获取
h,w = orig_img.shape[:2]
# 结合代码可以看到,代码这里的返回值为landmark
tmp_lms = fa.get_landmarks_from_image(orig_img) #但这里得到是两个array,第二个也没用过,就暂时不探究了。 第一个array的数据就是landmark点坐标,但是其是68*3的一个而且向量,对于第三列是什么我也还是不太清楚,前两列就是横纵坐标了。
单独运行这行代码时报错
lms = fa.get_landmarks_from_image(orig_img)[0]
print(lms[:,0])
TypeError: list indices must be integers or slices, not tuple
因为列表可以存放不同类型的数据,因此列表中每个元素的大小可以相同,也可以不同,也就不支持一次性读取一列,即使是对于标准的二维数字列表。
用列表解析的方法读取一列:
print( [ x[0] for x in lms ] )
Bounding box Regression bbox 边框回归
重新设置了一下边框的大小
def pad_bbox(bbox, img_wh, padding_ratio=0.2):
    x1, y1, x2, y2 = bbox
    width = x2 - x1
    height = y2 - y1
    size_bb = int(max(width, height) * (1+padding_ratio))
    center_x, center_y = (x1 + x2) // 2, (y1 + y2) // 2
    x1 = max(int(center_x - size_bb // 2), 0)
    y1 = max(int(center_y - size_bb // 2), 0)
    size_bb = min(img_wh[0] - x1, size_bb)
    size_bb = min(img_wh[1] - y1, size_bb)

    return [x1, y1, x1+size_bb, y1+size_bb]
- cv2.resize函数参考这里
cv2.resize(src, dsize[, dst[, fx[, fy[, interpolation]]]]) -> dst
参数说明:
src :需要改变尺寸的图像
dsize:目标图像大小
dst:目标图像
fx:w方向上的缩放比例
fy:h方向上的缩放比例
interpolation - 插值方法。共有5种:

有三点需要注意:
- 注意,dsize的形状是(w,h),而opencv读取出来的图像的形状是(h,w)
- 当参数dsize不为0时,dst的大小为dsize;否则,由src的大小以及缩放比例fx和fy来决定;可以看出dsize和(fx,fy)两者不能同时为0
- 因为dsize是没有默认值的,所以必须指定,也即我们使用fx和fy来控制大小的时候必须设置dsize=(0,0)
import cv2

img=cv2.imread("1.jpg")
print(img.shape)
#输出:(1559, 924, 3)

img_resize1=cv2.resize(img,dsize=(500,1000),
                           interpolation=cv2.INTER_NEAREST)
print(img_resize1.shape)
#输出:(1000, 500, 3)

img_resize2=cv2.resize(img_resize1,dsize=(0,0),
                                   fx=0.5,fy=0.5,
                                   interpolation=cv2.INTER_NEAREST)
print(img_resize2.shape)
#输出:(500, 250, 3)
关于代码中这一部分的理解,这里出现了[None, …]
lms = lms[:, :2][None, ...] #由(68,2)维的数据变成了(1,68,2)的数据
lms = torch.tensor(lms, dtype=torch.float32).cuda()
img_tensor = torch.tensor(cropped_img[None, ...], dtype=torch.float32).cuda()
Python中xx[:,None]是分开切片的意思
a[:,None]相当于调用a.getitem(slice(None, None, None), None)
- 省略号表示根据对应的
ndim展开相应数量的冒号,如对于ndim=3,以下两句等价
 arr[..., 0]
 arr[:, :, 0]
a[None,…]相当于调用a.getitem(None, slice(None, None, None)) (代码中lms是一个2维的数组) 这样一处理就变成了三维的数组
python切片的介绍

[:,None]
None表示该维不进行切片,而是将该维整体作为数组元素处理。
所以,[:,None]的效果就是将二维数组按每行分割,最后形成一个三维数组
xx = np.array([[1,2,3],[4,5,6]])
xx[:,None]
输出:
array([[[1, 2, 3]],
      [[4, 5, 6]]])
load facemodel阶段
很多数据集都是mat格式的标注信息,使用模块scipy.io的函数loadmat和savemat可以实现Python对mat数据的读写。
scipy.io.loadmat(file_name, mdict=None, appendmat=True, **kwargs)
scipy.io.savemat(file_name, mdict, appendmat=True, format='5', long_field_names=False, do_compression=False, oned_as='row')
torch.optim.Adam 方法的使用和参数的解释
torch.optim.Adam(params, lr=0.001, betas=(0.9, 0.999), eps=1e-08, weight_decay=0)
参数:
- params (iterable) – 待优化参数的iterable或者是定义了参数组的dict
- lr (float, 可选) – 学习率(默认:1e-3)
- betas (Tuple[float, float], 可选) – 用于计算梯度以及梯度平方的运行平均值的系数(默认:0.9,0.999)
- eps (float, 可选) – 为了增加数值计算的稳定性而加到分母里的项(默认:1e-8)
- weight_decay (float, 可选) – 权重衰减(L2惩罚)(默认: 0)
optimizer的方法
基本方法:
zero_grad() :清空所管理参数的梯度
step() :执行一步更新
add_param_group():添加参数组
state_dict() :获取优化器当前状态信息字典
load_state_dict() :加载状态信息字典
pytorch特性:张量梯度不自动清零
sum(1) 求数组每一行的和,等价于 sum(axis=1)
tqdm模块——进度条配置
Tqdm 是一个快速,可扩展的Python进度条,可以在 Python 长循环中添加一个进度提示信息,用户只需要封装任意的迭代器 tqdm(iterator)。
总之,它是用来显示进度条的,很漂亮,使用很直观(在循环体里边加个tqdm),而且基本不影响原程序效率
import time
from tqdm import tqdm
from tqdm._tqdm import trange

for i in tqdm(range(100)):
   time.sleep(0.01)
关于with torch.no_grad():
在使用pytorch时,并不是所有的操作都需要进行计算图的生成(计算过程的构建,以便梯度反向传播等操作)。而对于tensor的计算操作,默认是要进行计算图的构建的,在这种情况下,可以使用 with torch.no_grad():,强制之后的内容不进行计算图构建。
model.train() model.eval() with torch.no_grad() 参考这里
with torch.no_grad是指停止自动求导
model.train()用于在训练阶段
model.eval()用在验证和测试阶段
- 他们的区别是对于Dropout和Batch Normlization层的影响。在train模式下,dropout网络层会按照设定的参数p设置保留激活单元的概率(保留概率=p); batchnorm层会继续计算数据的mean和var等参数并更新。在val模式下,dropout层会让所有的激活单元都通过,而batchnorm层会停止计算和更新mean和var,直接使用在训练阶段已经学出的mean和var值。
models.py
最最重要的一个模块了
pytorch3d Renderer模块
可区分渲染通过允许2D图像像素与场景的3D属性相关联来弥合2D和3D之间的差距。
例如,根据神经网络预测的3D形状来渲染一个图像,其可能使用参考图像来计算2D损失。反转渲染步骤意味着我们可以将像素的2D损失与形状的3D属性(如网格顶点的位置)联系起来,使3D形状可以在没有任何明确的3D监督的情况下学习。
paddle 填补 一般在深度学习中都是将其填补成同一长度的序列
data loading and transformation / loss function / differentiable rendering

支持3d数据的异构批处理
第二层有力的支持了异构批处理
图卷积


render模块整体结构官网

Fragments
The rasterizer returns 4 output tensors in a named tuple.
-
pix_to_face: LongTensor of shape (N, image_size, image_size, faces_per_pixel) specifying the indices of the faces (in the packed faces) which overlap each pixel in the image.
-
zbuf: FloatTensor of shape (N, image_size, image_size, faces_per_pixel) giving the z-coordinates of the nearest faces at each pixel in world coordinates, sorted in ascending z-order.
-
bary_coords: FloatTensor of shape (N, image_size, image_size, faces_per_pixel, 3) giving the barycentric coordinates in NDC units of the nearest faces at each pixel, sorted in ascending z-order.
-
pix_dists: FloatTensor of shape (N, image_size, image_size, faces_per_pixel) giving the signed Euclidean distance (in NDC units) in the x/y plane of each point closest to the pixel.
渲染需要在几个不同的坐标框架之间进行转换:世界空间、视图/摄像机空间、NDC空间和屏幕空间。在每一步中,重要的是要知道相机的位置,+X, +Y, +Z轴是如何对齐的,以及可能的值范围。下图概述了PyTorch3D使用的约定。
NDC全称:Normalized Device Coordinates。

- Pytorch3D和OpenGL的坐标系约定存在差异

get_render函数
- 源码在 renderer/camera_utils.py // eye, at and up vectors represent its position.
from cameras import look_at_view_transform
eye, at, up = camera_to_eye_at_up(cam.get_world_to_view_transform())
R, T = look_at_view_transform(eye=eye, at=at, up=up)
只要根据同一个R T创造出来的相机,其观察的视角都是一样的
R, T = look_at_view_transform(10, 0, 0)
- 源码在renderer/cameras.py
znear: near clipping plane of the view frustrum
zfar: far clipping plane of the view frustrum.
R: Rotation matrix of shape (N, 3, 3)
T: T: Translation matrix of shape (N, 3)
fov: field of view angle of the camera.
#其原来是OpenGLPerspectiveCameras,现在改成FoVPerspective
#FoVPerspectiveCameras是一个类,它存储一批参数,通过指定视场来生成一批投影矩阵。
#下面这是初始化一个类的成员变量
cameras = FoVPerspectiveCameras(device=device, R=R, T=T, znear=0.01, zfar=50, fov=2*np.arctan(self.img_size//2/self.focal)*180./np.pi)
- 源码在 renderer/lighting.py
- PointLights也是一个类,这里也是初始化一个类的成员
ambient_color: RGB color of the ambient component
diffuse_color: RGB color of the diffuse component
specular_color: RGB color of the specular component
location: xyz position of the light.
lights = PointLights(device=device, location=[[0.0, 0.0, 1e5]], ambient_color=[[1, 1, 1]],
                             specular_color=[[0., 0., 0.]], diffuse_color=[[0., 0., 0.]])
源码在 render/mesh/rasterize_meshes.py
- blur_radius:范围[0,2]内的浮动距离,用于扩展面边界框以进行栅格化。设置模糊半径会使形状周围的边缘模糊,而不是硬边界。设置为0表示没有模糊。
- faces_per_pixel(可选):每个像素保存的面数,返回z轴上最近的faces_per_pixel点。
- image_size:要光栅化的输出图像的像素大小。在非正方形图像的情况下,可以选择为(H, W)的元组。
raster_settings = RasterizationSettings(
            image_size=self.img_size,  #设置输出图像的大小
            blur_radius=0.0,
            #因为只是为了可视化目的而渲染图像,所以设置faces_per_pixel=1 和blur_radius = 0.0
            faces_per_pixel=1, #set the value of k
        )
class BlendParams(NamedTuple):
sigma: float = 1e-4
gamma: float = 1e-4
background_color: Union[torch.Tensor, Sequence[float]] = (1.0, 1.0, 1.0)
blend_params = blending.BlendParams(background_color=[0, 0, 0])
最后一步,将前面的参数组合起来,来初始化一个render by composing a rasterizer and a shader
renderer = MeshRenderer(
            rasterizer=MeshRasterizer(
                cameras=cameras,
                raster_settings=raster_settings
            ),
            shader=SoftPhongShader(
                device=device,
                cameras=cameras,
                lights=lights,
                blend_params=blend_params
            )
        )
Split_coeff函数
将传过来的系数分别分开,最后分别返回这些系数:
return id_coeff, ex_coeff, tex_coeff, angles, gamma, translation
def Split_coeff(self, coeff):
       id_coeff = coeff[:, :80]  # identity(shape) coeff of dim 80
       ex_coeff = coeff[:, 80:144]  # expression coeff of dim 64
       tex_coeff = coeff[:, 144:224]  # texture(albedo) coeff of dim 80
       angles = coeff[:, 224:227]  # ruler angles(x,y,z) for rotation of dim 3
       gamma = coeff[:, 227:254]  # lighting coeff for 3 channel SH function of dim 27
       translation = coeff[:, 254:]  # translation coeff of dim 3

       return id_coeff, ex_coeff, tex_coeff, angles, gamma, translation
Shape_formation函数
只是用了身份和表情参数
einsum 爱因斯坦求和约定
def Shape_formation(self, id_coeff, ex_coeff):
        n_b = id_coeff.size(0)
        # 矩阵乘法
        face_shape = torch.einsum('ij,aj->ai', self.idBase, id_coeff) + \
                     torch.einsum('ij,aj->ai', self.exBase, ex_coeff) + self.meanshape
		# 改变其维度
        face_shape = face_shape.view(n_b, -1, 3)
        face_shape = face_shape - self.meanshape.view(1, -1, 3).mean(dim=1, keepdim=True)

        return face_shape
Texture_formation函数
使用了纹理系数
def Texture_formation(self, tex_coeff):
        n_b = tex_coeff.size(0)
        face_texture = torch.einsum('ij,aj->ai', self.texBase, tex_coeff) + self.meantex
        face_texture = face_texture.view(n_b, -1, 3)
        return face_texture
Compute_norm函数
def Compute_norm(self, face_shape):
        face_id = self.tri.long() - 1   #tri是triangle三角形  long() 函数将数字或字符串转换为一个长整型。
        point_id = self.point_buf.long() - 1
        shape = face_shape
        v1 = shape[:, face_id[:, 0], :]
        v2 = shape[:, face_id[:, 1], :]
        v3 = shape[:, face_id[:, 2], :]
        e1 = v1 - v2
        e2 = v2 - v3
        face_norm = e1.cross(e2)  #返回两个(数组)向量的叉积。
        empty = torch.zeros((face_norm.size(0), 1, 3), dtype=face_norm.dtype, device=face_norm.device)
        face_norm = torch.cat((face_norm, empty), 1)
        v_norm = face_norm[:, point_id, :].sum(2)
        #torch.norm()函数
        #inputs的一共N维的话对就这N个数据求p范数
        #p指的是求p范数的p值,函数默认p=2,那么就是求2范数
        #inputs3 = inputs.norm(p=2, dim=1, keepdim=False)

        v_norm = v_norm / v_norm.norm(dim=2).unsqueeze(2)
        return v_norm
Compute_rotation_matrix
#静态方法
#输入angles 输出rotation
rotXYZ = torch.eye(3).view(1, 3, 3).repeat(n_b * 3, 1, 1).view(3, n_b, 3, 3)

Rigid_transform_block
输入:face_shape, rotation, translation
输出:face_shape_t
将脸部旋转之后平移
def Rigid_transform_block(face_shape, rotation, translation):
        face_shape_r = torch.matmul(face_shape, rotation)
        face_shape_t = face_shape_r + translation.view(-1, 1, 3)
        return face_shape_t
Illumination_layer
输入:face_texture, norm, gamma
输出:face_color
get_lms
def get_lms(self, face_shape, kp_inds):
        lms = face_shape[:, kp_inds, :]
        return lms
Projection_block
输入:face_shape
输出:face_projection
pytorch函数
- bmm函数
- 计算两个tensor的矩阵乘法,torch.bmm(a,b),tensor a 的size为(b,h,w),tensor b的size为(b,w,h),注意两个tensor的维度必须为3. 结果维度为: (b,h,h)
- permute函数
- torch.Tensor.permute (Python method, in torch.Tensor)
- permute(dims) 将tensor的维度换位
- clone函数
- orch 为了提高速度,向量或是矩阵的赋值是指向同一内存的,这不同于 Matlab。如果需要保存旧的tensor即需要开辟新的存储地址而不是引用,可以用 clone() 进行深拷贝
- stack函数
- stack(tensors,dim=0,out=None)
- dim=0时,将tensor在一维上连接
- dim=1时,将每个tensor的第i行按行连接组成一个新的2维tensor,再将这些新tensor按照dim=0的方式连接。
- dim=2时,将每个tensor的第i行转置后按列连接组成一个新的2维tensor,再将这些新tesnor按照dim=0的方式连接
- tile函数
- tile函数位于python模块 numpy.lib.shape_base中,他的功能是重复某个数组。比如tile(A,n),功能是将数组A重复n次,构成一个新的数组
- clamp函数
- torch.clamp(input, min, max, out=None) → Tensor
- clamp()函数的功能将输入input张量每个元素的值压缩到区间 [min,max],并返回结果到一个新张量。
TexturesVertex
源代码位置:renderer/mesh/textures.py
这里也是初始化一个类的成员
face_color = TexturesVertex(face_color)
Meshes
源代码位置:structures/meshes.py
def __init__(
        self,
        verts=None,
        faces=None,
        textures=None,
        *,
        verts_normals=None,
    ) -> None:
mesh = Meshes(face_shape_t, tri.repeat(batch_num, 1, 1), face_color)


 828
828


 被折叠的 条评论
为什么被折叠?
被折叠的 条评论
为什么被折叠?
 到【灌水乐园】发言


