


FlowMap:
FlowMap的原理是uv偏移采样,但是这种方式可以实现模拟水体、岩浆流动的效果
要实现效果首先需要flowmap,推荐使用如下工具FlowMapPainter
http://teckartist.com/?page_id=107
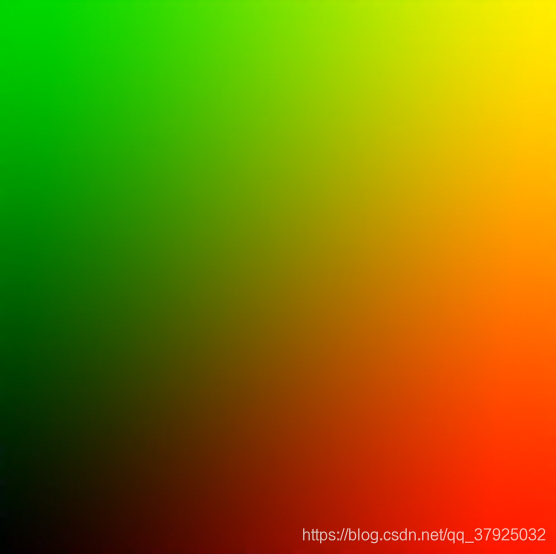
我们在工具中向不同的方向随便画一画可以得到如下的flowmap,为什么是长这样的呢,因为我们进行偏移时只使用了flowmap的R和G通道,所以X轴是0-1的红控制左右的流动,Y轴是0-1的绿控制上下的流动,整个flowmap的方向就如下图二所示,图一的流动方向就对应了图二中对应的位置。

实现起来也十分容易,相当于使用flowmap控制两层偏移,最后再lerp一下就行,但是要注意以下几点。首先由于uv的区间为[0,1],而采样方向向量肯定是有负轴向的,所以先将其变换到[-1,1]。然后使用了frac让偏移重复,但是由于frac得到的值是01之间跳变的,所以直接进行lerp最后结果也会有跳变。所以half lerpVal = abs((0.5 - part1)/0.5);一句其实就是得到如下值

就可以避免跳变的将两层偏移进行lerp得到结果
            v2f vert(appdata v) {
                v2f o;
                o.uv = TRANSFORM_TEX(v.uv, _MainTex);
		o.pos = UnityObjectToClipPos(v.vertex);
                return o;
            }

            fixed4 frag(v2f v) : COLOR {
                fixed4 col;
                fixed3 flowVal = (tex2D(_FlowMap, v.uv) * 2 - 1) * _Speed;
                float part1 = frac(_Time.y * 0.25 + 0.5);
                float part2 = frac(_Time.y * 0.25);
                half lerpVal = abs((0.5 - part1)/0.5);
                half4 col1 = tex2D(_MainTex, v.uv - flowVal.xy * part1);
                half4 col2 = tex2D(_MainTex, v.uv - flowVal.xy * part2);
                col = lerp(col1, col2, lerpVal);
                return c;
            }
效果如下:
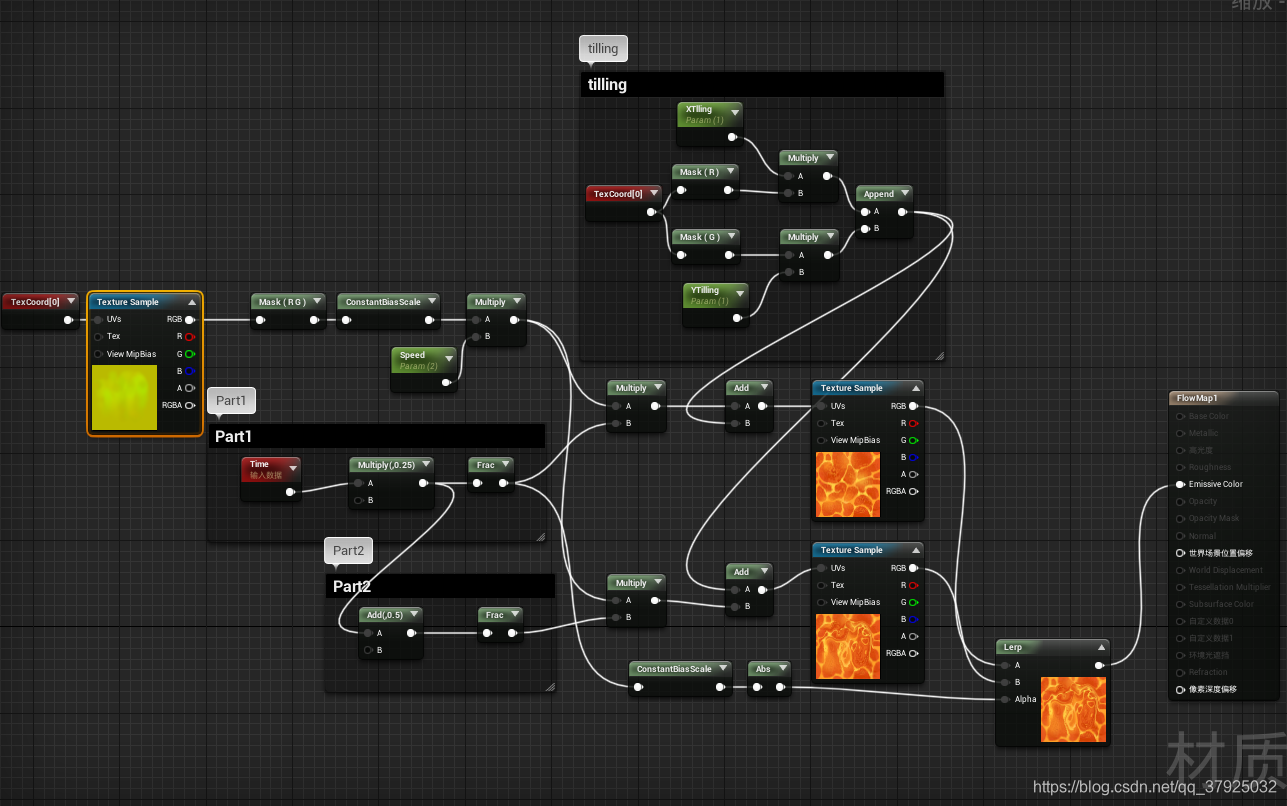
UE同理,但要注意flowmap图片格式设置为VectorDisplacementmap,使用Linear Color,ConstantBiasScale节点也能比较方便的进行区间转换。
这里都只使用了一张基本色图,如果要添加AO、法线什么的,同样也需要lerp,增加采样叠上去即可。。
Triplanar Tex:
关于三向贴图推荐这篇文章:https://medium.com/@bgolus/normal-mapping-for-a-triplanar-shader-10bf39dca05a
其原理可理解为使用世界坐标轴下的不同方向的平面投影得到的贴图效果,能够解决当物体本身uv不合理导致的贴图拉伸等问题,地形上用的比较多。主要的问题在于不同方向投影之后如何将三者融合,如果直接将三者的结果相加再平均,得到的结果是错误的,因为我们需要考虑面的朝向来确定混合程度。用的比较多的是使用世界坐标下的法线方向来进行融合,但是如果建模的时候有些地方法线方向突然变化过大可能最终效果也会出问题。

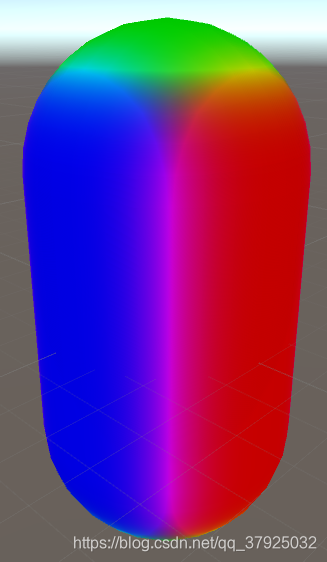
以下是一种使用了TriplanarTex的水纹效果的实现,注意其中的float3 blendNormal = saturate(pow(IN.worldNormal * 1.4,4));这句,以unity默认胶囊体为例,返回世界坐标法线,下图分别是power值为2和4时的效果,power值越大,平面相交混合的区域越小,同时过程中需要将法线归一化避免最后相加的值过大。
当然TriplanarTex的用途还有很多,比如可以使用该方法实现类似3D噪声的效果并且效果控制比较丰富,这里就不再实现。

Shader "Custom/Caustics"
{
    Properties
    {
        _Color ("Color", Color) = (1,1,1,1)
        _MainTex ("MainTex", 2D) = "white" {}
        _CausticsTex("CausticsTex", 2D) = "black" {}
	//用到xy,重复度,速度
        _CausticsProperties("Caustics properties (scale, speed, null, null)", Vector) = (0,0,2,0)
        _CausticsHeight("CausticsHeight", float) = 0
        _CausticsHeightSmoothness("CausticsSmooth", float) = 0
        _CausticsStrength("CausticsStrength", float) = 1
	_DistortTex("DistortTex",2D) = "white"{}
	_DistortAmount("DistortAmount",float) = 0
	_DistortSpeed("DistortSpeed",float) = 0
    }
    SubShader
    {
        Tags { "RenderType"="Opaque" }
        LOD 200

        CGPROGRAM
        #pragma surface surf Standard
        #pragma target 3.0

	fixed4 _Color;
        sampler2D _MainTex;
	sampler2D _CausticsTex;
        fixed4 _CausticsProperties;
        float _CausticsHeight;
        float _CausticsHeightSmoothness;
        float _CausticsStrength;
        sampler2D _DistortTex;
        float _DistortAmount;
        float _DistortSpeed;

        struct Input
        {
            float2 uv_MainTex;
            float2 uv_DisplacementGuide;
	    float2 uv_DistortTex;
            float3 worldPos;
	    float2 uv_CausticsTex;
	    float3 worldNormal;
        };


        void surf (Input IN, inout SurfaceOutputStandard o)
        {
            fixed4 c = tex2D (_MainTex, IN.uv_MainTex) * _Color;
            o.Albedo = c.rgb;
            float2 distort = tex2D(_DistortTex, IN.uv_DistortTex + _Time.y * _DistortSpeed);
            distort = (distort * 2.0 - 1.0) * _DistortAmount;

	    float causticsX = tex2D(_CausticsTex, IN.worldPos.zy * _CausticsProperties.x + distort + _Time.y * _CausticsProperties.y).r;
	    float causticsY = tex2D(_CausticsTex, IN.worldPos.zx * _CausticsProperties.x + distort + _Time.y * _CausticsProperties.y).r;
	    float causticsZ = tex2D(_CausticsTex, IN.worldPos.xy * _CausticsProperties.x + distort + _Time.y * _CausticsProperties.y).r;

	    float3 blendNormal = saturate(pow(IN.worldNormal * 1.4,4));
	    float blendT1 = causticsZ;
	    blendT1 = lerp(blendT1,causticsX,blendNormal.x);
	    blendT1 = lerp(blendT1,causticsY,blendNormal.y);

	    blendT1 = causticsX *  blendNormal.x + causticsY * blendNormal.y + causticsZ * blendNormal.z;

	    fixed3 caustics = blendT1;
            o.Emission = caustics * _CausticsStrength * smoothstep(IN.worldPos.y, IN.worldPos.y + _CausticsHeightSmoothness, _CausticsHeight);
            o.Alpha = c.a;
        }
        ENDCG
    }
    FallBack "Diffuse"
}
效果如下:

学生党一枚,文章中的错误,不足诚请各位指点!!
参考资料:
https://zhuanlan.zhihu.com/p/33288033
https://www.ronja-tutorials.com/2018/05/11/triplanar-mapping.html
https://catlikecoding.com/unity/tutorials/advanced-rendering/triplanar-mapping/
https://medium.com/@bgolus/normal-mapping-for-a-triplanar-shader-10bf39dca05a


 1529
1529


 被折叠的 条评论
为什么被折叠?
被折叠的 条评论
为什么被折叠?
 到【灌水乐园】发言


