


一、关于增强输入系统的介绍
二、增强输入系统的具体使用
注:在使用方面,不会介绍如何创建项目等基础操作,如果还没有UE的使用基础,可以参考一下我之前UE4的文章,操作差别不会很大。
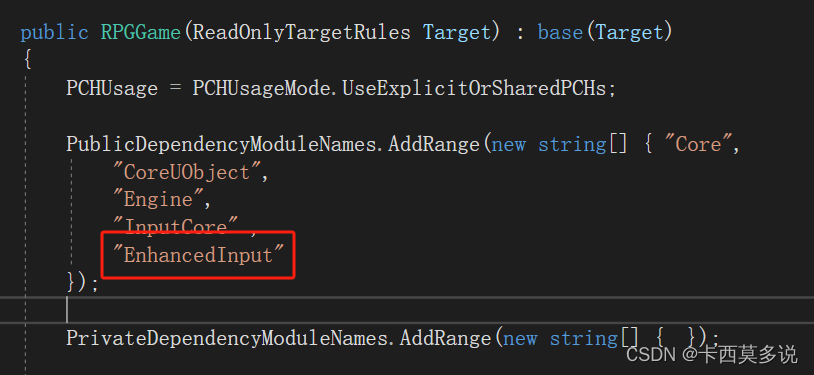
如上图所示,在自己创建好的项目工程中,找到.Build.cs文件,在添加的模块引用中,添加EnhancedInput模块,添加这个模块之后,才能在写完增强输入系统的代码后正确运行。
代码:
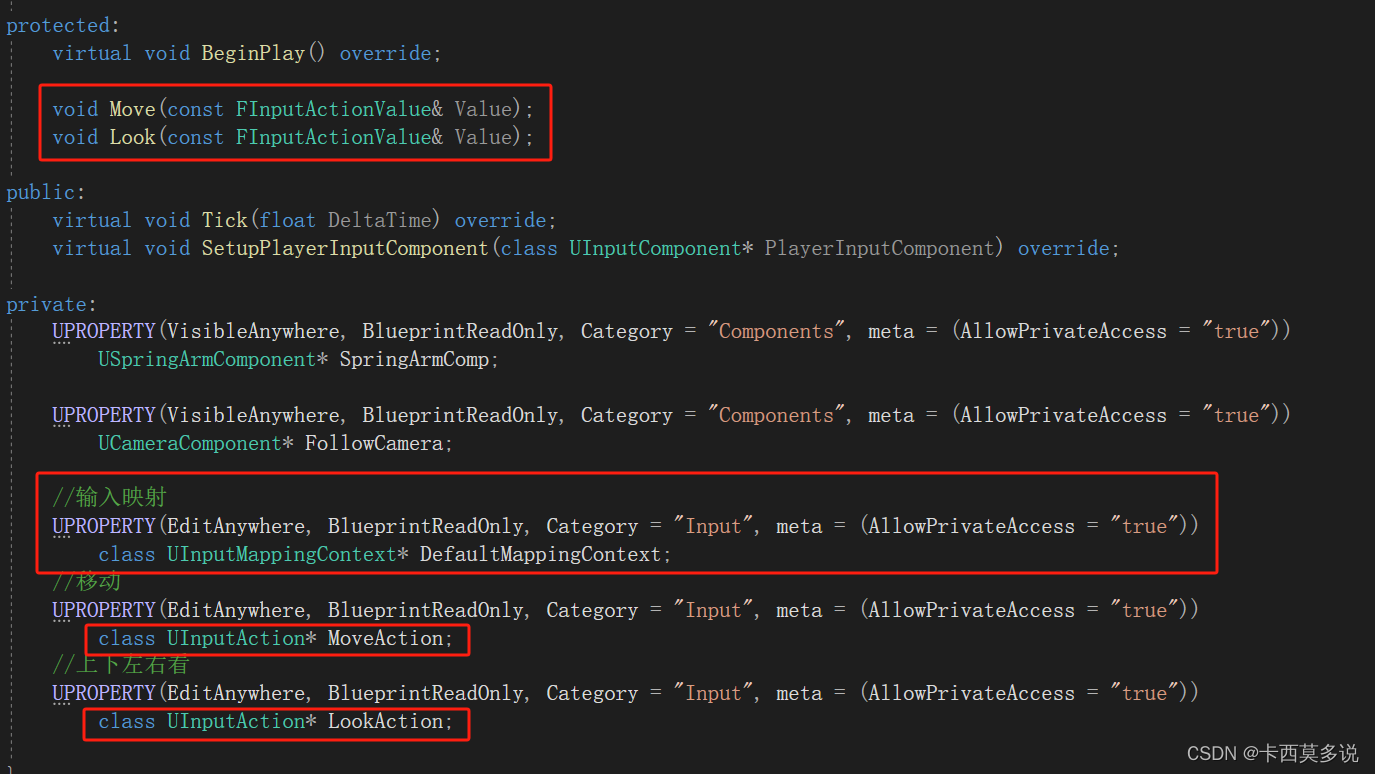
//输入映射
UPROPERTY(EditAnywhere, BlueprintReadOnly, Category = "Input", meta = (AllowPrivateAccess = "true"))
	class UInputMappingContext* DefaultMappingContext;
//移动
UPROPERTY(EditAnywhere, BlueprintReadOnly, Category = "Input", meta = (AllowPrivateAccess = "true"))
	class UInputAction* MoveAction;
//上下左右看
UPROPERTY(EditAnywhere, BlueprintReadOnly, Category = "Input", meta = (AllowPrivateAccess = "true"))
	class UInputAction* LookAction;
在我们创建完成的角色类中添加必要的组件,比如摄像机臂组件和摄像机组件。UInputMappingContext是用来引用操作上下文,而UInputAction对应某个具体的操作,比如我们的WASD前后左右移动,鼠标轴挥动去上下左右看,当我们的Action创建完成之后,去放到操作上下文中去映射,这个时候我们的输入便被绑定到角色中。

代码:
UEnhancedInputComponent* EnhancedInputComponent = CastChecked<UEnhancedInputComponent>(PlayerInputComponent);
if (EnhancedInputComponent && MoveAction && LookAction)
{
	EnhancedInputComponent->BindAction(MoveAction, ETriggerEvent::Triggered,this,&ASCharacter::Move);

	EnhancedInputComponent->BindAction(LookAction, ETriggerEvent::Triggered, this, &ASCharacter::Look);

}
在角色输入绑定函数中,用增强输入组件去绑定Action,之后输入操作按键便会执行对应的操作。
对于ETriggerEvent,在引擎源代码中有相应的介绍,有按键按下,一直按住,松开时的处理,会比UE4的输入更加详细。

在Move和Look的函数中,处理角色移动和上下左右看。
Move代码:
    FVector2D MovementVector = Value.Get<FVector2D>();
    if (Controller)
	{
		 const FRotator ControlRotation = Controller->GetControlRotation();
		 const FRotator YawRotation = FRotator(0.0f,ControlRotation.Yaw,0.0f);

		 const FVector ForawrdDirection = FRotationMatrix(YawRotation).GetUnitAxis(EAxis::X);
		 const FVector RightDirection = FRotationMatrix(YawRotation).GetUnitAxis(EAxis::Y);

		 AddMovementInput(ForawrdDirection,MovementVector.Y);
		 AddMovementInput(RightDirection, MovementVector.X);
	}
Look代码:
    FVector2D LookVector = Value.Get<FVector2D>();
	if (Controller)
	{
		AddControllerYawInput(LookVector.X);
		AddControllerPitchInput(LookVector.Y);
	}
以上处理完成之后,需要在游戏运行的时候,添加增强输入系统的映射。
    APlayerController* PlayerController = Cast<APlayerController>(Controller);
	UEnhancedInputLocalPlayerSubsystem* EnhancedInputSystem =
		ULocalPlayer::GetSubsystem<UEnhancedInputLocalPlayerSubsystem>(PlayerController->GetLocalPlayer());
	if (EnhancedInputSystem && DefaultMappingContext)
	{
		EnhancedInputSystem->AddMappingContext(DefaultMappingContext,0);
	}
这个时候,回到引擎中,去创建一个输入映射和move、look的Action。

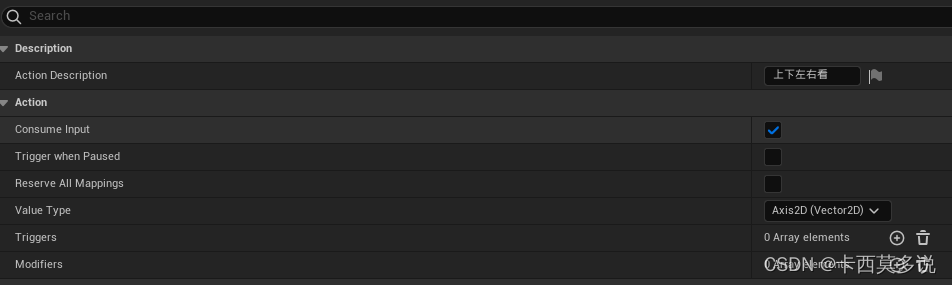
在移动和上下左右看的Action中,添加需要操作的按键。

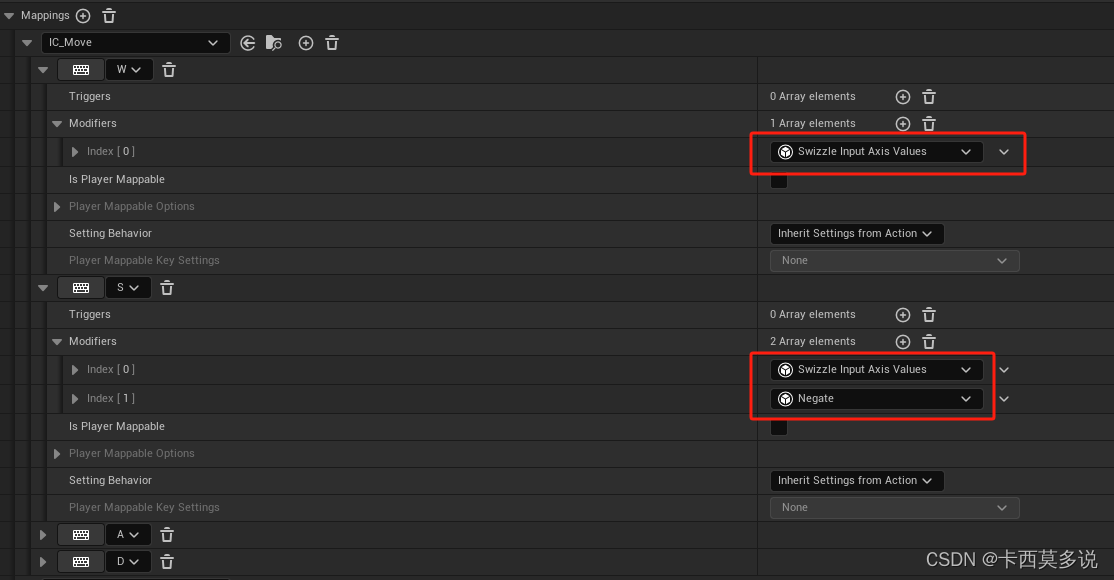
MappingContext中绑定,注意方向输入:

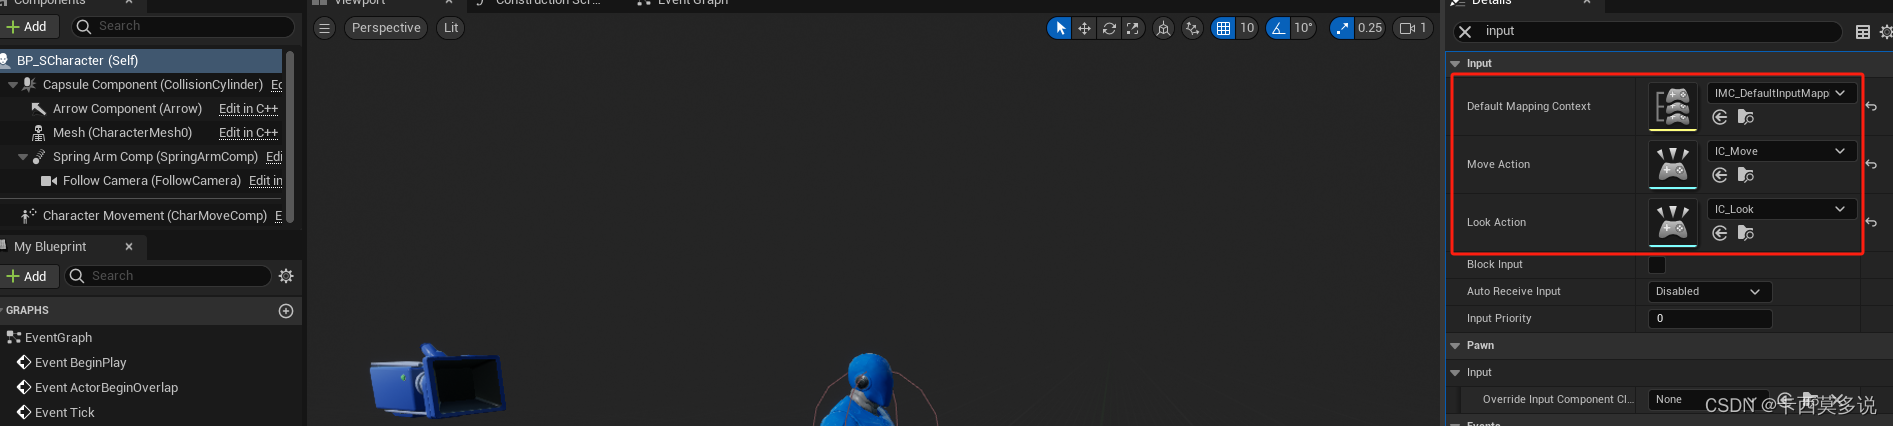
注意在角色蓝图中去选择创建的输入和映射。


 521
521


 被折叠的 条评论
为什么被折叠?
被折叠的 条评论
为什么被折叠?
 到【灌水乐园】发言


