


一.创建charactor,并且包含增强输入相关的头文件
1.项目名.build.cs。添加模块“EnhancedInput”,方便找到头文件和映射的一些文件。
PublicDependencyModuleNames.AddRange(new string[] { "Core", "CoreUObject", "Engine", "InputCore" ,"EnhancedInput","UMG"});2.添加InputActionValue.h EnhancedInputComponent.h EnhancedInputSubSystems.h GameFramework/Controller.h GameFrameWork/SpringArmComponent.h Camera/CameraComponent.h
#include "InputActionValue.h" //输入映射Value值的头文件
#include "EnhancedInputComponent.h" //增强映射的头文件
#include "EnhancedInputSubsystems.h" //增强子系统的头文件

#include "GameFramework/Controller.h" //输入控制器的头文件
#include "GameFramework/SpringArmComponent.h" //摇臂的头文件

#include "Camera/CameraComponent.h" //相机组件的头文件
#include "GameFramework/CharacterMovementComponent.h" //运动组件的头文件
3.在character头文件中,添加蓝图中的通信的变量 以及 值输入映射绑定的代理函数。
	UPROPERTY(VisibleAnywhere,BlueprintReadOnly,Category = "MySceneComponent")
	USpringArmComponent* MySpringArm;
	UPROPERTY(VisibleAnywhere,BlueprintReadOnly,Category = "MySceneComponent")
	UCameraComponent* MyCamera;
	UPROPERTY(EditAnywhere,BlueprintReadOnly,Category = "Input")
	class UInputMappingContext* DefaultmappingContext; //输入映射上下文
	UPROPERTY(EditAnywhere,BlueprintReadOnly,Category = "Input")
	class UInputAction* MoveAction;  //移动映射的变量
	UPROPERTY(EditAnywhere,BlueprintReadOnly,Category = "Input")
	class UInputAction* LookAction;  //旋转映射的变量
	UPROPERTY(EditAnywhere,BlueprintReadOnly,Category = "MySceneComponent")
	UWidgetComponent* MyWidgetHealth;
	void Move(const FInputActionValue& Value);  //所执行的代理函数绑定
	void Look(const FInputActionValue& Value);
二.实现相关函数
1.构造函数中,构造相机。
	PrimaryActorTick.bCanEverTick = true;
	MySpringArm = CreateDefaultSubobject<USpringArmComponent>(TEXT("MySpringArmComponent"));
	MyCamera = CreateDefaultSubobject<UCameraComponent>(TEXT("MyCameraComponent"));

	MySpringArm->TargetArmLength = 400.f;
	//
	MyCamera->SetupAttachment(MySpringArm);
	MySpringArm->SetupAttachment(RootComponent);//设置跟组件。
2. 设置控制器转动不影响角色,将角色运动面朝加速度。让pawn可以随着SpringArm旋转。
	//让控制器的转动不影响角色的转动,只影响相机的转动
	bUseControllerRotationRoll = false;
	bUseControllerRotationPitch = false;
	bUseControllerRotationYaw = false;
	GetCharacterMovement()->bOrientRotationToMovement = true; //让角色面朝加速度的方向
	MySpringArm->bUsePawnControlRotation = true;   //这个使用了Pawn控制器的旋转
3.在BeginPlay里,将Charactor自身的控制器 转换为 APlayerController,是否合法。获得本地玩家控制器的增强输入的子系统。加入 输入映射的上下文,优先级 作为 设置到子系统的映射。
Super::BeginPlay();
if (APlayerController* PlayerController = Cast<APlayerController>(Controller))  //如果控制器是合法的
{
	if (UEnhancedInputLocalPlayerSubsystem* Subsystem = ULocalPlayer::GetSubsystem<UEnhancedInputLocalPlayerSubsystem>(PlayerController->GetLocalPlayer())) //玩家控制器转换为 增强输入的本地玩家子系统
	{
		Subsystem->AddMappingContext(DefaultmappingContext,0);
	}
}
4.获得鼠标的输入的 2D 坐标 movementVector。判断控制器是否合法,获得控制器的旋转。将Yaw的旋转在Y轴上的 X轴上的方向的投影。移动的同时,人物先转动到相机的方向。我暂时理解的就是在控制器给定的方向移动,输入的距离。
void AMyCharacter::Move(const FInputActionValue& Value)
{
	FVector2D movementVector = Value.Get<FVector2D>();
	if (Controller!=nullptr)
	{
		const FRotator Rotation = Controller->GetControlRotation();
		const FRotator YawRotation(0,Rotation.Yaw,0);
		const FVector ForwardDirection = FRotationMatrix(YawRotation).GetUnitAxis(EAxis::X);
		const FVector RightDirection = FRotationMatrix(YawRotation).GetUnitAxis(EAxis::Y);
		AddMovementInput(ForwardDirection,movementVector.Y);
		AddMovementInput(RightDirection,movementVector.X);
	}
}
5.获得鼠标的X,Y方向的移动,获得X方向上的向量值。
void AMyCharacter::Look(const FInputActionValue& Value)
{
	FVector2D LookAxisVector = Value.Get<FVector2D>(); //获得鼠标的控制器
	if (Controller != nullptr)
	{
		AddControllerYawInput(LookAxisVector.X);
		AddControllerPitchInput(LookAxisVector.Y);
	}
}
6.玩家输入方式改为增强玩家输入映射,绑定输入(映射变量,方式,对象,绑定的函数)。
// Called to bind functionality to input
void AMyCharacter::SetupPlayerInputComponent(UInputComponent* PlayerInputComponent)
{
Super::SetupPlayerInputComponent(PlayerInputComponent); //自带的设置
if (UEnhancedInputComponent* EnhancedInputComponent = CastChecked<UEnhancedInputComponent>(PlayerInputComponent)) //执行输入的时候
{
EnhancedInputComponent->BindAction(MoveAction, ETriggerEvent::Triggered, this, &AMyCharacter::Move);
EnhancedInputComponent->BindAction(LookAction, ETriggerEvent::Triggered, this, &AMyCharacter::Look);
}
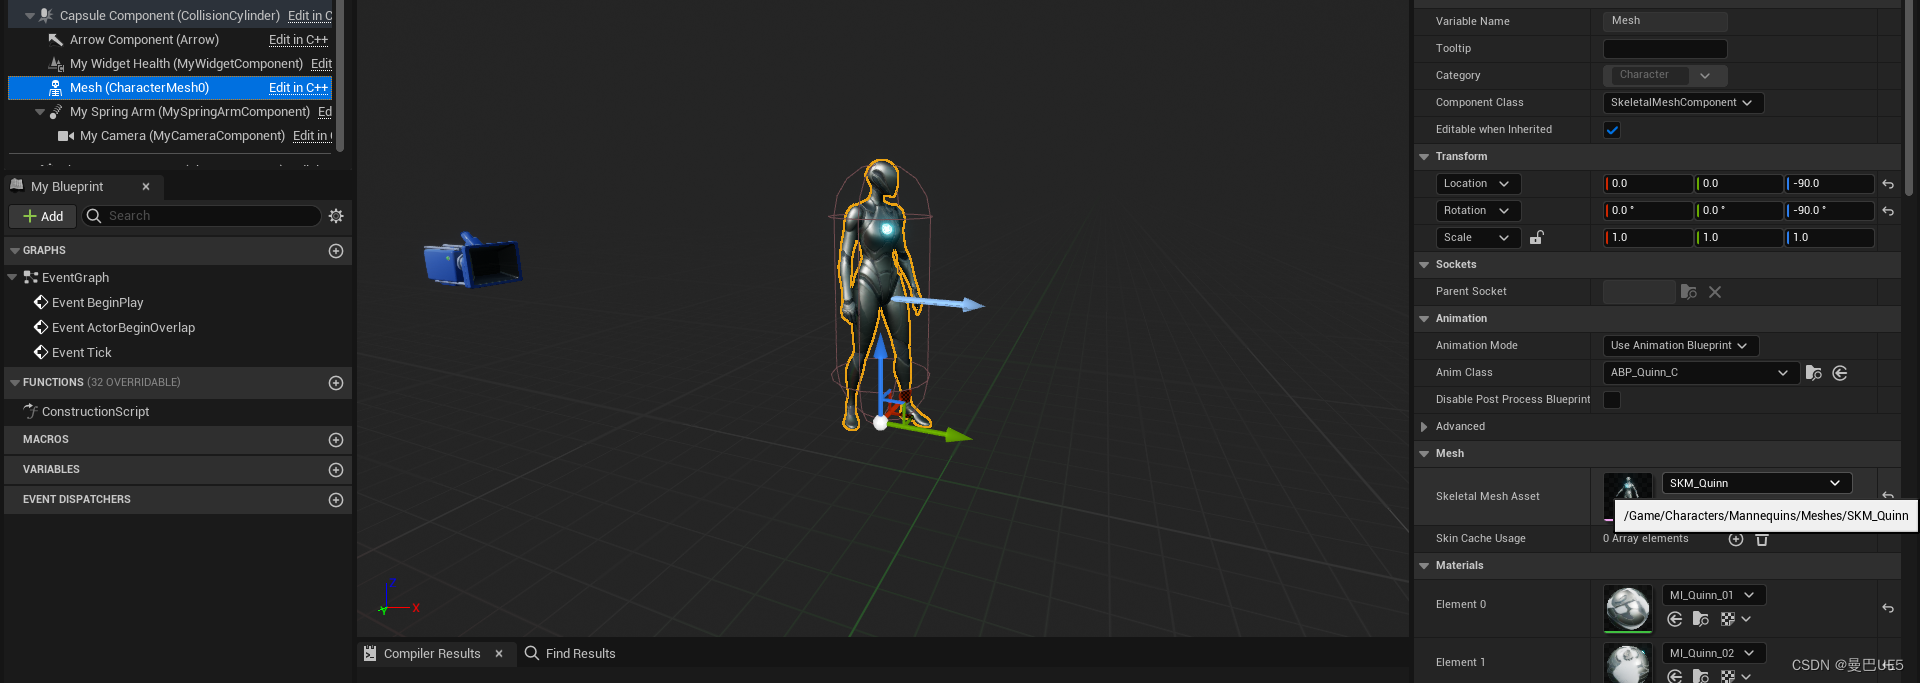
}7.创建继承C++的蓝图,设置Mesh。
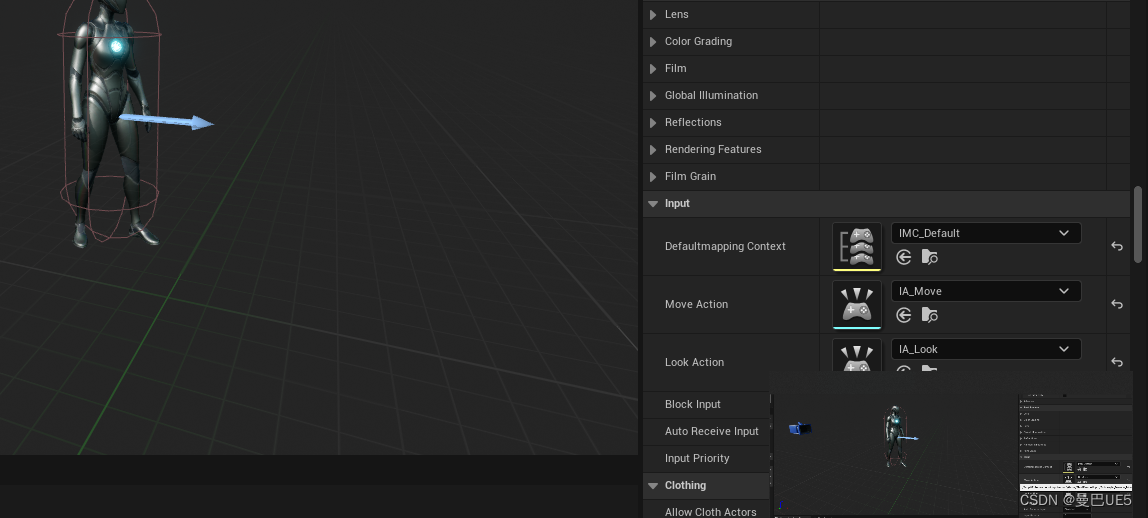
8.设置初始化Inputmapping 上下文, 和 Action。这里用的第三人称的现成资源。
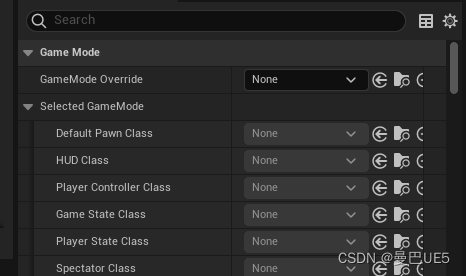
9.GameMode设置为空,测试成功。


 917
917

 被折叠的 条评论
为什么被折叠?
被折叠的 条评论
为什么被折叠?
 到【灌水乐园】发言


