


前言
dinoV2已经发布有一段时间了,faecbook豪言直接说前面的结构我们都不需要进行修改,只需要修改最后的全连接层就可以达到一个很好的效果。我们激动的揣摸了下自己激动的小手已经迫不及待了,这里我使用dinoV2进行了实验,来分享下实验结果。
- dinoV2官方地址:github链接
一、模型介绍
1、预训练模型介绍
# dinov2_vits14_pretrain.pth 结构
# s,b,l,g 主要是blocks 模块数量不同,

DinoVisionTransformer(
  (patch_embed): PatchEmbed(
    (proj): Conv2d(3, 384, kernel_size=(14, 14), stride=(14, 14))
    (norm): Identity()
  )
  (blocks): ModuleList(
    (0-11): 12 x NestedTensorBlock(
      (norm1): LayerNorm((384,), eps=1e-06, elementwise_affine=True)
      (attn): MemEffAttention(
        (qkv): Linear(in_features=384, out_features=1152, bias=True)
        (attn_drop): Dropout(p=0.0, inplace=False)
        (proj): Linear(in_features=384, out_features=384, bias=True)
        (proj_drop): Dropout(p=0.0, inplace=False)
      )
      (ls1): LayerScale()
      (drop_path1): Identity()
      (norm2): LayerNorm((384,), eps=1e-06, elementwise_affine=True)
      (mlp): Mlp(
        (fc1): Linear(in_features=384, out_features=1536, bias=True)
        (act): GELU(approximate='none')
        (fc2): Linear(in_features=1536, out_features=384, bias=True)
        (drop): Dropout(p=0.0, inplace=False)
      )
      (ls2): LayerScale()
      (drop_path2): Identity()
    )
  )
  (norm): LayerNorm((384,), eps=1e-06, elementwise_affine=True)
  (head): Identity()
)
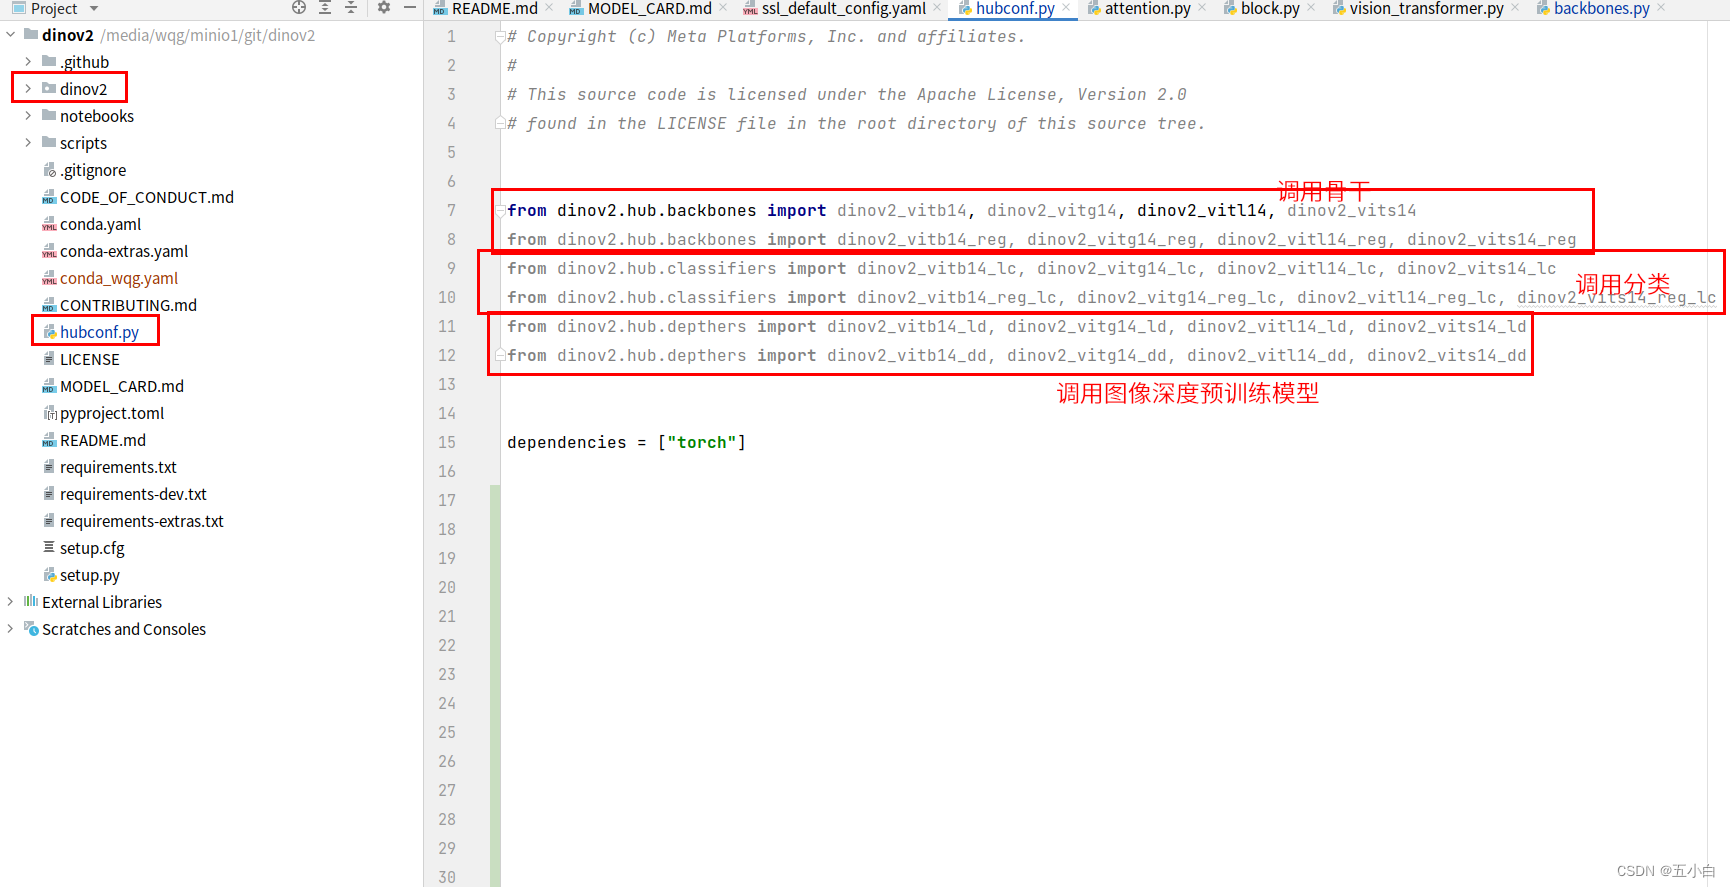
2、项目文件介绍
这里可以直接用hubconf.py文件里面进行调用,大家可以根据需求来进行选择。
 导入模型第一次都是从网络进行导入,对于国内用户可能不成功,这里大家可以修改为本地导入,传入已经下载好的预训练模型就行。这里给大家分享一个百度网盘的地址,提取码:mhdq,更多模型大家从官网下载。
导入代码如下:
- 注意 : dinov2_vitl14 此为L模型大小导入方法,需要和模型大小进行对应。
# hubconf.py文件 中导入
model = dinov2_vitl14(weights={'LVD142M':'/media/wqg/minio/model/dinoV2/dinov2_vitl14_pretrain.pth'})
这里如果直接使用model.eval()
模型输出是(bs,embed_dim)如果是一张图,使用dinov2_vits14模型,则输出是 (1,384)
b,l,g,的embed_dim大家可以通过model.embed_dim进行查看。
3、模型输出
由于我实验的时候发现仅仅只使用x_norm_clstoken效果一直不理想,我这里用到了x_norm_regtokens。
这里可以参考github中的finetune中的导入方法。
# 实例化模型代码
from functools import partial
from dinov2.eval.linear import create_linear_input
from dinov2.eval.linear import LinearClassifier
from dinov2.eval.utils import ModelWithIntermediateLayers

model = dinov2_vits14(weights={'LVD142M':'./model/dinoV2/dinov2_vits14_pretrain.pth'})
autocast_ctx = partial(torch.cuda.amp.autocast, enabled=True, dtype=torch.float16)
self.feature_model = ModelWithIntermediateLayers( model, n_last_blocks=1, autocast_ctx=autocast_ctx).to(device)


# 实例化分类模型全连接层。
self.embed_dim = model.embed_dim
 # 100对应的是你需要分类的类别数量
self.classifier = LinearClassifier( self.embed_dim*2, use_n_blocks=1, use_avgpool=True, num_classes=100).to(device)

# 冻结骨干网络
for param in model.feature_model.parameters():
    param.requires_grad = False
这里的self.feature_model 输出是有2个维度的,一个是x_norm_regtokens,shape为(bs,pach_h*pach_w,embed_dim),pach_h = input_h/14,pach_w = input_w/14.
另一个是x_norm_clstoken,shape为(bs,embed_dim)。一般情况下x_norm_clstoken用来分类就已经足够了。
4、完整代码
from modeling.dinov2.eval.linear import LinearClassifier,create_linear_input
from modeling.dinov2.eval.utils import ModelWithIntermediateLayers
from functools import partial

from modeling.dinov2.hub.backbones import dinov2_vitb14, dinov2_vitg14, dinov2_vitl14, dinov2_vits14
from modeling.dinov2.hub.backbones import dinov2_vitb14_reg, dinov2_vitg14_reg, dinov2_vitl14_reg, dinov2_vits14_reg

class HubConf(nn.Module):
    def __init__(self,cfg,pretrain_choice = 'frozen'):
        super(HubConf, self).__init__()

        model_path = cfg.MODEL.PRETRAIN_PATH
        self.cfg = cfg
        self.base = dinov2_vits14(weights={'LVD142M':'./model/dinoV2/dinov2_vits14_pretrain.pth'})
        self.in_planes = self.base.embed_dim

        autocast_ctx = partial(torch.cuda.amp.autocast, enabled=True, dtype=torch.float16)
        self.feature_model = ModelWithIntermediateLayers(self.base, n_last_blocks=1, autocast_ctx=autocast_ctx)
        if pretrain_choice == 'frozen':
            for param in self.feature_model.parameters():
                param.requires_grad = False


        self.classifier = LinearClassifier(self.in_planes*2, use_n_blocks=1, use_avgpool=True, num_classes=cfg.MODEL.nc)


    def forward(self, x):
        global_feat = self.feature_model(x)  # ((b,256, embed_dim ),(b, embed_dim )) ((1,256,384),(1,384))
        out = self.classifier(global_feat)
        return  out

    def load_param(self, trained_path, device='cpu'):
        param_dict = torch.load(trained_path, map_location=device)
        for i in param_dict:
            #if 'classifier' in i:
            if i not in self.state_dict():
                print('not load param ', i)
                continue
            self.state_dict()[i].copy_(param_dict[i])
二、模型修改
这里骨干网络已经完全冻结,没有什么需要修改的,只需要对x_norm_regtokens进行添加卷积操作。
1、添加卷积
# neck结构,在输出后添加卷积的过程。

def autopad(k, p=None):  # kernel, padding
    # Pad to 'same'
    if p is None:
        p = k // 2 if isinstance(k, int) else [x // 2 for x in k]  # auto-pad
    return p

class Conv(nn.Module):
    # Standard convolution
    def __init__(self, c1, c2, k=1, s=1, p=None, g=1,
                 act=True):  # ch_in, ch_out, kernel, stride, padding, groups
        super().__init__()
        self.conv = nn.Conv1d(c1, c2, k, s, autopad(k, p), groups=g, bias=False)
        self.bn = nn.BatchNorm1d(c2)
        self.act = nn.ReLU()

    def forward(self, x):
        return self.act(self.bn(self.conv(x)))


class neck_dinov2(nn.Module):
    def __init__(self, c0, c1, nc, dropout=0.5):
        super().__init__()
        self.conv1 = Conv1d(c0, c0)
        self.conv2 = Conv1d(c0, c0)
        self.drop = nn.Dropout(p=dropout)

        self.linear = nn.Linear(c1 * 2, nc)
        self.linear.weight.data.normal_(mean=0.0, std=0.01)
        self.linear.bias.data.zero_()

    def forward(self, x):
        feature, class_token = x[0]
        feature, class_token = torch.cat([feature.detach()], dim=-1), torch.cat([class_token.detach()], dim=-1)

        feature = self.drop(self.conv2(self.conv1(feature)))
        x0 = torch.cat((torch.mean(feature, dim=1), class_token), dim=-1)

        return self.linear(x0)
2、完整代码
我这里实验的是多头输出,大家单头的可以只实验一次neck结构就行。
class HubConf(nn.Module):
    def __init__(self,cfg,pretrain_choice = 'frozen'):
        super(HubConf, self).__init__()

        model_path = cfg.MODEL.PRETRAIN_PATH
        self.cfg = cfg
        self.base = eval(cfg.MODEL.NAME)(weights={'LVD142M':model_path})
        self.in_planes = self.base.embed_dim

        self.consize = int((cfg.INPUT.SIZE_TRAIN[0]/14)*(cfg.INPUT.SIZE_TRAIN[1]/14))

        autocast_ctx = partial(torch.cuda.amp.autocast, enabled=True, dtype=torch.float16)
        self.feature_model = ModelWithIntermediateLayers(self.base, n_last_blocks=1, autocast_ctx=autocast_ctx)
        if pretrain_choice == 'frozen':
            for param in self.feature_model.parameters():
                param.requires_grad = False

        self.country_cls = neck_dinov2(self.consize, self.in_planes, cfg.MODEL.nc1, dropout=cfg.MODEL.DROPOUT)  # 分类头1
        self.cn_cls = neck_dinov2(self.consize,self.in_planes, cfg.MODEL.nc2, dropout=cfg.MODEL.DROPOUT)  # 分类头2
        self.ct_cls = neck_dinov2(self.consize,self.in_planes, cfg.MODEL.nc3, dropout=cfg.MODEL.DROPOUT)  # 分类头3


    def forward(self, x):

        global_feat = self.feature_model(x)  # ((bs, pach_h*pach_w,embed_dim ),(bs, embed_dim ))    ((1,(224/14)*(224/14), 384),(1, 384))
        country_score = self.country_cls(global_feat)
        cn_score = self.cn_cls(global_feat)
        ct_score = self.ct_cls(global_feat)

        return (country_score, cn_score,ct_score)


    def load_param(self, trained_path, device='cuda:0'):
        param_dict = torch.load(trained_path, map_location=device)
        for i in param_dict:
            #if 'classifier' in i:
            if i not in self.state_dict():
                print('not load param ', i)
                continue
            self.state_dict()[i].copy_(param_dict[i])
三、实验自己的数据
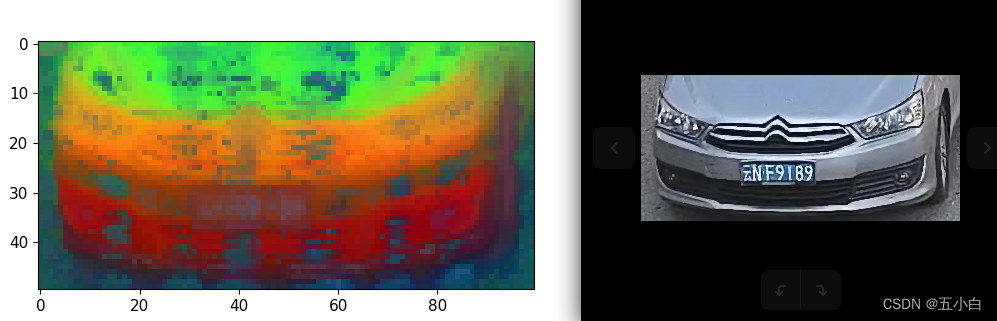
1、车辆品牌分类。
- 车辆品牌为单分类,目前类别有178类,输入图像大小为(126,252),输入图片为车头或者车辆尾部截图。
- 使用单一的LinearClassifier分类效果不如resnet50的全训练效果,个人分析主要原因是车标太小了,全连接无法准确的学习到,所以我在x_norm_regtokens维度添加了卷积操作。
- 可视化特征图。使用的骨干为dinov2_vitb14_pretrain,可视化效果如下
- 可视化代码
import torch
import torchvision.transforms as T
import matplotlib.pyplot as plt
import numpy as np
from PIL import Image
from sklearn.decomposition import PCA
import matplotlib
from dinov2.hub.backbones import dinov2_vitb14, dinov2_vitg14, dinov2_vitl14, dinov2_vits14


patch_h = 50
patch_w = 100
feat_dim = 384

transform = T.Compose([
    T.GaussianBlur(9, sigma=(0.1, 2.0)),
    T.Resize((patch_h * 14, patch_w * 14)),
    T.CenterCrop((patch_h * 14, patch_w * 14)),
    T.ToTensor(),
    T.Normalize(mean=(0.485, 0.456, 0.406), std=(0.229, 0.224, 0.225)),
])

# dinov2_vits14 = torch.hub.load('', 'dinov2_vits14', source='local').cuda()
vits14 = torch.hub.load('', 'dinov2_vits14', weights={'LVD142M':'./model/dinoV2/dinov2_vits14_pretrain.pth'},source='local').cuda()

features = torch.zeros(4, patch_h * patch_w, feat_dim)
imgs_tensor = torch.zeros(4, 3, patch_h * 14, patch_w * 14).cuda()

img_path = f'/home/wqg/桌面/car_face_crop/face/face_0003600_111963.jpg'
img = Image.open(img_path).convert('RGB')
imgs_tensor[0] = transform(img)[:3]
with torch.no_grad():
    features_dict = vits14.forward_features(imgs_tensor)
    features = features_dict['x_norm_patchtokens']

features = features.reshape(4 * patch_h * patch_w, feat_dim).cpu()
pca = PCA(n_components=3)
pca.fit(features)
pca_features = pca.transform(features)
pca_features[:, 0] = (pca_features[:, 0] - pca_features[:, 0].min()) / (
            pca_features[:, 0].max() - pca_features[:, 0].min())

pca_features_fg = pca_features[:, 0] > 0.3
pca_features_bg = ~pca_features_fg

b = np.where(pca_features_bg)

pca.fit(features[pca_features_fg])
pca_features_rem = pca.transform(features[pca_features_fg])
for i in range(3):
    # transform using mean and std, I personally found this transformation gives a better visualization
    pca_features_rem[:, i] = (pca_features_rem[:, i] - pca_features_rem[:, i].mean()) / (
                pca_features_rem[:, i].std() ** 2) + 0.5

pca_features_rgb = pca_features.copy()
pca_features_rgb[pca_features_fg] = pca_features_rem
pca_features_rgb[b] = 0

pca_features_rgb = pca_features_rgb.reshape(4, patch_h, patch_w, 3)
plt.imshow(pca_features_rgb[0][..., ::-1])
plt.savefig('features.png')
plt.show()
plt.close()
2、车辆属性分类。
- 车辆属性分类为多头输出,其中需要输出车辆类型,车辆颜色,车辆朝向等。
- 只使用LinearClassifier作为每个分类头进行输出既可获得较好的效果。
四、结论
- 使用dinoV2在大图上做细粒度分类效果不如整体训练效果,需要再通过卷积获得更小区域目标的强化学习。
- 使用dinoV2在分类整体图像效果时,可以直接得到一个较好的效果,比原有的模型输出效果更好,无须再训练backbone部分,
相关引用链接:
- dinoV2github: https://github.com/facebookresearch/dinov2
- dinoV2 finetune:https://github.com/xuwangyin/dinov2-finetune/tree/main
- dinoV2预训练权重:链接: https://pan.baidu.com/s/1ly7JpCu4Oi5gVBKixafXQg 提取码: mhdq


 5235
5235

 被折叠的 条评论
为什么被折叠?
被折叠的 条评论
为什么被折叠?
 到【灌水乐园】发言


