


arkit扫描3d模型
Recently I was looking for ways to control animations that are baked in 3D Models with Swift but all I could find was bits and pieces over the internet with no robust way of handling key frame animations of 3D Models specifically in .scn format.
最近,我在寻找一种方法来控制使用Swift烘焙3D模型中的动画,但我只能找到一点点零碎的内容,而没有可靠的方式来处理.scn格式的3D模型的关键帧动画。
So upon decrypting the very vague Apple API documentation I came up with a procedure that is a good solution or at least a good starting point (because how animations are implemented with the various tools can vary greatly).
因此,在解密非常模糊的Apple API文档时,我想出了一个很好的解决方案,或者至少是一个很好的起点(因为使用各种工具实现动画的方式可能会有很大差异)。
So let’s get cooking, we will need:
因此,让我们开始做饭,我们将需要:
Blender (open source 3D software) to export the model to
.daeformat (https://www.blender.org/download/)Blender(开源3D软件)将模型导出为
.dae格式( https://www.blender.org/download/ )- XCode XCode
- A real iOS device (not a simulator) 真正的iOS设备(不是模拟器)
准备好3D模型 (Getting the 3D Model ready)
Let us download a nice low poly 3D model with baked in animations from online:
让我们从网上下载一个带有动画效果的低多边形3D模型:
https://www.turbosquid.com/3d-models/3d-model-cartoon-helicopter-1317556
https://www.turbosquid.com/3d-models/3d-model-cartoon-helicopter-1317556
This one is excellent for our recipe!
这是我们食谱的绝佳选择!
Download the above model in .zip file and save it locally.
将上述模型下载为.zip文件,并将其保存在本地。
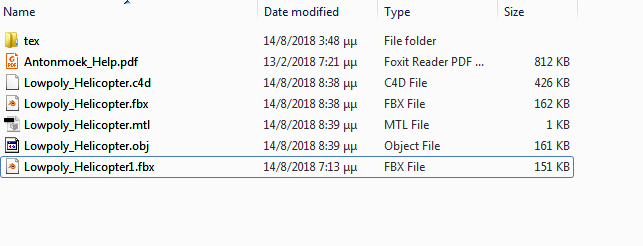
Unzip the downloaded file and you should see inside something like this:
解压缩下载的文件,您应该会在内部看到如下内容:
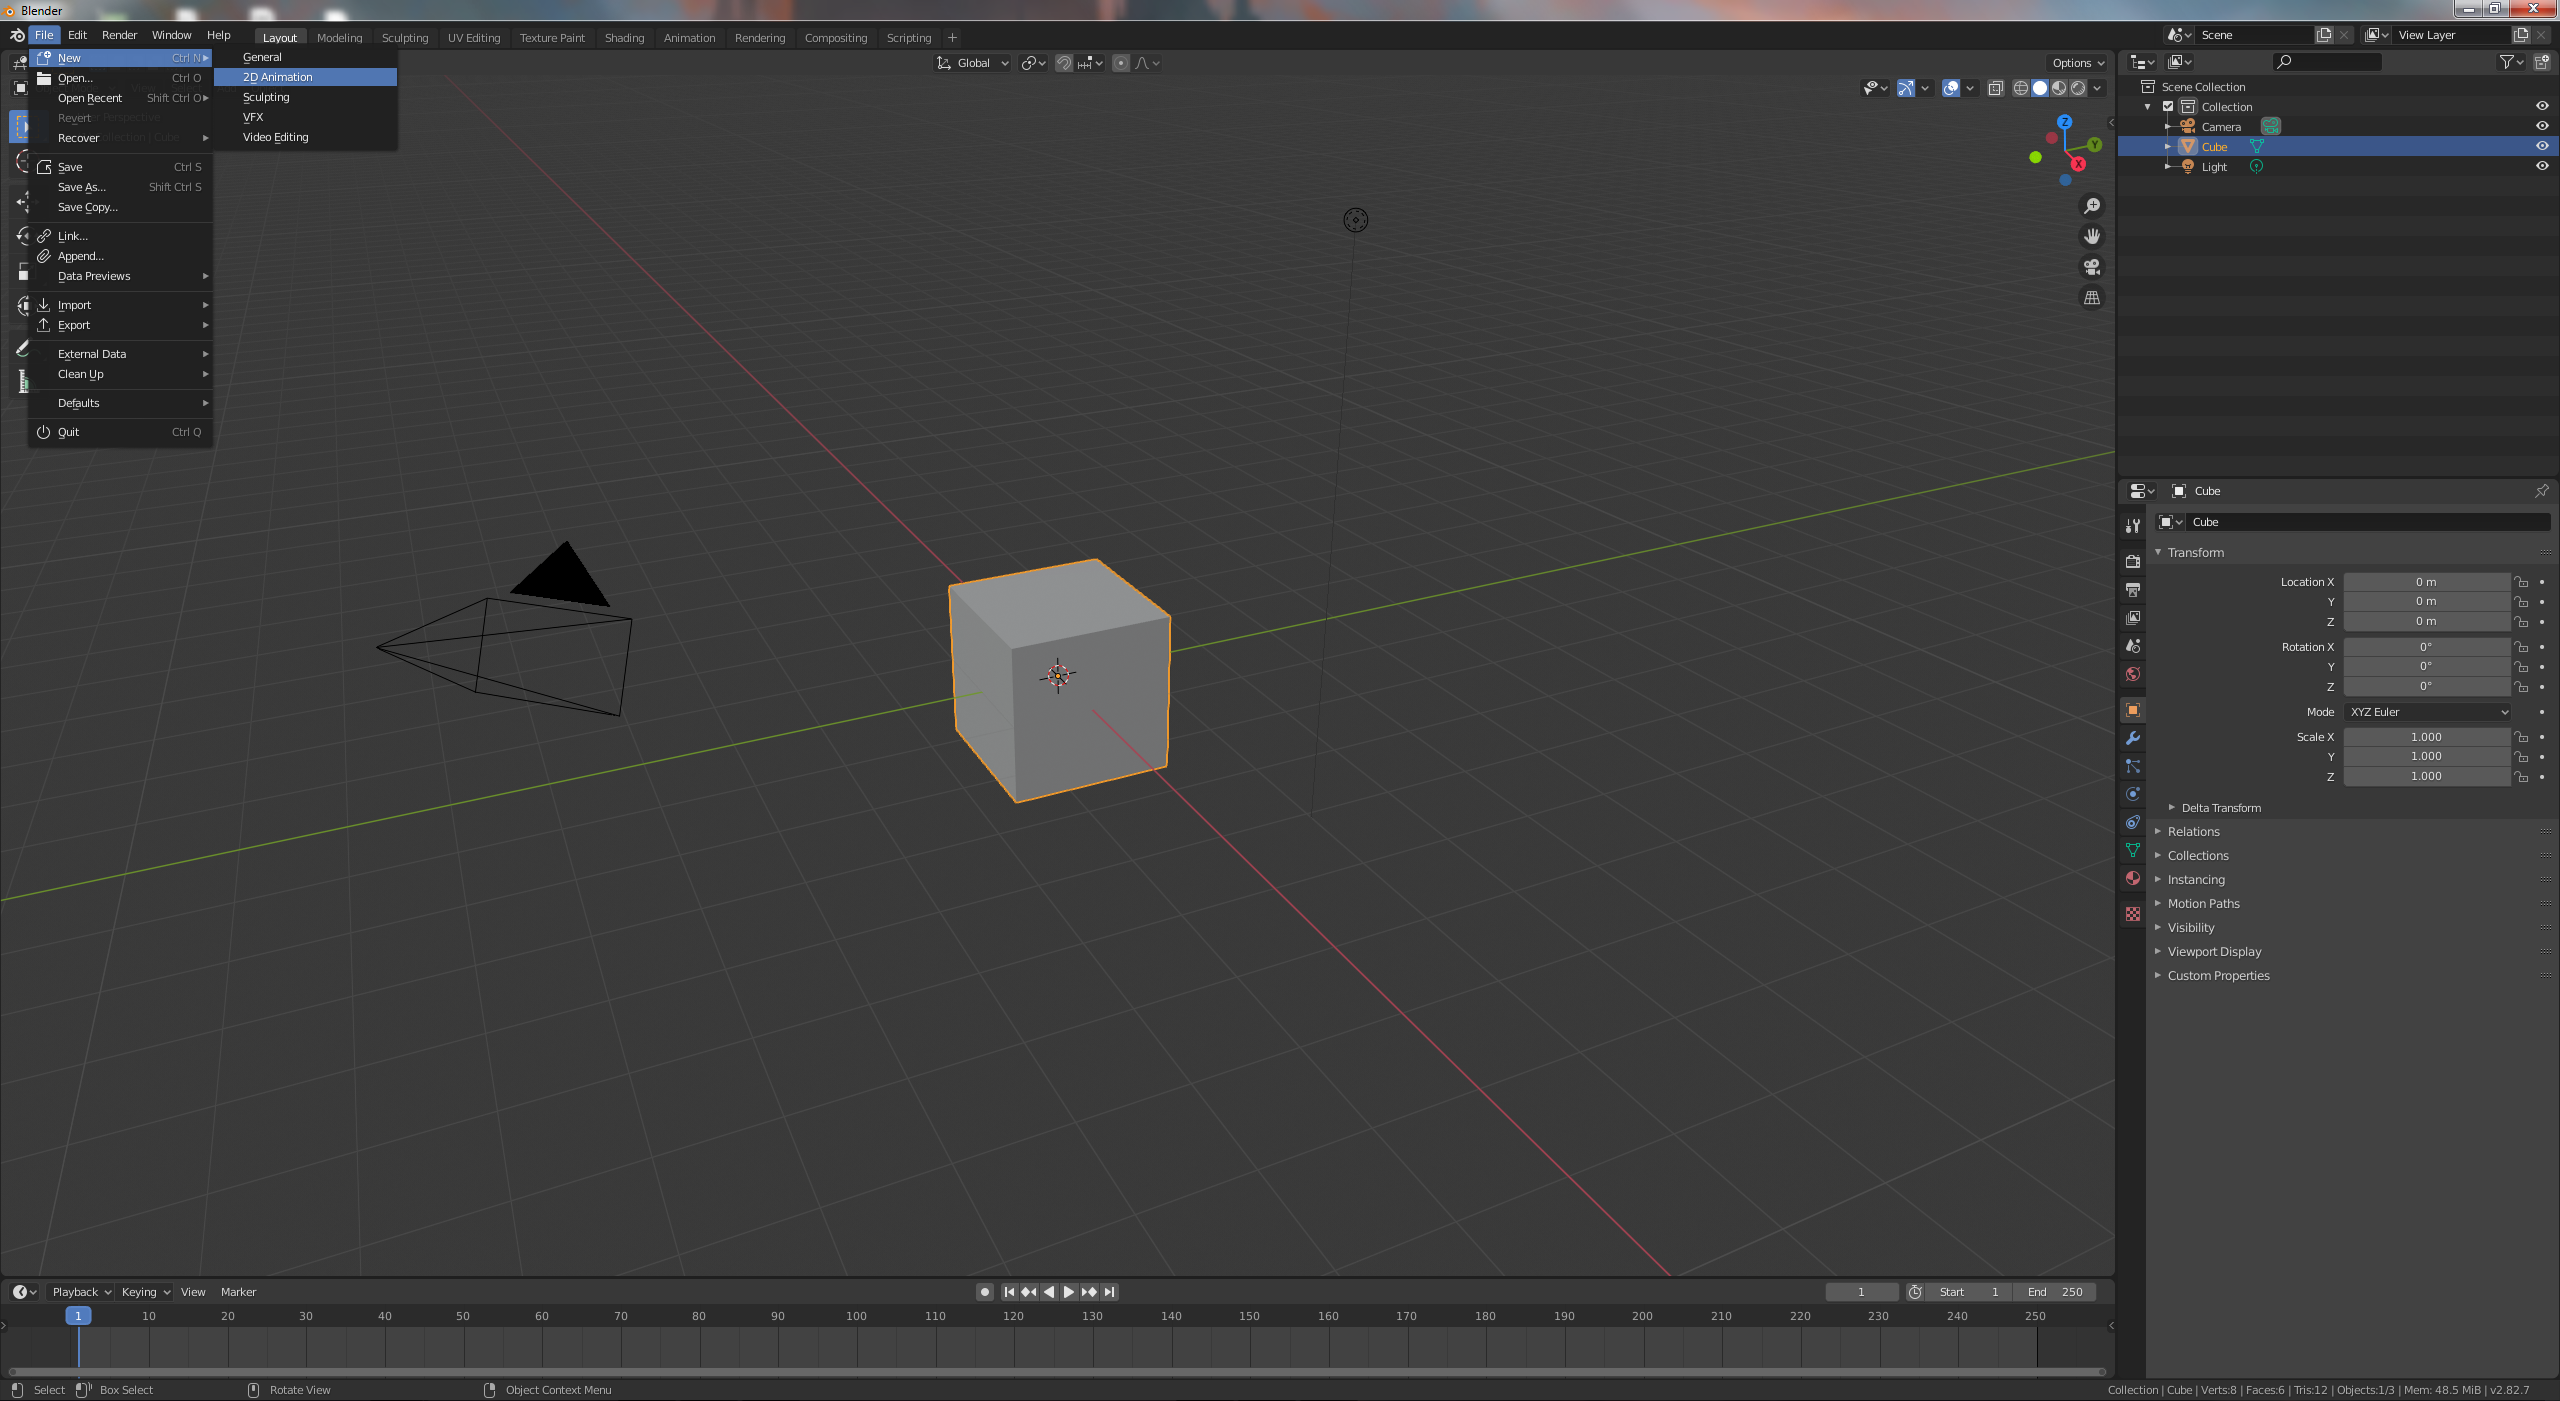
Now in blender we open a new General File
现在在Blender中,我们打开一个新的常规文件
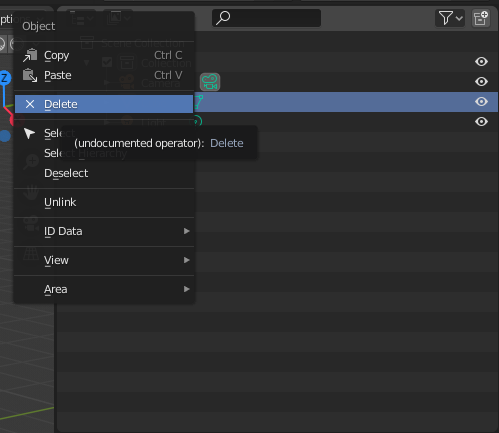
And delete the cube by right-clicking on the Cube node on the right panel
并通过右键单击右侧面板上的“多维数据集”节点来删除多维数据集
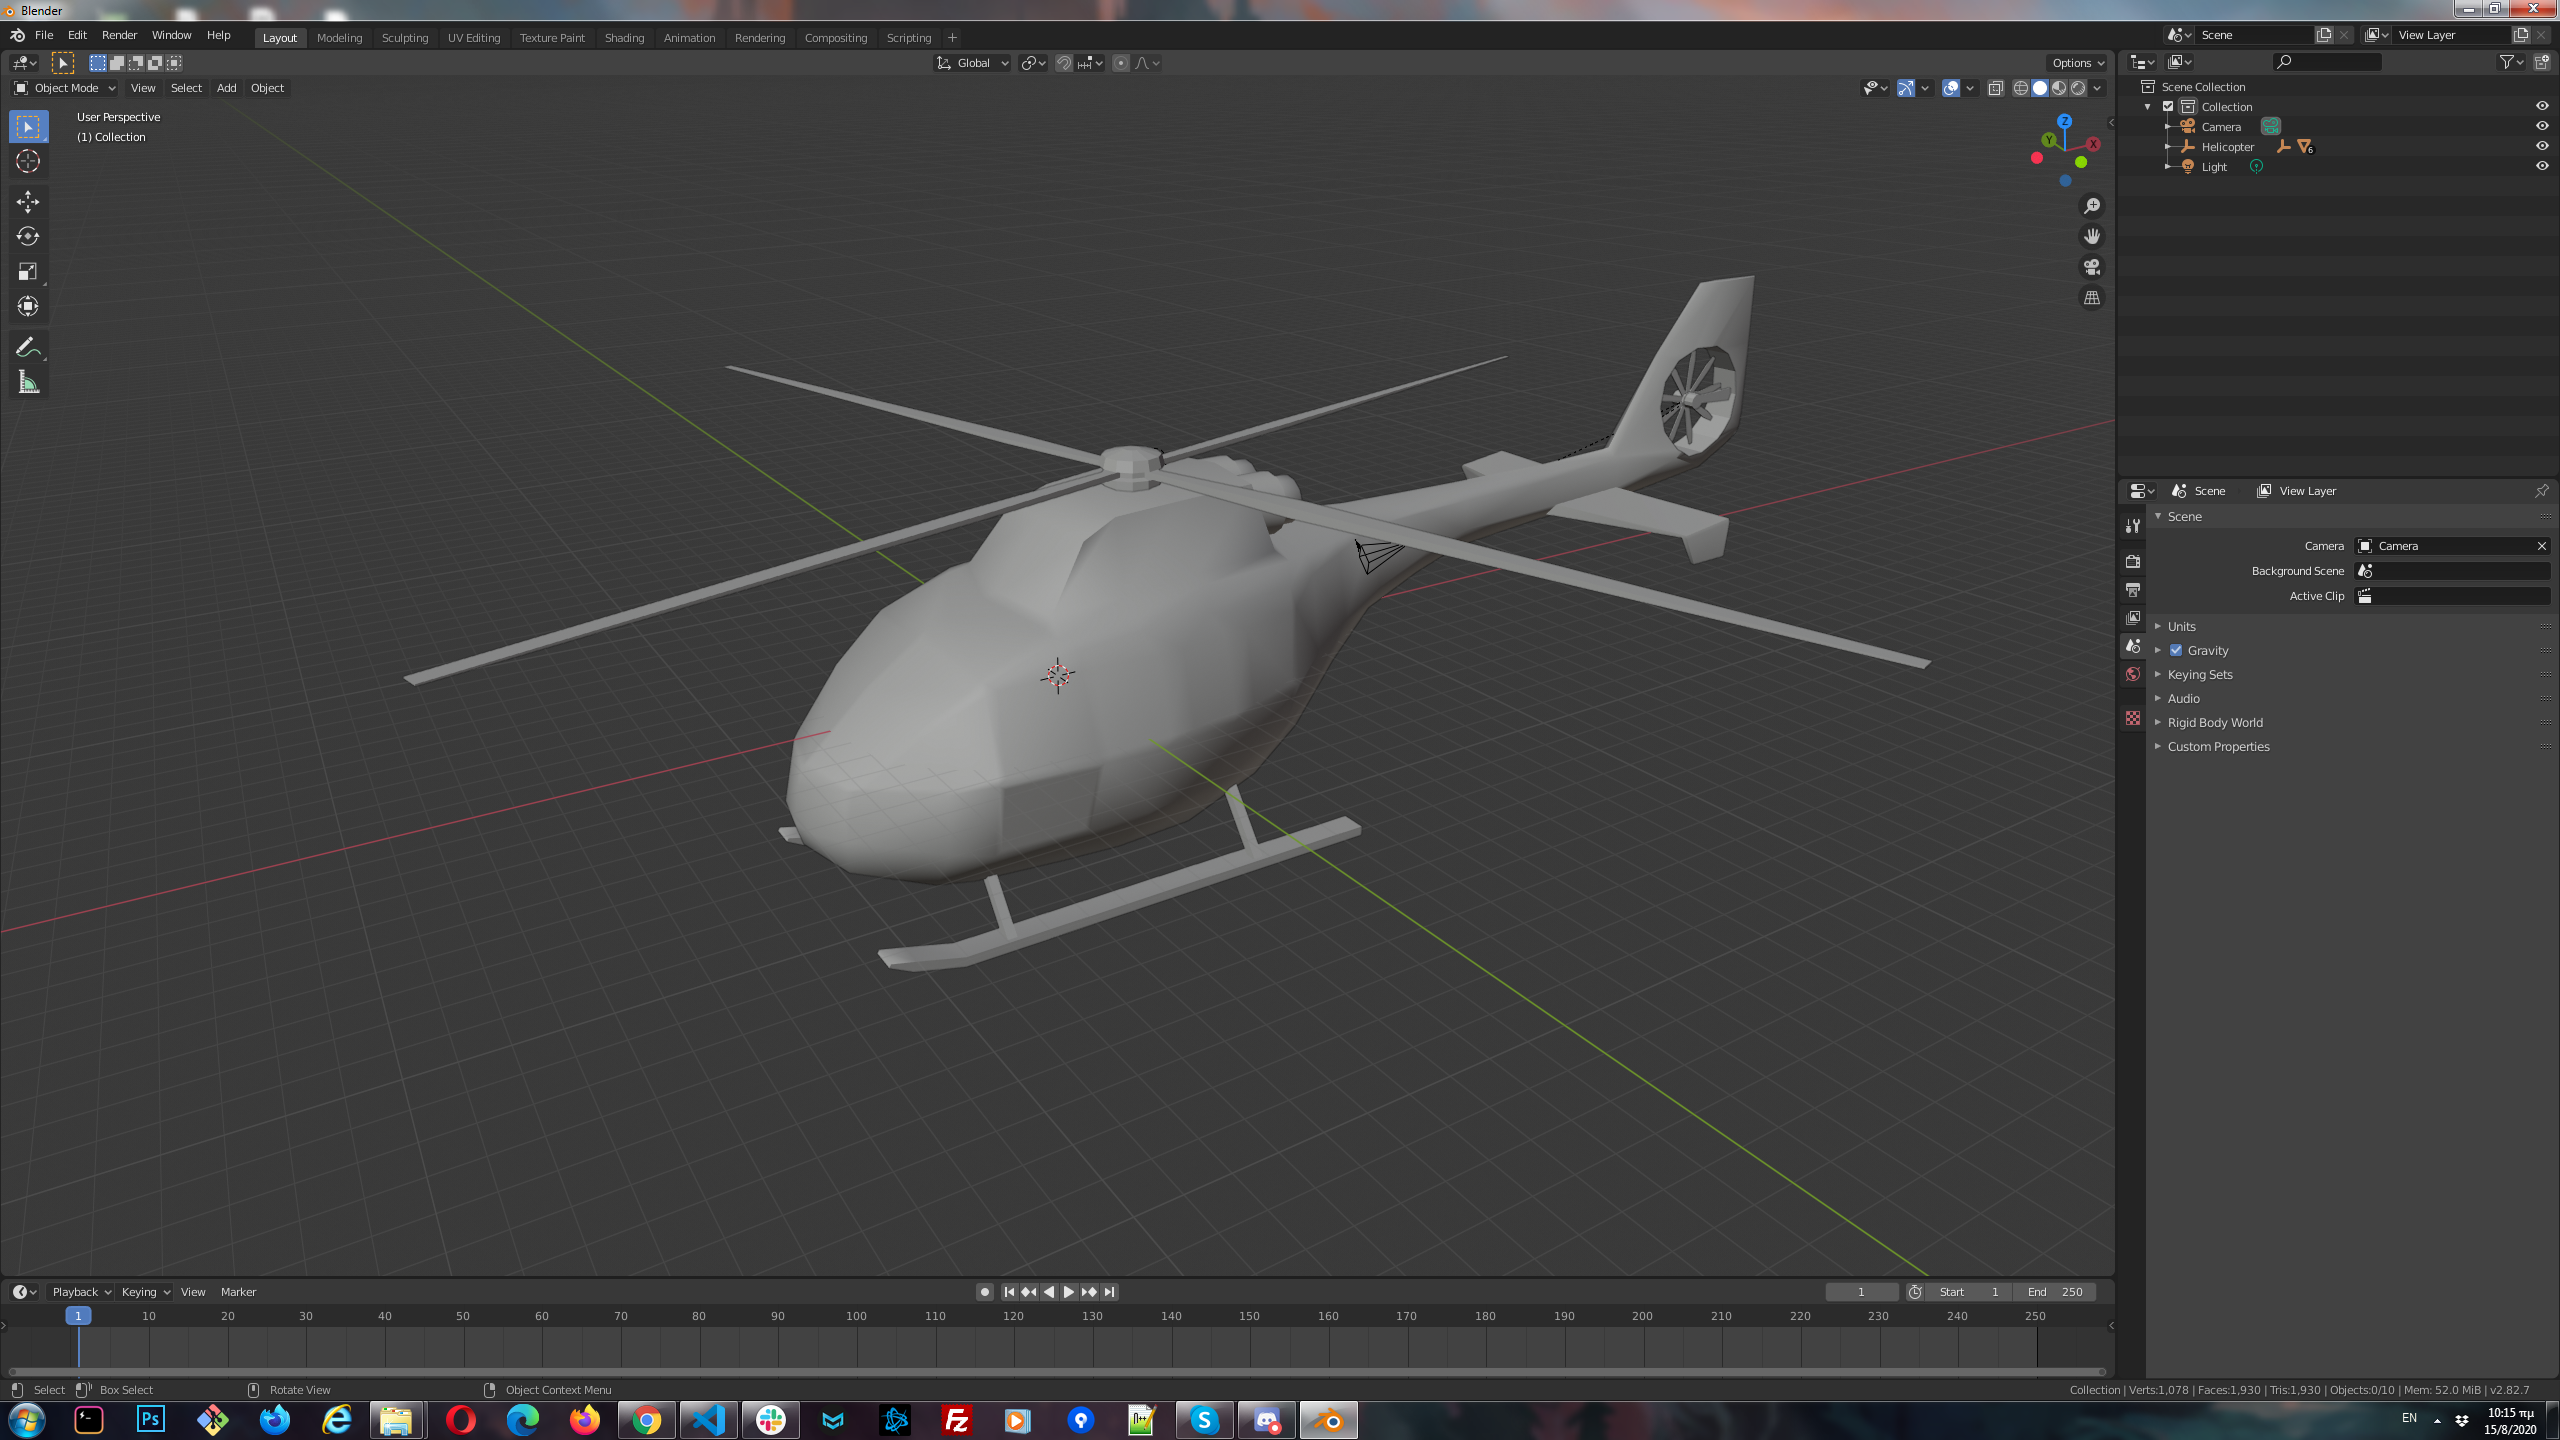
Now that we have a clean workspace we can import our model. Click File > Import > .FBX and search for the file Lowpoly_Helicopter1.fbx from the unzipped folder.
现在我们有了一个干净的工作区,我们可以导入模型了。 单击文件>导入> .FBX, Lowpoly_Helicopter1.fbx从解压缩的文件夹中搜索文件Lowpoly_Helicopter1.fbx 。
You should now have this:
您现在应该有这个:
But that doesn’t look so nice, so let us add some texture to it.
但这看起来不太好,所以让我们为其添加一些纹理。
There are a couple of ways to add texture to the 3D Model, I’m going to show you the easiest one, but its worth noting that learning your way around Blender is a very useful skill.
有几种方法可以向3D模型添加纹理,我将向您展示最简单的方法,但是值得注意的是,了解Blender的方法是一项非常有用的技能。
Texture time! Expand the Helicopter node from the right panel and select the Copter node.
纹理时间! 从右侧面板中展开“直升机”节点,然后选择“ Copter节点。
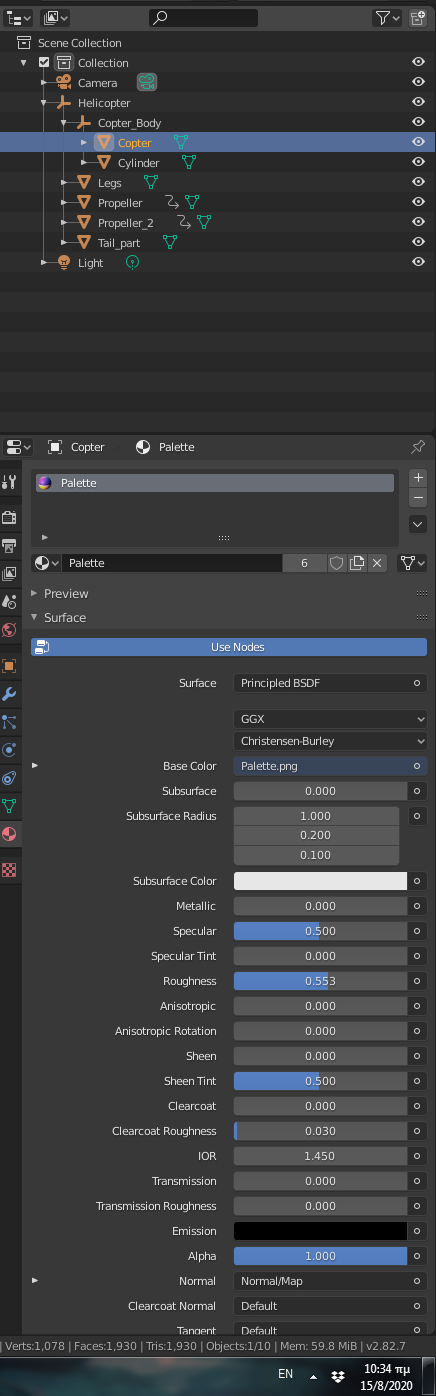
Now select the Texture Tab and then the Base Color option and select Image Texture.
现在选择“纹理”选项卡,然后选择“基色”选项,然后选择“图像纹理”。
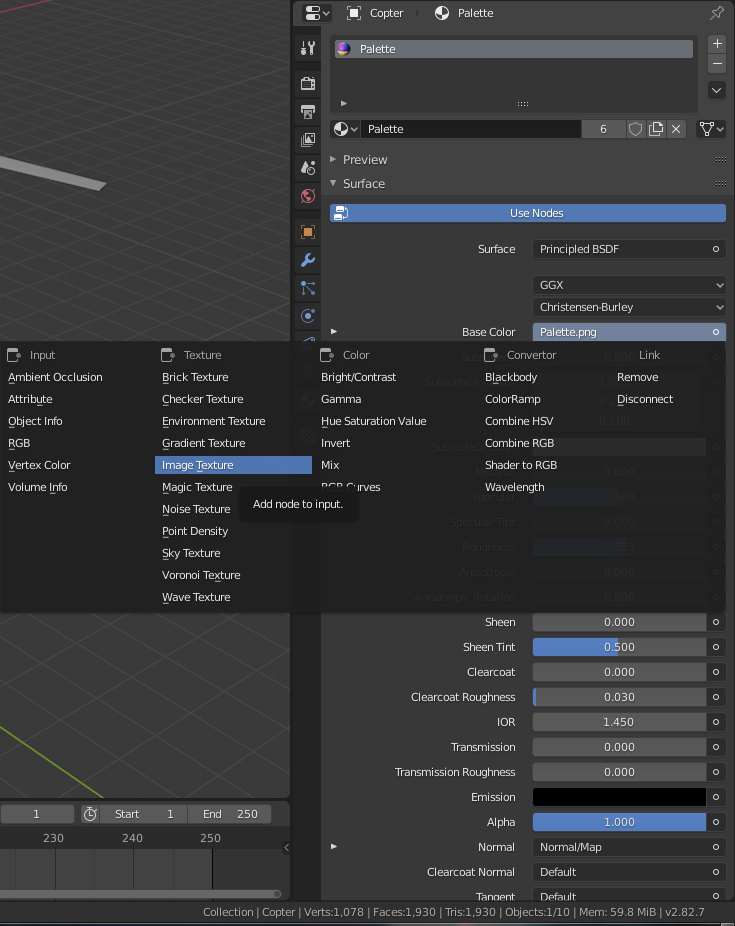
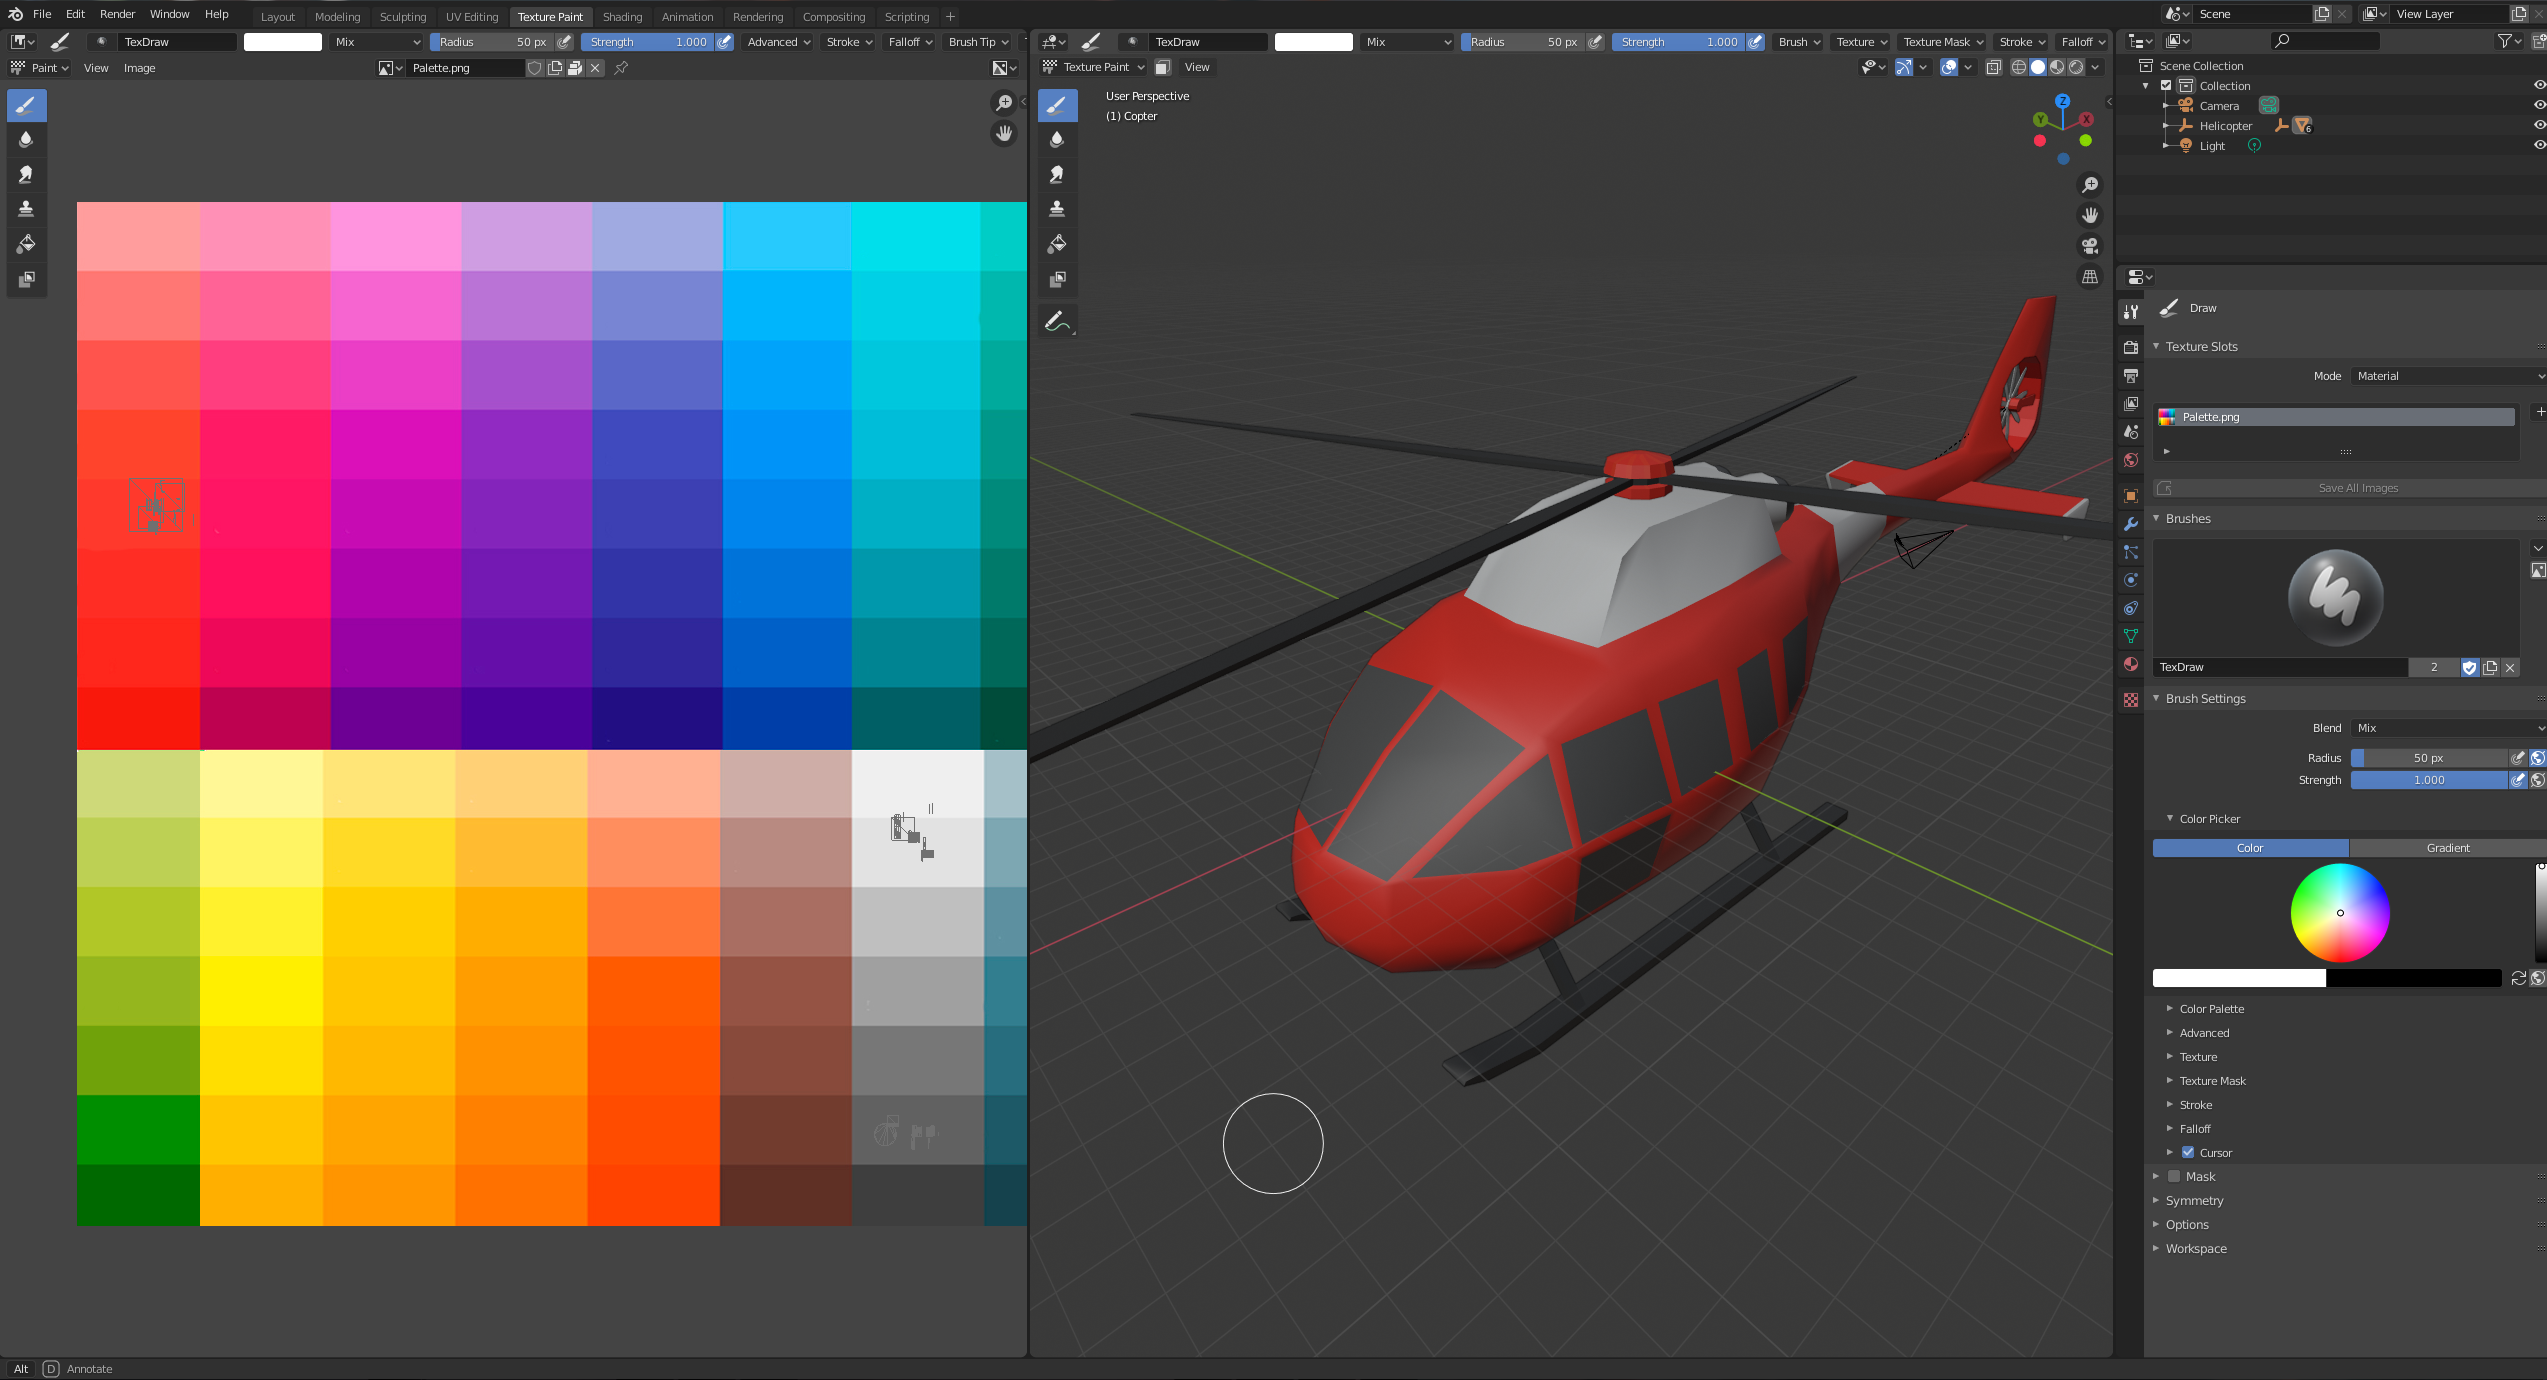
Then browse and find the texture text/Palette.png from the unziped folder and select it. At first you might not see any effect, but switch to Texture Paint tab from top and you should see this:
然后浏览并从解text/Palette.png的文件夹中找到纹理text/Palette.png并选择它。 首先,您可能看不到任何效果,但是从顶部切换到“ Texture Paint选项卡,您应该看到以下内容:
观看动画 (Viewing Animations)
In order to view the animation of the helicopter simply press the Space key on your keyboard and the rotor of the helicopter will start spinning.
为了查看直升机的动画,只需按键盘上的Space key ,直升机的旋翼就会开始旋转。
However before we move on to code we should take a note of the total frames of the animation, this will come in handy later on, so to view this switch to Animation tab from the top and select the Helicopter>Propeller node from the right panel, then the following will appear on the bottom animation timeline:
但是,在继续进行代码编写之前,我们应该记下动画的总帧数,这将在以后派上用场,因此要从顶部查看对“ Animation选项卡的切换,并从右侧面板中选择“ Helicopter>Propeller节点,则以下内容将出现在底部的动画时间轴上:

So we see here that the total frames of the animation is 360, keep a note of this as we will need it later on.
因此,我们在这里看到动画的总帧数为360 ,请注意这一点,稍后我们将需要它。
导出到.dae (Export to .dae)
In order for us to make use of this model we need to export it in a format that XCode can understand, this is the Collada format or .dae . From the top menu select File > Export > Collada (.dae), that should export two files the helicopter.dae and the Palette.png on your selected destination.
为了使我们能够使用此模型,我们需要将其导出为XCode可以理解的格式,即Collada格式或.dae 。 从顶部菜单中选择“文件”>“导出”>“ Collada(.dae)”,这应在您选择的目标位置上导出两个文件“ optering.dae”和“ Palette.png”。
导入到XCode (Import to XCode)
Now we need to import these files to XCode to make use of them.
现在,我们需要将这些文件导入XCode以使用它们。
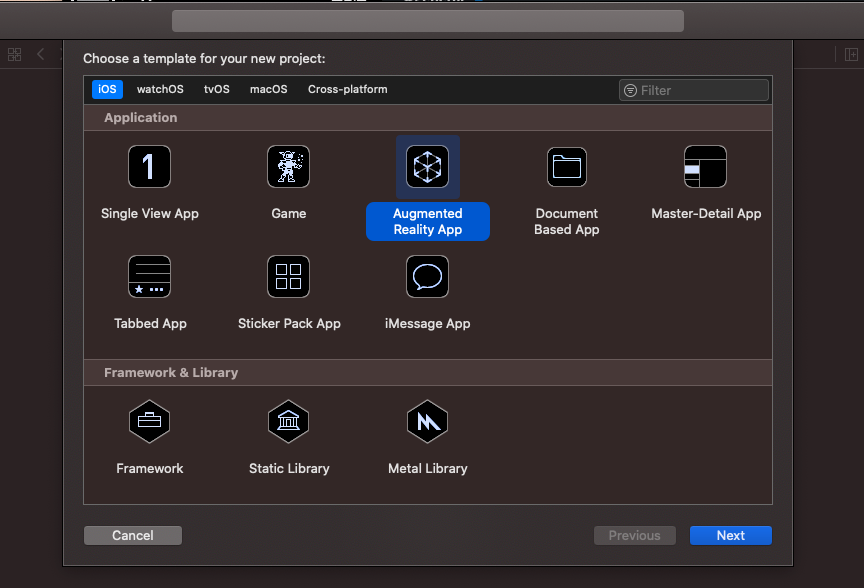
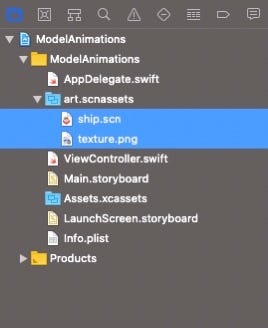
Create a new ARKit project
创建一个新的ARKit项目
Then proceed and delete the ship.scn and texture.png from the art.scnassets folder.
然后继续并从art.scnassets文件夹中删除ship.scn和texture.png。
Then drag and drop the exported files from blender into that folder.
然后将导出的文件从Blender拖放到该文件夹中。
Now if you select the helicopter.dae file from the left menu you should see something like this:
现在,如果您从左侧菜单中选择直升飞机.dae文件,您应该会看到类似以下内容:
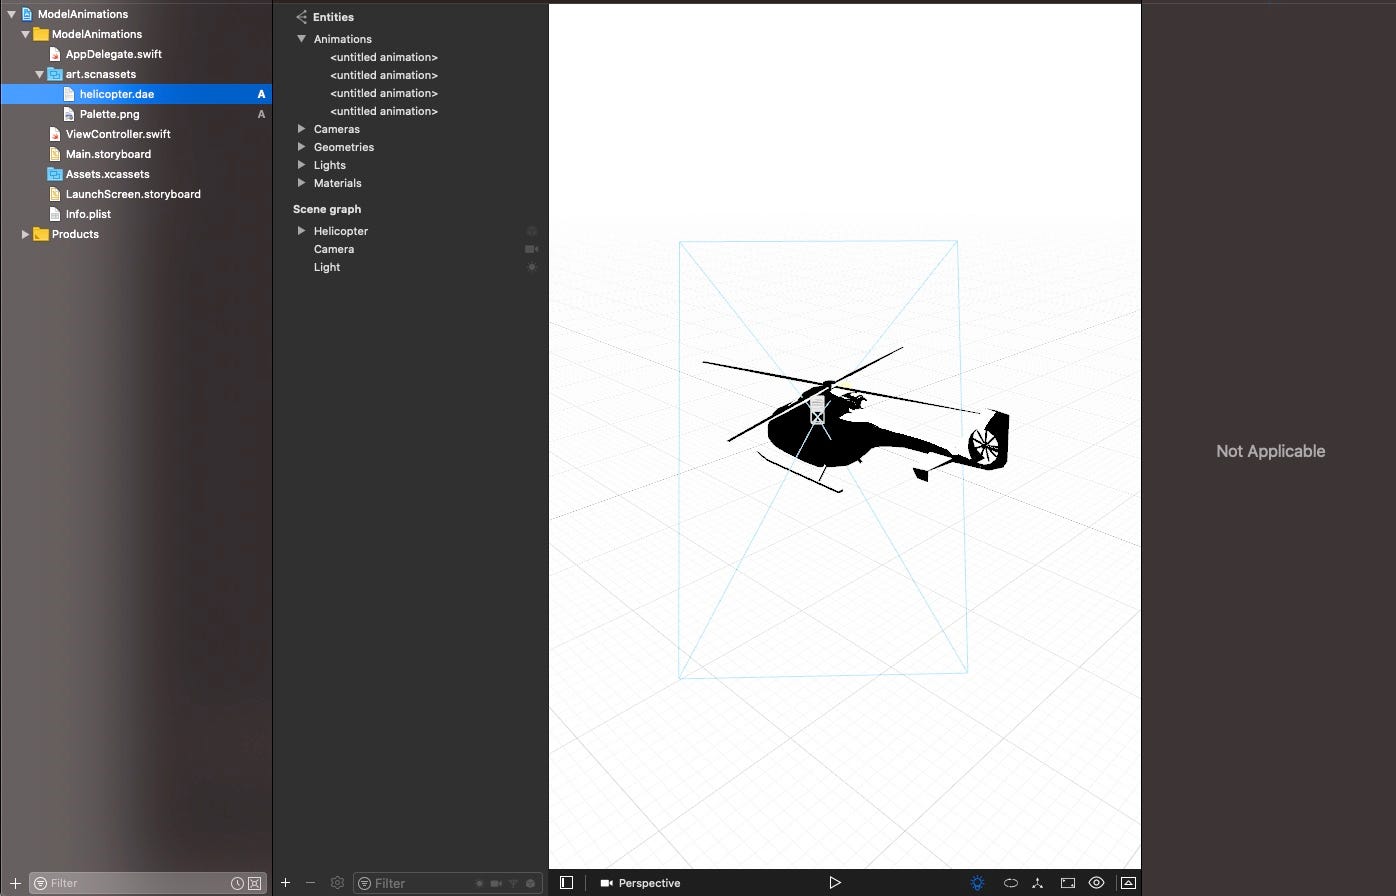
Now we need to convert that to .scn file and also do some minor fixes to make it look even better. Select the Editor XCode menu and select the option to conver to convert to scene kit format (.scn)
现在,我们需要将其转换为.scn文件,并进行一些小的修复以使其看起来更好。 选择“编辑器XCode”菜单,然后选择要转换为场景工具包格式(.scn)的选项
You should now see a new file (name it helicopter.scn). But it seems kinda dark, lets fix that, select the helicopter.scn file and then the Light node, switch to Attribute inspector on the right-side panel and select as a type: probe
现在,您应该看到一个新文件(将其命名为直升飞机.scn)。 但是似乎有点黑,请解决此问题,选择helicopter.scn文件,然后选择“光”节点,切换到右侧面板上的“属性”检查器,然后选择一种类型: probe
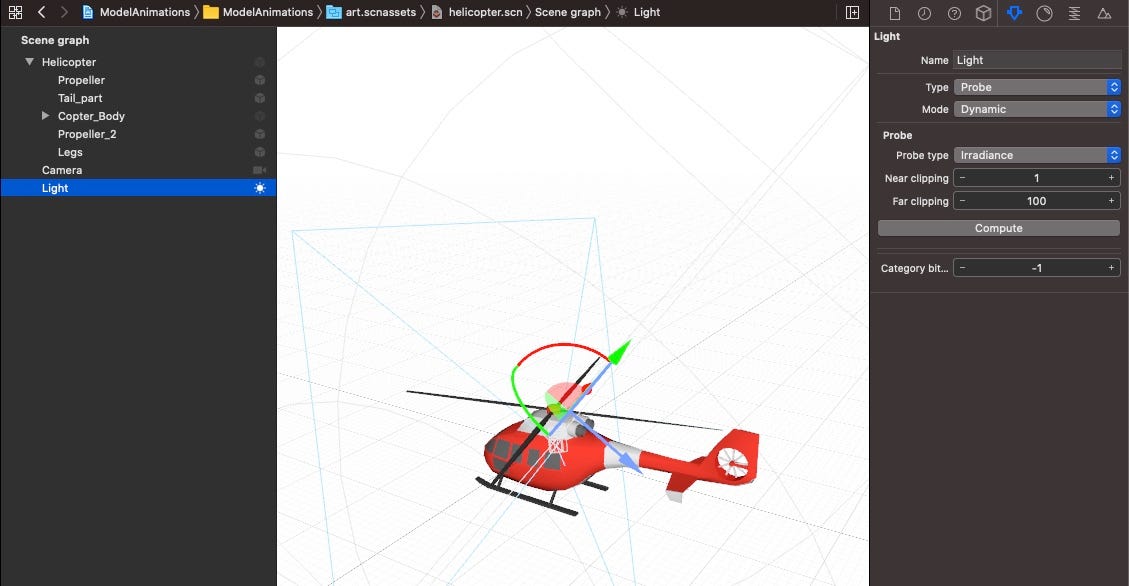
Looks good. If you want to preview the animation hit the Play button on the model preview area.
看起来挺好的。 如果要预览动画,请单击模型预览区域上的“播放”按钮。
从模型导出动画 (Export animations from Model)
In our root folder we add a helper class called Animations.swift, it looks like this:
在我们的根文件夹中,添加一个名为Animations.swift的帮助类,它看起来像这样:
//
//  Animations.swift
//

import Foundation
import SceneKit
import ARKit


class Animations {

    func timeRange(forStartingAtFrame start:Int, endingAtFrame end:Int, fps:Double = 30) -> (offset:TimeInterval, duration:TimeInterval) {
        let startTime   = self.time(atFrame: start, fps: fps) //TimeInterval(start) / fps
        let endTime     = self.time(atFrame: end, fps: fps) //TimeInterval(end) / fps
        return (offset:startTime, duration:endTime - startTime)
    }


    func time(atFrame frame:Int, fps:Double = 30) -> TimeInterval {
        return TimeInterval(frame) / fps
    }


    func animation(from full:SCNAnimation, startingAtFrame start:Int, endingAtFrame end:Int, fps:Double = 30) -> CAAnimation {
        let range = self.timeRange(forStartingAtFrame: start, endingAtFrame: end, fps: fps)
        let animation = CAAnimationGroup()
        let sub = full.copy() as! SCNAnimation
        sub.timeOffset = range.offset
        animation.animations = [CAAnimation(scnAnimation: sub)]
        animation.duration = range.duration
        return animation
    }
}
The above code will help us create animations with a specific range of AnimationFrames (our example here only uses 1–360, but there are other models with more than one animation baked in and stored in subsequent frames).
上面的代码将帮助我们创建具有特定范围的AnimationFrames的动画(我们的示例仅使用1–360,但是还有其他模型带有多个动画,这些动画嵌入并存储在后续帧中)。
In our ViewController.swift we add a single function called loadAnimations and it looks like this:
在ViewController.swift中,我们添加了一个名为loadAnimations函数,它看起来像这样:
func loadAnimations () {
        // Load the character in the idle animation
        let idleScene = SCNScene(named: "art.scnassets/helicopter.scn")!

        // This node will be parent of all the animation models
        let node = SCNNode()

        // Add all the child nodes to the parent node
        for child in idleScene.rootNode.childNodes {

            if (child.childNodes.count > 0) {
                for item in child.childNodes {
                    if item.animationKeys.count > 0 {
                        let animations = item.animationKeys
                        if let oldplayer = item.animationPlayer(forKey: animations.first!) {
                            // initially stop it
                            oldplayer.stop()
                            // make an animation for each animation group
                            let anims = Animations()
                            let idleAnim = anims.animation(from: oldplayer.animation, startingAtFrame: 1, endingAtFrame: 360)
                            item.addAnimationPlayer(SCNAnimationPlayer(animation: SCNAnimation(caAnimation: idleAnim)), forKey: "idle")
                            DispatchQueue.main.asyncAfter(deadline: .now()+2.0) {
                                if let idlePlayer:SCNAnimationPlayer = item.animationPlayer(forKey: "idle") {
                                    idlePlayer.animation.repeatCount = CGFloat(Float.greatestFiniteMagnitude)
                                    idlePlayer.animation.blendInDuration = TimeInterval(CGFloat(1))
                                    idlePlayer.animation.blendOutDuration = TimeInterval(CGFloat(0.5))

                                    let event = SCNAnimationEvent(keyTime: 1) { (animation, object, backwards) in
                                        print("animation ended")
                                        idlePlayer.stop()
                                    }
                                    idlePlayer.animation.animationEvents = [event]
                                    idlePlayer.play()
                                }
                            }
                        }
                    }
                }

            }
            node.addChildNode(child)
        }

        // Set up some properties
        node.position = SCNVector3(0, -1, -2)
        node.eulerAngles.y = 0
        node.scale = SCNVector3(0.025, 0.025, 0.025)

        // Add the node to the scene
        sceneView.scene.rootNode.addChildNode(node)
    }
Now let us break it down and see what this does. First of all lets list of all the things we need it to do:
现在让我们分解一下,看看它能做什么。 首先让我们列出我们需要做的所有事情:
- Find the animation and initially stop it 找到动画并开始将其停止
- Create a new animation based on specific animation frames (because some 3D models contain more than one animation in continuous frames) 根据特定的动画帧创建新动画(因为某些3D模型在连续帧中包含多个动画)
- After 2 seconds start the animation 2秒后开始播放动画
- Play the animation on a loop 循环播放动画
- Listen for an event when the animation has finished one loop 动画结束一个循环后侦听事件
So first of all we load the model scene and loop through its children nodes recursively.
因此,首先,我们加载模型场景并递归遍历其子节点。
// Load the character in the idle animation
        let idleScene = SCNScene(named: "art.scnassets/helicopter.scn")!

        // This node will be parent of all the animation models
        let node = SCNNode()

        // Add all the child nodes to the parent node
        for child in idleScene.rootNode.childNodes {

            if (child.childNodes.count > 0) {
                for item in child.childNodes {
                    if item.animationKeys.count > 0 {
                    }
                }
            }
        }
If one of them contains a non 0 count/length in animationKeys property we move on and fetch the SCNAnimationPlayer associated with the first animation id (returned by item.animationKeys.first)
如果其中一个在animationKeys属性中包含非0的计数/长度,我们继续前进并获取与第一个动画ID关联的SCNAnimationPlayer (由item.animationKeys.first返回)
if let oldplayer = item.animationPlayer(forKey: animations.first!) {
    // initially stop it
    oldplayer.stop()
    // make an animation for each animation group
    let anims = Animations()
    let idleAnim = anims.animation(from: oldplayer.animation, startingAtFrame: 1, endingAtFrame: 360)
    item.addAnimationPlayer(SCNAnimationPlayer(animation: SCNAnimation(caAnimation: idleAnim)), forKey: "idle")
 }
If the SCNAnimationPlayer that contains all of the animations exist, we move on and create one of our own with only a select set of AnimationFrames (1 to 360 which is the value we noted from Blender before).
如果存在包含所有动画的SCNAnimationPlayer ,则我们继续前进并创建自己的动画,其中仅包含一组选定的AnimationFrames(1到360,这是我们之前从Blender记录的值)。
Now that we have created our own SCNAnimationPlayer and we have stopped the baked in one, we have more control over the animation. So let us set it to start after two seconds.
现在,我们已经创建了自己的SCNAnimationPlayer并停止了烘焙,现在我们可以更好地控制动画了。 因此,让我们将其设置为在两秒钟后开始。
DispatchQueue.main.asyncAfter(deadline: .now()+2.0) {
      if let idlePlayer:SCNAnimationPlayer = item.animationPlayer(forKey: "idle") {
             idlePlayer.animation.repeatCount = CGFloat(Float.greatestFiniteMagnitude)
             idlePlayer.animation.blendInDuration = TimeInterval(CGFloat(1))
             idlePlayer.animation.blendOutDuration = TimeInterval(CGFloat(0.5))

             let event = SCNAnimationEvent(keyTime: 1) { (animation, object, backwards) in
                    print("animation ended")
                    idlePlayer.stop()
              }
              idlePlayer.animation.animationEvents = [event]
              idlePlayer.play()
       }
}
As you might notice we also set some extra properties like repeatCount, blendInDuration, blendOutDuration and animationEvents we do this to add more control to our animation by setting it to infinitely repeat, to more smoothly switch between animations (if we had more than one) and finally we set some listener when the animation completes (keyTime: 1 is 100% of animation played)
您可能会注意到,我们还设置了一些额外的属性,例如repeatCount, blendInDuration, blendOutDuration and animationEvents我们这样做是通过将动画设置为无限重复来增加对动画的更多控制,以便在动画(如果有多个动画)之间更平滑地切换。最后,当动画完成时,我们设置了一些侦听器(keyTime:1是播放的动画的100%)
最终结果! (The end result!)
有用的链接: (Useful links:)
https://developer.apple.com/documentation/scenekit/scnanimationplayer
https://developer.apple.com/documentation/scenekit/scnanimationplayer
https://developer.apple.com/documentation/scenekit/animation
https://developer.apple.com/documentation/scenekit/animation
https://developer.apple.com/documentation/scenekit/scnanimationevent
https://developer.apple.com/documentation/scenekit/scnanimationevent
https://developer.apple.com/documentation/scenekit/scnanimatable
https://developer.apple.com/documentation/scenekit/scnanimatable
请享用! (Enjoy!)
翻译自: https://medium.com/swlh/swift-3d-model-animations-in-arkit-demystified-6a191ce76409
arkit扫描3d模型


 301
301

 被折叠的 条评论
为什么被折叠?
被折叠的 条评论
为什么被折叠?
 到【灌水乐园】发言


