


第二章 cpp-empty-test:还是那个HelloWorld!
上一章我们讲到说曾经的HelloWorld演示更名为cpp-empty-test。
本章我们来分析一下这个cpp-empty-test。
执行程序,我们能够看到熟悉的HelloWorld程序:
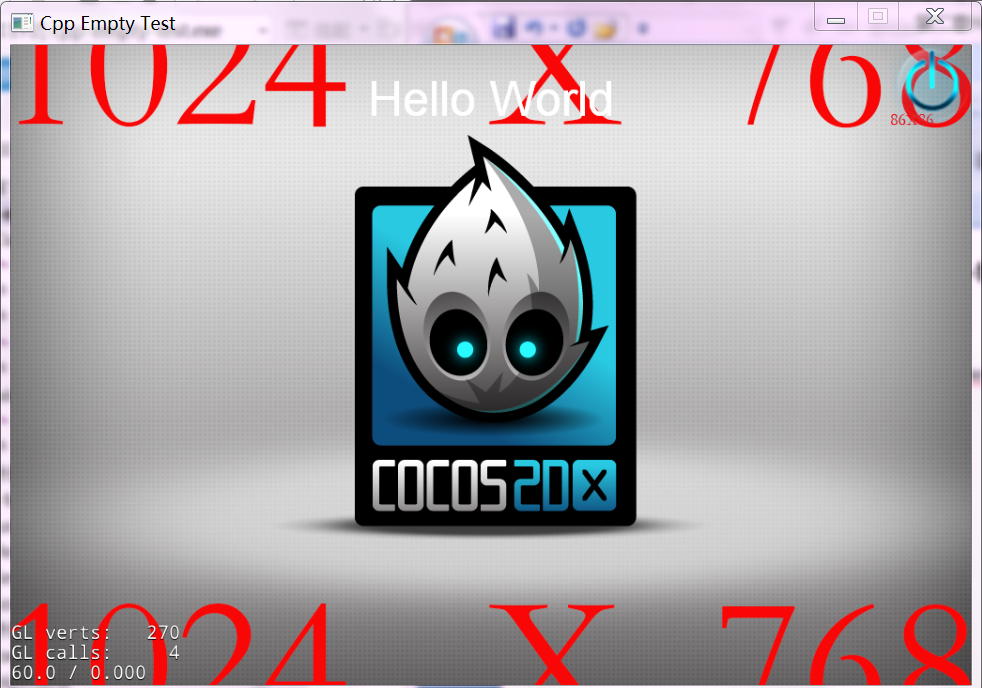
与之前cocos2d-x2.x版本号的HelloCpp看起来没太大区别,主要有三点:1。标题文字显示为Cpp Empty Test。
2,button由以下改到了上面。3,左下角的信息显示有所不同,曾经显示的是(1)批次(2)每帧的平均执行秒数(3)FPS数。如今改成了(1)OPENGL的顶点数量(2)OPENGL的批次(3)FPS数/每帧的平均执行秒数。
如今来详细看下project代码:

project的文件夹有两个
Classes:程序中的类。
AppDelegate.h/cpp:Cocos2d-x程序框架
AppMacros.h:所用到的宏,主要是设置分辩率及相应的资源文件夹 C
HelloWorldScene.h/cpp:场景显示层
win32:WIN32程序所涉及的主函数
main.cpp:winMain主函数
在WinMain函数中,仅仅有一个实例化程序并执行它的过程:
int APIENTRY _tWinMain(HINSTANCE hInstance,
                       HINSTANCE hPrevInstance,
                       LPTSTR    lpCmdLine,
                       int       nCmdShow)
{
    UNREFERENCED_PARAMETER(hPrevInstance);
    UNREFERENCED_PARAMETER(lpCmdLine);

    // 创建一个应用程序对象。
AppDelegate app; // 执行它。
return Application::getInstance()->run(); }
一切,都被封装到程序类AppDelegate中。这是一个基于Cocos2d-x的cocos2d::Application
类的派生类。它将程序框架封装为一个类,提供了统一的多平台上基本程序框架的实现。
AppDelegate.cpp:
#include "AppDelegate.h"

#include <vector>
#include <string>

#include "HelloWorldScene.h"
#include "AppMacros.h"

USING_NS_CC;
using namespace std;

AppDelegate::AppDelegate() {

}

AppDelegate::~AppDelegate()
{
}

//程序初始化函数
bool AppDelegate::applicationDidFinishLaunching() {
    // 取得设备
    auto director = Director::getInstance();
	// 取得OpenGL窗体
    auto glview = director->getOpenGLView();
    if(!glview) {
	    //假设为空,则创建以" Cpp Empty Test"为窗体标题的窗体。
        glview = GLView::create("Cpp Empty Test");
	    //设置设备使用的窗体。此句能够去掉。
director->setOpenGLView(glview); } //设置设备使用的窗体。 director->setOpenGLView(glview); // 假设是WP8平台,设置分辩率 #if (CC_TARGET_PLATFORM == CC_PLATFORM_WP8) // 在WP8上跑DX11。使用ResolutionPolicy::NO_BORDER模式设置分辩率会有一个BUG,这里改为ResolutionPolicy::SHOW_ALL模式。 glview->setDesignResolutionSize(designResolutionSize.width, designResolutionSize.height, ResolutionPolicy::SHOW_ALL); #else glview->setDesignResolutionSize(designResolutionSize.width, designResolutionSize.height, ResolutionPolicy::NO_BORDER); #endif //取得了视窗的大小 Size frameSize = glview->getFrameSize(); vector<string> searchPath; //依据视窗大小与分辩率的大小选择对应的资源文件夹。 //ipadhd if (frameSize.height > mediumResource.size.height) { searchPath.push_back(largeResource.directory); director->setContentScaleFactor(MIN(largeResource.size.height/designResolutionSize.height, largeResource.size.width/designResolutionSize.width)); } //ipad else if (frameSize.height > smallResource.size.height) { searchPath.push_back(mediumResource.directory); director->setContentScaleFactor(MIN(mediumResource.size.height/designResolutionSize.height, mediumResource.size.width/designResolutionSize.width)); } //iphone else { searchPath.push_back(smallResource.directory); director->setContentScaleFactor(MIN(smallResource.size.height/designResolutionSize.height, smallResource.size.width/designResolutionSize.width)); } // 设置资源文件夹 FileUtils::getInstance()->setSearchPaths(searchPath); // 打开FPS显示 director->setDisplayStats(true); // 设置每秒60帧 director->setAnimationInterval(1.0 / 60); // 创建HelloWorld场景 auto scene = HelloWorld::scene(); // 执行场景 director->runWithScene(scene); return true; } // 当收到电话时,游戏转入后台服务,响应这句 void AppDelegate::applicationDidEnterBackground() { Director::getInstance()->stopAnimation(); // 假设使用声音,以下能够用这句代码暂停 // SimpleAudioEngine::sharedEngine()->pauseBackgroundMusic(); } // 当电话完毕。选择恢复游戏时,响应这句 void AppDelegate::applicationWillEnterForeground() { Director::getInstance()->startAnimation(); // 假设使用声音。以下能够用这句代码恢复 // SimpleAudioEngine::sharedEngine()->resumeBackgroundMusic(); }
OK,代码跟之前版本号区别不大,只是这里要注意,3.0使用了auto自己主动类型变量。这个是C++11的新标准,比方原来要指定变量是int还是float,如今能够用auto,在赋值的时候,编译器自己主动识别类型。
以下我们来看一下HelloWorld场景,它是一个基于cocos2d::Layer的派生类。cocos2d::Layer是什么?在这里,我想打个例如来建立一些主要的认知,例如说我们生活在地球上,地球属于宇宙内的一部分。从Cocos2d-x的框架体系来看。我们是Sprite精灵,地球是Layer,而宇宙是Scene。
一个程序要想表现出精彩的世界,要先建立一个宇宙Scene,然后添加地球,月球。太阳等Layer,然后在这些Layer上添加对应的物体。
而我们站在地球上,地球运动,我们也会跟着一起运动。
OK,如今我们来看一下怎样创建Scene和Layer:
HelloWorldScene.h:
#ifndef __HELLOWORLD_SCENE_H__
#define __HELLOWORLD_SCENE_H__

#include "cocos2d.h"

class HelloWorld : public cocos2d::Layer
{
public:
    // 初始化
    virtual bool init();

    // 静态函数创建Scene
    static cocos2d::Scene* scene();

    // 响应按钮退出程序
    void menuCloseCallback(Ref* sender);

    // 添加一个静态的create函数来创建实例。
    CREATE_FUNC(HelloWorld);
};

#endif // __HELLOWORLD_SCENE_H__

	HelloWorldScene.cpp:

#include "HelloWorldScene.h"
#include "AppMacros.h"
//使用Cocos2d-x命名空间
USING_NS_CC;
//静态函数创建场景
Scene* HelloWorld::scene()
{
    // 创建一个Scene。即宇宙
    auto scene = Scene::create();

    // 创建一个Layer,即地球
    HelloWorld *layer = HelloWorld::create();

    // 将地球放到宇宙中
    scene->addChild(layer);

    return scene;
}

// 初始化
bool HelloWorld::init()
{
    //先进行初始化
    if ( !Layer::init() )
    {
        return false;
    }
    //取得分辩率的大小及原点坐标
    auto visibleSize = Director::getInstance()->getVisibleSize();
    auto origin = Director::getInstance()->getVisibleOrigin();

    // 创建一个菜单项。它由两张图片来表现普通状态和按下状态,设置按下时调用menuCloseCallback函数响应关闭
    auto closeItem = MenuItemImage::create(
                                        "CloseNormal.png",
                                        "CloseSelected.png",
                                        CC_CALLBACK_1(HelloWorld::menuCloseCallback,this));

    closeItem->setPosition(origin + Point(visibleSize) - Point(closeItem->getContentSize() / 2));

    //由菜单项创建菜单.
    auto menu = Menu::create(closeItem, NULL);
    menu->setPosition(Point::ZERO);
    this->addChild(menu, 1);

    //创建一个文字标签
    auto label = LabelTTF::create("Hello World", "Arial", TITLE_FONT_SIZE);

    // 设置居中显示
    label->setPosition(Point(origin.x + visibleSize.width/2,
                            origin.y + visibleSize.height - label->getContentSize().height));

    // 将文字标签放到当前Layer中。
    this->addChild(label, 1);

    // 添加一个图片精灵
    auto sprite = Sprite::create("HelloWorld.png");

    // 设置居中显示
    sprite->setPosition((ccp(visibleSize.width/2 + origin.x, visibleSize.height/2 + origin.y));
    //将Sprite放到当前Layer中。
this->addChild(sprite); return true; } //响应菜单按下时的事件处理 void HelloWorld::menuCloseCallback(Ref* sender) { //假设是WP8平台。弹出消息框提示一下。
#if (CC_TARGET_PLATFORM == CC_PLATFORM_WP8) || (CC_TARGET_PLATFORM == CC_PLATFORM_WINRT) MessageBox("You pressed the close button. Windows Store Apps do not implement a close button.","Alert"); return; #endif //否则,终止程序。
Director::getInstance()->end(); //退出程序 #if (CC_TARGET_PLATFORM == CC_PLATFORM_IOS) exit(0); #endif }
Layer中添加了精灵,button,文字等表现物。有了这些表现物,一个Layer才有价值。
OK,简单的程序总是讲的快。最后希望大家记住这样宇宙,地球,你。我,他。


 293
293

 被折叠的 条评论
为什么被折叠?
被折叠的 条评论
为什么被折叠?
 到【灌水乐园】发言


