


这是关于 Randlanet 从环境配置到C++推理部署 的博客,原作者的代码是基于tensorflow1.x的,但是现在的显卡基本上都开始是30系列了,只支持cuda11.1以上的开发环境。本系列博客是基于tensorflow-2.6.0 + 3050显卡开发的,在win和ubuntu都会有环境配置到训练自己数据集的教程,并且会有如何将Randlanet加入到自己软件的教程
本篇博客是Ubuntu下的环境配置和训练Semantic3D
环境配置这里之前折腾了不少时间,主要是是30显卡的cuda要求cuda11.1以上 和 TF版本要一一对应的问题,并且要将tf1的代码改成tf2的代码,
再者 编译 最近邻模块cpp的部分折腾了一会,没有直接用原来的 sh compile_op.sh 编译 (直接用sh编译会少个文件)
1.开发环境
python 3.8.13
cuda 11.2
cudnn 8.1.0
tensorflow -2.6.0
ubuntu 20.04 (18.04也可以)
3050显卡(3090也测试过了)
2.拉取代码和数据集下载
用github 代理 网址:https://ghproxy.com/ 拉取,比较快
git clone https://ghproxy.com/https://github.com/QingyongHu/RandLA-Net.git
下载地址:Semantic3D
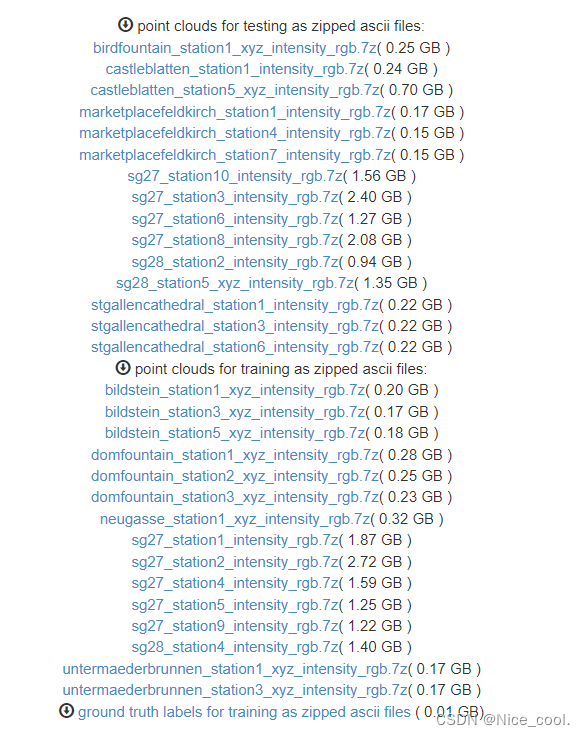
将这些数据都下载下来,放在工程的 /data/semantic3d/original_data 里面(要自己创建文件夹)
3.修改代码
打开 代码里的helper_requirements.txt,改成以下内容
numpy==1.19.5
matplotlib==3.6.0
h5py==3.1.0
cython==0.29.15
open3d-python==0.3.0
pandas==1.1.5
scikit-learn==0.21.3
scipy==1.5.4
PyYAML==6.0
打开 main_Semantic3D.py,RandLANet.py,tester_Semantic3D.py
把 import tensorflow as tf 改成
import tensorflow.compat.v1 as tf
tf.disable_v2_behavior()
打开 helper_tool.py
把 from open3d import linux as open3d 改成
import open3d as open3d
把 import nearest_neighbors.lib.python.nearest_neighbors as nearest_neighbors 改成
import nearest_neighbors.nearest_neighbors as nearest_neighbors
打开 main_Semantic3D.py
把 self.path = ‘/data/semantic3d’ 改成 数据存放的绝对路径
self.path = '/root/RandLA-Net/data/semantic3d'
打开 data_prepare_semantic3d.py
把 dataset_path = ‘/data/semantic3d/original_data’ 改成 数据存放的绝对路径
self.path = '/root/RandLA-Net/data/semantic3d/original_data'
4.安装Cuda&cudnn
这里因为Tensorflow的版本是严格一一对应的(除非自己编译),然而在 conda 里面没有 对应的cudatoolkit11.2 和 cudnn8.1.0 ,所以要去英伟达的官网下载,然后将cuda11.2的路径 添加进 .bashrc文件里面
4.1. 方法一 官网下载
4.2. 方法二 conda install (先创建虚拟环境)
conda install cudatoolkit=11.2
conda install cudnn=8.1
5.开始配置 anaconda 的环境
打开终端,在代码目录下
conda create -n randlanet python==3.8.13
conda activate randlanet
pip install tensorflow-gpu==2.6 -i https://pypi.tuna.tsinghua.edu.cn/simple --timeout=120
pip install cython==0.29.15 -i https://pypi.tuna.tsinghua.edu.cn/simple --timeout=120
pip install -r helper_requirements.txt -i https://pypi.tuna.tsinghua.edu.cn/simple --timeout=120
pip install open3d -i https://pypi.tuna.tsinghua.edu.cn/simple --timeout=120
pip install protobuf==3.20.1 -i https://pypi.tuna.tsinghua.edu.cn/simple --timeout=120
pip install keras==2.6 -i https://pypi.tuna.tsinghua.edu.cn/simple --timeout=120
测试 gpu 是否可用,返回True则继续
python
import tensorflow as tf
tf.test.is_gpu_available()
6.编译
打开终端 进入 conda 的 randlanet 环境下
cd utils/cpp_wrappers/cpp_subsampling
执行命令
python setup.py build_ext --inplace
生成以下文件
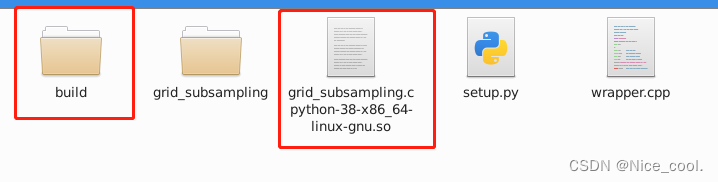
cd nearest_neighbors
执行命令
python setup.py build_ext --inplace
生成以下文件

在 utils\nearest_neighbors 文件夹下有个 test.py,打开test.py
把 import lib.python.nearest_neighbors as nearest_neighbors 改成
import nearest_neighbors as nearest_neighbors
运行代码
import numpy as np
import nearest_neighbors as nearest_neighbors
import time

batch_size = 16
num_points = 81920
K = 16
pc = np.random.rand(batch_size, num_points, 3).astype(np.float32)

# nearest neighbours
start = time.time()
neigh_idx = nearest_neighbors.knn_batch(pc, pc, K, omp=True)
print(neigh_idx)
print(time.time() - start)
出现
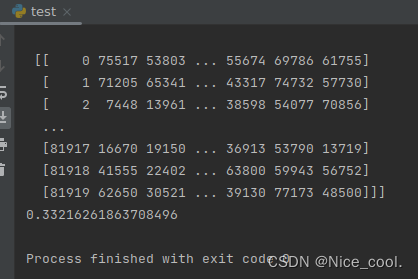
则编译成功
7.开始训练
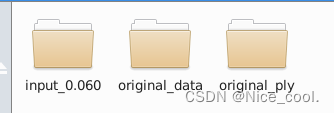
运行 data_prepare_semantic3d.py 进行数据预处理
python data_prepare_semantic3d.py
训练
python main_Semantic3D.py --mode train --gpu 0
推理
python main_Semantic3D.py --mode test --gpu 0
8.训练结果可视化
这里我没有上传到官网,而是将生成的 label 文件和 源文件拼接成 las ,
然后用 cloudcompare 打开 ,选择 scalar filed 显示 ,直观的观看结果
pip install laspy
可直接运行代码进行拼接 ,记得 修改 输入和输出的 文件路径
import numpy as np
import laspy
import os

ascii_files = {
    "MarketplaceFeldkirch_Station4_rgb_intensity-reduced.txt": "marketsquarefeldkirch4-reduced",
    "StGallenCathedral_station6_rgb_intensity-reduced.txt": "stgallencathedral6-reduced",
    "sg27_station10_rgb_intensity-reduced.txt": "sg27_10-reduced",
    "sg28_Station2_rgb_intensity-reduced.txt": "sg28_2-reduced"
}
# 原始点云文件
test_file_dir = r"/root/RandLA-Net/data/original_data"
# 测试结果labels文件
test_label_dir = r"/root/RandLA-Net/data/test/Log_2023-02-13_01-30-30/predictions"
# 结果存放位置
stack_file_dir = r"/root/RandLA-Net/data/test/Log_2023-02-13_01-30-30/probs"

for txt_file_name in ascii_files:
    txt_file = os.path.join(test_file_dir, txt_file_name)
    test_label = os.path.join(test_label_dir, ascii_files[txt_file_name] + ".labels")
    stack_file = os.path.join(stack_file_dir, ascii_files[txt_file_name] + ".las")
    point_cloud = np.loadtxt(txt_file)
    print(point_cloud.shape)
    label = np.loadtxt(test_label)
    print(label.shape)

    data_all = np.hstack([point_cloud, label.reshape(-1, 1)])

    las = laspy.create(file_version="1.2", point_format=3)
    las.x = data_all[:, 0]
    las.y = data_all[:, 1]
    las.z = data_all[:, 2]
    las.red = data_all[:, 4]
    las.green = data_all[:, 5]
    las.blue = data_all[:, 6]

    las.raw_classification = data_all[:, -1]
    las.write(stack_file)


 1163
1163


 被折叠的 条评论
为什么被折叠?
被折叠的 条评论
为什么被折叠?
 到【灌水乐园】发言


