# https://www.pysimplegui.org/en/latest/#jump-start
import PySimpleGUI as sg
import cv2
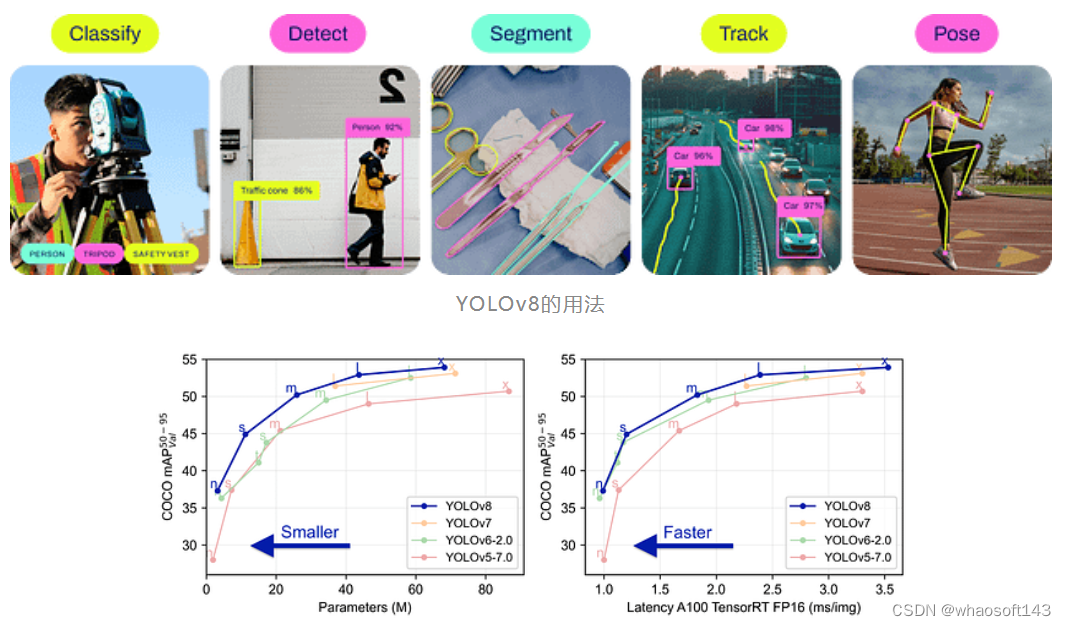
# https://docs.ultralytics.com/modes/track/#python-examples
from ultralytics import YOLO
# Create Layouy of the GUI
layout = [
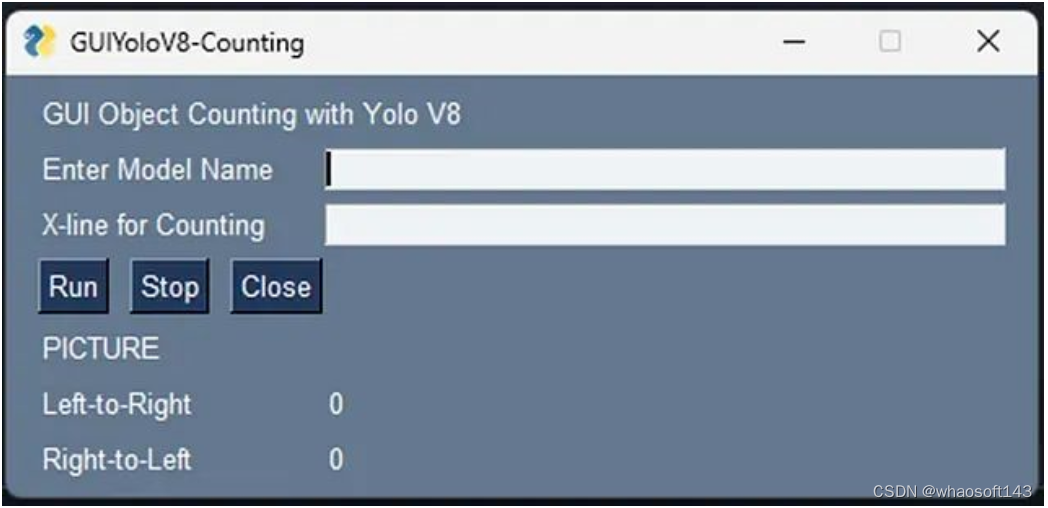
[sg.Text('GUI Object Counting with Yolo V8')],
[sg.Text('Enter Model Name', size= (15)), sg.InputText(key='model_name')],
[sg.Text('X-line for Counting', size= (15)), sg.InputText(key= 'line_position')],
[sg.Button('Run'), sg.Button('Stop'), sg.Button('Close')],
[sg.Image(filename='', key='image')],
[sg.Text('Right-to-Left', size= (15), key='out1'), sg.Text("0", key='right-to-left')],
[sg.Text('Left-to-Right', size= (15), key='out2'), sg.Text("0", key='left-to-right')]
]
# Create the Window
window = sg.Window('GUIYoloV8-Counting', layout)
run_model, verbose = False, False
# Event Loop to process "events"
while True:
event, values = window.read(timeout=0)
# When press Run
if event == 'Run' :
# Load the YOLOv8 model
model = YOLO(values['model_name'])
# Counting config
line_position = 50
text_size = 30
text_x_position = 50
text_y_position = 0
# Open the camera
cap = cv2.VideoCapture(0)
# Get Camera Parameter
width = cap.get(cv2.CAP_PROP_FRAME_WIDTH)
height = cap.get(cv2.CAP_PROP_FRAME_HEIGHT)
# Counting prep
x_line= line_position*width/100
pt1 = (int(x_line), 0)
pt2 = (int(x_line), int(height))
counting_buffer = {}
counting_result = {'left-to-right' : 0, 'right-to-left' : 0}
# Run Signal
run_model = True
# When close window or press Close
elif event in ('Stop', sg.WIN_CLOSED, 'Close'):
if run_model :
run_model = False # Stop running
cap.release() # Release video
if event != sg.WIN_CLOSED : window['image'].update(filename='') # Destroy picture
# When close window or press Close
if event in (sg.WIN_CLOSED, 'Close'): break
# Run Model
if run_model :
# Read a frame from the video
success, frame = cap.read()
if success:
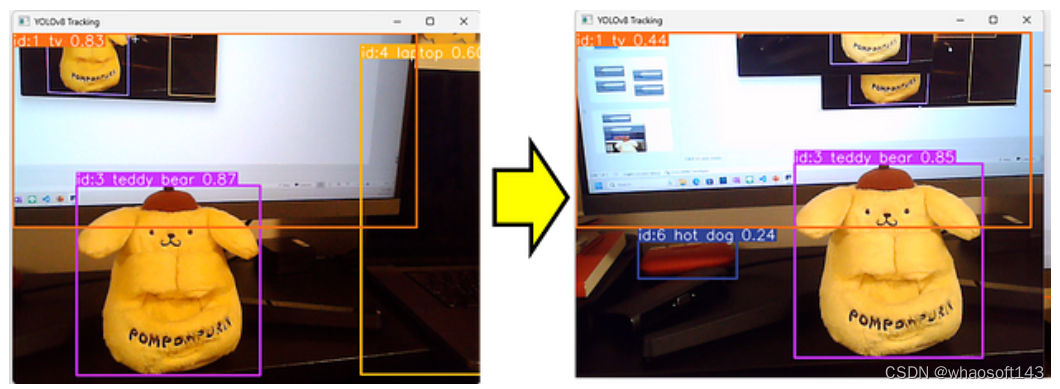
# Run YOLOv8 tracking on the frame, persisting tracks between frames
results = model.track(frame
, persist=True
, verbose=False
)
# Visualize the results on the frame
annotated_frame = results[0].plot()
# Get Data for counting
result = results[0].cpu().boxes
detect_id = result.id.tolist() if result.id != None else []
detect_xyxy = result.xyxy.tolist() if result.xyxy != None else []
frame_counting_buffer = dict(zip(detect_id, detect_xyxy))
# Process
for i in frame_counting_buffer :
# Prep count buffer
counting_buffer[i] = counting_buffer.get(i,[])
if len(counting_buffer[i]) >= 2 : counting_buffer[i] = counting_buffer[i][-1:]
# Append avg x axis to buffer
avg_x = (frame_counting_buffer[i][0] + frame_counting_buffer[i][2])/2
counting_buffer[i].append(avg_x)
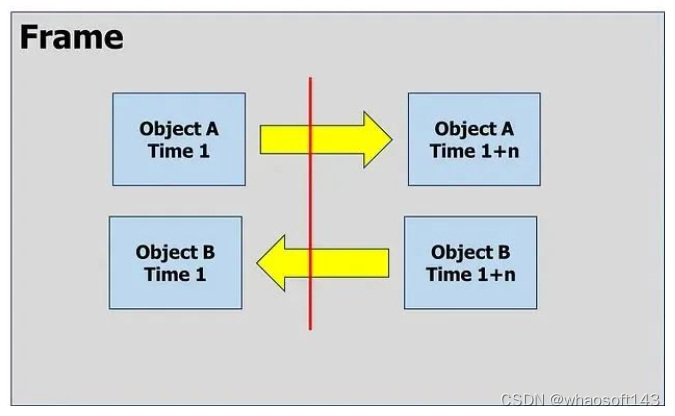
# Count logic
if len(counting_buffer[i]) >= 2 :
if (counting_buffer[i][0] > x_line) & (counting_buffer[i][1] < x_line) :
counting_result['right-to-left'] += 1
elif (counting_buffer[i][0] < x_line) & (counting_buffer[i][1] > x_line) :
counting_result['left-to-right'] += 1
# Create Line
cv2.line(annotated_frame, pt1= pt1, pt2= pt2 , color= (0,0,255), thickness= 2)
# Put Counting to picture
text_position = text_y_position
for i in counting_result :
text_position += text_size
info_text = f"{i} : {counting_result[i]}"
annotated_frame = cv2.putText( annotated_frame
, info_text
, (int(width*text_x_position/100)
, text_position)
, cv2.FONT_HERSHEY_SIMPLEX
, 1
, (0,0,255)
, 1
, cv2.LINE_AA)
# Show Image
imgbytes = cv2.imencode('.png', annotated_frame)[1].tobytes()
window['image'].update(data=imgbytes)
window['right-to-left'].update(str(counting_result['right-to-left']))
window['left-to-right'].update(str(counting_result['left-to-right']))
else:
# Break the loop if not read
cap.release()
run_model = False
# Close window
window.close()
- 1.
- 2.
- 3.
- 4.
- 5.
- 6.
- 7.
- 8.
- 9.
- 10.
- 11.
- 12.
- 13.
- 14.
- 15.
- 16.
- 17.
- 18.
- 19.
- 20.
- 21.
- 22.
- 23.
- 24.
- 25.
- 26.
- 27.
- 28.
- 29.
- 30.
- 31.
- 32.
- 33.
- 34.
- 35.
- 36.
- 37.
- 38.
- 39.
- 40.
- 41.
- 42.
- 43.
- 44.
- 45.
- 46.
- 47.
- 48.
- 49.
- 50.
- 51.
- 52.
- 53.
- 54.
- 55.
- 56.
- 57.
- 58.
- 59.
- 60.
- 61.
- 62.
- 63.
- 64.
- 65.
- 66.
- 67.
- 68.
- 69.
- 70.
- 71.
- 72.
- 73.
- 74.
- 75.
- 76.
- 77.
- 78.
- 79.
- 80.
- 81.
- 82.
- 83.
- 84.
- 85.
- 86.
- 87.
- 88.
- 89.
- 90.
- 91.
- 92.
- 93.
- 94.
- 95.
- 96.
- 97.
- 98.
- 99.
- 100.
- 101.
- 102.
- 103.
- 104.
- 105.
- 106.
- 107.
- 108.
- 109.
- 110.
- 111.
- 112.
- 113.
- 114.


 432
432

 被折叠的 条评论
为什么被折叠?
被折叠的 条评论
为什么被折叠?
 到【灌水乐园】发言


