


Input System
直接获取设备状态
    Keyboard keyboard;
    Mouse mouse;
    Gamepad gamepad;
    private void Start()
    {
        keyboard = Keyboard.current;    //获取键盘
        keyboard.onTextInput += (c) =>  { if (c == 'a') { print("A键按下"); } };   //键盘的事件绑定 按住会一直触发
        mouse = Mouse.current;          //获取鼠标
        gamepad = Gamepad.current;      //获取手柄
    }
    int num = 0;
    private void Update()
    {
        if (keyboard != null)
        {
            if (keyboard.spaceKey.wasPressedThisFrame) { num = 0; }       //按键按下
            if (keyboard.spaceKey.isPressed) { num += 1; }               //按键按住
            if (keyboard.spaceKey.wasReleasedThisFrame) { print(num); }  //按键弹起
        }
        //mouse.position.ReadValue();  鼠标当前的坐标
        //mouse.delta.ReadValue();     两帧之间的位移
        //mouse.sceoll.ReadValue();    鼠标滚轮坐标
        //未找到鼠标的事件绑定 可以通过inputAction绑定
    }
嵌入式操作(Using Embedded Actions)
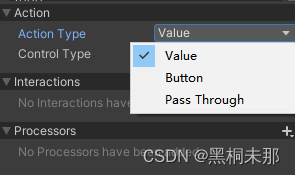

Value: 用于状态连续更改是输入 如果有多个设备绑定这个Action,只会发送其中一个设备的输入
Button: 用于每次按下时触发的Action (只会返回ture和false两种状态???未验证)
Pass Through: 同Value 但多个设备绑定(如上图 在同一个Action上绑定两个按钮 按下一个会触发两次) 会发送所有的设备的输入
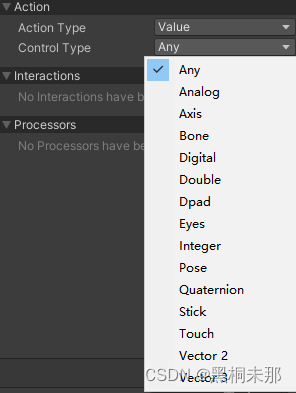
选择对应的类型 相当于筛选输入设备 例如:选择Vector2后 绑定设备时就绑定不了键盘 因为键盘输入返回不了Vector2的值
	[Header("Binding")]
    public InputAction move
    private void OnEnable()
    {
        move.Enable();   //启用
        //给InputAction添加监听事件
        move.started += (obj) =>{ print("started"); };
        move.performed += (obj) =>{ print("performed"); };
        move.canceled += (obj) =>{print("canceled"); };
    }
       private void OnDisable()
    {
        move.Disable();   //关闭
    }
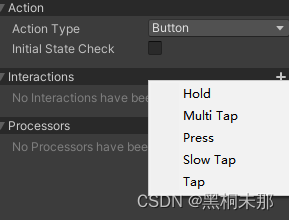
Hold: 长按 按下是触发started 按住时间大于hold time时触发 performed 松开触发canceled
Press Point:按钮对应的浮点值 0表示未按 1表示按下 当大于设置的这个值后则认为按钮按下
Tap: 轻按 按下触发started 松开时如果时间小于Max Tap Duration 触发performed 否则触发canceled
SlowTap: 长按并松开 按下触发started 松开时如果时间大于Max Tap Duration触发performed 否则触发 canceled
MultiTap: 连击 Tap Count 点击次数 Max Tap Spacing 每次点击的间隔 Max Tap Duration 每次点击的持续时间
Press: 按下 Press Only(默认状态) 按下时触发started和performed 松开是触发canceled | Release Only 按下时出发started 松开时出发 performed和canceled | Press And Release 按下的时候触发 started和performed 松开时再次触发performed和canceled
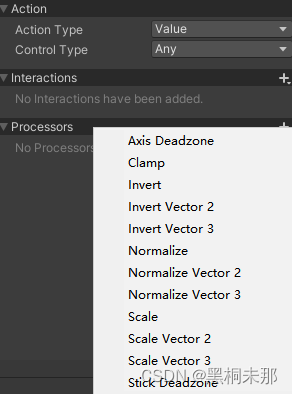
对设备的返回值进行预处理
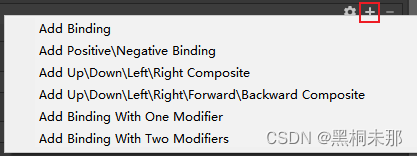
Add Binding: 单按键绑定
Add Positive \ Negative Binding: 添加 1D 轴组合 返回 -1 ~ 1 之间的一个值
Add Up \ Down \ Left \ Right Composite: 添加 2D 向量组合 返回Vector2
Add Up \ Down \ Left \ Right \ Forward \ Backward Composite: 添加 3D 向量组合 返回Vector3
Add Button With One Modifier Composite: 一个复合按钮(Ctrl + C、Ctrl + V)
Add Button With Two Modifier Composite: 两个的按钮(比如 Ctrl+ K + U)
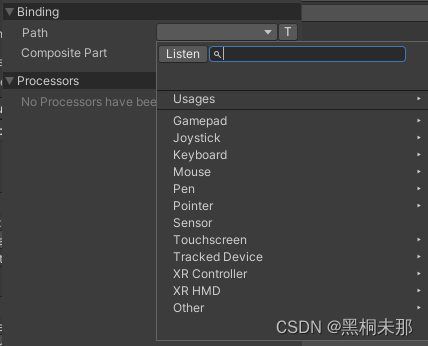
创建绑定后 为每个按键绑定输入设备
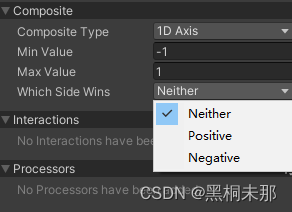
Neither: 返回最大和最小的中间值
Positive: 正面优先 返回最大值
Negative: 负面优先 返回最小值
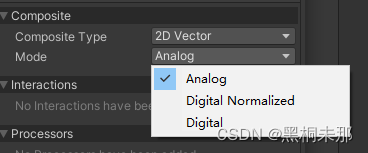
Analog: 将按钮Control的按压值原样进行组合
Digital: 根据按钮是否被按下转化为0或1再进行组合
Digital Normalized: 同Digital,组合后的向量会被归一化
例子:以手柄的遥感为例 旋转遥感 第一个模式返回的值范围为([-1,1],[-1,1]) 第二个模式只会返回(-1|0|1,-1|0|1) 第三个模式会返回(-1|0|1|0.7|-0.7,-1|0|1}0.7|-0.7)
动作资产(Using Actions Asset)

自定义控制方案 选择不同的方案 Actions窗口会自动过滤非方案中的设备
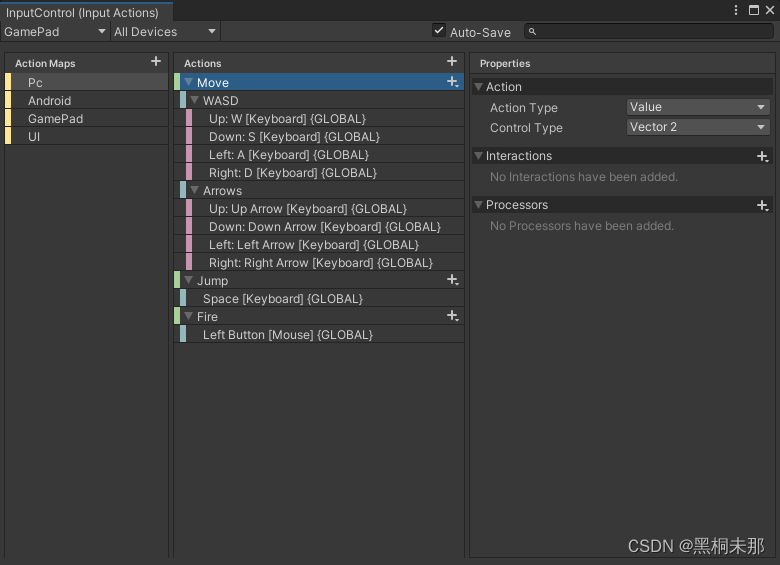
单个资产可以添加多个Action Map 可以根据需要对Actions集合进行批量禁用或启用 比如:UI情景中WASD是上下选择 游戏情景中WASD是前后移动 可以通过通过启用禁用PC UI这两个Maps实现
使用方法1
	public InputActionAsset inputActions;  //资产这里通过inspector面板绑定
    private InputActionMap PcMap;          //声明ActionMap
    private InputAction Pc_Move;		   //声明Action
    ....
    private void Awake()
    {
        PcMap = inputActions.FindActionMap("PC");

        Pc_Move = PcMap.FindAction("Move");
        Pc_Jump = PcMap.FindAction("Jump");
        Pc_Fire = PcMap.FindAction("Fire");

        Pc_Move.performed += Move;
        Pc_Jump.performed += Jump;
        Pc_Fire.performed += Fire;

		PcMap.Enable();
    }
     private void Move(InputAction.CallbackContext obj)
    {
        print("Move" + "___" + obj.control.name);
    }
使用方法2
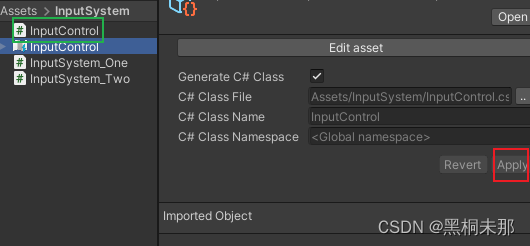
//点击会生成一个Actions Asset 同名的配置文件
    private InputControl inputActions;
    void Start()
    {
        inputActions = new InputControl();

        inputActions.GamePad.Jump.performed += (obj) =>
        {
            print("Jump");
        };

        inputActions.GamePad.Enable();
    }
玩家输入组件(Using Actions Asset and palyerInput Component)
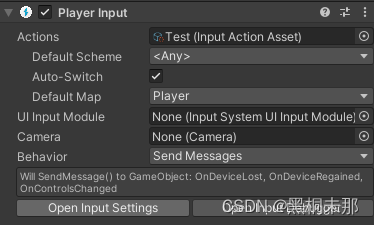
Avtions: 绑定一个Action Asset
Default Scheme: 默认启用哪一个控制方案
Auto-Switch: 自动切换设备 表现为选中时操作不同设备会调用Changed回调
Default Map: 默认Actions Map 表现为默认player时只有这个Map下的Input Actions可以触发
UI Input Module: 用于绑定UGUI的EventSystem上的新组件
Camera: 设置分屏时用于绑定另一个相机
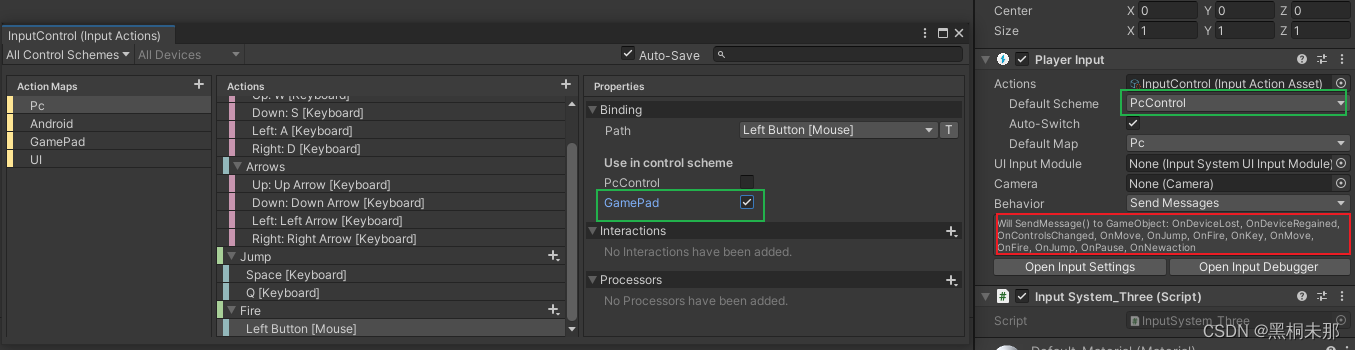
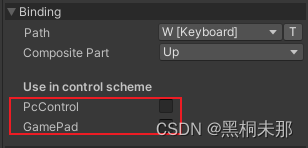
- 红色方框内是需要实现的方法 和Actions的名字相关
- 绿色方框默认的是PcControl 而Fire键属于GamePad 所以即便实现OnFire函数也不会触发
Send Messages 将脚本挂载到和PlayerInpu同一对象上 会通过SendMessage的方式执行对应的函数  只会监听是否按下
    public void OnJump(InputValue inputValue)    //注意参数要为 InputValue
    {
        print("OnJump_" + transform.name);
    }
    public void OnMove(InputValue inputValue)
    {
        print("OnMove_" + transform.name);
    }
    public void OnFire(InputValue inputValue)  //此时不会触发 需要将Fire的Use in control schene 选择为PcControl 或者取消GamePad的勾选
    {
        print("OnFire_" + transform.name);
    }
    //OnDeviceLost 设备丢失  OnDeviceRegaine 设备注册 OnControlsChanged 设备切换
    public void OnControlsChanged(PlayerInput playerInput)      //前三个设备监听参数为PlayerInput playerInput 或者无参
    {
        print("ControlsChande");
    }
Broadcast Messages 同 Send Messages 但是可以将脚本挂载子物体上
Invoke UnityEvents 面板拖拽的方式绑定函数
    public void OnJump2(InputAction.CallbackContext callbackContext)   //注意参数为InputAction.CallbackContext
    {
        if (callbackContext.phase == InputActionPhase.Started)         //按下会同时触发三次OnJumo2函数三次
        {
            print("开始");
        }
        if (callbackContext.phase == InputActionPhase.Performed)      //如果要设置长按等状态 Jump绑定只能绑定一个 如图绑定了空格和Q键 会出BUG
        {
            print("触发");
        }
        if (callbackContext.phase == InputActionPhase.Canceled)
        {
            print("取消");
        }
    }
Invoke CSharpEvents 通过添加事件监听的方式绑定函数
    PlayerInput playerInput1;
    void Start()
    {
        playerInput1 = GetComponent<PlayerInput>();
        playerInput1.onActionTriggered += InputValue;
    }
    public void InputValue(InputAction.CallbackContext callbackContext)
    {
        switch (callbackContext.action.name)
        {
            case "Jump":
                if (callbackContext.phase == InputActionPhase.Performed)
                {
                    print("触发");
                }
                break;
            case "Move":
                print("Move");
                break;
        }
    }
PlayerInputManage
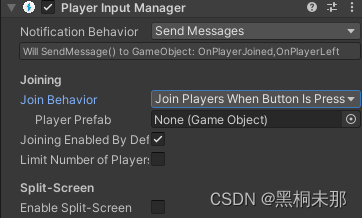
- 管理本地多人输入的输入管理器(玩家的加入和离开)
- Notification Behavior:玩家进入是调用函数的方式
- JoinBehavior:玩家加入的方式
- Join Players When Button Is Pressed: 当有新设备加入按下任意键 或者没有玩家加入按下任意键
- Join Players When Join Action Is Triggered: 当有新设备加入 按下指定按键
- Join Players Manually: 手动添加
- Player Prefab: 玩家本体 需要挂载 Player Input
- Joining Enabled By Default: 启用规则
- Limit Number of Player: 限制加入游戏的玩家数量
- Enable Split-Screen: 多个玩家时自动分屏设置 玩家的Player Input组件要绑定所属的相机
改键
        InputSystem.onAnyButtonPress.Call((control) =>
        {
            print(control.name);
            print(control.path);
        });      //添加按键监听 持续监听

        InputSystem.onAnyButtonPress.CallOnce((control) =>
        {
            print(control.name);
            print(control.path);
        });      //添加按键监听 监听一次
        //通过json文件加载输入配置文件
        string json = Resources.Load<TextAsset>("inputJson").text;     //inputJson文件可复制.inputactions文件内容  修改control.path后加载
        InputActionAsset asset = InputActionAsset.FromJson(json);
        Playerinput.action = asset;
        Playerinput.onActionTriggered += (context)=>{
          //同Invoke CSharpEvents
        };
关于InputSystem
- InputSystem不支持GUI 编辑器代码不受影响 必须选择Both或者只激活新输入系统OnGUI中的内容才会生效
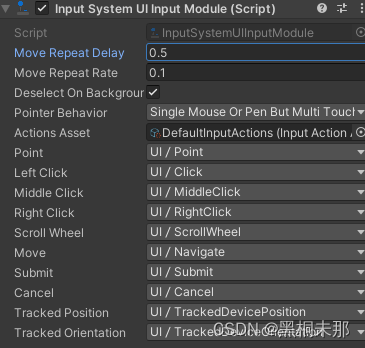
- InputSystem支持UGUI 但是需要使用新的输入模块Input System UI Input Module
- VR项目中使用新系统需要在Canvas上添加Tracked Device Raycaster组件
- 使用多套UI方案 Multiplayer Event System 组件和Input System UI Input Module
- On-Screen Button 使UI按钮可以模拟Action按键触发 On-Screen Stick 使UI可以模拟摇杆触发
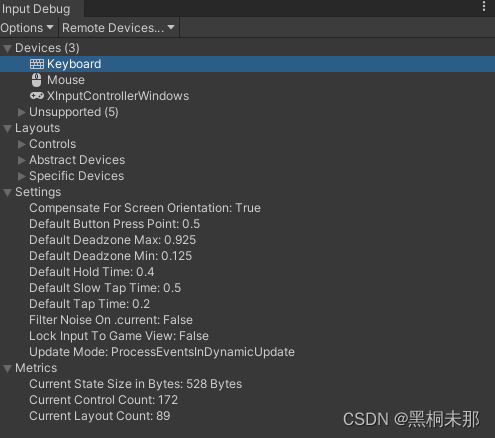
- InputDebug 帮助调试输入设备


 1000
1000


 被折叠的 条评论
为什么被折叠?
被折叠的 条评论
为什么被折叠?
 到【灌水乐园】发言


