我自己的原文哦~ https://blog.51cto.com/whaosoft/13303718
1、Yolo8
1.1、姿态识别
使用深度学习进行姿势估计
近年来,计算机视觉领域取得了前所未有的进步,其中很大一部分归功于深度学习的突破性能力。在众多受益于这场革命的任务中,姿势估计是一个关键且具有挑战性的问题。
姿势估计是计算机视觉领域的一项关键任务,涉及解读图像或视频帧中捕捉到的物体或个人的复杂空间关系和方向。这项任务对各种领域都至关重要,从跟踪运动员动作进行体育分析到增强自主机器人的能力。
AlphaPose:

OpenPose:另一个有影响力的模型 OpenPose 引入了一种多阶段架构,可以同时检测身体、手和脸的关键点。
Detectron2:在姿势估计领域,Detectron2 是一个多功能框架,提供广泛的物体检测功能。
在本文中,我们重点介绍Ultralytics YOLOv8 姿势估计模型,该模型提出了一种使用深度学习解决姿势估计难题的创新方法。
使用 Ultralytics 框架进行姿势估计
姿势估计是一项不常见的计算机视觉任务,涉及识别图像中的特定点(称为关键点)。这些关键点通常对应于关节、地标或其他独特特征等基本元素。这些关键点的位置通常使用 2D[x, y]或 3D[x, y, visible]坐标表示,其中“可见”表示关键点是否可检测到。
姿势估计模型的目的是预测图像中物体上关键点的位置,同时为每个检测到的点提供置信度分数。当需要精确识别物体各部分及其空间关系时,姿势估计就会得到应用。
Ultralytics YOLOv8 姿势模型
Ultralytics YOLOv8 框架提供了专门用于姿势估计任务的模型,以-pose后缀表示(例如yolov8n-pose.pt)。这些模型是在 COCO 关键点数据集上训练的,COCO 关键点数据集是评估姿势估计模型的著名基准。Ultralytics 团队在提供全面的文档方面做得非常出色。本文中分享的代码片段直接来自他们有据可查的资源
预训练姿势模型
Ultralytics提供预训练的 YOLOv8 姿势模型,具有不同的大小和功能。这些模型已在 COCO 关键点数据集上进行训练,可随时用于您的特定姿势估计需求。以下是一些可用模型的详细信息:
预测:易于使用
利用训练有素的 YOLOv8-pose 模型进行关键点预测就像向模型提供图像一样简单。
来源: https: //docs.ultralytics.com/
Python 🐍
from ultralytics import YOLO


# Load a model
model = YOLO('yolov8n-pose.pt')  # load an official model
model = YOLO('path/to/best.pt')  # load a custom model


# Predict with the model
results = model('https://ultralytics.com/images/bus.jpg')  # predict on an image
CLI命令行:
yolo pose predict model=yolov8n-pose.pt source='https://ultralytics.com/images/bus.jpg'  # predict with official model
yolo pose predict model=path/to/best.pt source='https://ultralytics.com/images/bus.jpg'  # predict with custom model
有许多可用于预测的来源:
结果:
训练 YOLOv8 姿势模型
使用 Ultralytics 框架训练 YOLOv8 姿势模型非常简单。该框架提供了用于训练的 Python 和命令行界面。您可以根据自己的需求从头开始训练或微调预训练模型。训练的示例代码片段以 Python 和 CLI 格式提供。
来源: https: //docs.ultralytics.com/
Python 🐍
from ultralytics import YOLO
# Load a model
model = YOLO('yolov8n-pose.yaml')  # build a new model from YAML
model = YOLO('yolov8n-pose.pt')  # load a pretrained model (recommended for training)
model = YOLO('yolov8n-pose.yaml').load('yolov8n-pose.pt')  # build from YAML and transfer weights
# Train the model
results = model.train(data='coco8-pose.yaml', epochs=100, imgsz=640)
CLI命令行:
# Build a new model from YAML and start training from scratch
yolo pose train data=coco8-pose.yaml model=yolov8n-pose.yaml epochs=100 imgsz=640
# Start training from a pretrained *.pt model
yolo pose train data=coco8-pose.yaml model=yolov8n-pose.pt epochs=100 imgsz=640
# Build a new model from YAML, transfer pretrained weights to it and start training
yolo pose train data=coco8-pose.yaml model=yolov8n-pose.yaml pretrained=yolov8n-pose.pt epochs=100 imgsz=640
使用模型进行验证和预测
训练或获得预训练的 YOLOv8 姿势模型后,您可以使用验证数据集验证其准确性。该框架还允许您对图像运行预测以展示模型的功能。
来源: https: //docs.ultralytics.com/
Python 🐍
from ultralytics import YOLO
# Load a model
model = YOLO('yolov8n-pose.pt')  # load an official model
model = YOLO('path/to/best.pt')  # load a custom model
# Validate the model
metrics = model.val()  # no arguments needed, dataset and settings remembered
metrics.box.map    # map50-95
metrics.box.map50  # map50
metrics.box.map75  # map75
metrics.box.maps   # a list contains map50-95 of each category
CLI命令行:
yolo pose val model=yolov8n-pose.pt  # val official model
yolo pose val model=path/to/best.pt  # val custom model
导出模型
导出经过训练的姿势估计模型在训练阶段之外具有宝贵的优势。一旦您的模型取得了令人满意的结果,将其导出为 ONNX、CoreML 等各种格式就成为一项战略举措。这种做法可确保您的模型可以无缝集成到不同的应用程序和框架中,从而增强其可访问性和多功能性。无论您是在边缘设备上部署模型、将其集成到移动应用程序中,还是将其集成到更大的管道中,导出都使您能够在各种平台和用例中充分发挥姿势估计解决方案的潜力。它弥合了模型开发和实际部署之间的差距,使您在姿势估计方面的努力真正产生影响。
Ultralytics YOLOv8 框架可让您以各种格式(如 ONNX、CoreML、TensorFlow Lite 等)导出经过训练的姿势模型。所有这些模型都默认采用 AGPL-3.0 许可证。但是,如果您希望将它们用于内部或外部研发,或用于商业项目和服务,同时保持对工作的专有控制,则可以使用企业许可证选项。
来源: https: //docs.ultralytics.com/
Python 🐍
from ultralytics import YOLO
# Load a model
model = YOLO('yolov8n-pose.pt')  # load an official model
model = YOLO('path/to/best.pt')  # load a custom trained
# Export the model
model.export(format='onnx')
CLI命令行:
yolo export model=yolov8n-pose.pt format=onnx  # export official model
yolo export model=path/to/best.pt format=onnx  # export custom trained model
1.2、车速检测
使用YOLOv8+BYTETrack+OpenCV实现车辆速度的计算
您是否想过如何使用计算机视觉来估计车辆的速度?在本教程中,我们将探索从对象检测到跟踪再到速度估计的整个过程。
本文的实现主要包含以下三个主要步骤,分别是对象检测、对象跟踪和速度估计,下面我们将一一介绍其实现步骤。
车辆检测
要对视频执行对象检测,我们需要迭代视频的帧,然后对每个帧运行我们的检测模型。推理则提供对预先训练的对象检测模型的访问,我们使用yolov8x-640模型。相关代码和文档可参考链接:
https://github.com/roboflow/inference?ref=blog.roboflow.com
https://inference.roboflow.com/?ref=blog.roboflow.com
import supervision as sv
from inference.models.utils import get_roboflow_model
model = get_roboflow_model(‘yolov8x-640’)
frame_generator = sv.get_video_frames_generator(‘vehicles.mp4’)
bounding_box_annotator = sv.BoundingBoxAnnotator()
for frame in frame_generator:
results = model.infer(frame)[0]
detections = sv.Detections.from_inference(results)
annotated_frame = trace_annotator.annotate(
scene=frame.copy(), detections=detections)
当然您也可以将其替换为Ultralytics YOLOv8、YOLO-NAS或任何其他模型。您需要更改代码中的几行,然后就可以了。
import supervision as sv
from ultralytics import YOLO


model = YOLO("yolov8x.pt")
frame_generator = sv.get_video_frames_generator(‘vehicles.mp4’)
bounding_box_annotator = sv.BoundingBoxAnnotator()


for frame in frame_generator:
    result = model(frame)[0]
    detections = sv.Detections.from_ultralytics(result)


    annotated_frame = trace_annotator.annotate(
        scene=frame.copy(), detectinotallow=detections)
车辆跟踪
物体检测不足以执行速度估计。为了计算每辆车行驶的距离,我们需要能够跟踪它们。为此,我们使用 BYTETrack,可在 Supervision pip 包中访问。
...


# initialize tracker
byte_track = sv.ByteTrack()


...


for frame in frame_generator:
    results = model.infer(frame)[0]
    detections = sv.Detections.from_inference(results)


    # plug the tracker into an existing detection pipeline
    detections = byte_track.update_with_detections(detectinotallow=detections)

    ...
如果您想了解有关将 BYTETrack 集成到对象检测项目中的更多信息,请访问 Supervision文档页面。在那里,您将找到一个端到端示例,展示如何使用不同的检测模型来做到这一点。
https://supervision.roboflow.com/how_to/track_objects/?ref=blog.roboflow.com
车速计算
让我们考虑一种简单的方法,根据边界框移动的像素数来估计距离。
当您使用点来记住每辆车每秒的位置时,会发生以下情况。即使汽车以恒定速度移动,其行驶的像素距离也会发生变化。距离相机越远,覆盖的距离越小。
因此,我们很难使用原始图像坐标来计算速度。我们需要一种方法将图像中的坐标转换为道路上的实际坐标,从而消除沿途与透视相关的失真。幸运的是,我们可以使用 OpenCV 和一些数学来做到这一点。
视角转换背后的数学
为了变换视角,我们需要一个变换矩阵,我们使用OpenCV 中的函数getPerspectiveTransform确定它。该函数有两个参数:源感兴趣区域和目标感兴趣区域。在下面的可视化中,这些区域分别标记为A-B-C-D和A'-B'-C'-D'。
在分析单个视频帧时,我们选择了一段道路作为感兴趣的源区域。在高速公路的路肩上,通常有垂直的柱子——标记,每隔固定的距离间隔开。在本例中为 50 米。感兴趣的区域横跨道路的整个宽度以及连接上述六个柱子的部分。
在我们的例子中,我们正在处理一条高速公路。Google 地图研究表明,感兴趣源区域周围的区域大约宽 25 米,长 250 米。我们使用此信息来定义相应四边形的顶点,将新坐标系锚定在左上角。
最后,我们将顶点A-B-C-D和的坐标分别重新组织A'-B'-C'-D'为二维SOURCE和TARGET矩阵,其中矩阵的每一行包含一个点的坐标。
SOURCE = np.array([
    [1252, 787],
    [2298, 803],
    [5039, 2159],
    [-550, 2159]
])


TARGET = np.array([
    [0, 0],
    [24, 0],
    [24, 249],
    [0, 249],
])
视角转换
需要一使用源矩阵和目标矩阵,我们创建一个 ViewTransformer 类。该类使用OpenCV的getPerspectiveTransform函数来计算变换矩阵。Transform_points 方法应用此矩阵将图像坐标转换为现实世界坐标。
class ViewTransformer:
    def __init__(self, source: np.ndarray, target: np.ndarray) -> None:
        source = source.astype(np.float32)
        target = target.astype(np.float32)
        self.m = cv2.getPerspectiveTransform(source, target)


    def transform_points(self, points: np.ndarray) -> np.ndarray:
        if points.size == 0:
            return points


        reshaped_points = points.reshape(-1, 1, 2).astype(np.float32)
        transformed_points = cv2.perspectiveTransform(
                reshaped_points, self.m)
        return transformed_points.reshape(-1, 2)


view_transformer = ViewTransformer(source=SOURCE, target=TARGET)
用计算机视觉计算速度
现在我们已经有了检测器、跟踪器和透视转换逻辑。是时候计算速度了。原则上很简单:将行驶的距离除以行驶该距离所需的时间。然而,这项任务有其复杂性。
在一种情况下,我们可以计算每一帧的速度:计算两个视频帧之间行进的距离,并将其除以 FPS 的倒数,在我的例子中为 1/25。不幸的是,这种方法可能会导致非常不稳定和不切实际的速度值。
为了防止这种情况,我们对一秒钟内获得的值进行平均。这样,汽车行驶的距离明显大于闪烁引起的小盒子移动,我们的速度测量也更接近真实情况。
...


video_info = sv.VideoInfo.from_video_path('vehicles.mp4')


# initialize the dictionary that we will use to store the coordinates
coordinates = defaultdict(lambda: deque(maxlen=video_info.fps))


for frame in frame_generator:
    result = model(frame)[0]
    detections = sv.Detections.from_ultralytics(result)
    detections = byte_track.update_with_detections(detectinotallow=detections)


    points = detections.get_anchors_coordinates(
        anchor=sv.Position.BOTTOM_CENTER)


    # plug the view transformer into an existing detection pipeline
    points = view_transformer.transform_points(points=points).astype(int)


    # store the transformed coordinates
    for tracker_id, [_, y] in zip(detections.tracker_id, points):
        coordinates[tracker_id].append(y)


    for tracker_id in detections.tracker_id:


        # wait to have enough data
        if len(coordinates[tracker_id]) > video_info.fps / 2:


            # calculate the speed
            coordinate_start = coordinates[tracker_id][-1]
            coordinate_end = coordinates[tracker_id][0]
            distance = abs(coordinate_start - coordinate_end)
            time = len(coordinates[tracker_id]) / video_info.fps
            speed = distance / time * 3.6


...
速度估计隐藏的复杂性
在构建现实世界的车辆速度估计系统时,应考虑许多其他因素。让我们简要讨论其中的几个。
遮挡和修剪的盒子:盒子的稳定性是影响速度估计质量的关键因素。当一辆车暂时遮挡另一辆车时,方框大小的微小变化可能会导致估计速度值的巨大变化。
设置固定参考点:在本例中,我们使用边界框的底部中心作为参考点。这是可能的,因为视频中的天气条件很好——晴天,没有下雨。然而,很容易想象找到这一点会困难得多的情况。
道路的坡度:在本例中,假设道路完全平坦。事实上,这种情况很少发生。为了尽量减少坡度的影响,我们必须将自己限制在道路相对平坦的部分,或者将坡度纳入计算中。
1.3、在Android上~YOLOv8目标检测
Yolov8 是一种流行的物体检测 AI。Android是世界上用户最多的移动操作系统。
本文介绍如何在 Android 设备上执行 yolov8 物体检测。
步骤1:从Pytorch格式转换为tflite格式
YOLOv8 以pytorch格式构建。将其转换为tflite,以便在 android 上使用。
安装YOLOv8
安装一个名为Ultralytics的框架。Yolov8包含在此框架中。
pip install ultralytics转换为 tflite
使用转换代码进行转换。以下代码将下载预训练模型的权重。
如果您有使用自己的自定义数据训练的模型的权重检查点文件,请替换 yolov8s.pt 部分。
from ultralytics import YOLO
model = YOLO('yolov8s.pt')
model.export(format="tflite")
将生成yolov8s_saved_model/yolov8s_float16.tflite,因此请使用它。
如果发生转换错误...
如果出现以下错误,则是由于tensorflow的版本问题,因此请安装兼容的版本。
ImportError:generic_type:无法初始化类型“StatusCode”:具有该名称的对象已定义
例如将tensorflow改为如下版本。
pip install tensorflow==2.13.0在 Android 上运行 tflite 文件
从这里开始,我们将在android studio项目中运行yolov8 tflite文件。
将 tflite 文件添加到项目中
在android studio项目的app目录下创建assets目录(File → New → Folder → Asset Folder),添加tflite文件(yolov8s_float32.tflite)和labels.txt,可以通过复制粘贴的方式添加。
labels.txt 是一个文本文件,其中描述了 YOLOv8 模型的类名,如下所示。
如果您设置了自定义类,请写入该类。
默认的 YOLOv8 预训练模型如下。
labels.txt内容如下:
person
bicycle
car
motorcycle
airplane
bus
train
truck
boat
traffic light
fire hydrant
stop sign
parking meter
bench
bird
cat
dog
horse
sheep
cow
elephant
bear
zebra
giraffe
backpack
umbrella
handbag
tie
suitcase
frisbee
skis
snowboard
sports ball
kite
baseball bat
baseball glove
skateboard
surfboard
tennis racket
bottle
wine glass
cup
fork
knife
spoon
bowl
banana
apple
sandwich
orange
broccoli
carrot
hot dog
pizza
donut
cake
chair
couch
potted plant
bed
dining table
toilet
tv
laptop
mouse
remote
keyboard
cell phone
microwave
oven
toaster
sink
refrigerator
book
clock
vase
scissors
teddy bear
hair drier
toothbrush
安装 tflite
将以下内容添加到 app/build.gradle.kts 中的依赖项中以安装 tflite 框架。
应用程序/build.gradle.kts
implementation("org.tensorflow:tensorflow-lite:2.14.0")
implementation("org.tensorflow:tensorflow-lite-support:0.4.4")
添加完以上内容后,按立即同步进行安装。
导入所需模块
import org.tensorflow.lite.DataType
import org.tensorflow.lite.Interpreter
import org.tensorflow.lite.gpu.CompatibilityList
import org.tensorflow.lite.gpu.GpuDelegate
import org.tensorflow.lite.support.common.FileUtil
import org.tensorflow.lite.support.common.ops.CastOp
import org.tensorflow.lite.support.common.ops.NormalizeOp
import org.tensorflow.lite.support.image.ImageProcessor
import org.tensorflow.lite.support.image.TensorImage
import org.tensorflow.lite.support.tensorbuffer.TensorBuffer
import java.io.BufferedReader
import java.io.IOException
import java.io.InputStream
import java.io.InputStreamReader
必需的类属性
private val modelPath = "yolov8s_float32.tflite"
private val labelPath = "labels.txt"
private var interpreter: Interpreter? = null
private var tensorWidth = 0
private var tensorHeight = 0
private var numChannel = 0
private var numElements = 0
private var labels = mutableListOf<String>()
private val imageProcessor = ImageProcessor.Builder()
    .add(NormalizeOp(INPUT_MEAN, INPUT_STANDARD_DEVIATION))
    .add(CastOp(INPUT_IMAGE_TYPE))
    .build() // preprocess input


companion object {
    private const val INPUT_MEAN = 0f
    private const val INPUT_STANDARD_DEVIATION = 255f
    private val INPUT_IMAGE_TYPE = DataType.FLOAT32
    private val OUTPUT_IMAGE_TYPE = DataType.FLOAT32
    private const val CONFIDENCE_THRESHOLD = 0.3F
    private const val IOU_THRESHOLD = 0.5F
}
初始化模型
初始化 tflite 模型。获取模型文件并将其传递给 tflite 的Interpreter。可选地传递要使用的线程数。
如果您在 Activity 以外的类中使用它,则需要将上下文传递给该类。
val model = FileUtil.loadMappedFile(context, modelPath)
val options = Interpreter.Options()
options.numThreads = 4
interpreter = Interpreter(model, options)
从解释器获取 yolov8s 输入和输出shape。
val inputShape = interpreter.getInputTensor(0).shape()
val outputShape = interpreter.getOutputTensor(0).shape()


tensorWidth = inputShape[1]
tensorHeight = inputShape[2]
numChannel = outputShape[1]
numElements = outputShape[2]
从 label.txt 文件中读取类名。
必须明确关闭 InputStream 和 InputStreamReader。
try {
    val inputStream: InputStream = context.assets.open(labelPath)
    val reader = BufferedReader(InputStreamReader(inputStream))
    var line: String? = reader.readLine()
    while (line != null && line != "") {
        labels.add(line)
        line = reader.readLine()
    }
    reader.close()
    inputStream.close()
} catch (e: IOException) {
    e.printStackTrace()
}
输入图像并执行
输入是位图,但根据模型的输入格式进行下面的预处理。
1. 调整大小以匹配模型的输入形状
2. 使其成为张量
3. 通过将像素值除以 255 来标准化像素值(使其成为 0 到 1 范围内的值)
4. 转换为模型的输入类型
5. 输入获取 imageBuffer 以
val resizedBitmap = Bitmap.createScaledBitmap(bitmap, tensorWidth, tensorHeight, false)
val tensorImage = TensorImage(DataType.FLOAT32)
tensorImage.load(resizedBitmap)
val processedImage = imageProcessor.process(tensorImage)
val imageBuffer = processedImage.buffer
创建一个与模型输出形状相匹配的输出张量缓冲区,并将其与上面的输入 imageBuffer 一起传递给解释器进行执行。
val output = TensorBuffer.createFixedSize(intArrayOf(1 , numChannel, numElements), OUTPUT_IMAGE_TYPE)
interpreter.run(imageBuffer, output.buffer)
对输出进行后处理
输出框被视为 BoudingBox 类。
它是一个具有类、框和置信度的类。
x1, y1 是起点。x2, y2 是终点。cx, cy 是中心。w是宽度, h是高度。
data class BoundingBox(
    val x1: Float,
    val y1: Float,
    val x2: Float,
    val y2: Float,
    val cx: Float,
    val cy: Float,
    val w: Float,
    val h: Float,
    val cnf: Float,
    val cls: Int,
    val clsName: String
)
接下来的过程是从众多输出框候选中选择一个可靠性较高的框。
1. 提取置信度高于置信度阈值的框。
2. 在重叠框中,保留可靠性最高的框。(nms)
private fun bestBox(array: FloatArray) : List<BoundingBox>? {


    val boundingBoxes = mutableListOf<BoundingBox>()


    for (c in 0 until numElements) {
        var maxConf = -1.0f
        var maxIdx = -1
        var j = 4
        var arrayIdx = c + numElements * j
        while (j < numChannel){
            if (array[arrayIdx] > maxConf) {
                maxConf = array[arrayIdx]
                maxIdx = j - 4
            }
            j++
            arrayIdx += numElements
        }


        if (maxConf > CONFIDENCE_THRESHOLD) {
            val clsName = labels[maxIdx]
            val cx = array[c] // 0
            val cy = array[c + numElements] // 1
            val w = array[c + numElements * 2]
            val h = array[c + numElements * 3]
            val x1 = cx - (w/2F)
            val y1 = cy - (h/2F)
            val x2 = cx + (w/2F)
            val y2 = cy + (h/2F)
            if (x1 < 0F || x1 > 1F) continue
            if (y1 < 0F || y1 > 1F) continue
            if (x2 < 0F || x2 > 1F) continue
            if (y2 < 0F || y2 > 1F) continue


            boundingBoxes.add(
                BoundingBox(
                    x1 = x1, y1 = y1, x2 = x2, y2 = y2,
                    cx = cx, cy = cy, w = w, h = h,
                    cnf = maxConf, cls = maxIdx, clsName = clsName
                )
            )
        }
    }


    if (boundingBoxes.isEmpty()) return null


    return applyNMS(boundingBoxes)
}


private fun applyNMS(boxes: List<BoundingBox>) : MutableList<BoundingBox> {
    val sortedBoxes = boxes.sortedByDescending { it.cnf }.toMutableList()
    val selectedBoxes = mutableListOf<BoundingBox>()


    while(sortedBoxes.isNotEmpty()) {
        val first = sortedBoxes.first()
        selectedBoxes.add(first)
        sortedBoxes.remove(first)


        val iterator = sortedBoxes.iterator()
        while (iterator.hasNext()) {
            val nextBox = iterator.next()
            val iou = calculateIoU(first, nextBox)
            if (iou >= IOU_THRESHOLD) {
                iterator.remove()
            }
        }
    }


    return selectedBoxes
}


private fun calculateIoU(box1: BoundingBox, box2: BoundingBox): Float {
    val x1 = maxOf(box1.x1, box2.x1)
    val y1 = maxOf(box1.y1, box2.y1)
    val x2 = minOf(box1.x2, box2.x2)
    val y2 = minOf(box1.y2, box2.y2)
    val intersectionArea = maxOf(0F, x2 - x1) * maxOf(0F, y2 - y1)
    val box1Area = box1.w * box1.h
    val box2Area = box2.w * box2.h
    return intersectionArea / (box1Area + box2Area - intersectionArea)
}
此时你会得到yolov8的输出。
val bestBoxes = bestBox(output.floatArray)将输出框绘制到图像上
fun drawBoundingBoxes(bitmap: Bitmap, boxes: List<BoundingBox>): Bitmap {
    val mutableBitmap = bitmap.copy(Bitmap.Config.ARGB_8888, true)
    val canvas = Canvas(mutableBitmap)
    val paint = Paint().apply {
        color = Color.RED
        style = Paint.Style.STROKE
        strokeWidth = 8f
    }
    val textPaint = Paint().apply {
        color = Color.WHITE
        textSize = 40f
        typeface = Typeface.DEFAULT_BOLD
    }


    for (box in boxes) {
        val rect = RectF(
            box.x1 * mutableBitmap.width,
            box.y1 * mutableBitmap.height,
            box.x2 * mutableBitmap.width,
            box.y2 * mutableBitmap.height
        )
        canvas.drawRect(rect, paint)
        canvas.drawText(box.clsName, rect.left, rect.bottom, textPaint)
    }


    return mutableBitmap
}
在一些情况下,解释器为空时需要模型路径是否正确。
1.4、YOLOv8n + OC-SORT + CRCM算法~百香果产量估算
百香果产量的精确估计对于果园的有效管理至关重要,但它带来了诸如遮挡、光线变化和相机抖动等挑战,这可能导致漏检、错误检测和重复计数小果等问题。在本研究中,提出了一种鲁棒的计算机视觉算法YOLOv8n + OC-SORT + CRCM (Central Region Counting Method)来完成百香果的检测、跟踪和产量估计三个任务。首先,比较了各种YOLO系列检测算法对百香果的检测结果,选择了YOLOv8n作为检测器。然后,选择OC-SORT算法作为跟踪器,因为它可以有效地解决遮挡、垂直抖动和速度不均匀等问题。最后,设计了用于百香果计数的CRCM计数算法,以解决估计百香果产量的挑战。为了验证这些方法的有效性,建立了一个真实世界的百香果视频数据集,其中包括24个视频,每个视频的长度为1分钟。在测试集上的检测结果中,YOLOv8n探测器在YOLOv5n、YOLOv7和YOLOv8n三种探测器中取得了最好的效果,mAP@0.5 (mean Average Precision)达到86.3%,模型大小仅为6.2 MB。OC-SORT跟踪器的HOTA(高阶跟踪精度)为67.10%,比BoT-SORT、Byte Track和Strong SORT三种主流跟踪器分别高出2.98%、4.71%和8.82%。在果实产量估计中,CRCM的平均计数准确率为87.0%,分别比ID数法和单线法(SLM)方法高49.8%和10.5%。综上所述,YOLOv8n + OC-SORT + CRCM算法有效解决了错误识别、小果漏检、重复计数等问题,实现了对百香果产量的稳定、实时、准确估计。
图1 百香果栽培。
图2 数据集的一部分。
图3 数据集的处理流程。
图4 基于YOLOv8n + OC-SORT + CRCM的百香果产量估计算法流程图。
图5 C3模块和C2f模块。
图6 YOLOv8架构。
图7 OC-SORT。
图8 计算SLM和CRCM的面积。
图9 不同检测器在实际场景中的检测结果。
图10 视频41中OC-SORT、BoT-SORT、ByteTrack和Strong SORT跟踪结果的比较。
图11 测试视频10,21的OC-SORT跟踪结果。
图12 真实值与预测果数方法(ID number, SLM, CRCM)的比较结果。
图13 ID、SLM和CRCM的数量可视化结果。
来 源
Tu, S., Huang, Y., Huang, Q., Liu, H., Cai, Y., & Lei, H. Estimation of passion fruit yield based on YOLOv8n + OC-SORT + CRCM algorithm. Computers and Electronics in Agriculture. 2025, 229, 109727
2、Yolo11
2.1、YOLO11-JDE 及其自监督突破
革命性的多目标跟踪
多目标跟踪不断演变的挑战
多目标跟踪 (MOT) 是现代计算机视觉应用的核心。从增强自动驾驶汽车的安全性到完善运动分析,MOT 可确保在视频帧中准确检测和跟踪对象,同时保持其唯一身份。然而,尽管技术不断进步,遮挡、运动不规则和实时性能要求等挑战仍然存在。
传统上,MOT 系统依赖于广泛使用的“检测跟踪”(TbD)范式,该范式将对象检测和跟踪分为不同的过程。虽然这些方法很有效,但它们通常缺乏真实场景所需的效率和可扩展性,尤其是在拥挤或动态环境中。进入 YOLO11-JDE,这是一个改变游戏规则的框架,它使用联合检测和嵌入(JDE)将检测和重新识别(Re-ID)合并为一个简化的模型。结果如何?超快速、准确且参数高效的 MOT 解决方案。
本文主要探讨YOLO11-JDE 的架构、训练创新和实际意义,展示了这种新方法如何突破 MOT 功能的界限。
YOLO11-JDE 语境:MOT 方法简要概述
在深入研究 YOLO11-JDE 之前,了解 MOT 范式的演变至关重要。早期的 MOT 系统采用单独的模型进行检测和 Re-ID,称为单独检测和嵌入 (SDE)。这些系统通过专用的 Re-ID 模块处理每个检测到的对象,虽然准确,但计算成本很高。
为了解决这些限制,JDE 模型应运而生。这些模型将检测和 Re-ID 统一到一个框架中,同时优化这两项任务。通过共享特征并执行联合优化,JDE 模型显著缩短了推理时间,使其成为实时应用的理想选择。YOLO11-JDE 在此基础上构建,引入了自监督学习技术,消除了对昂贵的身份标记数据集的依赖,从而使 MOT 适用于更广泛的用例。
YOLO11-JDE:架构和突破
简化的高效架构
YOLO11-JDE 框架是广受好评的 YOLO11 检测器的扩展,并包含一个专用于 Re-ID 任务的附加分支。模型架构由三个关键组件组成:
- 主干:从输入图像中提取特征图。
- 颈部:融合深层和浅层特征以细化表现形式。
- 预测头:包括分类头、边界框回归头,以及用于生成判别嵌入的专门 Re-ID 分支。
Re-ID 分支使用一系列具有 SiLU 激活的卷积层,将特征图映射到低维嵌入空间。这种集成使 YOLO11-JDE 能够在一次推理过程中输出检测结果和 Re-ID 嵌入。
自我监督训练:范式转换
YOLO11-JDE 最重要的创新之一是其自监督训练策略。传统的 MOT 系统需要大规模、身份标记的数据集来进行 Re-ID 任务,而创建这些数据集既昂贵又耗时。YOLO11-JDE 通过利用Mosaic 数据增强(一种将多幅图像组合成单个输入的技术)来规避这一限制。这种方法使模型能够进行各种转换,使其能够学习稳健的嵌入,而无需依赖明确的身份标签。
此外,该模型还采用了三重态损失函数,并采用了硬正向和半硬负向挖掘策略。这些方法确保同一身份的嵌入更加紧密,而不同身份的嵌入则更加疏远,从而促进判别性特征学习。
定制数据关联算法
为了提高跟踪精度,YOLO11-JDE 集成了定制的数据关联算法,该算法结合了运动、外观和位置线索。该算法使用两阶段匹配过程:
- 高置信度匹配:使用运动预测和 Re-ID 嵌入的组合来更新轨迹。
- 低置信度匹配:剩余轨迹根据边界框重叠进行匹配,确保在涉及遮挡或低质量检测的具有挑战性的场景中的稳健性。
实验结果:提高 MOT 性能标准
用更少的参数实现更优异的性能
YOLO11-JDE 已在 MOT17 和 MOT20 基准上经过严格评估,实现了具有竞争力的跟踪精度,同时在每秒帧数 (FPS) 方面明显优于其他 JDE 模型。该模型的轻量级设计(参数少于 1000 万个)可确保实时推理能力,而不会牺牲准确性。
拥挤环境中的稳健性
得益于其自监督训练和 Mosaic 增强,YOLO11-JDE 在拥挤场景中表现出色,如 MOT20 数据集所示。该模型即使在严重遮挡的情况下也能保持跨帧身份一致性,这凸显了其在现实世界中的实用性。
YOLO11-JDE 为何重要:实际意义
YOLO11-JDE 的推出标志着 MOT 技术的一个关键时刻。通过将实时性能与自监督学习相结合,该模型解决了两个关键障碍:可扩展性和可访问性。其轻量级架构和高效的训练过程使其成为从视频监控到体育分析和自动导航等应用的多功能解决方案。
此外,消除身份标记数据集使 MOT 变得民主化,使资源有限的研究人员和从业者能够部署高性能跟踪系统。这一进步不仅拓宽了 MOT 应用范围,还加速了各行业的创新。
结论:MOT 的新前沿
YOLO11-JDE 重新定义了多目标跟踪的可能性,将速度、准确性和效率完美结合。其自监督训练策略和自定义数据关联算法为 MOT 系统树立了新标准,为更广泛的采用和更具影响力的应用铺平了道路。
展望未来,YOLO11-JDE 的潜在改进可能包括多尺度嵌入融合和高级数据增强技术,以进一步提高性能。凭借其创新方法和令人鼓舞的结果,YOLO11-JDE 不仅是 MOT 研究的一个里程碑,而且是下一代跟踪技术的基础。
参考链接:
https://arxiv.org/pdf/2501.13710
2.2、YOLOv11和MediaPipe~规范佩戴和洗手检测
在对污染控制有着严格要求的领域,诸如制药业、食品加工业以及电子产品制造业,维持洁净室标准始终是重中之重。
发网与口罩的规范佩戴,以及正确洗手规程的严格执行,是保障生产环境的卫生,有效控制污染的关键所在。
接下来,我们将深入阐述如何将计算机视觉技术与这些卫生习惯相结合,以此作为一种创新方式,确保相关卫生要求得到切实遵守,为大家呈现一个概念性的解决方案。
介 绍
我们的解决方案采用三个主要组件:
MediaPipe Hands:专门检测盒子内的手部存在和运动(我们假设将其划为接收器)
YOLO 物体检测:经过训练的 AI 视觉模型,用于识别发网和口罩/胡须护具。
OpenCV:用于帧捕获和处理。
这个想法是创建一个系统,该系统可以在洗手时检测手部,并确保它们在指定的区域(水龙头下)停留一段时间。同时,它使用 YOLO 检查是否存在必要的装备,例如发网和口罩。
训练模型
免责声明-我正在使用 roboflow 的数据集,其中包含 4266 张带有注释的发网、口罩和手套图像,这是一项艰巨的工作:)
训练示例:
https://universe.roboflow.com/fyp-70ptp/annotated_pics-xp3st-rrues-asmhi?source=post_page-----33b103fb133f---------------------------------------模型权重无法下载,因此为了在本地运行它,我必须使用以下代码运行 100 个 epoch 将其训练成 yolo11n 模型:
from ultralytics import
YOLOmodel = YOLO("yolo11n.pt")  # load a pretrained model (recommended for training)
results = model.train(data="data.yaml", epochs=100, imgsz=640)
我已将权重上传至此 git 以节省您的计算费用:
https://github.com/jhlins/cleanroomcompliancemodel?source=post_page-----33b103fb133f---------------------------------------对于数据爱好者来说,这里是该模型的混淆矩阵:
先决条件
在深入研究代码之前,请确保已安装以下库:
pip install opencv-python mediapipe ultralytics代码演示
导入库
我们首先导入必要的库:
import cv2
import mediapipe as mp
import time
from ultralytics import YOLO
初始化模型
使用预训练权重初始化 MediaPipe Hands 和 YOLO 模型:
# Initialize MediaPipe Hands
mp_hands = mp.solutions.hands
mp_drawing = mp.solutions.drawing_utils


# Initialize YOLO Model
yolo_model = YOLO("trainedyolo11n.pt")
desired_classes = [1, 2, 4, 5]  # Define classes to detect: 1 - Hairnet, 2 - Mask, etc.
视频捕获
我们使用网络摄像头捕捉视频帧:
cap = cv2.VideoCapture(0)洗手检测
一个小功能,用于确定来自媒体管道的手部标志是否实际位于定义的区域内。
def is_hand_in_zone(hand_landmarks, frame_width, frame_height, zone_x_min, zone_y_min, zone_x_max, zone_y_max):
for landmark in hand_landmarks.landmark:
        if (zone_x_min <= landmark.x * frame_width <= zone_x_max and zone_y_min <= landmark.y * frame_height <= zone_y_max):
            return True
    return False
主循环
我们进入主循环来处理帧,为了减少处理器的负载,我们使用 frame_counter 技术在 while 循环中仅捕获每 3 帧。
我们还创建了一个计时器,如果用户在指定区域内洗手(放置)的时间超过规定的时间(在我们的例子中是 5 秒,但我们知道应该是 30 秒),则向他们表示感谢。
# Initialize variables
hand_detected_time = None
hands_detected_in_zone = False
frame_counter = 0  # Initialize a frame counter
# Start MediaPipe hands
with mp_hands.Hands(static_image_mode=False, max_num_hands=2, min_detection_cnotallow=0.1, min_tracking_cnotallow=0.1) as hands:
    while True:
        # To analyze only every 3rd frame
        if frame_counter % 3 == 0:
            ret, frame = cap.read()
            if not ret:
                break
            frame_height, frame_width, _ = frame.shape
            # Define the zone
            zone_x_min = int(frame_width * 0.1)
            zone_y_min = int(frame_height * 0.65)
            zone_x_max = int(frame_width * 0.9)
            zone_y_max = int(frame_height * 1)
            cv2.rectangle(frame, (zone_x_min, zone_y_min), (zone_x_max, zone_y_max), (255, 0, 0), 2)
            # Convert the BGR frame to RGB for MediaPipe
            rgb_frame = cv2.cvtColor(frame, cv2.COLOR_BGR2RGB)
            # Process the frame and detect hands
            results = hands.process(rgb_frame)
            hand_in_zone = False
            if results.multi_hand_landmarks:
                for hand_landmarks in results.multi_hand_landmarks:
                    if is_hand_in_zone(hand_landmarks, frame_width, frame_height, zone_x_min, zone_y_min, zone_x_max, zone_y_max):
                        hand_in_zone = True
                        mp_drawing.draw_landmarks(frame, hand_landmarks, mp_hands.HAND_CONNECTIONS)
            hands_detected_in_zone = hand_in_zone
            # Check time duration for hand detection in the zone
            if hands_detected_in_zone:
                if hand_detected_time is None:
                    hand_detected_time = time.time()
                elapsed_time = time.time() - hand_detected_time
                countdown = max(0, 5 - int(elapsed_time))
                if countdown == 0:
                    message = "Thanks for washing for 5 seconds!"
                else:
                    message = f"Counting down: {countdown}s"
            else:
                hand_detected_time = None
                countdown = 5
                message = "No hands detected in the zone."
            # Display the message and countdown on the frame
            cv2.putText(frame, message, (10, 30), cv2.FONT_HERSHEY_SIMPLEX, 1, (255, 255, 0), 2, cv2.LINE_AA)
            # YOLO Object Detection
            yolo_results = yolo_model(frame)
            # Filter results to only include desired classes
            for result in yolo_results:
                for box in result.boxes:
                    if box.cls in desired_classes:
                        x1, y1, x2, y2 = [int(coord) for coord in box.xyxy[0]]
                        label = yolo_model.names[int(box.cls)]
                        if box.cls == 1 or box.cls == 2:
                            cv2.rectangle(frame, (x1, y1), (x2, y2), (0, 255, 0), 2)
                            cv2.putText(frame, f"{label}", (x1, y1 - 10), cv2.FONT_HERSHEY_SIMPLEX , 0.5,(0, 255, 0), 2)
                        else:
                            cv2.rectangle(frame, (x1, y1), (x2, y2), (0, 0, 255), 2)
                            cv2.putText(frame, f"{label}", (x1, y1 - 10), cv2.FONT_HERSHEY_SIMPLEX , 0.5, (0, 0, 255), 2)
            # Display the frame
            cv2.imshow("Hand and Object Detection", frame)
            # Increment the frame counter
            frame_counter += 1
            # Press 'ESC' to quit
            if cv2.waitKey(1) == 27:
                break
# Release the video capture object and close the display window
cap.release()
cv2.destroyAllWindows()
通过集成 MediaPipe Hands 和 YOLO 进行对象检测,我们可以自动监控洁净室合规性 - 并结合其他通知 API(如电报或 MSpowerapp 生态系统),我们甚至可以捕捉到坏人并提醒合规团队。该计算机视觉概念也让我们得以了解监测和降低污染风险以及确保敏感环境中卫生标准的方法。
2.3、YOLO11 ~药丸检测
医疗药丸数据集是专为制药 AI 应用设计的概念验证 (POC) 数据集。它包括 92 张训练图像和 23 张验证图像,每张都带有药丸检测注释。该数据集在自动药丸分类、优化库存管理以及加强药房和制药行业的质量控制方面发挥着至关重要的作用。
通过使用Ultralytics YOLO11模型进行微调,企业可以更准确地跟踪和分类药丸,减少人工错误并提高运营效率。
在本文中,我们将探讨:
- 医疗药丸数据集在制药领域的应用。
- 在自定义数据集上训练 YOLO11 的步骤。
- 在 medical-pills 数据集上训练 YOLO11。
- 使用医疗药丸模型进行推理。
- 医疗药丸数据集的附加资源。
Medical-pills 数据集在制药领域的应用
医疗药丸数据集在制药行业有许多应用,其中最重要的应用如下。
- 药丸识别与分类:YOLO11可根据颜色、形状、大小自动对药丸进行分类识别,简化药品生产流程。
- 库存管理:药房可以通过在医疗药丸数据集上微调 YOLO11 模型来实现药丸分类和追踪的自动化,确保准确监控。
- 假药检测:使用包含合法和假药的数据集,可以训练 YOLO11 在质量测试期间检测假药。
在自定义数据集上训练 YOLO11 的步骤
总之,要在自定义数据集上训练 YOLO11 模型,您需要遵循概述的步骤。
- 1-准备数据集:收集并标记药丸图像,您可以标记不同类型、形状和颜色的药丸,以便分类检测药丸。
- 2-配置 YAML:创建一个 YAML 文件,指定数据集路径和类(例如药丸类型或一般的“药丸”类别)。
- 3- 训练模型:利用 YOLO11 模型对标记数据集进行训练。Ultralytics 提供用户友好的工具和脚本来简化训练过程。
- 4- 评估和微调:在验证集上测试训练后的模型以评估准确性。如有必要,可微调模型以增强性能并优化检测准确性。
注意:对于 medical-pills 数据集,不需要步骤 1 和 2,因为该数据集已经集成到Ultralytics包中。🔥🔥🔥
在 Medical-pills 数据集上训练 YOLO11。
medical-pills 数据集由Ultralytics原生支持,无需手动下载或路径配置。只需安装Ultralytics Python 包即可开始在此数据集上训练YOLO11模型。
您可以使用命令行界面 (CLI) 或 Python 代码轻松训练模型,如下所示。
CLI(命令行界面)
yolo task=detect mode=train data=medical-pills.yaml model=yolo11n.ptPython
from ultralytics import YOLO
model = YOLO("yolo11n.pt")
model.train(data="medical-pills.yaml", epochs=100)
一旦执行该命令,模型训练就会开始,您将看到训练过程正在初始化,如下所示。
Epoch    GPU_mem   box_loss   cls_loss   dfl_loss  Instances       Size
1/25      2.65G      1.759      3.309      1.464        371        640: 100%|██████████| 6/6 [00:02<00:00,  2.16it/s]
         Class     Images  Instances      Box(P          R      mAP50  mAP50-95): 100%|██████████| 1/1 [00:01<00:00,  1.29s/it]
           all         23        399     0.0558      0.965      0.119     0.0711
Epoch    GPU_mem   box_loss   cls_loss   dfl_loss  Instances       Size
2/25      2.82G      1.141      2.883      1.047        453        640: 100%|██████████| 6/6 [00:01<00:00,  5.32it/s]
         Class     Images  Instances      Box(P          R      mAP50  mAP50-95): 100%|██████████| 1/1 [00:00<00:00,  6.44it/s]
           all         23        399     0.0574      0.992      0.795      0.498
Epoch    GPU_mem   box_loss   cls_loss   dfl_loss  Instances       Size
3/25      2.69G      1.031      2.143     0.9523        335        640: 100%|██████████| 6/6 [00:01<00:00,  5.70it/s]
         Class     Images  Instances      Box(P          R      mAP50  mAP50-95): 100%|██████████| 1/1 [00:00<00:00,  6.56it/s]
           all         23        399     0.0575      0.995      0.888      0.595
Epoch    GPU_mem   box_loss   cls_loss   dfl_loss  Instances       Size
4/25      2.75G      1.069      1.691     0.9471        477        640: 100%|██████████| 6/6 [00:01<00:00,  5.92it/s]
         Class     Images  Instances      Box(P          R      mAP50  mAP50-95): 100%|██████████| 1/1 [00:00<00:00,  7.22it/s]
           all         23        399     0.0575      0.995      0.908       0.51
Epoch    GPU_mem   box_loss   cls_loss   dfl_loss  Instances       Size
5/25      2.82G       1.06      1.326     0.9502        428        640: 100%|██████████| 6/6 [00:01<00:00,  5.75it/s]
         Class     Images  Instances      Box(P          R      mAP50  mAP50-95): 100%|██████████| 1/1 [00:00<00:00,  7.44it/s]
           all         23        399     0.0575      0.995      0.907      0.607
训练完成后,导航到“运行/检测/训练”以访问各种性能指标,包括精度曲线、召回曲线和其他详细结果。
注意:您还会发现一个包含“best.pt”文件的权重文件夹,我们将在下一步中使用该文件进行预测。
使用 Medical-pills 模型运行推理
现在是时候使用训练好的模型进行预测并评估其检测药丸的性能了。
您可以使用下面的 CLI 或 Python 命令执行推理并探索结果。
CLI(命令行界面)
yolo task=detect mode=predict \
source="https://ultralytics.com/assets/medical-pills-sample.jpg" \
save=True \
model="path/to/best.pt"
show=True
Python
from ultralytics import YOLO
# Load a model
model = YOLO("/path/to/best.pt")  # load a fine-tuned model
# Inference using the model
results = model.predict(
source="https://ultralytics.com/assets/medical-pills-sample.jpg",
save=True)
运行推理后,结果将显示如下所示。
Medical-pills 数据集的其他资源
探索 Medical-pills 数据集:
https://www.kaggle.com/datasets/ultralytics/medical-pills/用 Ultralytics 笔记本打开:
https://github.com/ultralytics/notebooks/blob/main/notebooks/how-to-train-ultralytics-yolo-on-medical-pills-dataset.ipynbMedical-pills 数据集文档:
https://docs.ultralytics.com/datasets/detect/medical-pills/2.4、YOLOv11和ByteTrack ~目标跟踪
介 绍
之前我们介绍了使用YOLOv9与 ByteTrack 结合进行对象跟踪的概念,展示了这两种强大的技术如何有效地协同工作。现在,让我们通过探索与 ByteTrack 结合的 YOLOv11 来进一步了解这一概念。
YOLOv11(You Only Look Once,版本 11)代表了物体识别技术的最新进展,进一步突破了速度和准确性的界限。YOLOv11 就像是我们增强的眼睛,能够以无与伦比的准确性同时快速识别和分类多个物体。
ByteTrack 是对这一强大检测能力的补充,它是一种先进的跟踪算法,可以无缝连接 YOLOv11 的跨帧检测。ByteTrack 充当视觉背后的大脑,一丝不苟地处理检测,并在物体穿过场景时保持一致的物体身份。
本文中我们将逐步指导您使用 YOLOv11 和 ByteTrack 实现卓越的实时对象跟踪性能。
入门
步骤 1:安装库
pip install opencv-python ultralytics步骤 2:导入库
import cv2
from ultralytics import YOLO
步骤 3:加载模型
model = YOLO('yolo11l-seg.pt') # Load an official Segment model在下面网站上,你可以从各种模型中进行选择。在本例中,我们选择了 yolo11l-seg.pt。
https://docs.ultralytics.com/models/yolo11/#supported-tasks-and-modes
第 4 步:设置视频文件路径
# open the video file
video_path = r"YourVideoPath"
cap = cv2.VideoCapture(video_path)
步骤 5:循环播放视频帧
while cap.isOpened():
    # Read a frame from the video
    success, frame = cap.read()


    if success:
        frame = cv2.resize(frame, (416, 416))
        # Run YOLOv9 tracking on the frame, persisting tracks between frames
        conf = 0.2
        iou = 0.5
        results = model.track(frame, persist=True, cnotallow=conf, iou=iou, show=False, tracker="bytetrack.yaml")


        # Visualize the results on the frame
        annotated_frame = results[0].plot()


        # Display the annotated frame
        cv2.imshow("YOLOv11 Tracking", annotated_frame)
        cv2.waitKey(1)
完整代码:
import cv2
from ultralytics import YOLO


model = YOLO('yolo11l-seg.pt')  # Load an official Segment model


# open the video file
video_path = r"DeinVideoPfad"
cap = cv2.VideoCapture(video_path)


while cap.isOpened():
    # Read a frame from the video
    success, frame = cap.read()


    if success:
            frame = cv2.resize(frame, (416, 416))
            # Run YOLOv9 tracking on the frame, persisting tracks between frames
            conf = 0.2
            iou = 0.5
            results = model.track(frame, persist=True, cnotallow=conf, iou=iou, show=False, tracker="bytetrack.yaml")
            # Visualize the results on the frame
            annotated_frame = results[0].plot()
            # Display the annotated frame
            cv2.imshow("YOLOv11 Tracking", annotated_frame)
            cv2.waitKey(1)
3、Yolo12
3.1、目标检测YOLOv12算法来袭,更高性能、更快速度
目标检测是CV领域最常用的算法应用,而Yolo是目标检测算法非常经典的算法模型,近日Yolov12算法正式开源,提出区域注意力模块,残差高效层聚合网络,性能更好,速度更快
创新点
这篇论文围绕实时目标检测,在网络架构设计上引入创新,克服了传统注意力机制在实时应用中的速度瓶颈,提升了检测性能。
- 构建注意力中心框架
突破传统 YOLO 依赖 CNN 架构的局限,以注意力机制为核心设计 YOLOv12 框架,发挥注意力机制强大的建模能力,打破 CNN 模型在 YOLO 系列中的主导地位。 - 高效的区域注意力模块
提出简单有效的区域注意力模块(A2),通过简单的特征图划分方式,在减少注意力计算复杂度的同时,保持较大的感受野,显著提升计算速度,且对性能影响较小。 - 残差高效层聚合网络
引入 R-ELAN 解决注意力机制带来的优化挑战。通过块级残差设计和重新设计的特征聚合方法,增强特征聚合能力,降低模型计算成本和参数 / 内存使用,保证大模型稳定训练。 - 优化基础注意力机制
对基础注意力机制进行多项改进,如调整 MLP 比例、采用卷积算子、去除位置编码并引入大的可分离卷积感知位置信息等,使模型更适配 YOLO 系统的实时性要求,提升综合性能。
实验
- 对于N规模模型,YOLOv12-N在mAP方面分别优于YOLOv6-3.0-N 、YOLOv8-N 、YOLOv10-N 和YOLOv11 3.6%、3.3%、2.1%和1.2%,同时保持相似甚至更少的计算量和参数,并实现1.64 ms/图像的快速延迟速度。
- 对于S规模模型,YOLOv12-S具有21.4G FLOPs和9.3M参数,以2.61 ms/图像的延迟实现了48.0 mAP。 它分别优于YOLOv8-S[24]、YOLOv9-S [58]、YOLOv10-S [53]和YOLOv11-S [28]3.0%、1.2%、1.7%和1.1%,同时保持相似或更少的计算量。 与端到端检测器 RT-DETR-R18[66] / RT-DETRv2-R18 [41]
- 对于 M 尺度模型,YOLOv12-M,具有 67.5G FLOPs 和 20.2M 个参数,实现了 52.5 mAP 性能和 4.86与 Gold-YOLO-M [54]、YOLOv8-M [24]、YOLOv9-M [58]、YOLOv10 [53]、YOLOv11 [28] 和 RT-DETR-R34 [66] / RT-DETRv2-R34 [40] 相比,YOLOv12-S 表现更优。
- 对于 L 尺度模型,YOLOv12-L 甚至超过了 YOLOv10-L [53],FLOPs 少了 31.4G。YOLOv12-L 以可比拟的 FLOPs 和参数,比 YOLOv11 [28] 的 mAP 高 0.4%。 YOLOv12-L 还优于 RT-DERT-R50 [66] / RT-DERTv2-R50 [41],速度更快,FLOPs 更少 (34.6%),参数也更少 (37.1%)。
- 对于 X 尺度模型,YOLOv12-X 明显优于 YOLOv10-X [53] / YOLOv11-X [28],分别高出 0.8% 和 0.6%,速度、FLOPs 和参数方面则可比拟。YOLOv12-X 再次击败了 RT-DETR-R101 [66] / RT-DETRv2-R101 [40],速度更快,FLOPs 更少 (23.4%),参数也更少 (22.2%)。
- 特别地,如果使用 FP32 精度评估 L/X 尺度模型(这需要分别以 FP32 格式保存模型),YOLOv12 将实现 ∼0.2%这意味着 YOLOv12-L/X 将报告 33.9%/55.4% mAP。
论文标题:YOLOv12: Attention-Centric Real-Time Object Detectors
介绍
造成 attention(注意力机制)不能作为核心模块用于 yolo 框架的主要原因在于其本身的低效性,这主要源于两个因素:(1)attention 的计算复杂度呈二次增长;(2)attention 的内存访问操作低效(后者是 FlashAttention 主要解决的问题)。在相同的计算预算下,基于 CNN 的架构比基于 attention 的架构快约 2-3 倍,这极大限制了 attention 在 YOLO 系统中的应用,由于 YOLO 体系高度依赖高推理速度。
首先,作者提出了一种简单而高效的区域注意力模块(area attention, A2),该模块在保持大感受野的同时,以最简单直接的方式降低了 attention 的计算复杂度,从而提升了计算速度。
其次,作者引入了残差高效层聚合网络(R-ELAN),以解决 attention(主要是大规模模型)带来的优化难题。
R-ELAN 在原始的基础上进行了两项改进:1)block 级残差设计,结合缩放技术以优化梯度流动;2)重新设计的特征聚合方法,以提升模型的优化效率。
最后,作者针对 YOLO 体系对 attention 进行了一系列架构改进,优化了传统的 attention 主导架构,包括:1)引入 FlashAttention 以解决注意力机制的显存访问问题;2)移除位置编码等设计,使模型更加高效简洁;3)调整 MLP ratio(从 4 降至 1.2),以平衡注意力机制和前馈网络的计算开销,从而提升整体性能;4)减少堆叠块的深度,以简化优化过程等。
Area Attention
首先介绍 area attention 机制,其目的在于降低传统 attention 的计算代价,同时克服线性注意力和局部注意力在全局依赖性、稳定性及感受野方面的局限性。为此,作者提出了一种简单高效的区域注意力(A2)模块。
不同于局部注意力的显式窗口划分,A2 采用最简单的方式将特征图划分为纵向或横向的区域(每个区域大小为
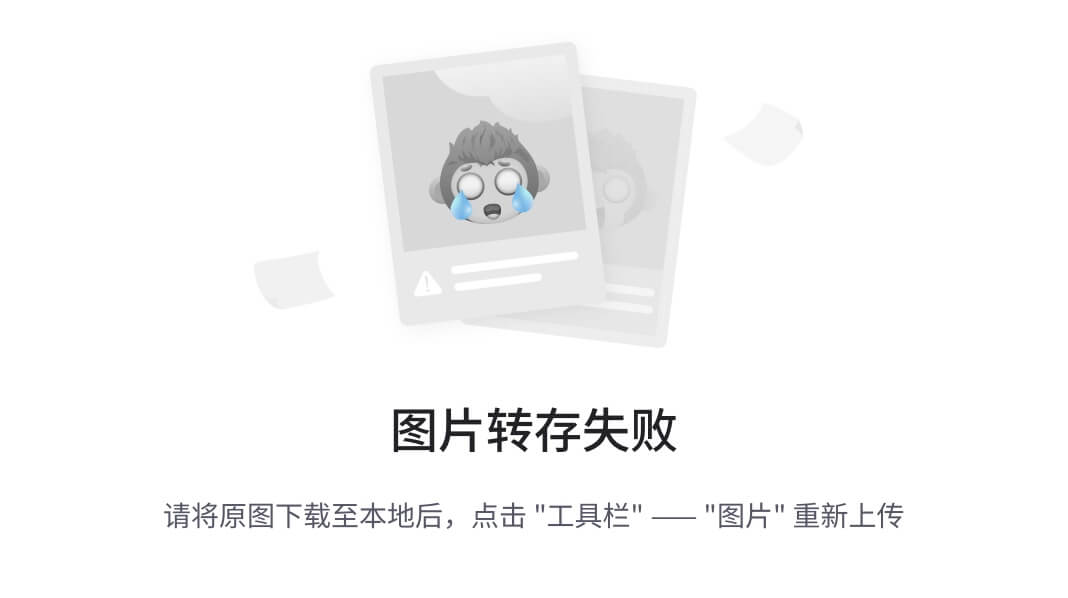
或
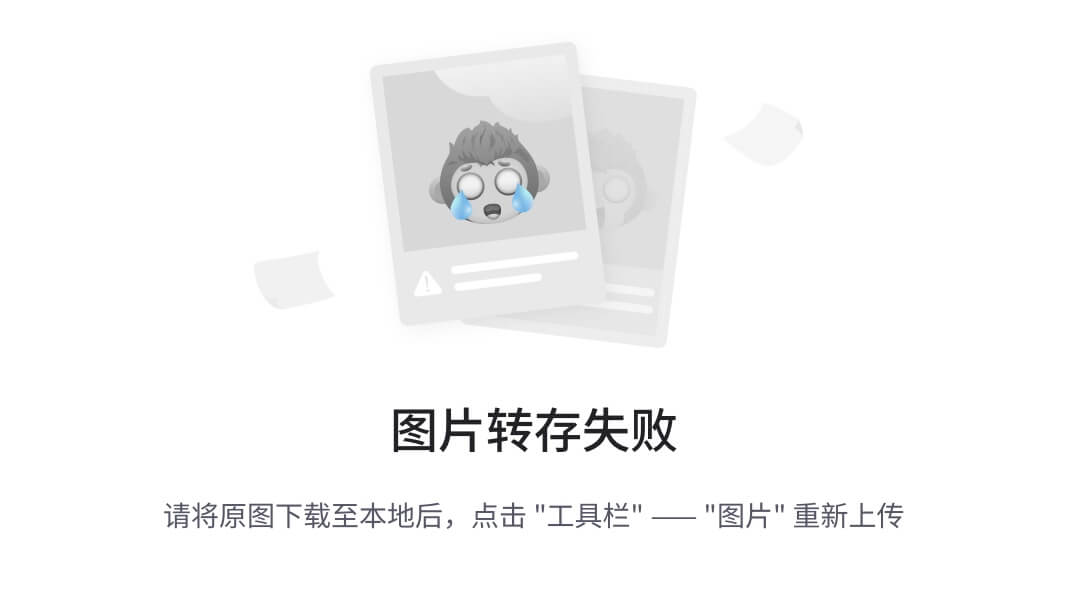
,这仅需简单的 reshape 操作,避免了额外的复杂计算带来的开销,从而提升计算效率。
在实验中,作者将默认分割数
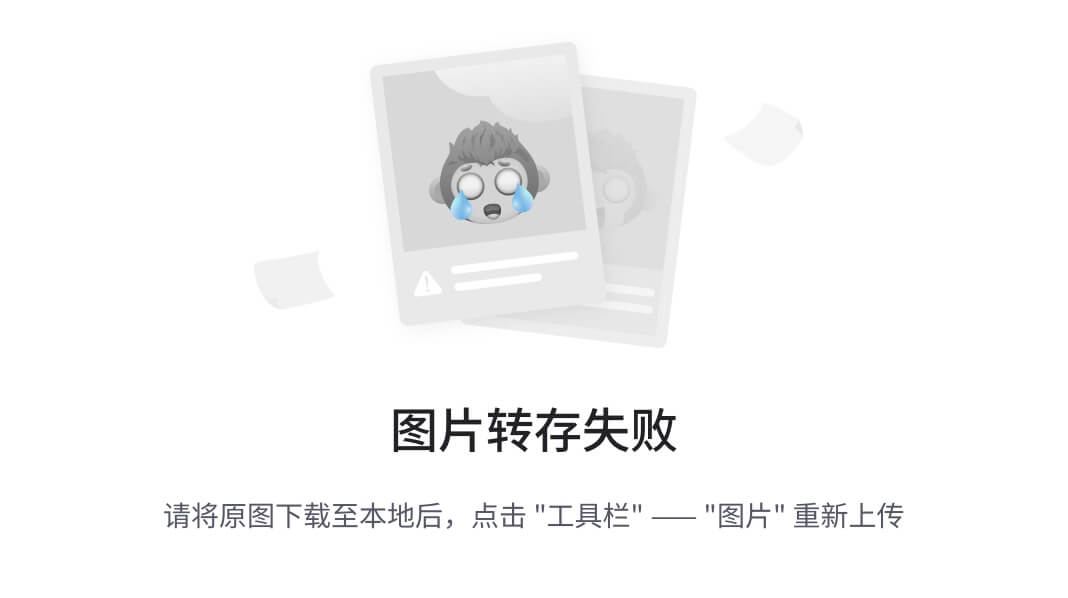
设为 4,使感受野缩小至原来的
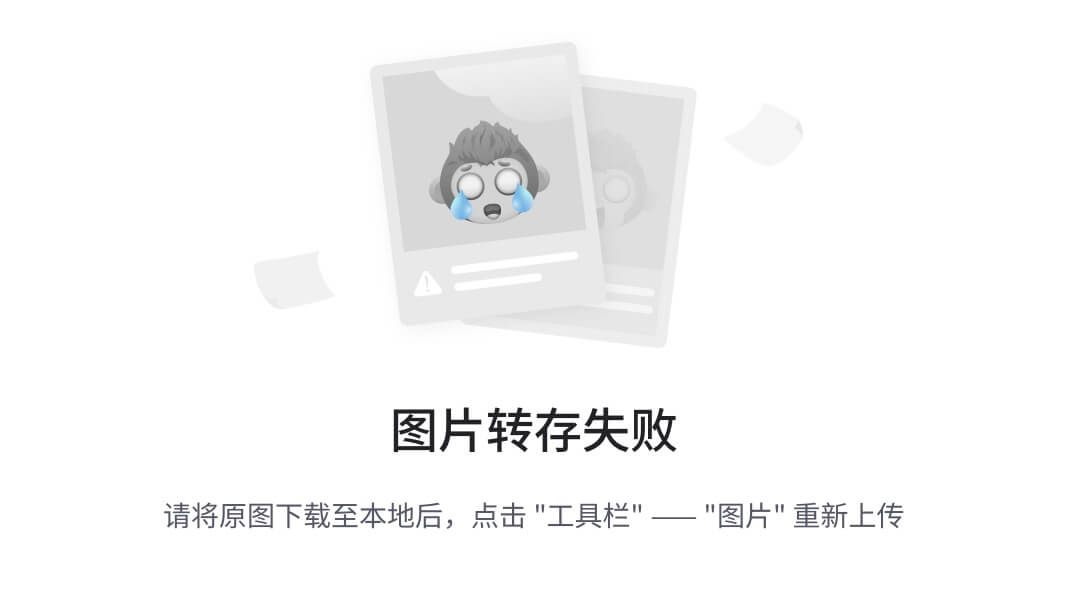
,仍能覆盖足够的信息范围。在计算复杂度方面,A2 将注意力机制的计算量从
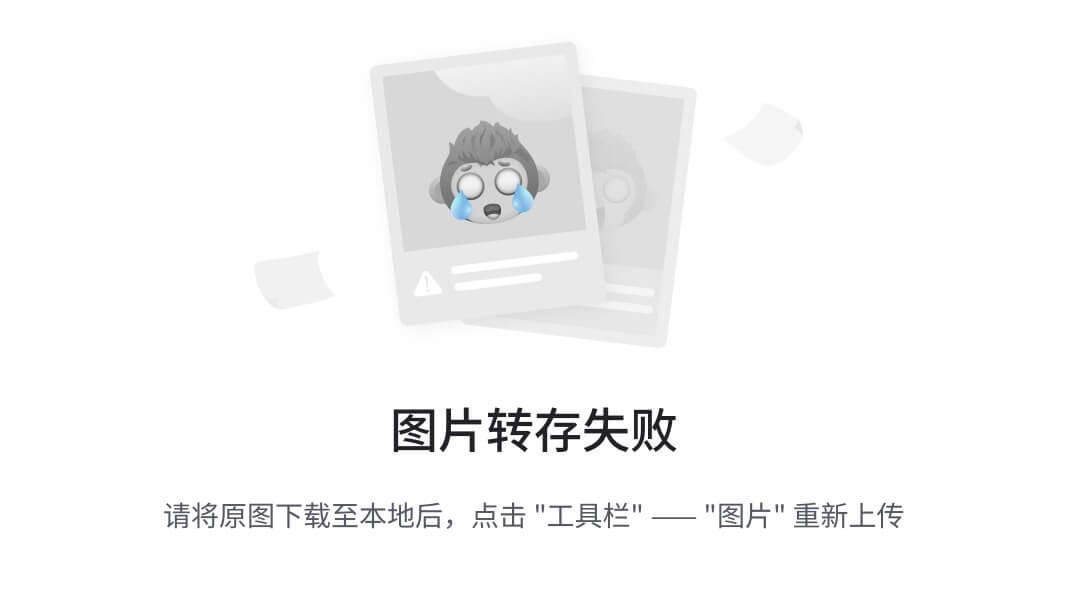
降低至
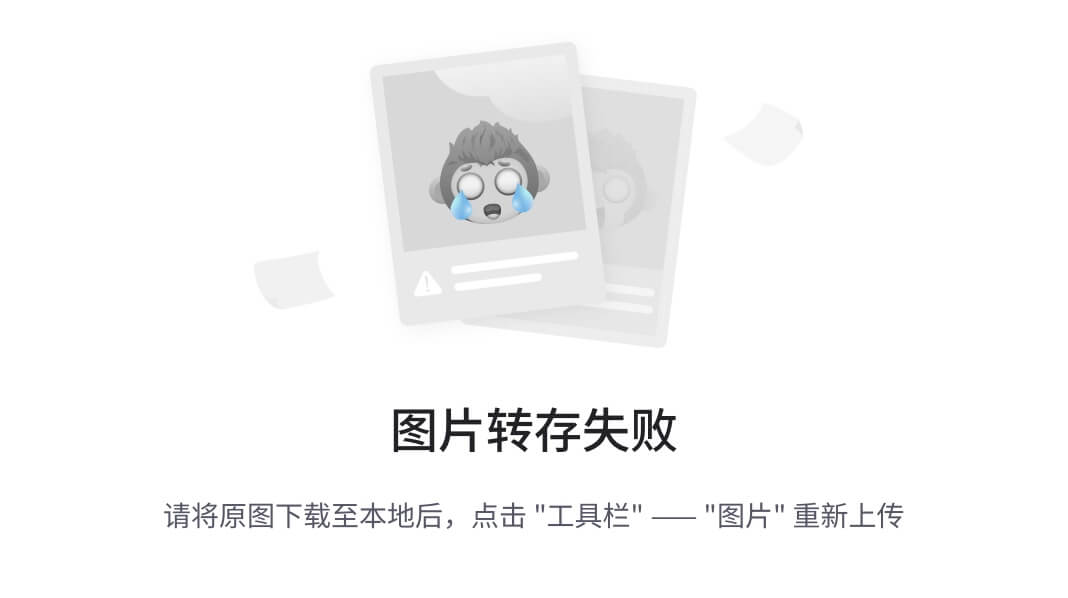
。尽管仍保持二次复杂度,但在 token 数量 n 不是特别大的情况下(如 YOLO:640x640),此优化方案在实际应用中仍足够高效,满足了实时推理的需求。最终,实验表明,A2 仅对性能产生轻微影响,但显著提升了计算速度,为 YOLO 等对速度要求极高的任务提供了一种更优的注意力机制替代方案。
R-ELAN
R-ELAN 的主要动机是优化 ELAN 结构,以提升特征聚合效率并解决其带来的优化不稳定性问题,尤其是在引入注意力机制后,参数量较大的模型(如 YOLOv12-L 和 YOLOv12-X)容易发生梯度阻塞或收敛困难。为此,作者提出了残差高效层聚合网络(R-ELAN)。
与原始 ELAN 不同,R-ELAN 在整个 block 内引入从输入到输出的残差连接,并结合缩放因子(默认 0.01),以稳定训练并优化梯度流动。
此外,作者重新设计了特征聚合方式,使其采用瓶颈结构(如上图所示),通过调整通道维度并简化计算流程,以减少计算成本和显存占用,同时保持高效的特征融合能力。最终,R-ELAN 显著提升了模型的优化稳定性和计算效率,使 YOLOv12 的大规模模型能够更好地收敛,并在保证性能的同时提升推理速度。
结构改进
另外,作者还提出一些优化技术,使注意力机制更适应实时目标检测任务,同时降低计算开销并提升优化稳定性。
首先,作者保留了 YOLO 主干网络的分层设计,不同于很多基于 attention 的架构采用的平铺结构的视觉 Transformer。
此外,作者减少了主干网络(Backbone)最后阶段的堆叠的 block 数量,仅保留单个 R-ELAN block,以减少计算量并优化训练收敛性。主干网络的前两阶段继承自 YOLOv11,未使用 R-ELAN,以保持轻量级设计。
同时,作者对基础注意力机制进行了一系列优化,包括:调整 MLP ratio(从 4 降至 1.2 或 2)以更合理地分配计算资源,用 Conv2d+BN 替换 Linear+LN 以充分利用卷积算子的计算效率,移除位置编码并引入 7x7 可分离卷积(Position Perceiver) 以帮助区域注意力感知位置信息。
最终,这些改进提升了模型的优化稳定性和计算效率,使其更适用于 YOLO 系统,同时保持具有竞争力的性能。
实验结果
YOLOv12 在 COCO 上取得的效果如下表所示:
- N-scale 模型:YOLOv12-N 比 YOLOv6-3.0-N、YOLOv8-N、YOLOv10-N 和 YOLOv11-N 分别提升 3.6%、3.3%、2.1%、1.2%,同时计算量和参数规模相近或更少,推理速度达到具有竞争力的 1.64 ms / 图像。
- S-scale 模型:YOLOv12-S 在 21.4G FLOPs 和 9.3M 参数的情况下,实现 48.0% mAP,比 YOLOv8-S、YOLOv9-S、YOLOv10-S 和 YOLOv11-S 分别提升 3.0%、1.2%、1.7%、1.1%,计算量相近或更少,并且在推理速度、计算开销和参数量方面明显优于 RT-DETR-R18 / RT-DETRv2-R18。
- M-scale 模型:YOLOv12-M 在 67.5G FLOPs 和 20.2M 参数的情况下,实现 52.5 mAP,推理速度 4.86 ms / 图像,在各项指标上均优于 Gold-YOLO-M、YOLOv8-M、YOLOv9-M、YOLOv10-M、YOLOv11-M 以及 RT-DETR-R34 / RT-DETRv2-R34。
- L-scale 模型:YOLOv12-L 相较于 YOLOv10-L,减少了 31.4G FLOPs 的计算量,同时 mAP 仍优于 YOLOv11-L 达 0.4%,计算量和参数量相近。此外,YOLOv12-L 在推理速度、FLOPs(减少 34.6%)和参数量(减少 37.1%)方面均优于 RT-DETR-R50 / RT-DETRv2-R50。
- X-scale 模型:YOLOv12-X 比 YOLOv10-X 和 YOLOv11-X 分别提升 0.8% 和 0.6%,计算量和参数量相近,推理速度基本持平。同时,相比 RT-DETR-R101 / RT-DETRv2-R101,YOLOv12-X 计算量减少 23.4%,参数量减少 22.2%,且推理速度更快。
可视化分析
参数量 / CPU 速度 - 精度的 Trade-offs 比较:YOLOv12 在参数量和 CPU 推理速度方面上均实现了突破。如上图所示,实验结果显示,YOLOv12 在准确率 - 参数量平衡方面优于现有方法,甚至超越了参数量更少的 YOLOv10,证明了其高效性。此外,在 CPU(Intel Core i7-10700K @ 3.80GHz)上的推理速度测试中,YOLOv12 在不同 YOLO 版本中展现出最佳的计算效率。
YOLOv12 热力图分析:上图展示了 YOLOv12 与当前最先进的 YOLOv10 和 YOLOv11 的热力图对比。这些热力图来自 X-scale 模型主干网络的第三阶段,显示了模型激活的区域,从而反映其目标感知能力。结果表明,相较于 YOLOv10 和 YOLOv11,YOLOv12 能够生成更清晰的目标轮廓和更精确的前景激活,说明其目标感知能力得到了提升。这一改进主要归因于区域注意力机制(Area Attention),该机制相比卷积网络具有更大的感受野,因此在捕捉全局上下文信息方面更具优势,从而实现了更精准的前景激活。作者认为,这一特性使 YOLOv12 在检测性能上占据优势。
最后,我们期待 YOLO 社区能继续提出更强大的检测器,为实时目标检测任务提供更多选择。
YOLOv12 安装指南
设置 YOLOv12 涉及某些步骤以确保兼容性,特别是与 CUDA 和 GPU 配置。但您需要先克隆存储库:
git clone https://github.com/sunsmarterjie/yolov12.git
cd yolov12
1. 验证 CUDA 版本:确认系统的 CUDA 版本兼容。运行:
nvcc - version输出信息:
nvcc: NVIDIA (R) Cuda compiler driver
Copyright (c) 2005-2024 NVIDIA Corporation
Built on Thu_Mar_28_02:18:24_PDT_2024
Cuda compilation tools, release 12.4, V12.4.131
Build cuda_12.4.r12.4/compiler.34097967_0
因此,由于我获得了 CUDA v12.4 并且 YOLOv12 需要torch==2.2.0,我决定安装CUDA12.2 的torch和torchvision(CUDA v12.4 不可用)。
2. 安装PyTorch和TorchVision:
pip install torch==2.2.2 torchvision==0.17.2 --index-url https://download.pytorch.org/whl/cu1213. 安装其他依赖项:
# Install thop, a library used for profiling PyTorch models' operations and estimating FLOPs.
pip install thop
# Install flash-attn v2.7.3 with the flag to disable build isolation. It improves memory efficiency during attention operations but requires CUDA.
pip install flash-attn==2.7.3 --no-build-isolation
# Install all other necessary dependencies listed in the requirements.txt file, essential for running YOLOv12.
pip install -r requirements.txt
注意注意(以前从来没有说过更好🤣)。重要提示⚠️:
YOLOv12 不支持仅 CPU 环境,主要是因为它需要 FlashAttention,因为安装需要 CUDA,所以不支持仅 CPU 环境。请确保您的系统上正确配置了 CUDA。
将 YOLOv12 与 Gradio 界面结合使用
项目提供了 Gradio 应用界面模板,方便演示和界面测试。进入仓库目录,运行:
python app.py这将启动 Gradio 界面,使其更容易与模型交互。
YOLOv11和YOLOv12检测结果对比:
使用 YOLOv12 预测视频、图像或相机 📹
轻松利用 YOLOv12 强大的推理能力:
from ultralytics import YOLO
# Load and predict with a model
model = YOLO('yolov12x.pt')
model.predict(0) # Webcam
model.predict("video.mp4") # Video file
model.predict("image.jpg") # Image file
将 YOLOv12 用于你的项目
YOLOv12 提供多种模式,满足机器学习生命周期的每个阶段:
- 训练模式:通过精确的数据集调整来定制模型训练。
- 验证模式:提高训练后的准确性。
- 预测模式:实现实时数据预测。
- 导出模式:为各种部署平台配置模型。
- 跟踪模式:为监控或自动驾驶汽车等应用启用实时对象跟踪。
YOLOv12 代表了物体检测技术的重大进步,在保持实时性的同时成功融入了注意力机制,技术成果显著:
- 在所有尺度上均达到最佳性能(40.6% — 55.2% mAP)
- 引入高效的区域注意力机制,降低计算复杂度且不造成显著的性能损失
- 实现 R-ELAN(残差高效层聚合网络)以实现更好的功能集成
- 与 YOLOv10 和 YOLOv11 相比,表现出更出色的热图可视化效果
- 在不同模型规模上保持有竞争力的推理速度(1.64ms — 11.79ms)
- 与之前的 YOLO 版本相比,减少了参数数量,同时提高了准确率
项目地址:
https://github.com/sunsmarterjie/yolov123.2、YOLOv12 ~目标检测
介 绍
在研究了YOLOv8、YOLOv9、YOLOv10甚至YOLOv11之后,我们很高兴地推出 YOLO 系列的最新版本:YOLOv12!这个新版本采用了以注意力为中心的架构,改变了实时对象检测的方式。它还为准确性和效率树立了新标准。
释放 YOLOv12 的力量:
与之前的版本一样,YOLOv12 在检测、分类和定位图像和视频中的对象方面表现出色。但是,它包含重大增强功能,可提高多种用例的性能和适应性。下一节将介绍 YOLOv12 作为该系列的一个显著迭代而具有的关键增强功能。
推动 YOLOv12 性能提升的关键创新:
- 增强注意力特征提取
YOLOv12 集成了新颖的区域注意力机制和先进的残差高效层聚合网络 (R-ELAN)。这种集成能够在不影响速度的情况下捕获更丰富的上下文信息并提高检测准确性。
- 优化的效率和速度:
所考虑的模型已被证明通过使用精炼的架构设计和智能优化(例如 FlashAttention)实现了令人印象深刻的实时性能。该模型的设计旨在确保在各种应用程序中(无论是在边缘设备还是高端 GPU 上)快速准确地进行推理。
- 无与伦比的跨任务多功能性:
YOLOv12 的功能超出了传统物体检测的范围,涵盖了广泛的计算机视觉任务。这些任务包括实例分割、图像分类、姿势估计和定向边界框检测。这些广泛的功能使 YOLOv12 成为解决各个领域无数挑战的强大解决方案。
如何使用 YOLOv12 处理图像
第 1 步:安装必要的库
pip install opencv-python ultralytics第 2 步:导入库
import cv2
from ultralytics import YOLO
import random
第 3 步:选择模型
model = YOLO("yolo12x.pt")在下面网址中,你可以比较不同的模型,并权衡它们各自的优缺点。在本例中,我们选择了 yolov12x.pt。
https://docs.ultralytics.com/de/models/yolo12/#key-improvements第 4 步:编写一个函数来预测和检测图像中的目标
def predict(chosen_model, img, classes=[], conf=0.5):
    if classes:
        results = chosen_model.predict(img, classes=classes, conf=conf)
    else:
        results = chosen_model.predict(img, conf=conf)


    return results


def predict_and_detect(chosen_model, img, classes=[], conf=0.5, rectangle_thickness=5, text_thickness=2):
    results = predict(chosen_model, img, classes, conf=conf)
    yolo_classes = list(model.names.values())
    classes_ids = [yolo_classes.index(clas) for clas in yolo_classes]
    colors = [random.choices(range(256), k=3) for _ in classes_ids]


    for result in results:
        for box in result.boxes:
            color_number = classes_ids.index(int(box.cls[0]))
            cv2.rectangle(img, (int(box.xyxy[0][0]), int(box.xyxy[0][1])),
                          (int(box.xyxy[0][2]), int(box.xyxy[0][3])), colors[color_number], rectangle_thickness)
            cv2.putText(img, f"{result.names[int(box.cls[0])]}",
                        (int(box.xyxy[0][0]), int(box.xyxy[0][1]) - 10),
                        cv2.FONT_HERSHEY_PLAIN, 1, colors[color_number], text_thickness)
    return img, results
第 5 步:使用 YOLOv12 检测图像中的物体
# read the image
image = cv2.imread("YourImagePath")
result_img, _ = predict_and_detect(model, image, classes=[], conf=0.5)
如果您想要检测特定的类别(您可以在这里找到),只需在类别列表中写入对象的 ID 号即可。
https://github.com/ultralytics/ultralytics/blob/main/ultralytics/cfg/datasets/coco.yaml第 6 步:保存并绘制结果图像
cv2.imshow("Image", result_img)
cv2.imwrite("YourSavePath", result_img)
cv2.waitKey(0)
完整代码:
from ultralytics import YOLO
import cv2
import random


def predict(chosen_model, img, classes=[], conf=0.5):
    if classes:
        results = chosen_model.predict(img, classes=classes, conf=conf)
    else:
        results = chosen_model.predict(img, conf=conf)


    return results


def predict_and_detect(chosen_model, img, classes=[], conf=0.5, rectangle_thickness=5, text_thickness=2):
    results = predict(chosen_model, img, classes, conf=conf)
    yolo_classes = list(model.names.values())
    classes_ids = [yolo_classes.index(clas) for clas in yolo_classes]
    colors = [random.choices(range(256), k=3) for _ in classes_ids]


    for result in results:
        for box in result.boxes:
            color_number = classes_ids.index(int(box.cls[0]))
            cv2.rectangle(img, (int(box.xyxy[0][0]), int(box.xyxy[0][1])),
                          (int(box.xyxy[0][2]), int(box.xyxy[0][3])), colors[color_number], rectangle_thickness)
            cv2.putText(img, f"{result.names[int(box.cls[0])]}",
                        (int(box.xyxy[0][0]), int(box.xyxy[0][1]) - 10),
                        cv2.FONT_HERSHEY_PLAIN, 1, colors[color_number], text_thickness)
    return img, results


model = YOLO("yolo12x.pt")


# read the image
image = cv2.imread(r"YourImagePath")
result_img, _ = predict_and_detect(model, image, classes=[], conf=0.5)


cv2.imshow("Image", result_img)
cv2.imwrite("YourSavePath.png", result_img)
cv2.waitKey(0)
如何使用 YOLOv12 处理视频
前面步骤相同,所以这里直接给出完整代码供大家参考:
import cv2
from ultralytics import YOLO
import random


def predict(chosen_model, img, classes=[], conf=0.5):
    if classes:
        results = chosen_model.predict(img, classes=classes, conf=conf)
    else:
        results = chosen_model.predict(img, conf=conf)


    return results


def predict_and_detect(chosen_model, img, classes=[], conf=0.5, rectangle_thickness=5, text_thickness=2):
    results = predict(chosen_model, img, classes, conf=conf)
    yolo_classes = list(model.names.values())
    classes_ids = [yolo_classes.index(clas) for clas in yolo_classes]
    colors = [random.choices(range(256), k=3) for _ in classes_ids]


    for result in results:
        for box in result.boxes:
            color_number = classes_ids.index(int(box.cls[0]))
            cv2.rectangle(img, (int(box.xyxy[0][0]), int(box.xyxy[0][1])),
                          (int(box.xyxy[0][2]), int(box.xyxy[0][3])), colors[color_number], rectangle_thickness)
            cv2.putText(img, f"{result.names[int(box.cls[0])]}",
                        (int(box.xyxy[0][0]), int(box.xyxy[0][1]) - 10),
                        cv2.FONT_HERSHEY_PLAIN, 1, colors[color_number], text_thickness)
    return img, results


# defining function for creating a writer (for mp4 videos)
def create_video_writer(video_cap, output_filename):
    # grab the width, height, and fps of the frames in the video stream.
    frame_width = int(video_cap.get(cv2.CAP_PROP_FRAME_WIDTH))
    frame_height = int(video_cap.get(cv2.CAP_PROP_FRAME_HEIGHT))
    fps = int(video_cap.get(cv2.CAP_PROP_FPS))
    # initialize the FourCC and a video writer object
    fourcc = cv2.VideoWriter_fourcc(*'MP4V')
    writer = cv2.VideoWriter(output_filename, fourcc, fps,
                             (frame_width, frame_height))
    return writer


model = YOLO("yolo12x.pt")
output_filename = "YourFilename.mp4"
video_path = r"YourVideoPath.mp4"
cap = cv2.VideoCapture(video_path)
writer = create_video_writer(cap, output_filename)


while True:
    success, img = cap.read()
    if not success:
        break
    result_img, _ = predict_and_detect(model, img, classes=[], conf=0.5)
    writer.write(result_img)
    cv2.imshow("Image", result_img)


    cv2.waitKey(1)
writer.release()
参考链接:
论文: https://www.arxiv.org/abs/2502.12524
仓库: https://github.com/sunsmarterjie/yolov12
3.3、YOLOv12 ~初学者使用教程
什么是 YOLOv12
YOLOv12(You Only Look Once v12)是一种最先进的基于图像机器学习的模型,可以使用 Ultrlaytics 库进行训练和实现。
YOLOv12 有多个版本,具体取决于手头的任务。
分类只是检测和标记物体。检测会检测物体并在物体周围形成一个边界框。分割会分割出手边的物体。跟踪是检测的扩展,但会在整个图像中跟踪物体,而姿势会显示个人的线框。
还有 OBB,即定向边界框,它可以检测,但边界框可以根据个人喜好进行旋转和定向。
每个任务中的模型尺寸也各不相同:纳米(N)、小型(S)、中型(M)、大型(L)和超大型(X)。
纳米和小型主要用于测试批次,中型和大型用于小型应用,超大型用于具有大型数据集的工业标准或提供性能最佳的模型。
从创建数据集开始
首先,我们要收集数据集中的图像,并创建一个包含所有图像的文件夹。接下来,我们将它们上传到 Roboflow。
如果您正在进行 OBB、检测或跟踪,请选择对象检测。如果您正在进行分类,请选择分类。如果您正在进行分割,请选择实例分割。如果您正在进行姿势,请选择关键点检测。
将您的图像上传到新的 Roboflow 项目,并使用右侧的工具箱对其进行注释。探索您可以使用的不同工具,如简单的边界框选择、多边形工具和 AI 助手。
导出和训练
现在您已完成注释,请转到主侧边栏中的健康检查,检查数据集的健康状况并进行必要的调整。之后,转到版本选项卡并浏览步骤并制作版本。获得版本后,为其命名,然后按右上角的导出。选择 YOLOv12,下载 zip 文件,解压并准备就绪。
在我们编写基本的 Python 代码或 CLI 之前,首先下载 Ultralytics!
pip install ultralytics完成环境配置后,在终端输入以下命令验证YOLO是否安装成功:
根据需求选择模型初始化方式:
- 预训练模型:使用 .pt 文件(基于大规模数据集训练好的权重)
- 从零开始训练:使用 .yaml 配置文件(定义模型结构)
参考文档开头的模型尺寸说明选择适合的版本:
常见尺寸:n (nano), s (small), m (medium), l (large), x (xlarge)
根据任务类型在模型名称后追加扩展名:
将各部分按顺序组合,格式为:
yolov12{尺寸}{扩展名(可选)}.pt 或 .yaml
正确示例:
- yolov12n-obb.pt (旋转框检测,nano尺寸,预训练模型)
- yolov12x-seg.yaml (实例分割,xlarge尺寸,从零开始训练)
- yolov12m-cls.pt (图像分类,medium尺寸,预训练模型)
Python训练代码示例
from ultralytics import YOLO


# 初始化模型(以 yolov12n-obb.pt 为例)
model = YOLO("yolov12n-obb.pt")  # 加载预训练模型


# 训练配置
results = model.train(
    data="your_dataset.yaml",  # 数据集配置文件路径
    epochs=100,                # 训练轮次
    batch=16,                  # 批次大小
    imgsz=640,                 # 输入图像尺寸
    device="0",                # 使用GPU 0(CPU则设为"cpu")
    project="runs/train",      # 输出目录
    name="yolov12n-obb"        # 训练任务名称
)


# 验证模型
metrics = model.val()
确保 your_dataset.yaml 包含正确的训练/验证集路径及类别标签:
模型导出与性能评估
1. 导出为ONNX格式
from ultralytics import YOLO


# 加载训练好的模型(示例路径:"runs/train/yolov12n-obb/weights/best.pt")
model = YOLO("模型路径")


# 导出模型(支持格式:ONNX、TensorRT、CoreML等)
model.export(format="onnx")  # 生成.onnx文件,便于跨平台部署
2. 模型性能基准测试
from ultralytics.utils.benchmarks import benchmark


# 在GPU上测试推理速度与精度
benchmark(
    model="模型路径",      # 例如:"yolov12n-obb.onnx"
    data="数据集路径",     # 数据集配置文件(如coco.yaml)
    imgsz=640,            # 输入分辨率(与训练设置一致)
    half=False,           # 是否启用FP16半精度推理(需硬件支持)
    device="0"            # 指定GPU设备(多卡可用"0,1,2,3")
)
3.4、智能交通分析
交通管理和道路安全对于现代智慧城市至关重要。检测交通违规行为、确保道路安全和改善城市交通需要创新的解决方案。这就是“智能交通监控:使用 YOLOv12N 进行实时闭路电视分析”项目的用武之地。本文将解释该项目的目的、技术、代码结构和未来的改进。
项目目的
在大城市,监控交通流量并立即检测违规行为有助于减少交通事故并优化城市交通。该项目旨在:
- 检测紧急车道违规并识别阻碍紧急车辆的车辆。
- 分析基于车道的交通流速和拥堵情况,以确定交通状况。
- 对车辆进行计数并对类型进行分类,以提供有关不同车辆类型的数据。
该系统可以集成到智能城市管理中,有助于创建公平高效的交通系统。
import json
import cv2
import numpy as np
import supervision as sv
from ultralytics import YOLO
from collections import defaultdict
from typing import Dict, List, Optional, Set, Tuple, Iterable
import argparse
from tqdm import tqdm
####################################
# 1) CONSTANTS AND CONFIG
####################################
JSON_PATH = "/Users/bahakizil/Desktop/firedetection/polygons.json"
VIDEO_INPUT = "/Users/bahakizil/Desktop/firedetection/emniyett.mp4"
VIDEO_OUTPUT = "output_lane_detection.mp4"
MODEL_PATH = "/Users/bahakizil/Desktop/firedetection/best.pt"
# Define the detection region (from the polygon.json data)
DETECTION_REGION = {
"x": 340,
"y": 220,
"width": 340,
"height": 180
}
# Define colors
try:
# Using ColorPalette if available
COLORS = sv.ColorPalette.from_hex([
"#FF0000", # Red for emniyet_seridi
"#FFFF00", # Yellow for sag_serit
"#00FF00", # Green for orta_serit1
"#800080", # Purple for orta_serit2
"#00FFFF", # Cyan for sol_serit
"#FFFFFF" # White for generic
])
except:
# Fallback to BGR colors
COLORS = {
"emniyet_seridi": (0, 0, 255), # Red in BGR
"sag_serit": (0, 255, 255), # Yellow in BGR
"orta_serit1": (0, 255, 0), # Green in BGR
"orta_serit2": (128, 0, 128), # Purple in BGR
"sol_serit": (255, 255, 0), # Cyan in BGR
"yol": (255, 255, 255) # White in BGR
}
####################################
# 2) LANE DETECTOR CLASS
####################################
class LaneDetector:
def __init__(self) -> None:
# Load polygons from JSON
self.lane_polygons = {}
self.lane_names = []
self.detection_zone = None # Will store the detection zone polygon
self.vehicle_counts = defaultdict(int) # Counter for vehicles in each lane
self.road_names_box = None # Will store the polygon for road names (id 7)
# Add tracking for vehicle speeds in each lane
self.lane_speeds = defaultdict(list) # Store speeds of vehicles in each lane
self.lane_average_speeds = defaultdict(float) # Store average speed for each lane
self.load_polygons()
def load_polygons(self) -> None:
try:
with open(JSON_PATH, "r") as f:
data = json.load(f)
except FileNotFoundError:
raise FileNotFoundError(f"JSON file not found: {JSON_PATH}")
boxes = data.get("boxes", [])
if not boxes:
raise ValueError("No 'boxes' found in JSON or empty.")
# Get original dimensions
original_width = data.get("width", 504)
original_height = data.get("height", 354)
# Get video dimensions for scaling
cap = cv2.VideoCapture(VIDEO_INPUT)
width = int(cap.get(cv2.CAP_PROP_FRAME_WIDTH))
height = int(cap.get(cv2.CAP_PROP_FRAME_HEIGHT))
cap.release()
# Calculate scaling factors
scale_x = width / original_width
scale_y = height / original_height
# Create a list of all points for the combined detection zone
all_points = []
# Translate lane names
translated_lane_names = {
"emniyet_seridi": "emergency_lane",
"sag_serit": "right_lane",
"orta_serit1": "middle_lane1",
"orta_serit2": "middle_lane2",
"orta_seri2": "middle_lane2", # Fix potential typo
"sol_serit": "left_lane",
"yol": "road"
}
# Process each box/polygon
for box in boxes:
label = box.get("label", "unknown")
box_id = box.get("id", "")
# Translate the label to English if it exists in our dictionary
if label in translated_lane_names:
label = translated_lane_names[label]
# Debug output for box ID 7
if (box_id == "7"):
print(f"Found box ID 7 with label: {label}")
if "points" in box:
print(f"Points: {box['points']}")
# Handle different formats of polygons in the JSON
if "points" in box:
# Polygon with points
points = box["points"]
# Scale points
scaled_pts = []
for point in points:
if isinstance(point, list) and len(point) == 2:
px, py = point
sx = px * scale_x
sy = py * scale_y
scaled_pts.append([sx, sy])
all_points.append([sx, sy]) # Collect all points for detection zone
# Check if this is the road names box (id 7)
if box_id == "7":
if scaled_pts:
self.road_names_box = np.array(scaled_pts, dtype=np.int32)
print(f"Box ID 7 scaled points: {scaled_pts}")
continue # Skip adding this to lane_polygons
# Only store valid polygons
if scaled_pts:
# For new format, ensure we handle duplicate labels properly
if label in self.lane_polygons:
# If label already exists, append a number to make it unique
counter = 1
new_label = f"{label}_{counter}"
while new_label in self.lane_polygons:
counter += 1
new_label = f"{label}_{counter}"
label = new_label
self.lane_polygons[label] = np.array(scaled_pts, dtype=np.int32)
if label not in self.lane_names: # Avoid duplicates
self.lane_names.append(label)
elif all(k in box for k in ["x", "y", "width", "height"]):
# Rectangle format (x, y, width, height)
x = float(box["x"]) * scale_x
y = float(box["y"]) * scale_y
w = float(box["width"]) * scale_x
h = float(box["height"]) * scale_y
# Create a rectangle polygon
rect_points = [
[x, y], # top-left
[x + w, y], # top-right
[x + w, y + h], # bottom-right
[x, y + h] # bottom-left
]
# Check if this is the road names box (id 7)
if box_id == "7":
self.road_names_box = np.array(rect_points, dtype=np.int32)
continue # Skip adding this to lane_polygons
# For new format, ensure we handle duplicate labels properly
if label in self.lane_polygons:
# If label already exists, append a number to make it unique
counter = 1
new_label = f"{label}_{counter}"
while new_label in self.lane_polygons:
counter += 1
new_label = f"{label}_{counter}"
label = new_label
self.lane_polygons[label] = np.array(rect_points, dtype=np.int32)
if label not in self.lane_names: # Avoid duplicates
self.lane_names.append(label)
# Add these points to all_points for detection zone
all_points.extend(rect_points)
# Create detection zone
# If there's a polygon labeled "emniyet_seridi" with id="6", use it as the detection zone
detection_zone_found = False
for box in boxes:
original_label = box.get("label", "")
if (original_label == "emniyet_seridi" or original_label == "emergency_lane") and box.get("id") == "6" and "points" in box:
points = box["points"]
scaled_pts = []
for point in points:
if isinstance(point, list) and len(point) == 2:
px, py = point
sx = px * scale_x
sy = py * scale_y
scaled_pts.append([sx, sy])
if scaled_pts:
self.detection_zone = np.array(scaled_pts, dtype=np.int32)
detection_zone_found = True
break
# If no specific detection zone was found, create one from all lane polygons
if not detection_zone_found:
if "road" not in self.lane_polygons:
# Use the DETECTION_REGION values if no polygons were loaded
if not all_points:
x = DETECTION_REGION["x"] * scale_x
y = DETECTION_REGION["y"] * scale_y
w = DETECTION_REGION["width"] * scale_x
h = DETECTION_REGION["height"] * scale_y
self.detection_zone = np.array([
[x, y], # top-left
[x + w, y], # top-right
[x + w, y + h], # bottom-right
[x, y + h] # bottom-left
], dtype=np.int32)
else:
# Create a detection zone that encompasses all lane polygons
# Check if all_points is not empty before creating convex hull
if len(all_points) > 0:
all_points_array = np.array(all_points, dtype=np.int32)
hull = cv2.convexHull(all_points_array)
self.detection_zone = hull
else:
# Fallback if no points were processed
self.detection_zone = np.array([
[0, 0],
[width, 0],
[width, height],
[0, height]
], dtype=np.int32)
else:
self.detection_zone = self.lane_polygons["road"]
print(f"Loaded {len(self.lane_polygons)} polygons: {', '.join(self.lane_names)}")
if self.road_names_box is not None:
print("Found road names box (id 7)")
def determine_lane(self, point):
"""Determine which lane a point is in"""
for lane_name, polygon in self.lane_polygons.items():
if self.is_point_in_polygon(point, polygon):
return lane_name
return "unknown"
def is_point_in_polygon(self, point, polygon):
"""Check if a point is inside a polygon using OpenCV"""
return cv2.pointPolygonTest(polygon, point, False) >= 0
def is_in_detection_zone(self, bbox):
"""Check if the center of a bounding box is within the detection zone"""
x1, y1, x2, y2 = bbox
center = ((x1 + x2) / 2, (y1 + y2) / 2)
return self.is_point_in_polygon(center, self.detection_zone)
def count_vehicle(self, lane_name):
"""Increment the count for a vehicle in a lane"""
self.vehicle_counts[lane_name] += 1
def reset_counts(self):
"""Reset all lane counts to zero"""
self.vehicle_counts = defaultdict(int)
def add_vehicle_speed(self, lane_name, speed):
"""Add a vehicle speed to the lane's speed list"""
self.lane_speeds[lane_name].append(speed)
# Update the average speed for this lane
self.update_average_speed(lane_name)
def update_average_speed(self, lane_name):
"""Update the average speed for a lane"""
if self.lane_speeds[lane_name]:
# Calculate the average speed, limit to 2 decimal places
self.lane_average_speeds[lane_name] = round(
sum(self.lane_speeds[lane_name]) / len(self.lane_speeds[lane_name]),
2
)
def reset_speeds(self):
"""Reset all lane speed tracking data"""
self.lane_speeds = defaultdict(list)
self.lane_average_speeds = defaultdict(float)
####################################
# 3) TRAFFIC FLOW MANAGER
####################################
class DetectionsManager:
def __init__(self) -> None:
self.tracker_id_to_zone_id: Dict[int, int] = {}
self.counts: Dict[int, Dict[int, Set[int]]] = {}
def update(
self,
detections_all: sv.Detections,
detections_in_zones: List[sv.Detections],
detections_out_zones: List[sv.Detections],
) -> sv.Detections:
for zone_in_id, detections_in_zone in enumerate(detections_in_zones):
for tracker_id in detections_in_zone.tracker_id:
self.tracker_id_to_zone_id.setdefault(tracker_id, zone_in_id)
for zone_out_id, detections_out_zone in enumerate(detections_out_zones):
for tracker_id in detections_out_zone.tracker_id:
if tracker_id in self.tracker_id_to_zone_id:
zone_in_id = self.tracker_id_to_zone_id[tracker_id]
self.counts.setdefault(zone_out_id, {})
self.counts[zone_out_id].setdefault(zone_in_id, set())
self.counts[zone_out_id][zone_in_id].add(tracker_id)
if len(detections_all) > 0:
detections_all.class_id = np.vectorize(
lambda x: self.tracker_id_to_zone_id.get(x, -1)
)(detections_all.tracker_id)
else:
detections_all.class_id = np.array([], dtype=int)
return detections_all[detections_all.class_id != -1]
def initiate_polygon_zones(
polygons: List[np.ndarray],
triggering_anchors: Iterable[sv.Position] = [sv.Position.CENTER],
) -> List[sv.PolygonZone]:
return [
sv.PolygonZone(
polygnotallow=polygon,
triggering_anchors=triggering_anchors,
)
for polygon in polygons
]
####################################
# 4) VIDEO PROCESSOR CLASS
####################################
# Add traffic flow zone definitions (adjust these coordinates to match your road layout)
ZONE_IN_POLYGONS = [
# Example zones - adjust these for your specific video
np.array([[100, 300], [200, 300], [200, 200], [100, 200]]), # Left entry
]
ZONE_OUT_POLYGONS = [
# Example zones - adjust these for your specific video
np.array([[100, 100], [200, 100], [200, 50], [100, 50]]), # Left exit (Exit 1)
]
class LaneVehicleProcessor:
def __init__(
self,
source_weights_path: str,
source_video_path: str,
target_video_path: Optional[str] = None,
confidence_threshold: float = 0.1,
iou_threshold: float = 0.7,
):
# Initialize detector
self.lane_detector = LaneDetector()
# Configuration
self.conf_threshold = confidence_threshold
self.iou_threshold = iou_threshold
self.source_video_path = source_video_path
self.target_video_path = target_video_path
# Get video info
self.video_info = sv.VideoInfo.from_video_path(source_video_path)
# Load YOLO model
self.model = YOLO(source_weights_path)
# Initialize tracker
self.tracker = sv.ByteTrack()
# Initialize zones
self.zone_in_polygons = []
self.zone_out_polygons = []
# Initialize annotators with thinner font settings
self.box_annotator = sv.BoxAnnotator(color=COLORS, thickness=1)
self.label_annotator = sv.LabelAnnotator(
text_color=sv.Color.WHITE,
text_padding=5,
text_thickness=1
)
self.trace_annotator = sv.TraceAnnotator(
color=COLORS,
positinotallow=sv.Position.CENTER,
trace_length=10,
thickness=1
)
# Expanded vehicle labels to detect - include all possible vehicle types
self.vehicle_labels = {
"car", "motorcycle", "bus", "truck", "bicycle",
"train", "boat", "airplane", "van", "scooter",
"vehicle", "motorbike", "lorry", "pickup", "suv",
"minivan", "trailer", "tractor", "ambulance", "taxi",
"police", "firetruck", "garbage truck", "limousine"
}
# Silently process class information without printing to terminal
if isinstance(self.model.names, dict):
available_classes = set(self.model.names.values())
# Filter vehicle_labels to only those present in model
self.vehicle_labels = self.vehicle_labels.intersection(available_classes)
self.vehicle_class_ids = [idx for idx, name in self.model.names.items()
if name in self.vehicle_labels]
else:
available_classes = set(self.model.names)
# Filter vehicle_labels to only those present in model
self.vehicle_labels = self.vehicle_labels.intersection(available_classes)
self.vehicle_class_ids = [idx for idx, name in enumerate(self.model.names)
if name in self.vehicle_labels]
# Initialize traffic flow zones
self.zones_in = initiate_polygon_zones(ZONE_IN_POLYGONS, [sv.Position.CENTER])
self.zones_out = initiate_polygon_zones(ZONE_OUT_POLYGONS, [sv.Position.CENTER])
self.detections_manager = DetectionsManager()
def process_video(self, display_while_saving: bool = True, target_fps: int = 30):
# Get frame generator
frame_generator = sv.get_video_frames_generator(
source_path=self.source_video_path
)
# Ensure target path has .mp4 extension
if self.target_video_path and not self.target_video_path.lower().endswith('.mp4'):
self.target_video_path = self.target_video_path + '.mp4'
print(f"Adding .mp4 extension to target path: {self.target_video_path}")
with sv.VideoSink(self.target_video_path, self.video_info) as sink:
total_frames = self.video_info.total_frames
# Get original video frame rate
source_fps = self.video_info.fps
# Calculate frame skip factor based on source and target fps
skip_factor = max(1, int(source_fps / target_fps))
print(f"Source video: {source_fps} fps")
print(f"Target playback: {target_fps} fps")
print(f"Processing every {skip_factor} frame(s)")
# Create progress bar
pbar = tqdm(total=total_frames, desc="Processing video")
frame_count = 0
for frame in frame_generator:
# Process only every skip_factor frame
if frame_count % skip_factor == 0:
annotated_frame = self.process_frame(frame)
# Write the visualized frame
sink.write_frame(annotated_frame)
# Display frame while processing if requested
if display_while_saving:
cv2.imshow("Lane Detection", annotated_frame)
if cv2.waitKey(1) & 0xFF == ord("q"):
break
# Update progress bar for every frame
pbar.update(1)
frame_count += 1
# Close progress bar
pbar.close()
print(f"Video processing complete! Saved to: {self.target_video_path}")
print(f"Processed {frame_count // skip_factor} frames out of {frame_count} total frames")
# Close window automatically after video is done
cv2.destroyAllWindows()
def process_frame(self, frame: np.ndarray) -> np.ndarray:
# Reset lane counts for this frame
self.lane_detector.reset_counts()
# Use standard YOLO detection
results = self.model(
frame, verbose=False, cnotallow=self.conf_threshold, iou=self.iou_threshold
)[0]
detections = sv.Detections.from_ultralytics(results)
# Filter by vehicle class
if len(detections) > 0:
class_ids = detections.class_id
mask = np.isin(class_ids, self.vehicle_class_ids)
detections = detections[mask]
# Filter detections by detection zone
if len(detections) > 0:
in_zone = [
self.lane_detector.is_in_detection_zone(bbox)
for bbox in detections.xyxy
]
detections = detections[in_zone]
# Track vehicles
detections = self.tracker.update_with_detections(detections)
# Create copy of original detections before zone processing
# Fix: manually create a copy since Detections has no copy() method
if len(detections) > 0:
original_detections = sv.Detections(
xyxy=detections.xyxy.copy(),
cnotallow=detections.confidence.copy() if detections.confidence is not None else None,
class_id=detections.class_id.copy() if detections.class_id is not None else None,
tracker_id=detections.tracker_id.copy() if detections.tracker_id is not None else None
)
else:
original_detections = sv.Detections.empty()
# Process zone detections for traffic flow analysis
detections_in_zones = []
detections_out_zones = []
# Check which detections are in entry and exit zones
for zone_in, zone_out in zip(self.zones_in, self.zones_out):
detections_in_zone = detections[zone_in.trigger(detectinotallow=detections)]
detections_in_zones.append(detections_in_zone)
detections_out_zone = detections[zone_out.trigger(detectinotallow=detections)]
detections_out_zones.append(detections_out_zone)
# Update flow tracking
# Fix: manually create a copy for flow_detections
if len(detections) > 0:
detections_copy = sv.Detections(
xyxy=detections.xyxy.copy(),
cnotallow=detections.confidence.copy() if detections.confidence is not None else None,
class_id=detections.class_id.copy() if detections.class_id is not None else None,
tracker_id=detections.tracker_id.copy() if detections.tracker_id is not None else None
)
flow_detections = self.detections_manager.update(
detections_copy, detections_in_zones, detections_out_zones
)
else:
flow_detections = sv.Detections.empty()
# Generate simplified labels and count vehicles per lane
labels = []
vehicle_count_by_lane = defaultdict(int)
# Generate consistent vehicle speeds based on tracker ID
# This ensures each vehicle maintains the same speed across frames
vehicle_speeds = {}
if len(original_detections) > 0:
for i, tracker_id in enumerate(original_detections.tracker_id):
class_id = int(original_detections.class_id[i])
# FIX: Validate class_id before accessing model.names
if isinstance(self.model.names, dict):
# Dictionary-style model.names (common in YOLO)
if class_id in self.model.names:
class_name = self.model.names[class_id]
else:
class_name = f"unknown_{class_id}"
else:
# List-style model.names
if 0 <= class_id < len(self.model.names):
class_name = self.model.names[class_id]
else:
class_name = f"unknown_{class_id}"
label = f"{class_name}" # Simplified to just show class name
# Count vehicles in each lane
x1, y1, x2, y2 = map(float, original_detections.xyxy[i])
center = ((x1 + x2) / 2, (y1 + y2) / 2)
lane_name = self.lane_detector.determine_lane(center)
self.lane_detector.count_vehicle(lane_name)
vehicle_count_by_lane[lane_name] += 1
# Generate consistent speed based on tracker ID
# Use tracker_id to ensure consistent speed per vehicle
np.random.seed(int(tracker_id) % 10000) # Consistent seed for each tracker ID
# Generate speeds based on vehicle type
if class_name.lower() in ["truck", "bus", "lorry", "trailer"]:
# Slower vehicles
speed = np.random.randint(60, 85)
elif class_name.lower() in ["motorcycle", "bicycle", "motorbike", "scooter"]:
# Potentially faster/smaller vehicles
speed = np.random.randint(70, 100)
elif lane_name.startswith("emergency") or lane_name.startswith("emniyet"):
# Vehicles on emergency lane (usually slower or stopped)
speed = np.random.randint(30, 60)
else:
# Regular cars
speed = np.random.randint(70, 120)
# Add some variance based on lane position
if "left" in lane_name or "sol" in lane_name:
# Left lanes typically have faster traffic
speed += np.random.randint(0, 12)
elif "right" in lane_name or "sag" in lane_name:
# Right lanes typically have slower traffic
speed -= np.random.randint(0, 10)
# Store speed for this vehicle
vehicle_speeds[tracker_id] = speed
# Update lane speeds
self.lane_detector.add_vehicle_speed(lane_name, speed)
labels.append(label)
# Annotate frame
return self.annotate_frame(frame, original_detections, labels, flow_detections)
def annotate_frame(
self, frame: np.ndarray, detections: sv.Detections,
labels: List[str], flow_detections: sv.Detections = None
) -> np.ndarray:
annotated_frame = frame.copy()
# Enhanced text calculation based on resolution
resolution_wh = (frame.shape[1], frame.shape[0])
base_font_scale = sv.calculate_optimal_text_scale(resolution_wh)
# Thinner text settings
font_scale = base_font_scale * 0.7
line_thickness = max(1, int(base_font_scale * 2))
# Utility function for anti-aliased text with thinner lines
def draw_text_aa(image, text, pos, font_scale, color, thickness, bg_color=None, padding=0):
font = cv2.FONT_HERSHEY_SIMPLEX
# Get text size
(text_width, text_height), baseline = cv2.getTextSize(text, font, font_scale, thickness)
# Draw background if specified
if bg_color is not None:
p1 = (pos[0] - padding, pos[1] + baseline + padding)
p2 = (pos[0] + text_width + padding, pos[1] - text_height - padding)
cv2.rectangle(image, p1, p2, bg_color.as_bgr(), -1)
# Draw text with anti-aliasing
cv2.putText(image, text, pos, font, font_scale, color.as_bgr(), thickness, cv2.LINE_AA)
return image
# Draw lane polygons with different colors - enhanced visibility
for i, lane_name in enumerate(self.lane_detector.lane_names):
polygon = self.lane_detector.lane_polygons[lane_name]
color_idx = i % len(COLORS.colors)
color = COLORS.colors[color_idx]
# Skip drawing emniyet_seridi with id="6" as it's too large and used as detection zone
if lane_name == "emergency_lane" and any(
np.array_equal(polygon, self.lane_detector.detection_zone)
for polygon in [self.lane_detector.lane_polygons[n] for n in self.lane_detector.lane_names]
):
continue
# Draw filled polygon with enhanced transparency
annotated_frame = sv.draw_filled_polygon(
scene=annotated_frame,
polygnotallow=polygon,
color=color,
opacity=0.3 # Increased opacity for better visibility
)
# Draw outline with increased thickness
annotated_frame = sv.draw_polygon(
scene=annotated_frame,
polygnotallow=polygon,
color=color,
thickness=line_thickness # Dynamic thickness based on resolution
)
# Draw lane statistics in top-left corner
# Create a semi-transparent background for better readability - make it wider for speed data
stats_bg_height = (len(self.lane_detector.lane_names) + 2) * 25 + 10 # +2 for title and header row
stats_bg_width = 200 # Increased width to fit speed data
bg_rect = np.array([
[10, 10],
[10 + stats_bg_width, 10],
[10 + stats_bg_width, 10 + stats_bg_height],
[10, 10 + stats_bg_height]
], dtype=np.int32)
annotated_frame = sv.draw_filled_polygon(
scene=annotated_frame,
polygnotallow=bg_rect,
color=sv.Color.BLACK,
opacity=0.7
)
annotated_frame = sv.draw_polygon(
scene=annotated_frame,
polygnotallow=bg_rect,
color=sv.Color.WHITE,
thickness=1
)
# Draw title
title_text = "LANE STATISTICS"
annotated_frame = draw_text_aa(
annotated_frame,
title_text,
(20, 30),
base_font_scale * 0.8,
sv.Color.WHITE,
1,
None,
padding=0
)
# Draw column headers with carefully positioned columns
header_text = "Lane Count Avg Speed KM/H"
annotated_frame = draw_text_aa(
annotated_frame,
header_text,
(20, 55), # Position below title
base_font_scale * 0.6, # Slightly smaller than title
sv.Color.WHITE,
1,
None,
padding=0
)
# Draw each lane statistic in order - with added speed info
for i, lane_name in enumerate(self.lane_detector.lane_names):
color_idx = i % len(COLORS.colors)
color = COLORS.colors[color_idx]
count = self.lane_detector.vehicle_counts[lane_name]
avg_speed = self.lane_detector.lane_average_speeds[lane_name]
# Y-position for this line, shift down to account for header row
y_pos = 80 + i * 25 # Start lower to account for header
# Draw colored square indicator
square_size = 15
square_top_left = (20, y_pos - square_size + 5)
square_bottom_right = (20 + square_size, y_pos + 5)
# Draw colored square
cv2.rectangle(annotated_frame, square_top_left, square_bottom_right,
color.as_bgr(), -1)
# Draw square outline
cv2.rectangle(annotated_frame, square_top_left, square_bottom_right,
sv.Color.WHITE.as_bgr(), 1)
# Get shortened lane name for display
short_name = lane_name
if len(lane_name) > 10:
if lane_name.startswith("emergency"):
short_name = "emergency"
elif lane_name.startswith("middle"):
short_name = "mid" + lane_name[-1:]
elif lane_name.startswith("right"):
short_name = "right"
elif lane_name.startswith("left"):
short_name = "left"
# Layout settings for precise column alignment
lane_col_width = 15 # Width for lane name column
count_col_pos = 115 # Starting position for count column
speed_col_pos = 160 # Starting position for speed column
# Draw lane name (left aligned)
lane_text = f"{short_name}"
annotated_frame = draw_text_aa(
annotated_frame,
lane_text,
(45, y_pos),
base_font_scale * 0.7,
sv.Color.WHITE,
1,
None,
padding=0
)
# Draw count (right aligned under "Count" header)
count_text = f"{count}"
annotated_frame = draw_text_aa(
annotated_frame,
count_text,
(count_col_pos, y_pos),
base_font_scale * 0.7,
sv.Color.WHITE,
1,
None,
padding=0
)
# Draw average speed (right aligned under "Avg Speed" header)
if avg_speed > 0:
speed_text = f"{avg_speed:.1f}"
else:
speed_text = "--"
annotated_frame = draw_text_aa(
annotated_frame,
speed_text,
(speed_col_pos, y_pos),
base_font_scale * 0.7,
sv.Color.WHITE,
1,
None,
padding=0
)
# Check for vehicles on emergency lane and draw warning
emergency_lane_vehicles = 0
emergency_vehicle_detections = []
if len(detections) > 0:
for i, xyxy in enumerate(detections.xyxy):
x1, y1, x2, y2 = map(int, xyxy)
center = ((x1 + x2) / 2, (y1 + y2) / 2)
lane_name = self.lane_detector.determine_lane(center)
# Check if vehicle is on emergency lane - support both Turkish and English names during transition
if lane_name == "emergency_lane" or lane_name == "emniyet_seridi":
emergency_lane_vehicles += 1
emergency_vehicle_detections.append(xyxy)
# If any vehicles detected on emergency lane, show warning with thinner text
if emergency_lane_vehicles > 0:
for xyxy in emergency_vehicle_detections:
x1, y1, x2, y2 = map(int, xyxy)
# Draw red warning border around the vehicle with thinner line
cv2.rectangle(annotated_frame, (x1, y1), (x2, y2),
(0, 0, 255), line_thickness) # Using standard line thickness
# Add warning text with thinner lines
warning_text = "WARNING! EMERGENCY LANE"
warning_pos = (int(x1), int(y1-15))
# Use anti-aliased text with thinner lines
annotated_frame = draw_text_aa(
annotated_frame,
warning_text,
warning_pos,
base_font_scale * 1.0,
sv.Color.WHITE,
1,
sv.Color.RED,
padding=8
)
# Draw global warning with thinner text
global_warning = f"ALERT! {emergency_lane_vehicles} vehicle(s) on emergency lane"
global_warning_pos = (int(frame.shape[1]/2 - 250), 60)
annotated_frame = draw_text_aa(
annotated_frame,
global_warning,
global_warning_pos,
base_font_scale * 1.2,
sv.Color.WHITE,
1,
sv.Color.RED,
padding=15
)
# Draw vehicle detections with thinner text
if len(detections) > 0:
# Configure annotators with thinner lines
self.box_annotator = sv.BoxAnnotator(
color=COLORS,
thickness=1
)
# Thinner text for labels
self.label_annotator = sv.LabelAnnotator(
text_color=sv.Color.BLACK,
text_scale=font_scale * 1.0,
text_thickness=1,
text_padding=5
)
self.trace_annotator = sv.TraceAnnotator(
color=COLORS,
positinotallow=sv.Position.CENTER,
trace_length=10,
thickness=1
)
# Draw traces with improved parameters
annotated_frame = self.trace_annotator.annotate(
scene=annotated_frame,
detectinotallow=detections
)
# Draw bounding boxes with improved parameters (no labels yet)
annotated_frame = self.box_annotator.annotate(
scene=annotated_frame,
detectinotallow=detections
)
# Custom labels with thinner text formatting
custom_labels = []
for i, (xyxy, label) in enumerate(zip(detections.xyxy, labels)):
# Determine which lane the vehicle is in
x1, y1, x2, y2 = map(int, xyxy)
center = ((x1 + x2) / 2, (y1 + y2) / 2)
lane_name = self.lane_detector.determine_lane(center)
# Better formatting with more readable structure
full_label = f"{label} ({lane_name})" if label else lane_name
custom_labels.append(full_label)
# Now draw the labels using the separate LabelAnnotator
annotated_frame = self.label_annotator.annotate(
scene=annotated_frame,
detectinotallow=detections,
labels=custom_labels
)
return annotated_frame
if __name__ == "__main__":
# Create a fresh parser with a unique name to avoid conflicts
lane_detection_parser = argparse.ArgumentParser(
descriptinotallow="Lane Detection and Traffic Flow Analysis with YOLO"
)
lane_detection_parser.add_argument(
"--source_weights_path",
default=MODEL_PATH,
help="Path to the source weights file",
type=str,
)
lane_detection_parser.add_argument(
"--source_video_path",
default=VIDEO_INPUT,
help="Path to the source video file",
type=str,
)
lane_detection_parser.add_argument(
"--target_video_path",
default="",
help="Path to the target video file (output). If empty, will display output instead of saving",
type=str,
)
lane_detection_parser.add_argument(
"--display",
actinotallow="store_true",
help="Display video while processing (even when saving)",
default=False
)
lane_detection_parser.add_argument(
"--confidence_threshold",
default=0.1,
help="Confidence threshold for the model",
type=float,
)
lane_detection_parser.add_argument(
"--iou_threshold",
default=0.7,
help="IOU threshold for the model",
type=float
)
# Parse arguments and proceed
args = lane_detection_parser.parse_args()
# Print processing mode for clarity
if args.target_video_path:
print(f"Processing video and saving to: {args.target_video_path}")
else:
print("Processing video for display only (not saving)")
# Print model selection
print(f"Using model: {args.source_weights_path}")
# Ensure target_video_path is set if not provided
if not args.target_video_path:
args.target_video_path = "output_lane_detection.mp4" # Default output filename
print(f"No output path specified, saving to: {args.target_video_path}")
elif not args.target_video_path.lower().endswith('.mp4'):
args.target_video_path += '.mp4'
print(f"Processing video and saving to: {args.target_video_path}")
print("Video will be displayed during processing and will close automatically when finished")
processor = LaneVehicleProcessor(
source_weights_path=args.source_weights_path,
source_video_path=args.source_video_path,
target_video_path=args.target_video_path,
confidence_threshold=args.confidence_threshold,
iou_threshold=args.iou_threshold
)
processor.process_video(display_while_saving=True) # Force display to be True使用的技术及方法
该项目是使用深度学习和计算机视觉模型 YOLOv12N 构建的。该模型使用来自 Roboflow Universe 的大型车辆数据集进行了 250 个 epoch 的训练。
Roboflow Polygon 工具集成
- 基于区域的检测:Roboflow 的多边形工具用于标记闭路电视录像中的车道和道路。
- 柔性区域分析:每条车道都经过单独分析,以跟踪车辆并测量速度。
实时处理
- 闭路电视视频分析:该模型分析了伊斯坦布尔 Kozyatagi 闭路电视摄像机的实时镜头。
- NVIDIA 优化:该模型可以转换为 .onnx 或 .engine 格式,以便在 NVIDIA 驱动的设备上高效运行。
技术细节:代码和结构
该项目采用模块化方法。以下是关键组件:
1. LaneDetector 类
- 加载多边形数据:从 JSON 文件中读取泳道区域并缩放它们以匹配视频分辨率。
- 确定泳道位置:使用其边界框检查检测到的车辆是否在车道内。
- 跟踪车辆数量和速度:计算车辆数量并计算每条车道的平均速度。
2. LaneVehicleProcessor 类
- 集成 YOLO 和 ByteTrack:YOLO 检测车辆,而 ByteTrack 跨帧跟踪它们。
- 分析检测区域:将检测到的车辆与预定义的车道区域进行比较。
- 显示流量数据:使用 OpenCV 和 Supervision 库在视频上叠加实时数据。
3. 流量管理
- 入口和出口区域:跟踪车辆进出的车道。
- 速度估计:为车辆分配随机但真实的速度值。
- 紧急车道警告:检测应急车道上的车辆并发出警告。
结果和未来改进
该项目为使用 CCTV 录像的交通监控提供了实时解决方案。收集的数据可以:
- 改进交通管理系统以更好地控制拥堵。
- 通过自动检测减少交通违规和事故。
- 确保应急车辆能够更快地到达目的地。
未来的增强功能
- 模型优化:将 YOLOv12N 转换为 .onnx 或 .engine 格式以获得更好的实时性能。
- 数据集扩展:使用来自不同角度和天气条件的图像进行训练,以提高准确性。
- 高级分析:使用机器学习对流量模式进行预测建模。
源码下载:
🔗 GitHub: https://github.com/bahakizil/Vehicle_Detection
🔗 GitHub Proje: https://github.com/bahakizil/Smart-Traffic-Analysis-With-Yolo
🔗 Roboflow: https://universe.roboflow.com/ktaivleschool-6njsd/cctv_cars_bike_detection-gi3nf/dataset/6
3.5、NVIDIA Jetson 设备上部署 YOLOv12
简 介
在前面的文章中,我们深入探讨了最新YOLOv12的特性和功能。
YOLOv12:重新定义实时目标检测(介绍+使用教程)
如何使用 YOLOv12 实现目标检测
今天我们将探索在 NVIDIA Jetson 等紧凑但功能强大的平台上设置 YOLOv12 的复杂性,分析其性能,并将其与其前身 YOLO11 进行比较。
使用 Docker Over Virtualenvs 进行部署
为什么我不使用虚拟环境来快速实现?使用 NVIDIA Jetson 设备时,您遇到的第一个挑战之一就是为 YOLO 等深度学习模型设置适当的环境。这些紧凑但功能强大的边缘计算设备在 ARM 架构上运行,这会导致与标准 Python 软件包(尤其是 PyTorch)的严重兼容性问题。
就我而言,我有一台 NVIDIA Jetson Xavier NX,配备 8GB 共享 RAM 和Jetpack 5.1 ,并且可以根据NVIDIA 文档提供的兼容性矩阵安装某些版本的 PyTorch 。
ARM 架构挑战
NVIDIA Jetson 设备采用 ARM 架构,这与大多数台式机和服务器计算机中的 x86 架构有着根本区别。这种架构差异意味着并非所有 Python 软件包都直接兼容,安装 PyTorch 等框架变得特别困难。
如果您尝试创建虚拟环境并运行的典型方法pip install ultralytics,那么您很快就会遇到问题。安装的 PyTorch 版本与 Jetson GPU 不兼容,导致模型仅在 CPU 上运行 - 大大减慢了推理速度。
# 这在 Jetson 设备上无法正常工作
pip install ultralytics # 将安装不兼容的 PyTorch 版本
使用 Jetson 设备时,在容器外安装 PyTorch 会出现一些问题。例如,您需要torchvision从头开始编译,这可能需要花费大量时间,并且您可能会在torch版本兼容性方面犯一些错误。
Docker:卓越的解决方案🚢
NVIDIA Jetpack 预装了完全兼容的 docker 版本,因此这种方法对于某些目的来说更快捷、更高效。使用 Docker 容器有几个优点:
- 预配置环境:Ultralytics 团队维护专门为不同 Jetpack 版本设计的Docker 镜像
- GPU 兼容性:这些容器附带 PyTorch 版本,这些版本经过正确编译,可利用 Jetson 的 GPU
- 隔离:您的部署与系统保持隔离,从而防止发生冲突
- 可重复性:同一个容器将在具有相同 Jetpack 版本的不同 Jetson 设备上一致地工作。
因此,在使用 ssh 协议连接到我们的 Jetson 设备后,我们需要确定哪个 Docker 映像与我们的 Jetpack 版本匹配,如果您遵循这个问题,这很容易。然后我们必须克隆我们将在本教程中使用的存储库。
https://github.com/hdnh2006/ultralyticsAPI.git对于 Jetpack 5.x,我们将使用:
git clone https://github.com/hdnh2006/ultralyticsAPI.git
t=ultralytics/ultralytics:latest-jetson-jetpack5 &&
sudo docker pull $t &&
sudo docker run -it --nerwork=host --ipc=host --runtime=nvidia -v "$(pwd)/ultralyticsAPI:/ultralyticsAPI" $t
在这个容器中,PyTorch 已经正确配置为与 Jetson 的 GPU 一起工作,你可以通过运行一个简单的推理来验证这一点:
cd /ultralyticsAPI
yolo predict detect
你会看到类似这样的内容:
root@JetsonXavierNX:/ultralyticsAPI yolo predict detect
WARNING ⚠️ 'source' argument is missing, using default 'source=/ultralytics/ultralytics/assets'.
Ultralytics 0.3.4 🚀 Python-3.8.10 CUDA:0 (Xavier, 6857MB)
YOLOv11 summary (fused): 180 layers, 2,616,240 parameters, 0 gradients, 6.5 GFLOPs


image 1/2 /ultralytics/ultralytics/assets/bus.jpg: 640x480 4 persons, 1 bus, 370.8ms
image 2/2 /ultralytics/ultralytics/assets/zidane.jpg: 384x640 2 persons, 1 tie, 389.7ms
Speed: 95.1ms preprocess, 380.2ms inference, 8.3ms postprocess per image at shape (1, 3, 384, 640)
Results saved to /ultralytics/runs/detect/predict2
💡 Learn more at https://docs.ultralytics.com/modes/predict
当推理运行时,您应该看到输出日志中提到的“CUDA”,确认 GPU 正在被利用。
要使用 Flask API,只需运行python3 predict_api.py --weights yolo12s.pt。进入浏览器后,http://nvidiajetsonip:5000 您将看到如下界面:
现在你可以上传视频,你会看到如下内容:
YOLO11 与 YOLOv12:NVIDIA Jetson 上的性能比较
成功使用 Docker 设置环境后,是时候检查 YOLO11 和 YOLOv12 在 NVIDIA Jetson Xavier NX 上的表现了。此比较揭示了一些有关模型效率的有趣见解,这些见解可能与流行的说法相矛盾。
初始基准测试结果
使用相同配置测试两种模型,我们观察到:
YOLOv12-S(未优化):
- 推理时间:最佳情况下约为 55 毫秒
- 帧率:~18 FPS
- 处理时间变化很大(55-200毫秒)
YOLO11-S(未优化):
- 推理时间:最佳情况下约为 36 毫秒
- 帧率:~27 FPS
- 更一致的处理时间
这一点尤其值得注意,因为 YOLOv12 被宣传为比其前代产品更快。然而,我们在 Jetson 设备上进行的实际测试表明,YOLOv11 的性能明显更好——在相同条件下比 YOLOv12 快约 9 FPS。
使用 TensorRT🚀 让您的推理速度加倍
在比较了 YOLO11 和 YOLOv12 的基准性能后,很明显优化对于 NVIDIA Jetson 设备上的实时应用至关重要。这就是NVIDIA TensorRT发挥作用的地方——这是一款功能强大的 SDK,专为优化 NVIDIA 硬件的神经网络模型而设计。
了解 TensorRT 优化
TensorRT不仅仅是一个库;它是一个高性能神经网络推理优化器,可以显著提高推理速度。它的工作原理是:
- 模型剪枝与权重精度校准
- 层融合以减少计算开销
- 针对特定 GPU 架构的内存优化
- 针对您所使用的硬件进行内核自动调整
TensorRT 的主要优势在于它可以根据模型运行的具体 GPU 来定制模型。缺点是什么?针对一台设备优化的模型无法转移到另一台设备 — 它是专门为您的硬件编译的。
将 YOLO 导出到 TensorRT
值得庆幸的是,Ultralytics 使曾经复杂的 TensorRT 转换过程变得非常简单。以下是如何将 YOLO 模型导出为 TensorRT 格式:
yolo export format=engine imgsz=480,640 half=True simplify=True device=0 batch=1 model=yolo11s.pt参数解释:
- format=engine:指定 TensorRT 作为输出格式
- imgsz=480,640:设置输入图像尺寸(高度、宽度)
- half=True:启用 FP16 精度以实现更快的推理
- simplify=True:使用微软的 ONNX 简化来精简模型架构
- device=0:针对 GPU
- batch=1:针对单幅图像处理进行优化(适合实时应用)
- model=yolo11s.pt:需要优化的模型。
此导出过程计算量很大,尤其是在 Jetson 设备上。在我们使用 Jetson Xavier NX 进行的测试中,总导出时间约为 34 分钟(2,057 秒)
对于 YOLO-X 变体等较大的模型,这个过程可能需要更长的时间。不过,这种一次性投资可以带来显著的性能提升。
加速结果
经过TensorRT优化后,我们再次对YOLO11-S进行了测试,结果非常出色:
YOLOv11-S(TensorRT 之前):
- ~27 帧每秒
- 处理时间变化很大(30-200毫秒)
YOLOv11-S(带有 TensorRT):
- ~55 帧每秒
- 处理时间始终保持在 20 毫秒以下
- 偶尔会飙升至 43 毫秒,但总体而言更加稳定
这意味着仅用几行代码就能使性能提高 100%!
结 论✨
我们在 NVIDIA Jetson 设备上部署 YOLO 模型的过程揭示了挑战传统观点的重要见解。虽然 YOLOv12 被誉为新的最先进模型,但我们的实际测试表明,YOLO11 在 NVIDIA Jetson 硬件上的表现实际上优于它——提供约 27 FPS,而 YOLOv12 为 18 FPS。这凸显了已发布的基准测试通常反映特定硬件配置的性能,而这些性能可能无法转化为边缘设备部署。
最重要的发现是 TensorRT 优化带来的变革性效果,它将我们的推理速度从 27 FPS 提高到 55 FPS,同时保持了检测准确率。此优化步骤与 Docker 容器相结合,解决了 ARM 架构兼容性难题,为希望在边缘设备上部署计算机视觉模型的从业者提供了一条清晰的途径。随着 YOLO 架构的不断发展,成功的边缘部署将需要理论理解和实际工程知识,而对目标硬件进行严格测试对于实现最佳性能仍然至关重要。
3.6、YOLOv12 实时目标检测到底强在哪
YOLOv12 在物体检测方面真的表现更好吗?
随着实时物体检测在自动驾驶汽车、医疗保健和监控等领域变得越来越重要,这是人工智能研究人员、开发人员和行业专业人士心中的问题。
YOLO(You Only Look Once)系列长期以来一直用于计算机视觉领域,因其能够在网络一次通过中预测边界框和类概率而闻名,兼具速度和准确性。
在实时监控中,即使是微小的延迟也可能意味着错过威胁。更快、更准确的物体检测对于监控繁忙区域、保护建筑物和快速应对安全问题至关重要。
例如,提前一秒发现可疑行为或检测到入侵者可以防止重大安全漏洞。
在高风险情况下,速度和准确性的提高对于保障人们的安全至关重要。
什么是目标检测
目标检测可以定位和分类图像或视频中的物体。首先,模型会分析输入,识别潜在物体的位置,并在它们周围绘制边界框。
然后,该模型为每个检测到的物体分配一个标签,从而有效地对其进行分类。这个过程使机器能够“看到”并理解视觉信息,从而使它们能够执行自动驾驶、监控和图像检索等任务。
目标检测以前是如何工作的
早期的 YOLO 模型依赖于基于网格的检测,将图像分成单元来预测边界框和类概率。
YOLOv11 通过改进主干和颈部架构对此进行了改进,显著提高了特征提取能力,从而实现了更精确的物体检测和复杂任务执行。
该架构包含C3k2、SPPF、C2PSA等创新模块,有助于增强其特征提取和处理效率。
YOLOv11 与前代产品相比,在 COCO 数据集上的表现有所提升。它实现了更高的平均精度 (mAP) 得分,同时使用的参数比 YOLOv8m 少 22%。
YOLOv12 有哪些新功能
YOLOv12 是 YOLO 物体检测系统的最新版本,这是一个很大的改进。它解决了旧版本的问题,例如难以处理小物体和速度慢。它通过两个主要新功能实现了这一点:
- 区域注意力机制:这有助于模型关注图像的重要部分。
- R-ELAN 架构:这使得模型更加高效和准确。
本质上,YOLOv12 在查找目标(尤其是小物体)方面更快、更好,这使其成为计算机视觉领域的一大进步。
区域注意力机制:它是如何工作的?
YOLOv12 的区域注意力机制通过以下方式加速物体检测:
- 划分特征图:该机制将特征图划分为更小的段或区域,从而允许其独立处理每个区域。
- 降低计算成本:通过关注较小的区域,与传统注意力机制相比,它显著降低了计算复杂度。
- 保持较大的感受野:尽管分段处理,它仍然保持较大的感受野,确保模型能够捕捉到广泛的背景。
本质上,这是一种更智能的方法,可以聚焦于图像的重要部分,使物体检测更快、更高效。
R-ELAN:通过残差连接增强特征学习
YOLOv12 还使用了 R-ELAN,它改进了模型理解图像的方式。它通过以下方式实现这一点:
- 改进特征集成:R-ELAN 主动结合各个层的特征,确保模型捕获广泛的上下文信息。
- 缓解梯度瓶颈:有助于防止训练期间的梯度瓶颈,使模型更有效地学习并保持稳定性。
- 增强特征融合:R-ELAN 优化了特征合并方式,确保利用所有相关信息,从而提高物体检测的准确性。
这意味着 YOLOv12 可以更好地理解图像,尤其是当图像中有不同大小的物体时。
YOLOv12 与 YOLOv11 的比较
我们以实时监控为例,用于检测场景中的目标,YOLOv11 和 YOLOv12 积极竞争,各自在准确性、速度和效率方面具有独特的优势,可满足不同的监控要求。
这是两种模型在实时监控中的比较结果。
1. YOLOv12 凭借其注意力机制,能够更好地区分不同的目标
2. YOLOv12 因其 R-ELAN 架构而更擅长检测多个目标,但仅限于物体密度较高的地方。它仍然会错过物体密度较低的边缘部分。
3. YOLOv11 在人员检测方面胜过 YOLOv12,因为它能够在困难的地方检测到人员。
如何使用 YOLOv12
首先在系统中安装 ultralytics 模块
pip install ultralytics使用上面命令行,您可以在系统中安装 ultralytics 模块。
然后,以下代码将用于对任何样本图像进行推理
from ultralytics import YOLO
# Load a COCO-pretrained YOLO12n model
model = YOLO("yolo12n.pt")
# Train the model on the COCO8 example dataset for 100 epochs
results = model.train(data="coco8.yaml", epochs=100, imgsz=640)
# Run inference with the YOLO12n model on the 'sample.jpg' image
results = model("path/to/sample.jpg")
结 论
YOLOv11和YOLOv12都是实时监控的有力工具,其中YOLOv11速度更快,而YOLOv12则具有更高的准确性和适应性。
它们之间的选择取决于特定的应用要求,例如需要超快速推理或卓越的检测精度。
常问问题
Q1:目标检测常用的算法有哪些?
答:流行的目标检测算法包括 YOLO(You Only Look Once)、Faster R-CNN、SSD(Single Shot MultiBox Detector)和 RetinaNet。
Q2:目标检测与图像分类有何不同?
答:图像分类为整个图像分配标签,而对象检测则识别并定位图像中的多个对象。
Q3:目标检测面临哪些挑战?
答:挑战包括物体大小、光照、遮挡、背景混乱和快速物体移动的变化。
Q4:目标检测可以实时工作吗?
答:是的,YOLO 和 SSD 等模型针对高帧率的实时物体检测进行了优化。
参考链接:
Yolov12 Github:
https://github.com/sunsmarterjie/yolov12Yolov12 博客:
https://docs.ultralytics.com/models/yolo12/Yolov12 论文:
https://arxiv.org/pdf/2502.12524v1


 1279
1279

 被折叠的 条评论
为什么被折叠?


