


1.GraphRAG概述
微软的GraphRAG 是一种结合了检索增强生成(Retrieval-Augmented Generation,RAG)技术和知识图谱(Knowledge Graphs,KGs)的系统,旨在提升大型语言模型(LLMs)处理复杂信息的问答性能。
2.创新点
图RAG方法:提出了一种新的Graph RAG方法,这种方法结合了知识图谱的构建、检索增强生成(RAG)和查询聚焦摘要(QFS),以支持对整个文本语料库的人类感知制作。GraphRAG 是一种新的检索方法,它在基本 RAG 架构中使用知识图谱和向量搜索。因此,它可以整合和理解各种知识,从而提供更广泛、更全面的数据视图。
知识图谱是一种强大的信息组织方式,用于表示和存储实体之间的复杂关系,不仅捕捉到实体本身,还包括定义它们的连接和属性。通过以图结构组织信息,知识图谱能够更深入地理解数据中的关系和层次,从而支持更复杂的推理和推断。
两阶段图索引构建:Graph RAG方法使用大型语言模型(LLM)分两个阶段构建基于图的文本索引:
第一阶段:从源文档中提取实体,构建实体知识图谱。
第二阶段:为所有密切相关的实体组预生成社区摘要。
社区检测算法:利用社区检测算法(如Leiden算法)将图索引划分为模块化的社区,这些社区内的节点(实体)之间有更强的联系。
查询聚焦摘要:通过查询聚焦摘要方法,将社区摘要合并为最终的全局答案,这种方法特别适用于处理大规模文本数据集。
3、GraphRAG架构
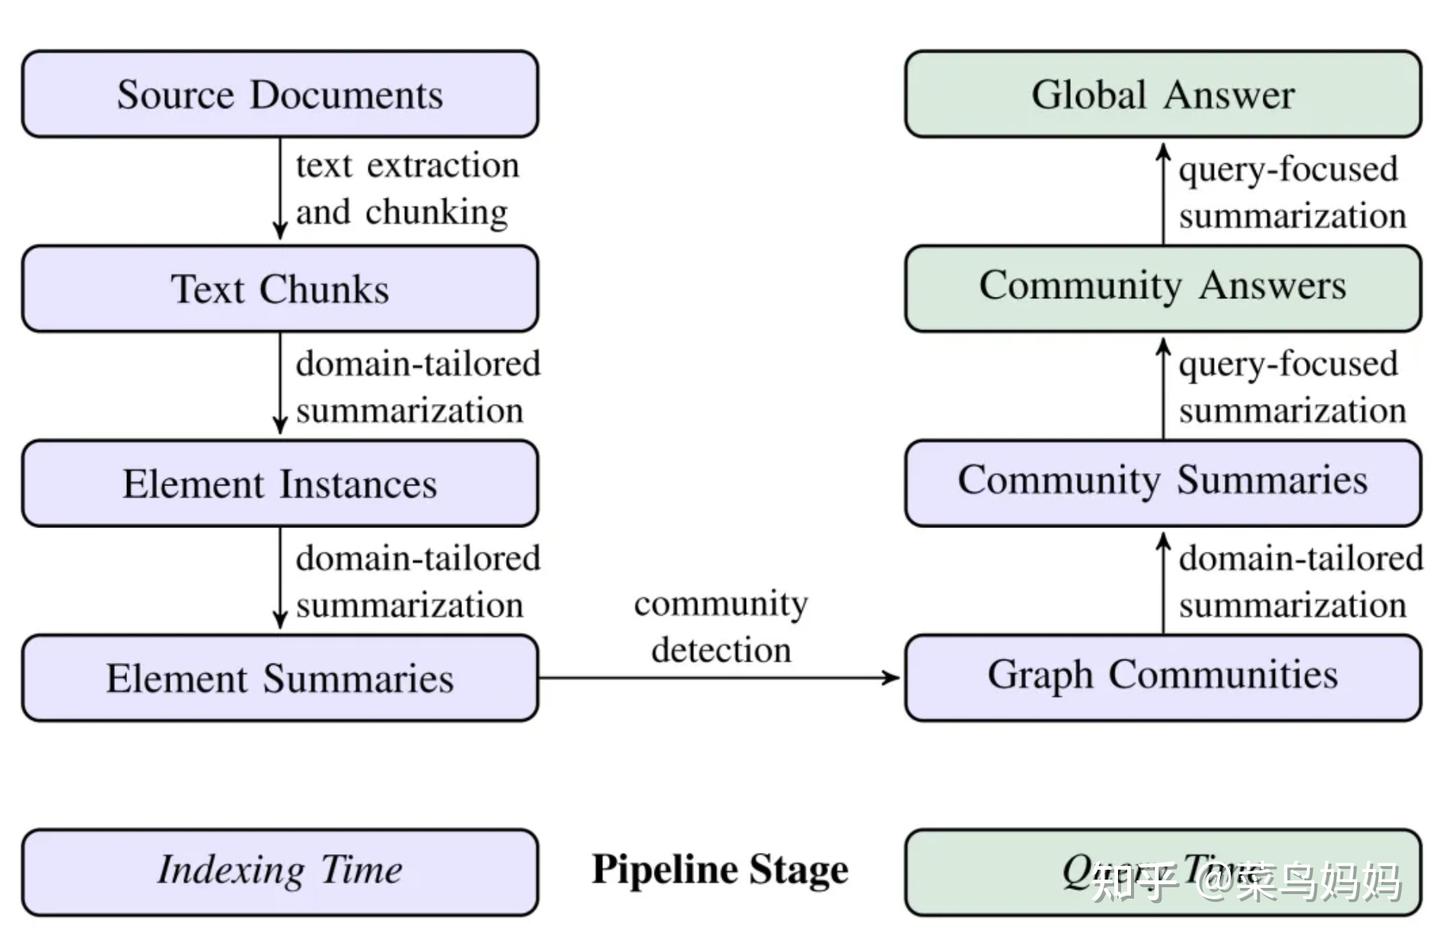
图索引构建:首先,使用LLM对源文档进行处理,提取实体和关系,构建实体知识图谱。然后,使用社区检测算法将图谱划分为社区,并为每个社区生成摘要。
查询处理:当接收到用户查询时,系统会使用社区摘要来生成部分答案。这些部分答案随后被汇总和摘要,以形成对用户的最终回答。
并行处理:在索引和查询时,系统能够并行处理社区摘要,这提高了处理效率并允许处理大规模数据集。
模块化和可扩展性:Graph RAG方法的模块化设计允许它适应不同规模和类型的数据集,同时保持高效和可扩展。
4、GraphRAG工作流程
GraphRAG的工作流程主要分为索引(Indexing)和查询(Querying)两个阶段:
- 索引阶段:
- 文本单元分割:将输入的文本语料库划分为多个文本单元,如段落或句子。
- 实体与关系提取:利用LLM识别并提取文本单元中的实体(如人名、地点等)、实体之间的关系以及关键信息。
- 层次聚类:使用社区检测算法(如Leiden算法)对提取的实体和关系进行分层聚类,形成多个社区。
- 社区摘要生成:为每个社区生成自然语言摘要,以了解数据集的主题结构和语义。
查询阶段:
-
- 局部搜索:在相关社区中进行搜索,获取中间答案。
- 全局搜索:汇总局部搜索的结果,生成最终的全局性答案。
5、GraphRAG安装和部署
1. 查询你系统中Python的版本,执行如下命令:
Python --version我环境中的Python版本如下:

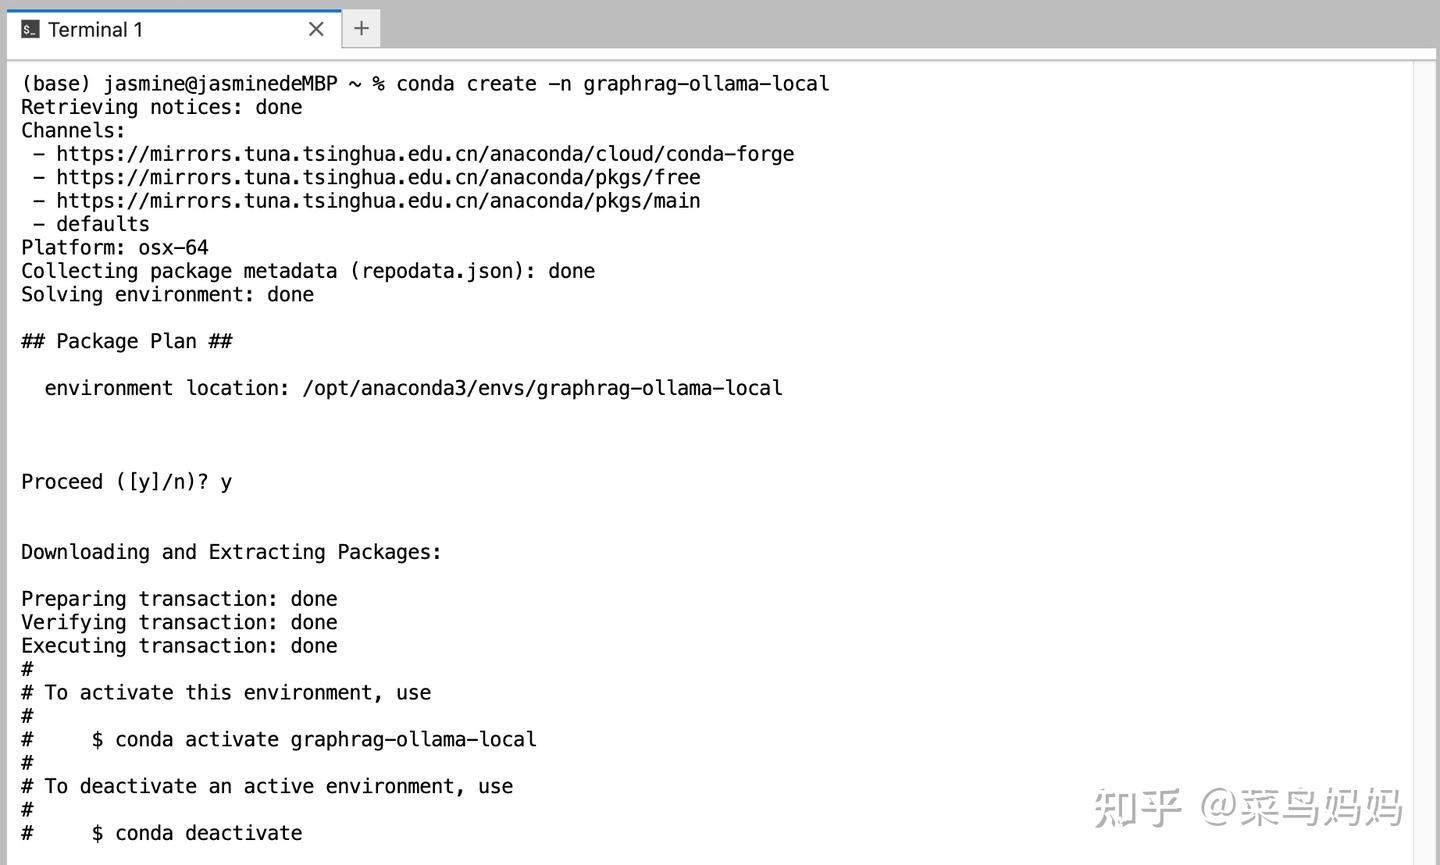
2、创建一个新的虚拟环境(首先,需要确保你的系统已经安装好anaconda),此处推荐python版本3.10以上
conda create -n graphrag-ollama-local python=3.12.2
3、激活虚拟环境
激活名为 graphrag-ollama-local 的 Conda 环境,执行命令行如下:
conda activate graphrag-ollama-local4、安装Ollama
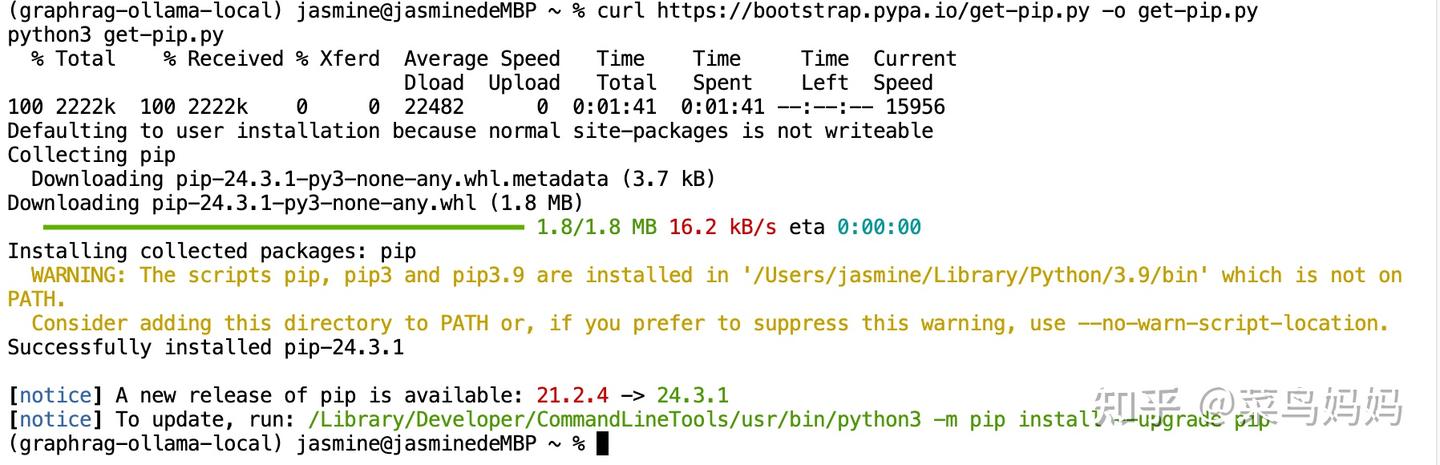
如果电脑上还没有安装pip,先执行如下命令安装pip
curl https://bootstrap.pypa.io/get-pip.py -o get-pip.py
python3 get-pip.py
安装完毕,如下:
如果已经安装好pip,执行如下命令,查看pip是否安装成功。
pip --version
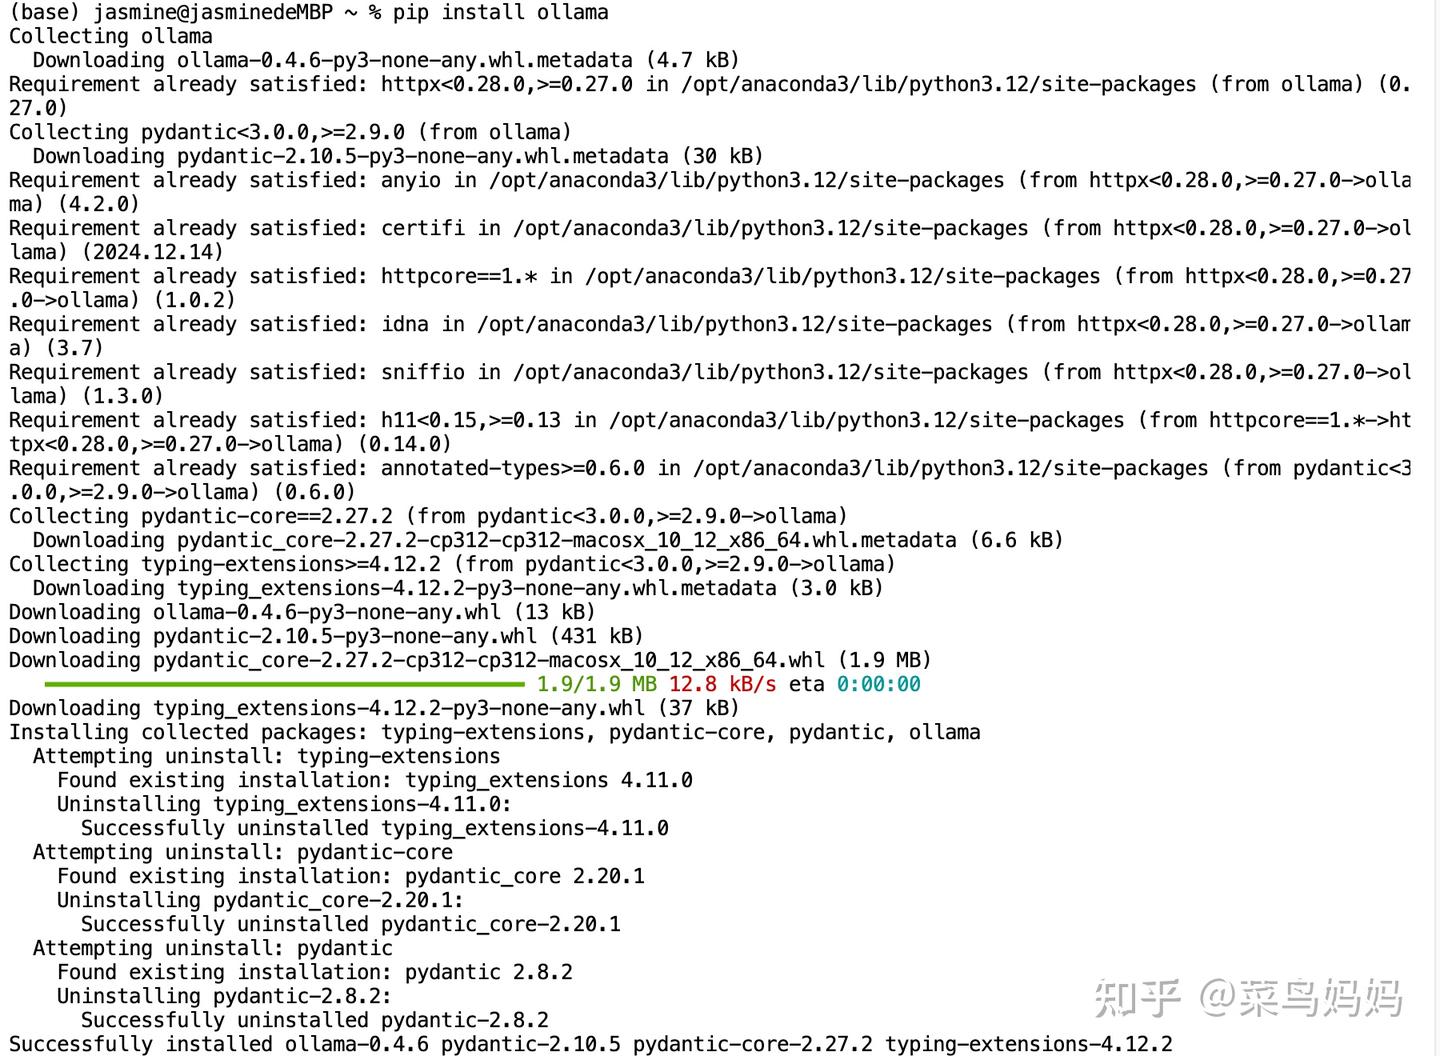
再执行安装Ollama
pip install ollama安装结果如下:
在mac笔记本的application下,找到Ollama安装压缩包,需要解压后,安装

安装完毕后,在命令行运行如下命令,可以看见ollama安装成功。
ollama --version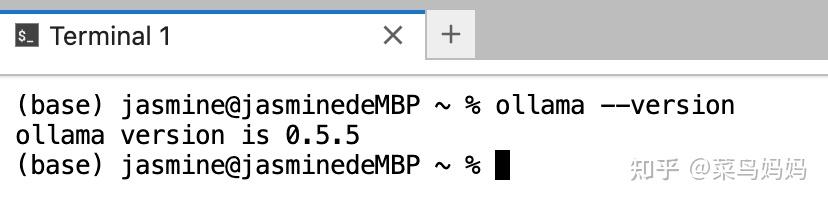
5、安装LLM模型和embedding模型
Ollama是一个专门设计用于在本地运行大型语言模型的开源框架。
- LLM模型
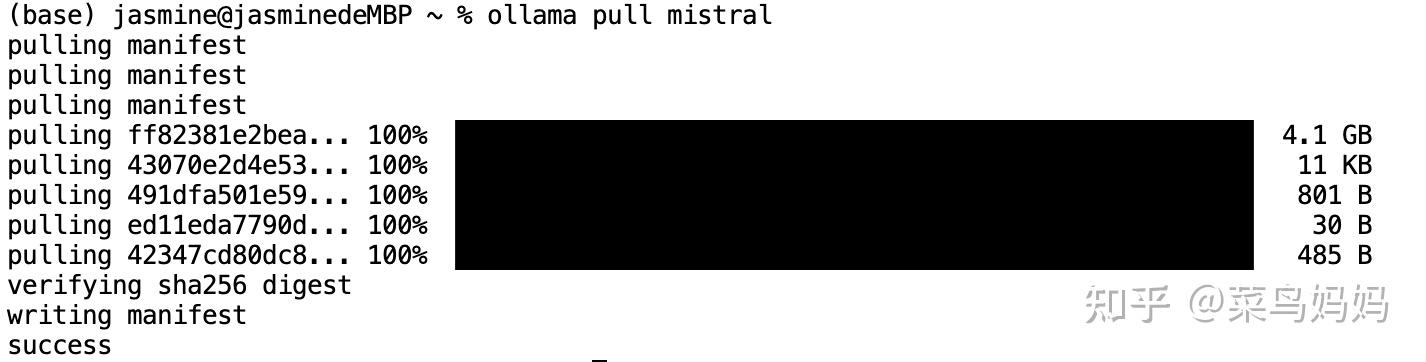
Mistral 是一个具有 7B 参数的模型,采用 Apache 许可证分发。它提供两种模式:指令跟随(instruct)和文本补全。Mistral 7B 在所有基准测试中均优于 Llama 2 13B,在许多基准测试中优于 Llama 1 34B,并且在代码任务上接近 CodeLlama 7B 的性能,同时在英语任务上表现良好。下载Mistral模型的命令如下,模型大小为4.1GB。
- Embedding模型
Embedding模型在当今的AI应用中扮演着至关重要的角色,特别是在RAG(Retrieval-Augmented Generation,检索增强生成)技术中。Embedding模型直接影响了检索的效果与生成的质量,因为它们能够将高维度的数据(例如文字、图片、音频)映射到低维度空间的过程,捕捉数据的语义或特征相似性。
这次我选择的是nomic-embed-text模型,大小为278MB。Nomic-Embed-Text 模型是一个功能强大的文本嵌入模型,专注于文本向量化和语义相似度计算。该模型在文本分类、检索、聚类和语义相似度评估等多项自然语言处理任务中表现优异。Nomic-Embed-Text-v1.5 模型是一个句子嵌入模型,广泛应用于句子相似度计算、分类、聚类等任务。
ollama pull nomic-embed-text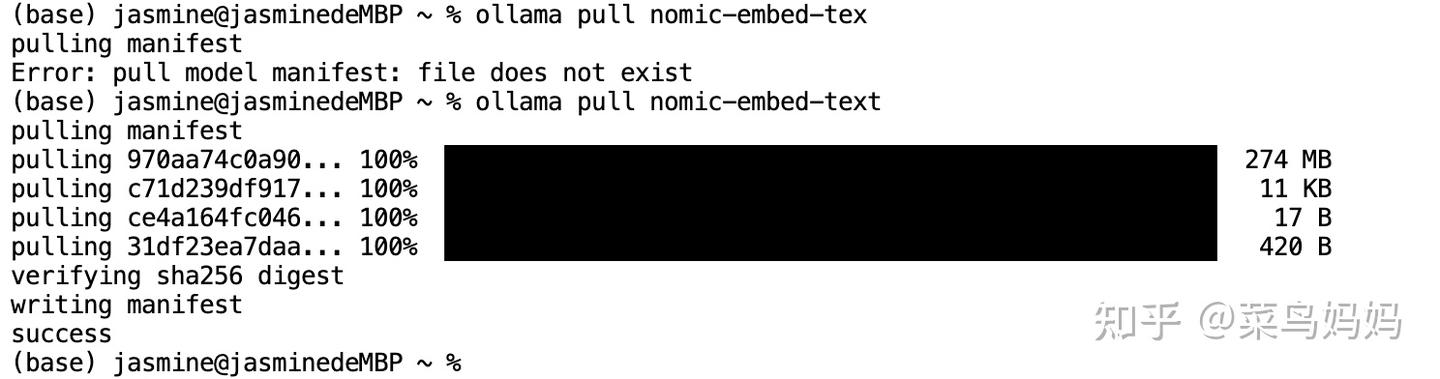
执行ollama list检查下载是否成功

启动ollama服务
ollama serve记得保证http://localhost:11434的ollama默认端口,不要被别的占用。可以执行如下命令,查看11434端口被哪个程序占用。
![]()
6、下载源代码
执行如下命令,下载源代码:
git clone GitHub - TheAiSingularity/graphrag-local-ollama: Local models support for Microsoft's graphrag using ollama (llama3, mistral, gemma2 phi3)- LLM & Embedding extraction
cd graphrag-local-ollama/
7、安装相关依赖(一定要安装,否则后面运行时会出错)
执行如下命令:
pip install -e .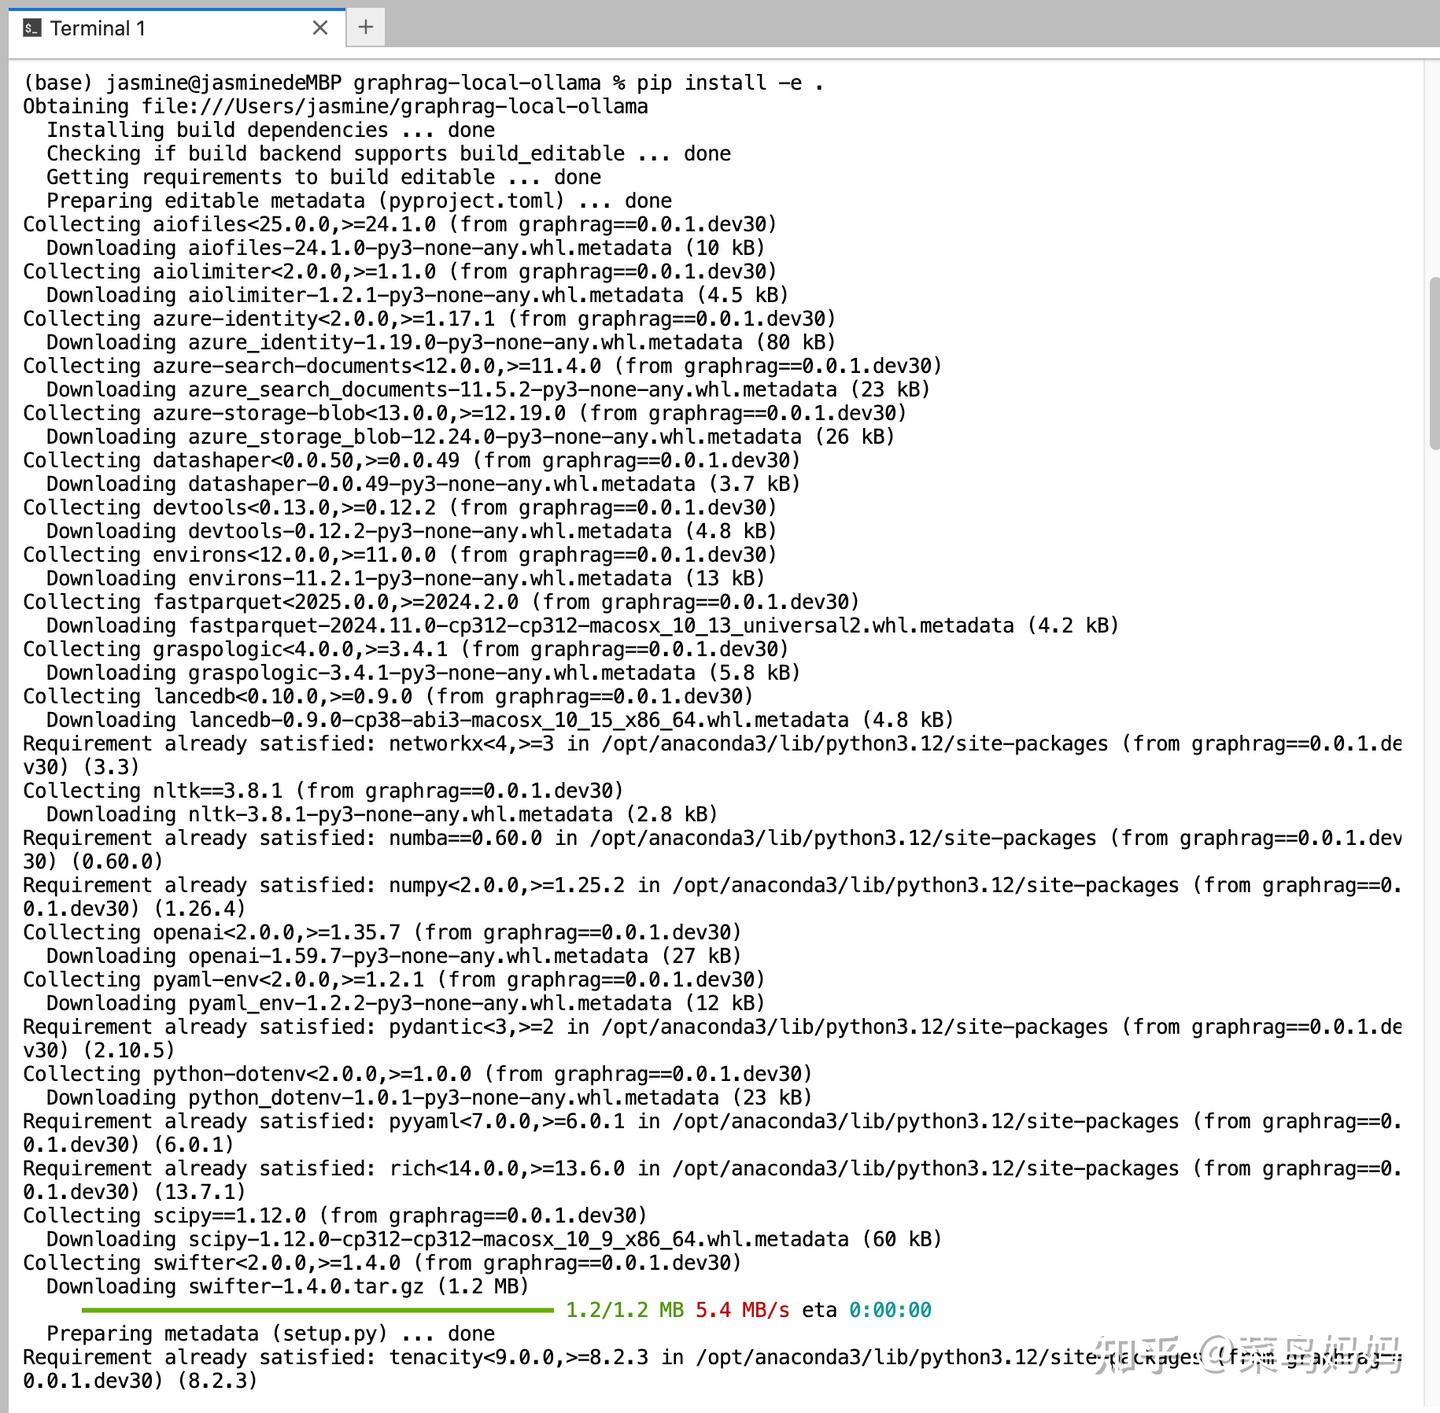
此处如果报错,一定要使用git clone源代码,再次运行即可。
8、 创建GraphRAG目录
创建GraphRAG目录,并且创建input/目录用于存放原始文档
mkdir -p ./ragtest/input将需要解析的原始文档copy一份,放入到./ragtest/input目录下(仅支持txt文件,可多个),我测试的原始文档为test0115.txt,你执行时,修改为你想要测试的文档
cp input/test0115.txt ./ragtest/input 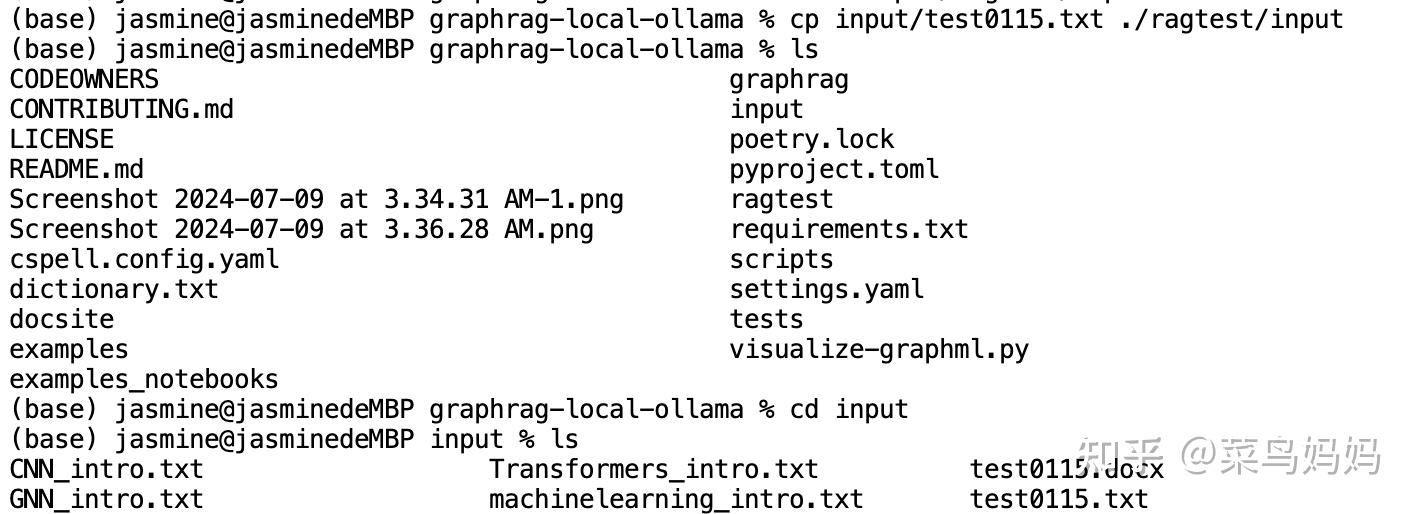
9、初始化项目
执行如下初始化命令后,ragtest目录下有output,input,settings.yaml, prompts,.env(默认隐藏)五个目录及文件。
python -m graphrag.index --init --root ./ragtest但是执行时,出错了,错误如下:
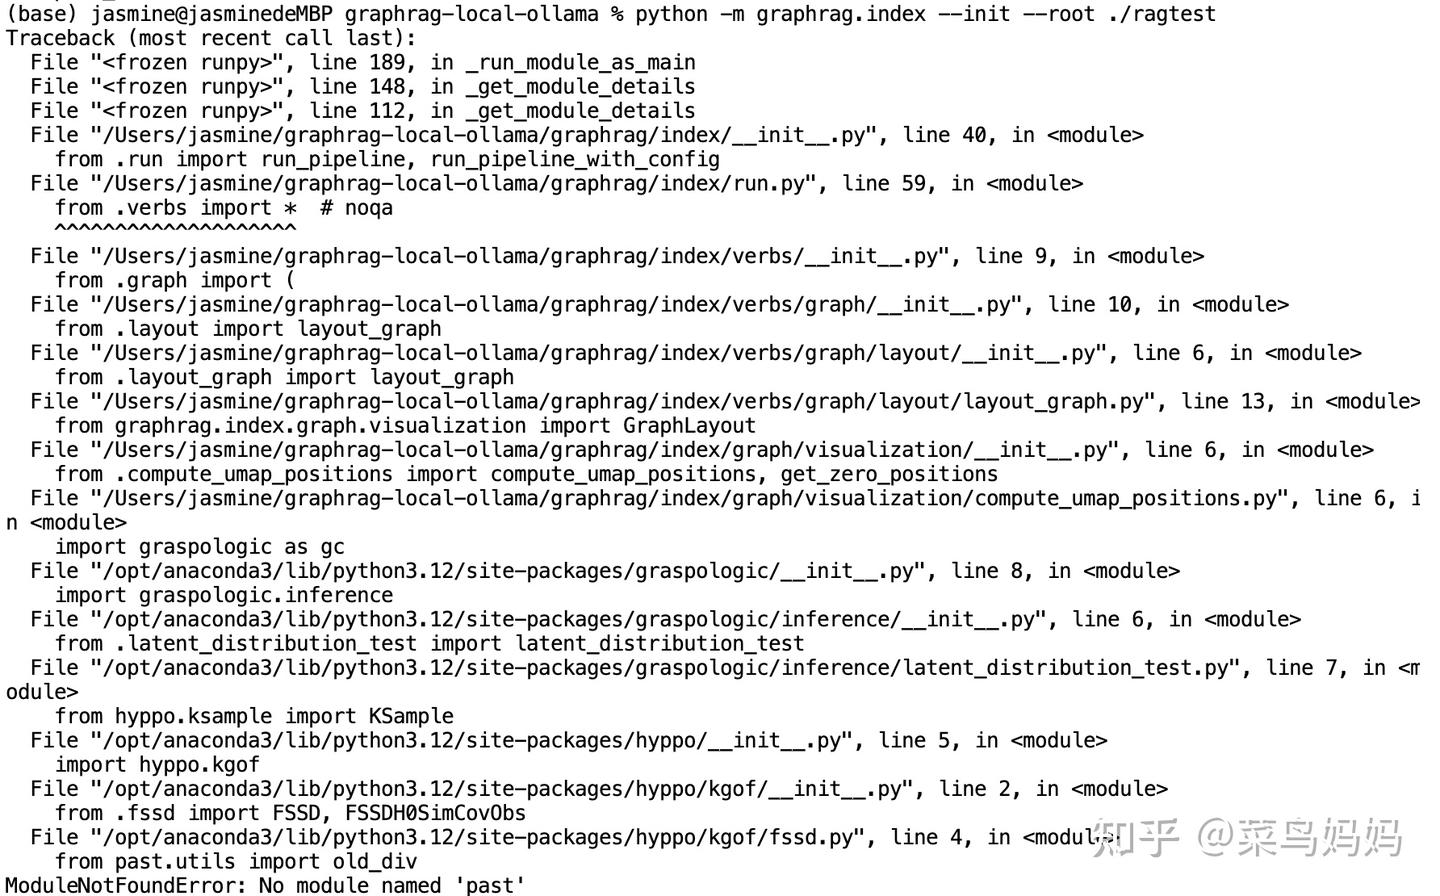
错误信息显示为 ModuleNotFoundError: No module named 'past',这意味着 Python 环境中缺少名为 past 的模块。错误发生在尝试导入 past.utils 模块时,这个模块是 hyppo 库的一部分,而 hyppo 库是 graphrag 依赖的库之一。past 库通常用于在 Python 2 和 Python 3 之间提供兼容性支持。
解决方案
要解决这个问题,需要安装 future 包,因为 past 库已经被 future 包取代。以下是安装步骤:
打开终端并运行以下命令来安装 future 包:
pip install future安装完成后,直接再运行:
python -m graphrag.index --init --root ./ragtest运行结束后,执行如下命令,可以看见ragtest目录初始化完成

10. 移动 settings.yaml 文件
这是用 ollama 本地模型配置的主要预定义配置文件:
mv settings.yaml ./ragtest修改之处如下
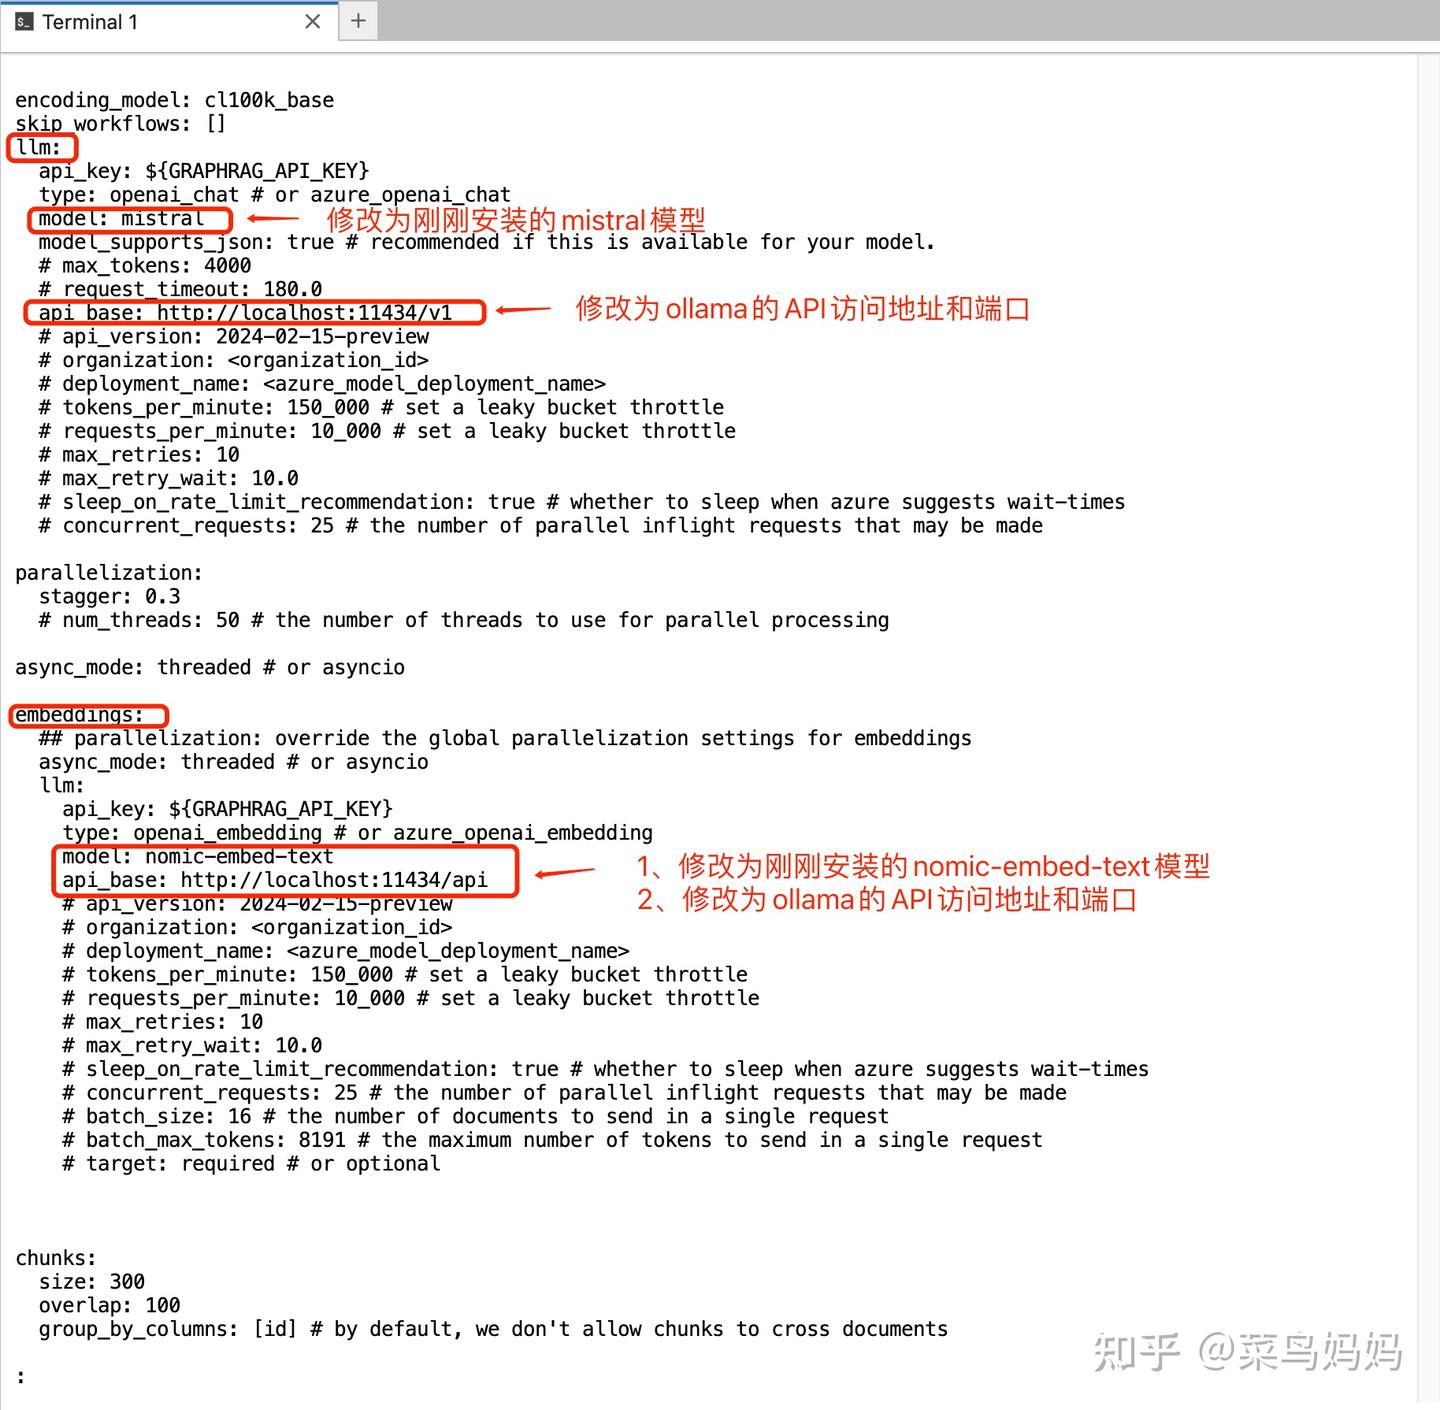
完整的文件配置如下:
encoding_model: cl100k_base
skip_workflows: []
llm:
  api_key: ${GRAPHRAG_API_KEY}
  type: openai_chat # or azure_openai_chat
  model: mistral
  model_supports_json: true # recommended if this is available for your model.
  # max_tokens: 4000
  # request_timeout: 180.0
  api_base: http://localhost:11434/v1
  # api_version: 2024-02-15-preview
  # organization: <organization_id>
  # deployment_name: <azure_model_deployment_name>
  # tokens_per_minute: 150_000 # set a leaky bucket throttle
  # requests_per_minute: 10_000 # set a leaky bucket throttle
  # max_retries: 10
  # max_retry_wait: 10.0
  # sleep_on_rate_limit_recommendation: true # whether to sleep when azure suggests wait-times
  # concurrent_requests: 25 # the number of parallel inflight requests that may be made

parallelization:
  stagger: 0.3
  # num_threads: 50 # the number of threads to use for parallel processing

async_mode: threaded # or asyncio

embeddings:
  ## parallelization: override the global parallelization settings for embeddings
  async_mode: threaded # or asyncio
  llm:
    api_key: ${GRAPHRAG_API_KEY}
    type: openai_embedding # or azure_openai_embedding
    model: nomic-embed-text
    api_base: http://localhost:11434/api
    # api_version: 2024-02-15-preview
    # organization: <organization_id>
    # deployment_name: <azure_model_deployment_name>
    # tokens_per_minute: 150_000 # set a leaky bucket throttle
    # requests_per_minute: 10_000 # set a leaky bucket throttle
    # max_retries: 10
    # max_retry_wait: 10.0
    # sleep_on_rate_limit_recommendation: true # whether to sleep when azure suggests wait-times
    # concurrent_requests: 25 # the number of parallel inflight requests that may be made
    # batch_size: 16 # the number of documents to send in a single request
    # batch_max_tokens: 8191 # the maximum number of tokens to send in a single request
    # target: required # or optional


chunks:
  size: 300
  overlap: 100
  group_by_columns: [id] # by default, we don't allow chunks to cross documents

input:
  type: file # or blob
  file_type: text # or csv
  base_dir: "input"
  file_encoding: utf-8
  file_pattern: ".*\\.txt$"

cache:
  type: file # or blob
  base_dir: "cache"
  # connection_string: <azure_blob_storage_connection_string>
  # container_name: <azure_blob_storage_container_name>

storage:
  type: file # or blob
  base_dir: "output/${timestamp}/artifacts"
  # connection_string: <azure_blob_storage_connection_string>
  # container_name: <azure_blob_storage_container_name>

reporting:
  type: file # or console, blob
  base_dir: "output/${timestamp}/reports"
  # connection_string: <azure_blob_storage_connection_string>
  # container_name: <azure_blob_storage_container_name>

entity_extraction:
  ## llm: override the global llm settings for this task
  ## parallelization: override the global parallelization settings for this task
  ## async_mode: override the global async_mode settings for this task
  prompt: "prompts/entity_extraction.txt"
  entity_types: [organization,person,geo,event]
  max_gleanings: 0

summarize_descriptions:
  ## llm: override the global llm settings for this task
  ## parallelization: override the global parallelization settings for this task
  ## async_mode: override the global async_mode settings for this task
  prompt: "prompts/summarize_descriptions.txt"
  max_length: 500

claim_extraction:
  ## llm: override the global llm settings for this task
  ## parallelization: override the global parallelization settings for this task
  ## async_mode: override the global async_mode settings for this task
  # enabled: true
  prompt: "prompts/claim_extraction.txt"
  description: "Any claims or facts that could be relevant to information discovery."
  max_gleanings: 0

community_report:
  ## llm: override the global llm settings for this task
  ## parallelization: override the global parallelization settings for this task
  ## async_mode: override the global async_mode settings for this task
  prompt: "prompts/community_report.txt"
  max_length: 2000
  max_input_length: 8000

cluster_graph:
  max_cluster_size: 10

embed_graph:
  enabled: false # if true, will generate node2vec embeddings for nodes
  # num_walks: 10
  # walk_length: 40
  # window_size: 2
  # iterations: 3
  # random_seed: 597832

umap:
  enabled: false # if true, will generate UMAP embeddings for nodes

snapshots:
  graphml: yes
  raw_entities: yes
  top_level_nodes: yes

local_search:
  # text_unit_prop: 0.5
  # community_prop: 0.1
  # conversation_history_max_turns: 5
  # top_k_mapped_entities: 10
  # top_k_relationships: 10
  # max_tokens: 12000

global_search:
  # max_tokens: 12000
  # data_max_tokens: 12000
  # map_max_tokens: 1000
  # reduce_max_tokens: 2000
  # concurrency: 32
原文件如下:

把原文件内容删除,换成下面的

注意:必须加上参数GRAPHRAG_CLAIM_EXTRACTION_ENABLED=True,否则无法生成协变量 covariates, 在 Local Search 时会出错。
11、修改源码
到此,你已经完成了80%的工作,修改完源码就大功告成啦!
在 Graph RAG 安装目录下有一个 graphrag 的文件夹:
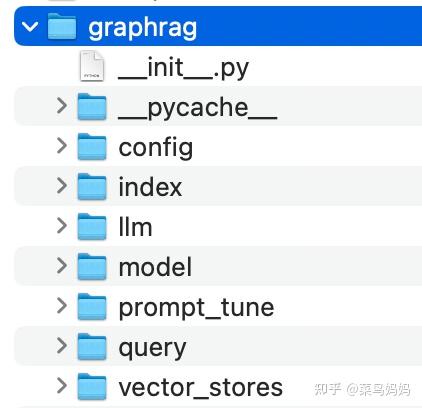
我们需要修改其中三个文件。
1)修改一
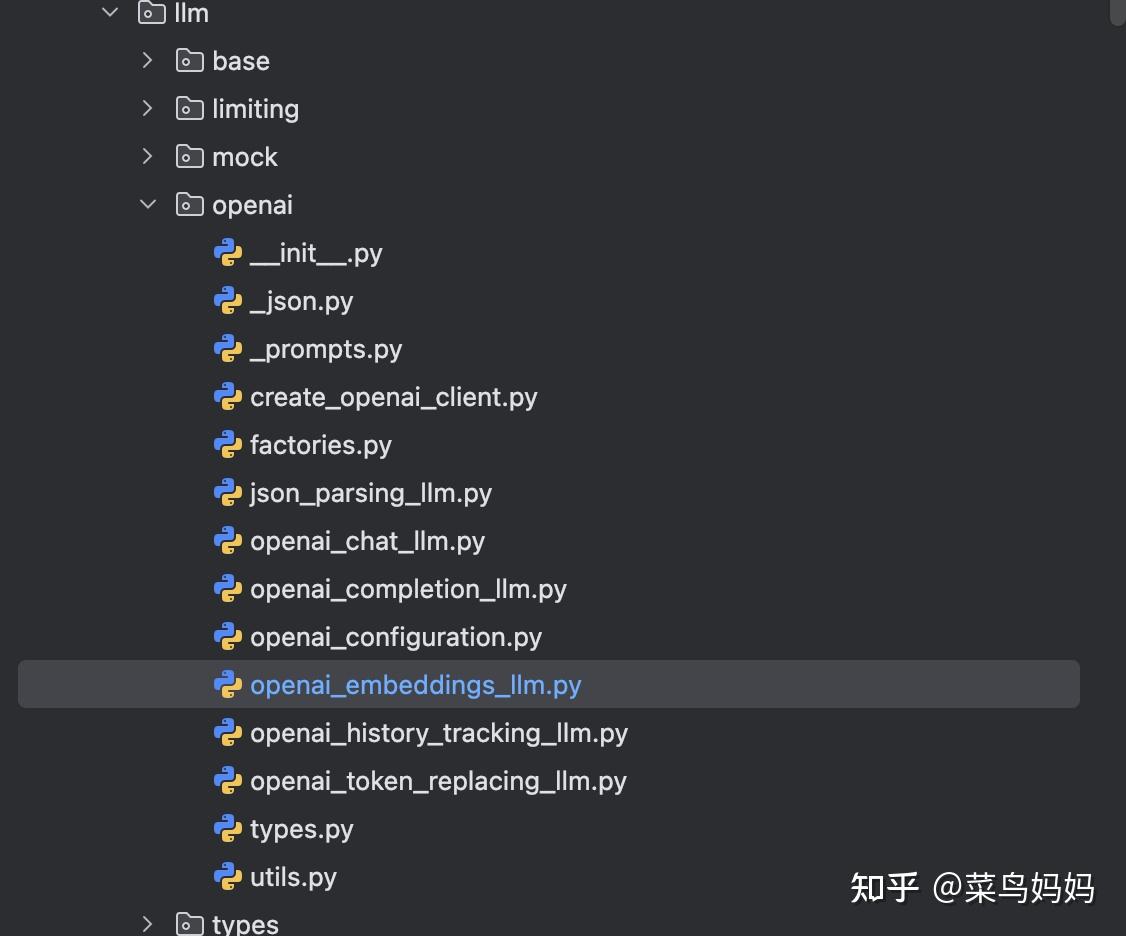
- 找到源代码文件:graphrag-local-ollama/graphrag/query/llm/openai/openai_embeddings_llm.py
可以在pycharm CE中打开graphrag-local-ollama项目,打开后,提示让你创建一个虚拟环境
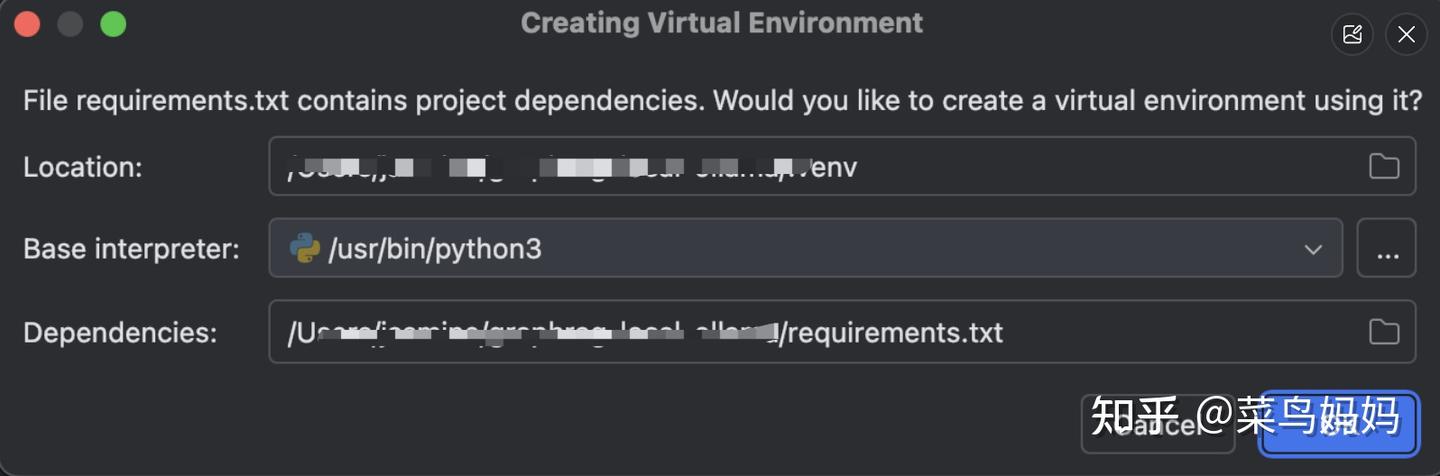
为项目创建一个虚拟环境,并自动安装 requirements.txt 文件中列出的所有依赖项,点击 OK 按钮。这将创建虚拟环境,并使用 requirements.txt 文件中的依赖项来配置它。
如果你选择创建虚拟环境,创建完成后,你可以在终端中激活它(对于 macOS 和 Linux),使用以下命令:
source /Users/jasmine/graphrag-local-ollama/.venv/bin/activate激活虚拟环境后,你可以运行项目,确保所有依赖项都已正确安装。
修改openai_embeddings_llm.py的代码如下:
#openai_embeddings_llm.py
from typing_extensions import Unpack
from graphrag.llm.base import BaseLLM
from graphrag.llm.types import (
    EmbeddingInput,
    EmbeddingOutput,
    LLMInput,
)
from .openai_configuration import OpenAIConfiguration
from .types import OpenAIClientTypes
import ollama # 增加依赖

class OpenAIEmbeddingsLLM(BaseLLM[EmbeddingInput, EmbeddingOutput]):
    _client: OpenAIClientTypes
    _configuration: OpenAIConfiguration

    def __init__(self, client: OpenAIClientTypes, configuration: OpenAIConfiguration):
        self._client = client
        self._configuration = configuration

    async def _execute_llm(
        self, input: EmbeddingInput, **kwargs: Unpack[LLMInput]
    ) -> EmbeddingOutput | None:
        args = {
            "model": self._configuration.model,
            **(kwargs.get("model_parameters") or {}),
        }
        # 修改此处
        '''
        embedding_list = []
        for inp in input:
            embedding = ollama.embeddings(model=self._configuration.model, prompt=inp)
            embedding_list.append(embedding["embedding"])
        return embedding_list
        '''
        embedding_list = []
        for inp in input:
            embedding = ollama.embeddings(model=self._configuration.model, prompt=inp)
            embedding_list.append(embedding["embedding"])
        return embedding_list
2)修改二
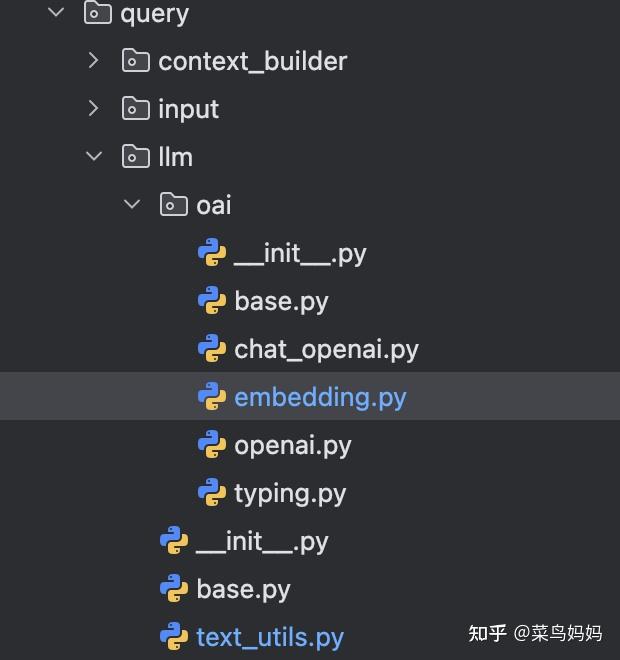
找到源代码文件:graphrag-local-ollama/graphrag/query/llm/oai/embedding.py
def embed(self, text: str, **kwargs: Any) -> list[float]:
 """
    Embed text using OpenAI Embedding's sync function.

    For text longer than max_tokens, chunk texts into max_tokens, embed each chunk, then combine using weighted average.
    Please refer to: https://github.com/openai/openai-cookbook/blob/main/examples/Embedding_long_inputs.ipynb
    """
 token_chunks = chunk_text(
 text=text, token_encoder=self.token_encoder, max_tokens=self.max_tokens
    )
    chunk_embeddings = []
    chunk_lens = []
 for chunk in token_chunks:
 try:
 '''
 embedding, chunk_len = self._embed_with_retry(chunk, **kwargs)
 '''
 embedding = ollama.embeddings(model='nomic-embed-text', prompt=chunk)['embedding']
            chunk_len = len(chunk)
            chunk_embeddings.append(embedding)
            chunk_lens.append(chunk_len)
 # TODO: catch a more specific exception
 except Exception as e:  # noqa BLE001
 self._reporter.error(
 message="Error embedding chunk",
 details={self.__class__.__name__: str(e)},
            )

 continue
 '''
            chunk_embeddings = np.average(chunk_embeddings, axis=0, weights=chunk_lens)
            chunk_embeddings = chunk_embeddings / np.linalg.norm(chunk_embeddings)
            return chunk_embeddings.tolist()
 '''

 return chunk_embeddings
3)修改三
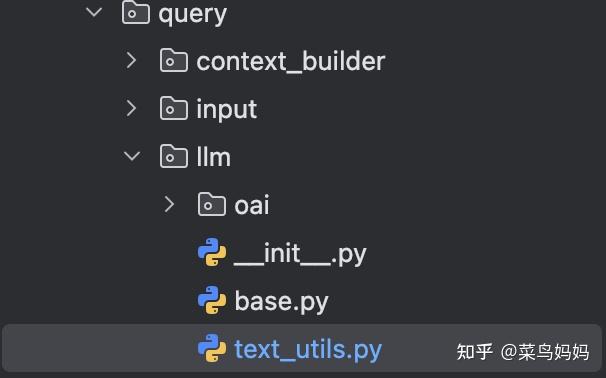
找到源代码文件:graphrag-local-ollama/graphrag/query/llm/text_utils.py
修改后的代码如下:
def chunk_text(
    text: str, max_tokens: int, token_encoder: tiktoken.Encoding | None = None
):
    """Chunk text by token length."""
    if token_encoder is None:
        token_encoder = tiktoken.get_encoding("cl100k_base")
    tokens = token_encoder.encode(text)  # type: ignore
    # 增加下面这行代码,将tokens解码成字符串
    tokens = token_encoder.decode(tokens)

    chunk_iterator = batched(iter(tokens), max_tokens)
yield from chunk_iterator- 在 chunk_text() 函数中增加一行代码即可。
但是在执行创建索引时,仍然出问题了,又执行了如下操作,你可以根据你实际执行的情况,做相应的处理。
pip install azure-identity
pip install azure-storage-blob
pip install datashaper
12、建立索引
建立索引(Indexing)的过程,利用 LLM 提取出节点(如实体)、边(如关系)和协变量(如 claim),然后利用社区检测技术对整个知识图谱进行划分,再利用 LLM 进一步总结。
进入 Graph RAG 安装目录,在命令行中输入:
python -m graphrag.index --root ./ragtest执行时,又报错:ValueError: numpy.dtype size changed, may indicate binary incompatibility. Expected 96 from C header, got 88 from PyObject
使用pip show numpy命令,查看了当前环境中的numpy版本是2.0.2版本,又去查看了graphrag-local-ollama/requirements.txt文件,发现numpy的版本是1.25.2,于是执行如下命令:
pip install numpy==1.25.2 -i https://pypi.tuna.tsinghua.edu.cn/simple记得一定要加速 -i https://pypi.tuna.tsinghua.edu.cn/simple,否则你安装时,速度慢,还超时出错,让你吐血。
一定要把解析的txt文件编码转换为UTF-8的格式。

执行索引命令:
python -m graphrag.index --root ./ragtest又出错了,上网查了一下,说.env中没有key,重新设置:


 868
868

 被折叠的 条评论
为什么被折叠?
被折叠的 条评论
为什么被折叠?
 到【灌水乐园】发言


