


构建蛋白质残基的特征(PSSM, HMM, DSSP)
1 前言
本文重点介绍这三种文件是如何通过相应的软件得到的。在得到这三个后缀文件(.pssm, .hmm, .dssp)后,如何对每个残基提取相应的特征,在github上很多人的代码中都有,在这里也会给出代码链接。
2 PSSM矩阵文件生成及使用
2.1 下载并安装ncbi-blast软件
无论wins还是linux,都可以在这里下载,可以选择需要的版本。如果不知道下载哪个版本,可以参考官网安装指南。
对于wins系统,直接安装就可。
对于linux,先解压到自己指定的文件夹下。安装步骤可以按官网步骤。在这里我也贴下linux命令并给出注释,以方便不明白命令的同学理解(其实我也不很明白)
wget https://ftp.ncbi.nlm.nih.gov/blast/executables/blast+/LATEST/ncbi-blast-2.16.0+-x64-linux.tar.gz  # 下载linux版本的blast软件
cd pssm  # 转到指定文件夹
tar zxvpf ncbi-blast-2.10.1+-x64-linux.tar.gz  # 解压tar.gz文件,zxvpf可以自行搜索是什么意思
export PATH=$PATH:pssm/ncbi-blast-2.10.1+/bin  # 将ncbi-blast-2.10.1+/bin放到系统目录中,这样每次使用的时候就不需要用绝对路径了。我这里的目录是pssm/ncbi-blast-2.10.1+/bin,请改为自己的目录
source ~/.bashrc  # 使配置文件的更改生效
 # 如果需要永久添加到系统文件,需要修改~/.bashrc,具体可以自己搜索。
 # 下面就是设置数据库的目录等,可以不用
mkdir $HOME/blastdb
export BLASTDB=pssm/blastdb
2.2 数据下载
点击官网数据库链接下载。其中有swiss数据库(就几百M,应该就是有些论文中提到的uniprot数据库),nr数据库(非常大,不太懂这个数据库,和其他论文提到的uniref90有什么区别?)
对于swiss数据库,直接下载tar.gz文件并解压到db文件夹(新建一个db文件夹)。
对于其他数据库,可以在这里下载对应的fasta文件,并编译为blast软件中数据库格式,代码如下:
# 以uniprot90为例
wget ftp://ftp.uniprot.org/pub/databases/uniprot/uniref/uniref90/uniref90.fasta.gz # 下载到指定目录
gzip -d uniref90.fasta.gz # 解压
makeblastdb -in uniref90.fasta -parse_seqids -hash_index -dbtype prot # 编译到当前目录
我是用的uniref90数据库很大,编译后总占大概100GB,运行blast非常缓慢,大概20-60分钟生成一个pssm文件。
2.3 运行blast并生成pssm文件
psiblast -query Data\test.fasta -db db\swissprot -evalue 0.001 -num_iterations 3 -out_ascii_pssm pssm\test.pssm # 执行psiblast(可能需要给出psiblast路径),-query查询哪个fasta,-db从什么数据库查询,-out_ascii_pssm保存pssm路径
具体其他参数的含义可以见官网。
2.4 利用pssm文件生成残基特征(python代码)
def process_pssm(pssm_file):
    with open(pssm_file, "r") as f:
        lines = f.readlines()
    pssm_feature = []
    for line in lines:
        if line == "\n":
            continue
        record = line.strip().split()
        if record[0].isdigit():
            pssm_feature.append([int(x) for x in record[2:22]])
    pssm_feature = np.array(pssm_feature)
    pssm_feature = (pssm_feature - np.min(pssm_feature)) / (np.max(pssm_feature) - np.min(pssm_feature))
    return pssm_feature
pssm_feature是数组类型,每行表示一个残基。
2.5 其他
最初我使用的swiss数据库,但我的数据中有少量fasta序列无法生成pssm文件,所以我进一步使用了uniref90数据库。
2.6 参考:
python 服务器批处理得到PSSM矩阵
如何使用Blast生成pssm矩阵,并输入到模型中
BLAST® Command Line Applications User Manual
python 服务器批处理得到PSSM矩阵
python代码参考1:PST-PRNA/protein.py
python代码参考2:GraphBind
python代码参考3:GraphSite
3 DSSP二级结构文件生成及使用
3.1 DSSP下载
3.1.2 DSSP软件下载得到DSSP
github上有好些dssp仓库,在这里给出:
https://github.com/PDB-REDO/dssp
https://github.com/cmbi/dssp
https://github.com/cmbi/hssp/releases
我不清楚这些软件之间的区别是什么。在这里我使用的第三个链接,3.1.5版本的DSSP,也是官网给出的下载链接。
和PSSM差不多,下载并安装。
3.1.2 Bio.PDB.DSSP模块
我是通过Bio这个包直接使用DSSP的,对比了DSSP软件下载得到的.pssm文件,结果是差不多的。应该是在线的比较?
以下给出使用方法:
from Bio.PDB import PDBParser
from Bio.PDB.DSSP import DSSP
p = PDBParser()
structure = p.get_structure("1MOT", "/local-pdb/1mot.pdb")
model = structure[0]
dssp = DSSP(model, '/local-pdb/1mot.pdb', dssp='mkdssp')
请注意,DSSP-2软件包中最新的DSSP可执行文件已重命名为 dssp 至 mkdssp,所以这里参数使用dssp=‘mkdssp’。
3.2 运行DSSP并生成.dssp文件
如果使用DSSP软件,linux下直接用以下命令即可生成.dssp文件
mkdssp -i 1crn.pdb -o 1crn.dssp
如果使用Bio.PDB.DSSP模块,则没有.dssp文件生成。
3.3 利用DSSP生成残基特征(python代码)
3.3.1 由.dssp文件生成残基特征
如果是使用得到的.dssp文件,需要先读取文件。我直接复制的代码,可能语法上有部分错误,具体代码可以见参考给出的代码。
def dssp():
        rASA = {}
        secondary = {}
        flag_1 = False
        flag_2 = False
        with open(out_file) as pid:
            for line in pid.readlines():
                if line[2] == '#':
                    flag_1 = True
                    continue
                if flag_1 and line[11] == self.chain[-1]:
                    flag_2 = True
                    res_name = line[13]
                    C_list = ['a', 'b', 'c', 'd', 'e', 'f', 'g', 'h', 'i']
                    if res_name in C_list:
                        res_name = 'C'
                    if res_name == 'X':
                        continue
                    res_id = int(line[5:10])
                    rASA[res_id] = float(line[34:39]) / float(macc[res_name])
                    if line[16] in ('G', 'H', 'I'):
                        secondary[res_id] = [1, 0, 0]
                    if line[16] in ('E', 'B'):
                        secondary[res_id] = [0, 1, 0]
                    if line[16] in ('T', 'S', ' '):
                        secondary[res_id] = [0, 0, 1]
                if flag_1 and flag_2 and line[13:15] == '!*':
                    break
3.3.2 利用Bio.PDB.DSSP模块生成残基特征
由于不知道的原因,对于部分pdb文件部分残基并没有生成对应的二级结构,所以用alphafold生成的结构代替真实pdb结构。
from Bio.PDB.DSSP import DSSP
from Bio.PDB import PDBParser


def get_dssp(pdb_path, len_seq):
    # 解析PDB文件
    p = PDBParser()
    structure = p.get_structure("protein_name", pdb_path)
    # 使用DSSP分析二级结构
    model = structure[0]
    dssp = DSSP(model, pdb_path)

    secondary = []
    for res in dssp:
        if res[2] in ('G', 'H', 'I'):
            secondary.append([1, 0, 0])
        if res[2] in ('E', 'B'):
            secondary.append([0, 1, 0])
        if res[2] in ('T', 'S', '-'):
            secondary.append([0, 0, 1])

    if len(secondary) != len_seq:
        pdb_path = pdb_path.replace('pdna_pdb','pdna_af2_pdb')
        p = PDBParser()
        structure = p.get_structure("protein_name", pdb_path)
        # 使用DSSP分析二级结构
        model = structure[0]
        dssp = DSSP(model, pdb_path)

        secondary = []
        for res in dssp:
            if res[2] in ('G', 'H', 'I'):
                secondary.append([1, 0, 0])
            if res[2] in ('E', 'B'):
                secondary.append([0, 1, 0])
            if res[2] in ('T', 'S', '-'):
                secondary.append([0, 0, 1])
    return secondary
3.4 其他
注意DSSP是需要pdb结构数据得到二级结构,而不是从fasta序列预测二级结构。
部分pdb结构的DSSP与fasta序列残基数量不对应,即部分残基并没有生成dssp二级结构。
3.5 参考:
biopython中的dssp在 linux 中的安装使用
使用DSSP计算二级结构以及计算a-helix个数
DSSP教程:一步步教你预测蛋白质二级结构
Bio.PDB.DSSP模块
python代码参考1:PST-PRNA/protein.py
python代码参考2:GraphBind
python代码参考3:GraphSite
4 HMM文件的生成及使用
4.1 HHblits的下载
HHblits在github上直接下载zip文件即可:地址(包含安装步骤)
按照以下给出的命令在linux上安装编译,最后一步export不设置的话,就直接用…/hmm_source_data/hh-suite/build/bin/hhblits这样的绝对地址,使用hhblits。
git clone https://github.com/soedinglab/hh-suite.git
mkdir -p hh-suite/build && cd hh-suite/build
cmake -DCMAKE_INSTALL_PREFIX=. ..
make -j 4 && make install
export PATH="$(pwd)/bin:$(pwd)/scripts:$PATH"  # 放到系统路径,但这是临时的
source ~/.bashrc
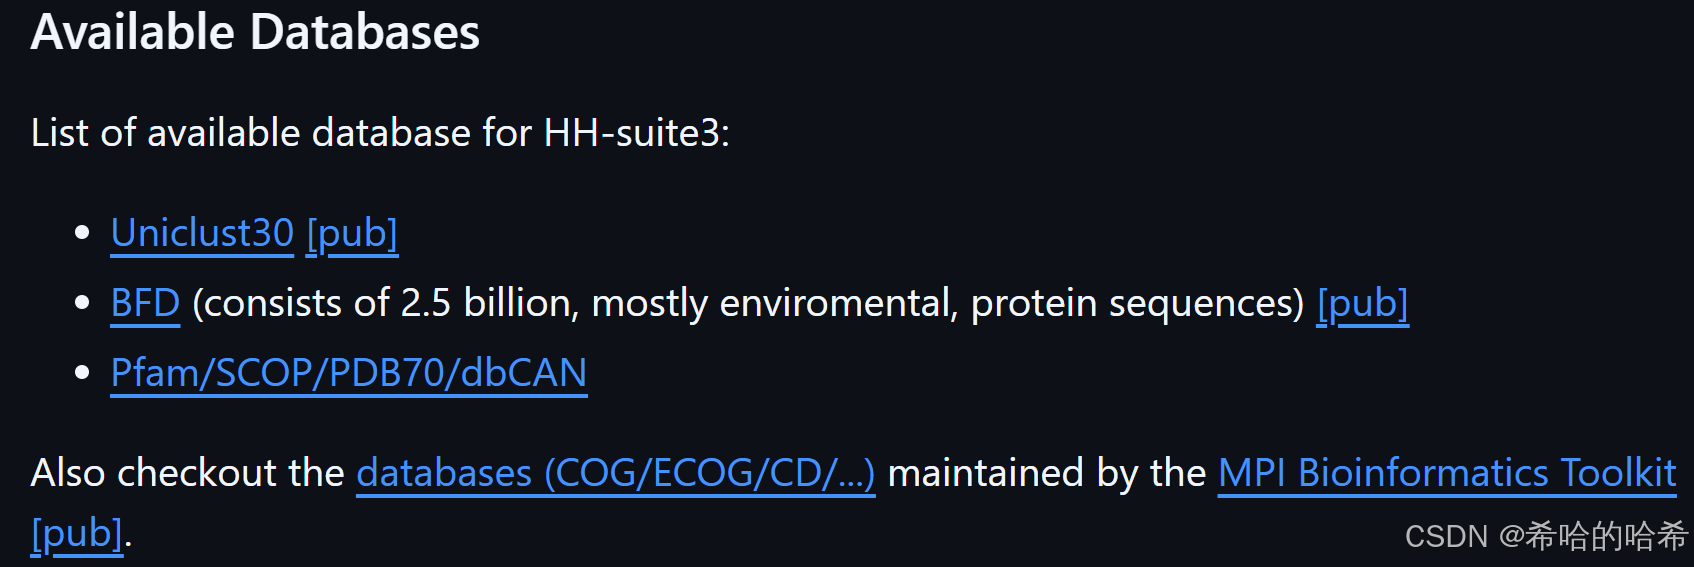
4.2 比对数据下载
在github的HHblits上给出了几种数据集。实测使用美国VPN能打开,香港VPN不能。直接下载安装即可。我使用的uniclust30大概占了100GB的空间。
4.3 生成.hmm文件后生成残基特征(python代码)
def call_HMM(hmm_dir):
    with open(hmm_dir, 'r') as f:
        text=f.readlines()
    hmm_begin_line=0
    hmm_end_line=0
    for i in range(len(text)):
        if '#' in text[i]:
            hmm_begin_line=i + 5
        elif '//' in text[i]:
            hmm_end_line=i
    hmm=np.zeros([int((hmm_end_line - hmm_begin_line) / 3), 30])

    axis_x=0
    for i in range(hmm_begin_line, hmm_end_line, 3):
        line1=text[i].split()[2:-1]
        line2=text[i + 1].split()
        axis_y=0
        for j in line1:
            if j == '*':
                hmm[axis_x][axis_y]=9999 / 10000.0
            else:
                hmm[axis_x][axis_y]=float(j) / 10000.0
            axis_y+=1
        for j in line2:
            if j == '*':
                hmm[axis_x][axis_y]=9999 / 10000.0
            else:
                hmm[axis_x][axis_y]=float(j) / 10000.0
            axis_y+=1
        axis_x+=1
    hmm=(hmm - np.min(hmm)) / (np.max(hmm) - np.min(hmm))  #####

    return hmm
其中hmm=(hmm - np.min(hmm)) / (np.max(hmm) - np.min(hmm))这行代码,不同论文写的不一样。有人是设置了一个固定的最小值和最大值,在这里我使用当前hmm文件的最小最大值归一化。
4.4 其他
好像在wins上不能安装HHblits,只能在linux系统安装。
有些代码生成的.hhm后缀文件,我们生成的.hmm文件,但应该都是一样的。
4.5 参考
ubuntu安装hhsuite/hhblits全过程!:下载过程中出现问题的解决方法
hhblits——正确版本的安装:本文参考的命令
python代码参考1:PST-PRNA/protein.py
python代码参考2:GraphBind
python代码参考3:GraphSite
5 注意事项和闲话:
1.PSSM和HMM都是比对方法,所以结果的好坏和比对的数据库大小是相关的。数据库越大,按理说对结果越有利,但内存消耗更大,运行时间更长。
2.由于pssm和hmm都是由fasta序列生成的,而dssp需要pdb文件才能生成,所以需要仔细比对pdb和fasta中序列是否保持一致。附录给出自己的代码,用以判断pdb残基序列和fasta文件残基是否一致。仅作参考。
3.如果做蛋白质位点或者其他什么任务,最好原始数据是pdb结构数据,而不是序列数据。因为结构数据可以比较简单地生成序列,而且结构可以自己设定阈值,定义位点。但原始数据为序列数据的话,如果要利用结构信息,那么需要用pdbbank中对应序列的结构数据,可能导致结构与序列不对应的情况。如果用alphafold生成的pdb结构,可以与序列匹配,但不是实验得到的,可能产生偏差。
4.PSSM和HMM都是传统多序列比对方法,现在有很多利用大模型编码残基的方法,都是值得一试的,比如ProtTrans,ESM等。
5.如果文中描述情况和你遇到的实际情况不符,可以将本文部分放入GPT,再给出自己遇到的问题,这样会生成更加可靠的回答。
附录
用以判断pdb结构的残基序列和fasta文件残基的残基序列是否一致。仅作参考。
from Bio import SeqIO
from Bio.PDB import PDBParser
import os
from Bio.PDB.DSSP import DSSP

def get_dssp(pdb_path):
    # 解析PDB文件
    p = PDBParser()
    structure = p.get_structure("protein_name", pdb_path)
    # 使用DSSP分析二级结构
    model = structure[0]
    dssp = DSSP(model, pdb_path)

    secondary = []
    dssp_res_id = []
    for res_id, res in dssp.property_dict.items():
        if res[2] in ('G', 'H', 'I'):
            secondary.append([1, 0, 0])
        if res[2] in ('E', 'B'):
            secondary.append([0, 1, 0])
        if res[2] in ('T', 'S', '-'):
            secondary.append([0, 0, 1])
        dssp_res_id.append(res_id[1][1])


    parser = PDBParser(QUIET=True)
    structure = parser.get_structure('X', pdb_path)
    sequence = []
    seq_id = []
    for model in structure:
        for chain in model:
            for residue in chain:
                # if residue.id[0] == ' ' and residue.id[2] == ' ':  # Skip heteroatoms # 重点判断,这是pdb和fasta残基不同之处
                #     if 'CA' in residue:  # Check for alpha carbon to ensure it's a standard amino acid
                seq_id.append(residue.id[1])
    if len(dssp_res_id) != len(seq_id):
        print("DSSP and sequence length 不相等.")
        print(len(dssp_res_id), len(seq_id))

    for i in range(len(dssp_res_id)):
        if dssp_res_id[i] != seq_id[i]:
            print(i, dssp_res_id[i], seq_id[i])

    return secondary


def extract_sequence_from_pdb(pdb_file):
    parser = PDBParser(QUIET=True)
    structure = parser.get_structure('X', pdb_file)
    sequence = []

    for model in structure:
        for chain in model:
            for residue in chain:
                # if residue.id[0] == ' ' and residue.id[2] == ' ':  # Skip heteroatoms
                #     if 'CA' in residue:  # Check for alpha carbon to ensure it's a standard amino acid
                sequence.append(residue.resname)

    # Convert three-letter codes to one-letter codes
    three_to_one = {
        'ALA': 'A', 'CYS': 'C', 'ASP': 'D', 'GLU': 'E', 'PHE': 'F',
        'GLY': 'G', 'HIS': 'H', 'ILE': 'I', 'LYS': 'K', 'LEU': 'L',
        'MET': 'M', 'ASN': 'N', 'PRO': 'P', 'GLN': 'Q', 'ARG': 'R',
        'SER': 'S', 'THR': 'T', 'VAL': 'V', 'TRP': 'W', 'TYR': 'Y'
    }
    seq_str = ''
    for i in sequence:
        if i in three_to_one:
            seq_str += three_to_one[i]
    return seq_str

def read_fasta_sequence(fasta_file):
    with open(fasta_file, "r") as file:
        for record in SeqIO.parse(file, "fasta"):
            return str(record.seq)

def compare_sequences(pdb_sequence, fasta_sequence):
    return pdb_sequence == fasta_sequence

# pdb_list = os.listdir("pdbs")
fasta_list = [fasta for fasta in os.listdir("fastas") if fasta.endswith(".fasta")]
for i in range(len(fasta_list)):
    # Specify your file paths
    # i = 585
    pdb_file_path = os.path.join("pdna_labels/pdna_pdb", fasta_list[i].split(".")[0] + ".pdb")
    pdb_dssp = get_dssp(pdb_file_path)  #重点判断了dssp,因为pdb生成的dssp矩阵和pdb中残基也不对应,有部分残基不存在二级结构。
    fasta_file_path = os.path.join("pdna_labels/pdna_fasta", fasta_list[i])

    # Extract sequences
    pdb_sequence = extract_sequence_from_pdb(pdb_file_path)
    fasta_sequence = read_fasta_sequence(fasta_file_path)

    # Compare sequences
    if compare_sequences(pdb_sequence, fasta_sequence):
        print("{%i} The sequences are 相等."%(i))
    else:
        print("{%i} The sequences are 不相等."%(i))
        for i in range(len(pdb_sequence)):
            if pdb_sequence[i] != fasta_sequence[i]:
                print(i, pdb_sequence[i], fasta_sequence[i])
        # break
    if len(pdb_dssp) != len(pdb_sequence):
        print("DSSP and sequence length 不相等.")
        print(len(pdb_dssp), len(pdb_sequence))


 2771
2771

 被折叠的 条评论
为什么被折叠?
被折叠的 条评论
为什么被折叠?
 到【灌水乐园】发言


