


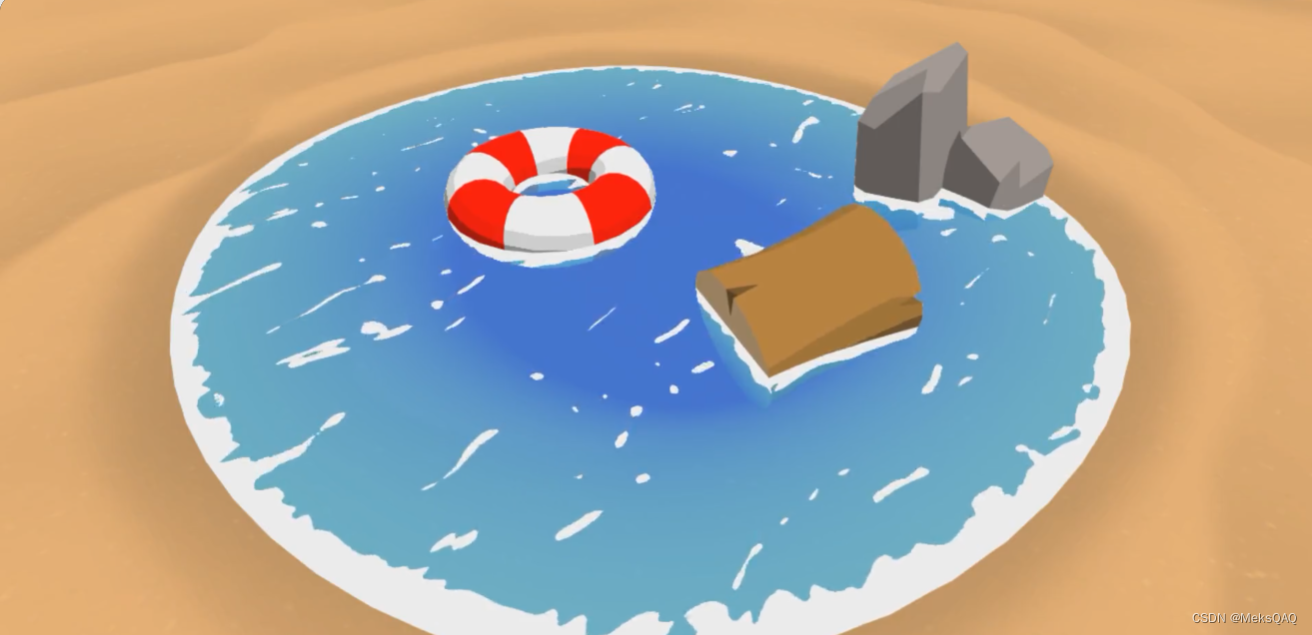
案例中水体设置成ZWrite Off,不写入深度,通过unity相机的深度图计算出水底的深度,再通过齐次坐标的w分量获得水面的深度。两者相减获得水体的深度,设置一个最大深度,根据水体深度插值控制水体颜色渐变。
泡沫效果是直接采用噪音贴图采样,然后设置阙值,对噪音贴图进行二进制效果转换让噪音贴图变得干净,然后根据深度截止边缘处的阙值。
对对噪音贴图进行采样的uv增加随时间流动,实现水体的流动。
增加扭曲纹理,采样后与噪音贴图的uv相加,实现更多复杂的流动。
通过获取unity相机中深度法线图,获取水底和水中物体的法线,再获取水面的视空间法线,两者点积,当点积较大时(没有物体)使用较大的泡沫阙值;当点积较小时(物体表面的法线和水体表面的法线接近垂直)使用小的泡沫阙值。根据上述原理对阙值进行插值再导入函数中。
锯齿问题:因为泡沫alpha值是极端的要么0要么1,所以设置smoothStep函数将alpha从0平滑混合到1
#define SMOOTHSTEP_AA 0.01

…

float surfaceNoise = smoothstep(surfaceNoiseCutoff - SMOOTHSTEP_AA, surfaceNoiseCutoff + SMOOTHSTEP_AA, surfaceNoiseSample);
o.screenPosition = ComputeScreenPos(o.vertex);float existingDepth01 = tex2Dproj(_CameraDepthTexture,UNITY_PROJ_COORD(i.screenPosition)).r;
float existingDepthLinear = LinearEyeDepth(existingDepth01);
float depthDifference = existingDepthLinear - i.screenPosition.w;案例原网址:
wUnity Toon Water Shader Tutorial https://roystan.net/articles/toon-water/江陵野少这里对齐次坐标的概念和为什么用齐次坐标的w分量作为顶点的深度进行了解释。
ComputeScreenPos(a)是将顶点转换成屏幕坐标值,但是是一个齐次空间坐标。顶点变换到齐次裁剪坐标,为裁剪做准备,并未进行透视除法。所以顶点齐次坐标w值为-z。
Unity Shader ScreenPos详解 - 知乎 (zhihu.com)![]() https://zhuanlan.zhihu.com/p/258036220
https://zhuanlan.zhihu.com/p/258036220
源码:
Shader "Roystan/Toon/Water Tut"
{
    Properties
    {
		// What color the water will sample when the surface below is shallow.
		_DepthGradientShallow("Depth Gradient Shallow", Color) = (0.325, 0.807, 0.971, 0.725)

		// What color the water will sample when the surface below is at its deepest.
		_DepthGradientDeep("Depth Gradient Deep", Color) = (0.086, 0.407, 1, 0.749)

		// Maximum distance the surface below the water will affect the color gradient.
		_DepthMaxDistance("Depth Maximum Distance", Float) = 1

		// Color to render the foam generated by objects intersecting the surface.
		_FoamColor("Foam Color", Color) = (1,1,1,1)

		// Noise texture used to generate waves.
		_SurfaceNoise("Surface Noise", 2D) = "white" {}

		// Speed, in UVs per second the noise will scroll. Only the xy components are used.
		_SurfaceNoiseScroll("Surface Noise Scroll Amount", Vector) = (0.03, 0.03, 0, 0)

		// Values in the noise texture above this cutoff are rendered on the surface.
		_SurfaceNoiseCutoff("Surface Noise Cutoff", Range(0, 1)) = 0.777

		// Red and green channels of this texture are used to offset the
		// noise texture to create distortion in the waves.
		_SurfaceDistortion("Surface Distortion", 2D) = "white" {}

		// Multiplies the distortion by this value.
		_SurfaceDistortionAmount("Surface Distortion Amount", Range(0, 1)) = 0.27

		// Control the distance that surfaces below the water will contribute
		// to foam being rendered.
		_FoamMaxDistance("Foam Maximum Distance", Float) = 0.4
		_FoamMinDistance("Foam Minimum Distance", Float) = 0.04
    }
    SubShader
    {
		Tags
		{
			"Queue" = "Transparent"
		}

        Pass
        {
			// Transparent "normal" blending.
			Blend SrcAlpha OneMinusSrcAlpha
			ZWrite Off

            CGPROGRAM
			#define SMOOTHSTEP_AA 0.01

            #pragma vertex vert
            #pragma fragment frag

            #include "UnityCG.cginc"

			// Blends two colors using the same algorithm that our shader is using
			// to blend with the screen. This is usually called "normal blending",
			// and is similar to how software like Photoshop blends two layers.
			float4 alphaBlend(float4 top, float4 bottom)
			{
				float3 color = (top.rgb * top.a) + (bottom.rgb * (1 - top.a));
				float alpha = top.a + bottom.a * (1 - top.a);

				return float4(color, alpha);
			}

            struct appdata
            {
                float4 vertex : POSITION;
				float4 uv : TEXCOORD0;
				float3 normal : NORMAL;
            };

            struct v2f
            {
                float4 vertex : SV_POSITION;
				float2 noiseUV : TEXCOORD0;
				float2 distortUV : TEXCOORD1;
				float4 screenPosition : TEXCOORD2;
				float3 viewNormal : NORMAL;
            };

			sampler2D _SurfaceNoise;
			float4 _SurfaceNoise_ST;

			sampler2D _SurfaceDistortion;
			float4 _SurfaceDistortion_ST;

            v2f vert (appdata v)
            {
                v2f o;


                o.vertex = UnityObjectToClipPos(v.vertex);
				o.screenPosition = ComputeScreenPos(o.vertex);
				o.distortUV = TRANSFORM_TEX(v.uv, _SurfaceDistortion);
				o.noiseUV = TRANSFORM_TEX(v.uv, _SurfaceNoise);
				o.viewNormal = COMPUTE_VIEW_NORMAL;

                return o;
            }

			float4 _DepthGradientShallow;
			float4 _DepthGradientDeep;
			float4 _FoamColor;

			float _DepthMaxDistance;
			float _FoamMaxDistance;
			float _FoamMinDistance;
			float _SurfaceNoiseCutoff;
			float _SurfaceDistortionAmount;

			float2 _SurfaceNoiseScroll;

			sampler2D _CameraDepthTexture;
			sampler2D _CameraNormalsTexture;

            float4 frag (v2f i) : SV_Target
            {
				// Retrieve the current depth value of the surface behind the
				// pixel we are currently rendering.
				float existingDepth01 = tex2Dproj(_CameraDepthTexture, UNITY_PROJ_COORD(i.screenPosition)).r;
				// Convert the depth from non-linear 0...1 range to linear
				// depth, in Unity units.
				float existingDepthLinear = LinearEyeDepth(existingDepth01);

				// Difference, in Unity units, between the water's surface and the object behind it.
				float depthDifference = existingDepthLinear - i.screenPosition.w;

				// Calculate the color of the water based on the depth using our two gradient colors.
				float waterDepthDifference01 = saturate(depthDifference / _DepthMaxDistance);
				float4 waterColor = lerp(_DepthGradientShallow, _DepthGradientDeep, waterDepthDifference01);

				// Retrieve the view-space normal of the surface behind the
				// pixel we are currently rendering.
				float3 existingNormal = tex2Dproj(_CameraNormalsTexture, UNITY_PROJ_COORD(i.screenPosition));

				// Modulate the amount of foam we display based on the difference
				// between the normals of our water surface and the object behind it.
				// Larger differences allow for extra foam to attempt to keep the overall
				// amount consistent.
				float3 normalDot = saturate(dot(existingNormal, i.viewNormal));
				float foamDistance = lerp(_FoamMaxDistance, _FoamMinDistance, normalDot);
				float foamDepthDifference01 = saturate(depthDifference / foamDistance);

				float surfaceNoiseCutoff = foamDepthDifference01 * _SurfaceNoiseCutoff;

				float2 distortSample = (tex2D(_SurfaceDistortion, i.distortUV).xy * 2 - 1) * _SurfaceDistortionAmount;

				// Distort the noise UV based off the RG channels (using xy here) of the distortion texture.
				// Also offset it by time, scaled by the scroll speed.
				float2 noiseUV = float2((i.noiseUV.x + _Time.y * _SurfaceNoiseScroll.x) + distortSample.x,
				(i.noiseUV.y + _Time.y * _SurfaceNoiseScroll.y) + distortSample.y);
				float surfaceNoiseSample = tex2D(_SurfaceNoise, noiseUV).r;

				// Use smoothstep to ensure we get some anti-aliasing in the transition from foam to surface.
				// Uncomment the line below to see how it looks without AA.
				// float surfaceNoise = surfaceNoiseSample > surfaceNoiseCutoff ? 1 : 0;
				float surfaceNoise = smoothstep(surfaceNoiseCutoff - SMOOTHSTEP_AA, surfaceNoiseCutoff + SMOOTHSTEP_AA, surfaceNoiseSample);

				float4 surfaceNoiseColor = _FoamColor;
				surfaceNoiseColor.a *= surfaceNoise;

				// Use normal alpha blending to combine the foam with the surface.
				return alphaBlend(surfaceNoiseColor, waterColor);
            }
            ENDCG
        }
    }
}


 1789
1789


 被折叠的 条评论
为什么被折叠?
被折叠的 条评论
为什么被折叠?
 到【灌水乐园】发言


