


彩色图灰度化
将图像转换为灰度图是图像处理中常见的操作。
输入图像是一个带有3个通道(RGB)的彩色图像。
输出图像是一个带有1个通道的灰度图像。 下面展示了输入图像和输出图像的示例。
图1是输入和输出图片的示例。
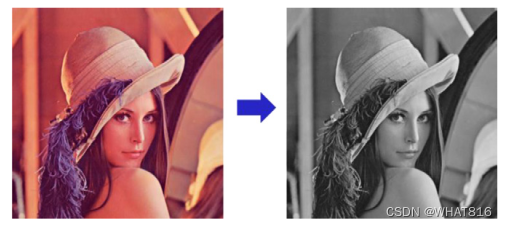
图1
线程层次结构
使用2D线程层次结构来进行灰度转换。
y维度中的线程数量对应图像的高度。
x维度中的线程数量对应图像的宽度。
每个维度中线程块的数量,等于像素数量除以线程块的线程数。
图2是线程层次结构的示例。。
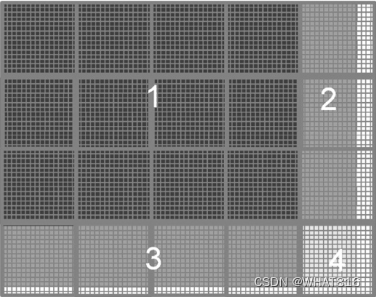
图2
线程块覆盖整个图像。但是,每个维度中最后一个块中的线程可能会超出图像。这是因为每个维度中的线程数量可能不是线程块中线程个数的倍数。我们需要停用这些线程。
Code
Host代码使用随机值初始化输入图像,并调用kernel将图像转换为灰度。输入图像以线性格式存储。原始图像预期存储格式为[height、wight、channels]。
#include <iostream>
#include <cstdio>
#include <ctime>
#include <cmath>

#include <cuda_runtime.h>
#include <thrust/host_vector.h>
#include <thrust/device_vector.h>
#include "image2gray.cuh"
#include "helper_cuda.h"
#include "error.cuh"

const int FORTIME = 1;

int main(void) {

    int m, n, t_x;

    m = 1024;
    n = 1024;
    t_x = 32;

    thrust::host_vector<uint8_t> h_in(3 * m * n);
    thrust::host_vector<uint8_t> h_out(m * n);

    srand(time(NULL));
    for (int i = 0; i < 3 * m * n; i++)
        h_in[i] = rand() % 256;

    for (int i = 0; i < m * n; i++) {
        h_out[i] = 0.21f * h_in[3 * i + 0] +
                   0.72f * h_in[3 * i + 1] +
                   0.07f * h_in[3 * i + 2];
    }


    thrust::device_vector<uint8_t> d_in = h_in;
    thrust::device_vector<uint8_t> d_out(m * n);

    dim3 threads(t_x, t_x);
    dim3 blocks((n + threads.x - 1) / threads.x, (m + threads.y - 1) / threads.y);

    cudaEvent_t start, stop;
    checkCudaErrors(cudaEventCreate(&start));
    checkCudaErrors(cudaEventCreate(&stop));
    checkCudaErrors(cudaEventRecord(start));

    for (int i = 0; i < FORTIME; i++)
        color_to_grayscale_conversion<<<blocks, threads>>>(thrust::raw_pointer_cast(d_in.data()),
                                                          thrust::raw_pointer_cast(d_out.data()),
                                                          n, m);
    checkCudaErrors(cudaEventRecord(stop));
    checkCudaErrors(cudaEventSynchronize(stop));
    float elapsed_time;
    checkCudaErrors(cudaEventElapsedTime(&elapsed_time, start, stop));
    printf("Time = %g ms.\n", elapsed_time / FORTIME);

    bool success = true;
    for (int i = 0; i < m * n; ++i)
        if (h_out[i] != d_out[i]) {
            std::cout << "Error at (" << i / m << " , " << i % m << "): " << int(h_out[i]) << " != " << int(d_out[i]) << std::endl;
            success = false;
        }
    if (success) printf("Success!\n");


    return 0;
}
图3展示了线性化输入图像的一个示例(格式:[2, 2, 3])
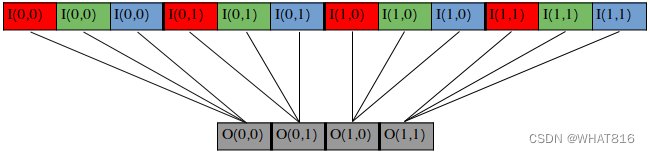
图3
以下是kernel代码的示例
#define NUM_CHANNELS 3

__global__
void color_to_grayscale_conversion(uint8_t *in, uint8_t *out, int width, int height){

    int row = blockIdx.y * blockDim.y + threadIdx.y;
    int col = blockIdx.x * blockDim.x + threadIdx.x;

    if(row < 0 || row >= height || col < 0 || col >= width) return;

    int grey_offset = row * width + col;

    int rgb_offset = grey_offset * NUM_CHANNELS;

    uint8_t r = in[rgb_offset + 0];
    uint8_t g = in[rgb_offset + 1];
    uint8_t b = in[rgb_offset + 2];

    out[grey_offset] = (uint8_t)(0.21f * r + 0.72f * g + 0.07f * b);
}
在前两行中,kernel计算当前线程的输出图像的相应行和列。
int row = blockIdx.y * blockDim.y + threadIdx.y;
int col = blockIdx.x * blockDim.x + threadIdx.x;
然后进行边界检查,确保当前线程没有访问无效的内存位置
if(row < 0 || row >= height || col < 0 || col >= width) return;kernel然后计算当前线程在线性化的输入和输出图像中的偏移量。
int grey_offset = row * width + col;
int rgb_offset = grey_offset * NUM_CHANNELS;
最后,读取输入图像中相应的像素,将其转换为灰度,并将其写入输出图像。
uint8_t r = in[rgb_offset + 0];
uint8_t g = in[rgb_offset + 1];
uint8_t b = in[rgb_offset + 2];

out[grey_offset] = (uint8_t)(0.21f * r + 0.72f * g + 0.07f * b);
性能分析
运行时间:
input图片维度:[1024,1024,3]
output图片维度:[1024,1024]
线程块维度:32×32
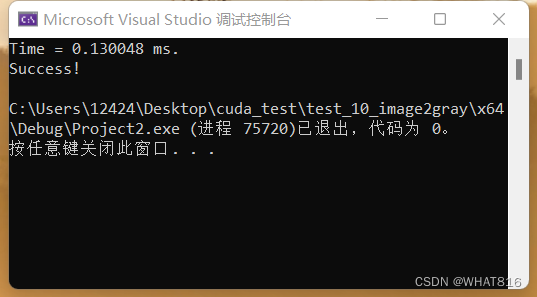
笔者采用设备:RTX3060 6GB
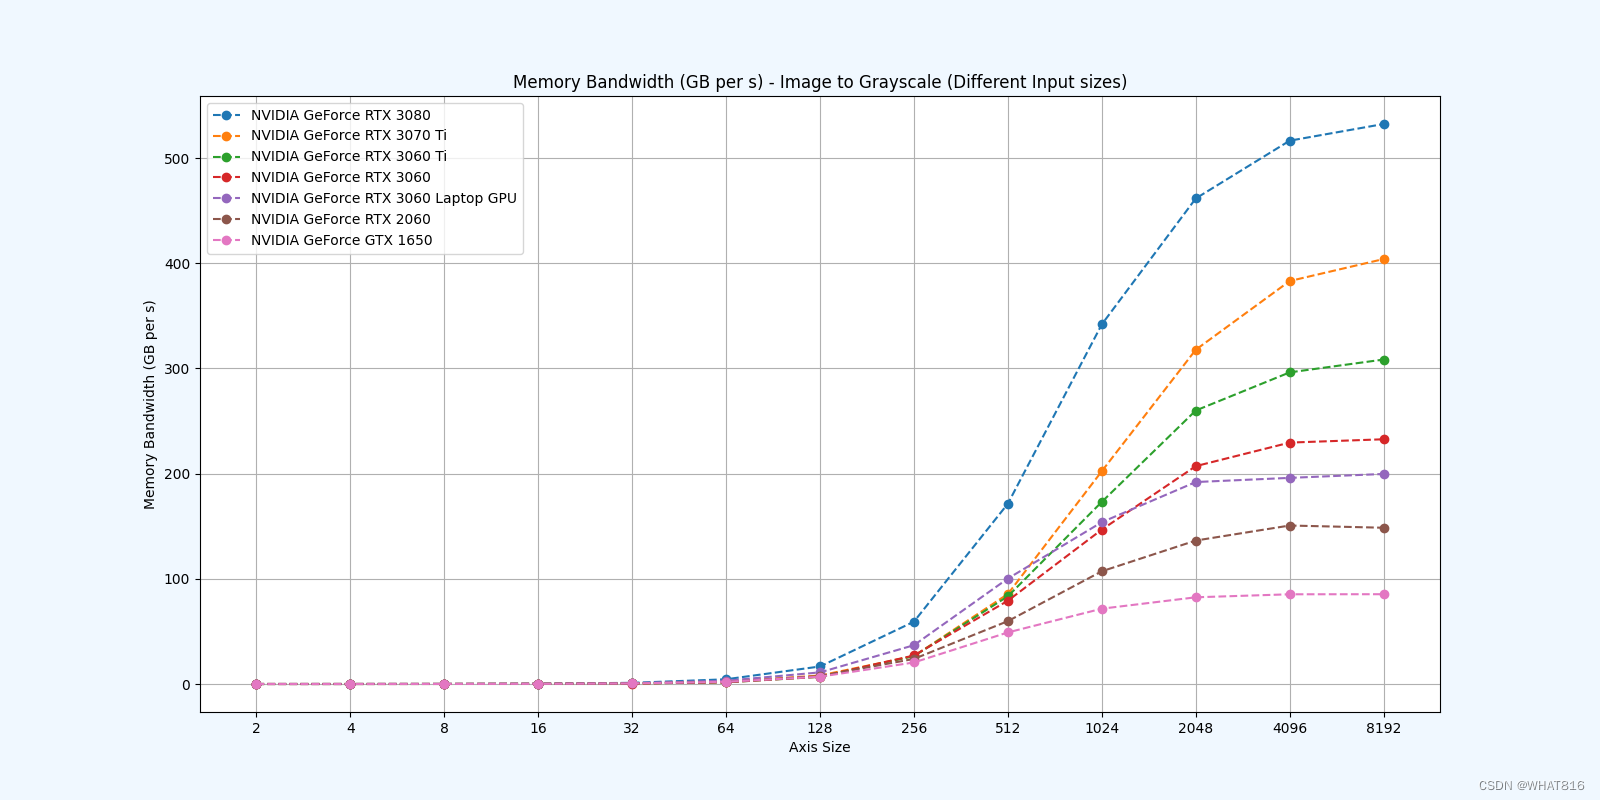
PMPP项目提供的分析
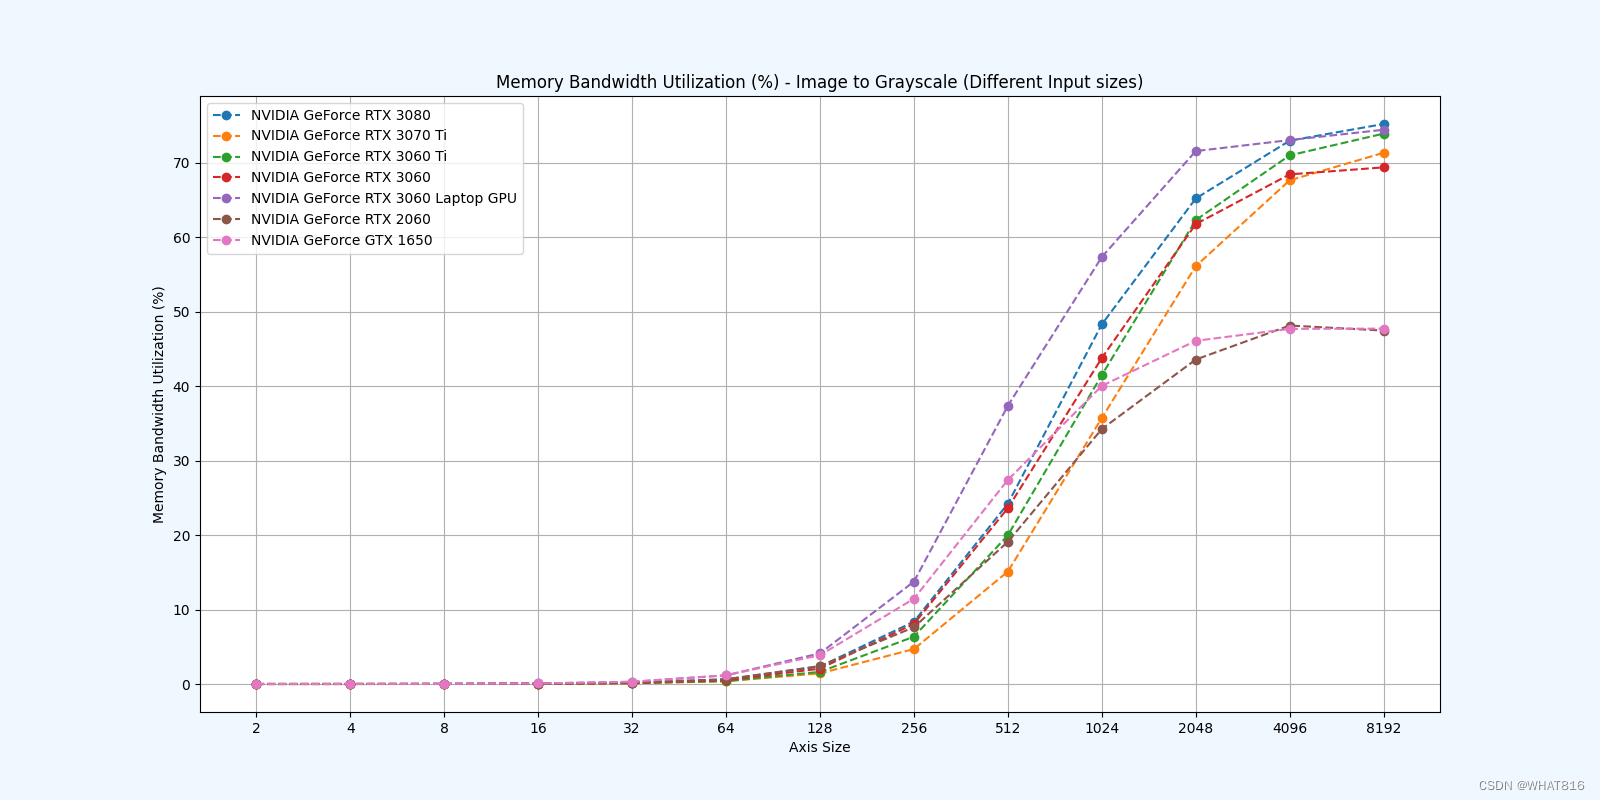
kernel的性能是使用NvBench项目在多个gpu中测量的。研究的性能测量方法有:
内存带宽:每秒传输的数据量。
内存带宽利用率:占用内存带宽的百分比。
参考文献:
1、大规模并行处理器编程实战(第2版)
2、PPMP


 645
645

 被折叠的 条评论
为什么被折叠?
被折叠的 条评论
为什么被折叠?
 到【灌水乐园】发言


