


十、Python 文件
到目前为止,我们主要在一个文件中工作;也就是说,我们所有的代码都保存在一个单独的.py文件中,并从同一个文件中运行。然而,在现实世界中,我们的许多程序将存储在多个文件中。更重要的是,我们很可能会将一些我们喜欢的代码片段和函数保存在文件中以备后用。这就是我们程序员的工作方式,现在也包括你。
我们使用多个代码文件有很多原因。其中一些以效率和减少代码中的错误为中心——还记得我们关于保存处理常见任务的程序部分以便以后在其他程序中重用的全部内容吗?当我们谈到函数和模块时,我们深入地讨论了这一点。
我们还可以选择保存类和对象、变量、数据列表,以及我们能想到的任何类型的常用代码。基本上,如果你认为你以后会在程序中用到某个东西,并且它会节省你的时间,减少用户输入的错误(也就是说,当你因为打击犯罪而疲惫的时候输入代码),那么就帮你自己一个大忙,把它复制到一个单独的文件中以备后用。
哦,一定要把它完整地记录下来,这样你就知道你保存这些代码是为了什么了!
我们使用来自多个文件的代码的另一个原因与这样一个事实有关——在更大的项目中也是如此——通常我们并不是一个程序中唯一的编码者。我们可能只处理整个应用的一小部分。仅仅因为这个原因,你可能会发现自己在处理过多的文件。
例如,如果你正在编写一个超级英雄角色扮演游戏,你可能会监督整个项目。你的朋友保罗·考德曼可能负责处理与战斗有关的那部分代码。你的另一个朋友 Ralph Programmerdudeson 可能会处理角色创建。你的办公室克星(每个人都需要一个)可能只是坐在角落里,整天愤怒地瞪着你,吃着数量可疑的快餐。
为了把程序组合在一起,你可以从 Paul Coderman 的文件中调用一组函数,从你的孩子 Ralph Programmerdudeson 的充满代码的文件夹中插入角色创建引擎。最后,你的仇人会增加他的愤怒和尖酸。结合起来,你将拥有一个成功的角色扮演游戏所需要的所有元素。
在 Python 中使用文件
如果您已经在本书中读到这里,我们将理所当然地认为您知道什么是文件系统。如果没有,就想想你电脑桌面上那些储存文档、漫画、视频游戏和大量自拍照的小文件夹。
当我们最初安装 Python 时,我们让它安装在默认位置。根据你的电脑,操作系统和你的硬盘设置方式,你可能会有一些和我的非常相似的东西。例如,我的 Python 和 IDLE 实例安装在:
C:\Users\James\AppData\Local\Programs\Python\Python36-32
你的可能有点不同,比如:
C:\Users\YourName\Programs\Python
诸如此类。
顺便提一下,我使用 IDLE 创建的所有.py或 Python 文件都自动存储在这个相同的位置。事实上,当我运行一个程序时,它首先搜索这个文件夹,寻找文件。如果我从我创建的 Python 程序中调用另一个文件,它会自动搜索这个文件夹,并期望在这里找到它。
下面是我的 Python 目录文件夹的一个例子,展示了我迄今为止为这本书写的所有文件(见图 10-1 ):
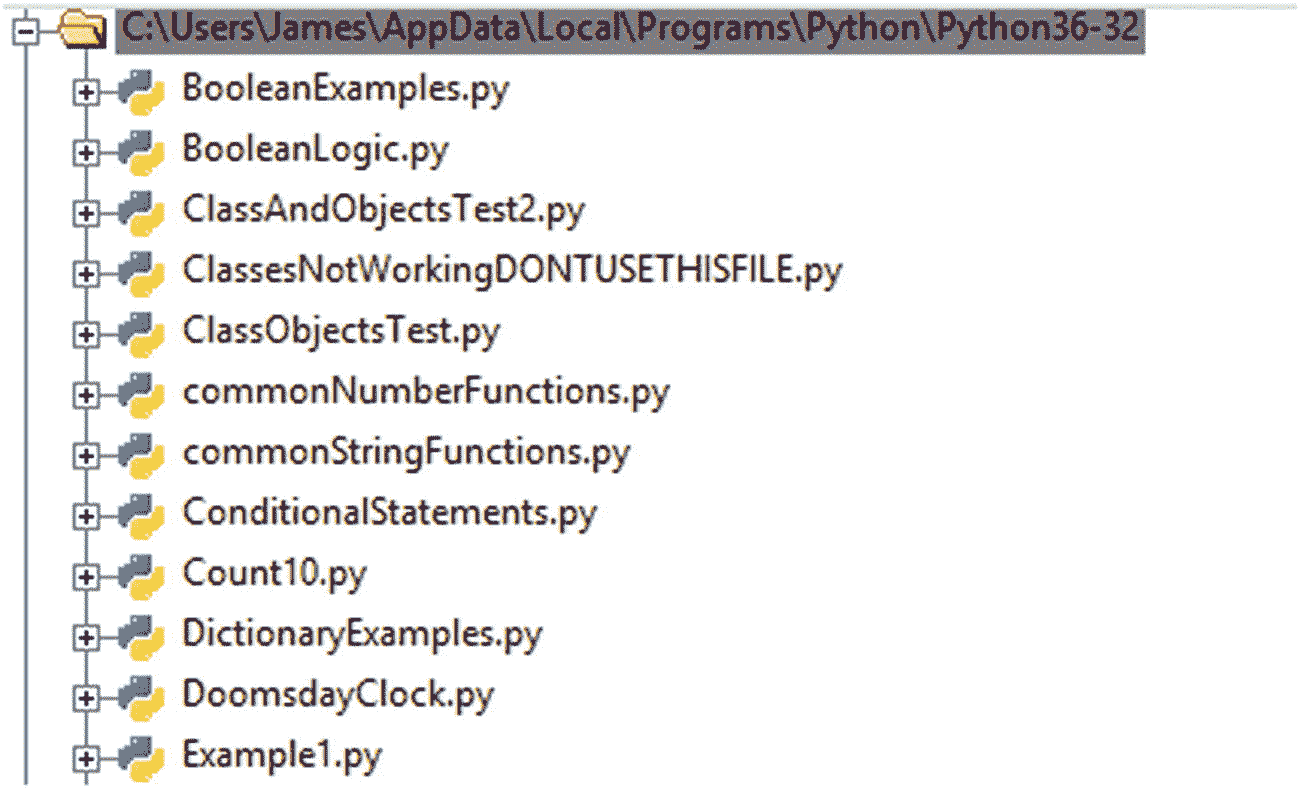
图 10-1。
Python 目录文件夹的示例
因为这些文件都在我们称之为root的目录中,当我把它们调入我的一个 Python 程序时,我不需要做任何特别的事情,比如改变目录或查看其他文件夹;我所要做的就是在程序中命名这个文件,然后它就把它导入——easy-peasey,mac-n-cheesey。
马上回来,我现在要去吃芝士通心粉了。
好吧,我回来了。
在现实生活中,事情并不总是这么简单。我们通常将每个程序的程序文件保存在特定的文件夹中,这样我们就不会混淆或意外调用错误的文件。你可以想象,在一年的时间里,你可能会积累相当多的文件,你肯定需要一种方法来组织你的工作。
例如,如果你正在开发超级英雄角色扮演游戏,你可能有一个名为超级英雄角色扮演游戏的主文件夹。然后,在那个文件夹中,你会有一组文件夹,用来存放游戏每个部分的文件。例如,考虑这种文件夹结构:
- 超级英雄 PG
-
字符创建模块
-
战斗引擎
-
VillainProfiles
-
区域文件
-
RandomEncounterFunctions
-
项目列表
-
超级大国
-
村庄词典
-
英雄阶层
-
使突变
-
人类
-
机器人
-
魔术师
-
侧踢侧面
-
等等。这些文件夹中的每一个都保存着你的程序的片断,这些片断执行了程序的每一个部分的功能。例如,BattleEngine文件夹将保存负责处理战斗场景、伤害结果等的函数和代码。
由于所有这些文件都存储在root文件夹的之外的中,我们需要从该部分代码所在的目录中调用主程序中的文件。
如果此刻这看起来令人困惑,那也没关系;我们将在这一章中详细讲述如何从另一个程序中调用一个程序——不管它在哪里。
既然您已经熟悉了文件夹结构和 Python 文件可能存储在不同位置的基本概念,剩下的事情就很容易了。
嗯……蛋糕。马上回来,去吃点蛋糕。
文件类型
到目前为止,我们只和。py 文件。实际上,我们可以用文本或。txt 文件,这是大多数程序员所做的,依赖于程序,如 Windows 的记事本或另一个更令人印象深刻的文本编辑器 Notepad++。我们将在本书的最后两章讨论一些你可以用来编码的工具;现在,要知道我们主要处理的是。py 文件。
当你扩展你的编程范围,开发你自己的程序,或者开始为一家公司工作时,你也会开始涉及到其他的文件类型。其中最常见的是。txt、超文本标记语言(HTML)(用于开发网页)和逗号分隔值(CSV)文件——想想电子表格数据。
当然,您也可以使用其他语言文件,比如 C 或 C++ 文件和 JSON。这就是所谓的扩展 Python,也是我们在第十三章简要介绍的一个主题。
对于本章中的例子,我们将主要使用。txt 和。py 文件,但是大部分理论都适用。
用 Python 代码创建文本文件
我们有几种方法可以接近这本书的下一部分。对于初学者,我们可以简单地打开一个记事本或文本编辑器程序,创建一个新的文本文件,然后将它保存到与所有其他文件(当前)相同的目录中。py 和 Python 编程文件保存到。但那似乎有点懒。相反,让我们用不同的方法——让我们用一些 Python 代码创建一个新的文本文件。
我们将在这一部分学习一些新概念,所以如果事情没有马上发生,不要太担心;在我们了解了核心概念之后,我们将会非常全面地介绍所有的内容。此外,请务必——一如既往——阅读注释代码,以便了解每一行的含义。
记住:我们在这个程序中的目标是使用 Python 创建一个新的文本文件。这些不同于。到目前为止,我们一直在创建 py 或 Python 文件。这里的技巧是,我们将从我们的 Python 文件中创建一个文本文件,所以请确保您不会混淆我们正在处理哪个文件。
首先,我们需要创建一个名为FunWithFiles.py的新 Python 文件。向其中添加以下代码:
# This code is used to open a file
# However, since the file does not already exist
# Python instead creates it for us
newFile = open("CreatedFile.txt", 'w')

# This code is similar to a print() statement
# However, instead of writing text or output to a user's computer screen
# It writes it to a file instead
newFile.write("Look, we created a brand new file using Python code!")

# The close() function closes the file we are working on and saves it
# It is important to always close a file when we are finished with it
# To ensure we do not make any additions or mess up the file in anyway
newFile.close()
这段代码中有几点需要注意。首先,我们这里的目的是使用代码创建一个新的文本或。名为CreatedFile.txt的 txt 文件。我们首先创建一个名为newFile的变量,并对其应用open()函数。通常,我们使用open()来做您认为它可能会做的事情——打开一个文件,以便我们可以对它采取某种行动。然而,在这个例子中,因为 Python 找不到名为CreatedFile.txt的文件,所以它继续假设我们想要创建一个新的。txt 文件,这样做。请注意,即使存在同名文件,它也会覆盖现有文件并在其中保留空白,因此使用这种方法时要小心!
在生产线上:
open("CreatedFile.txt", 'w')
"CreatedFile.txt"是我们希望打开/创建的文件的名称。'w'部分被称为参数,是我们可以在open()函数中使用的几个参数之一。
在这种情况下,'w'告诉 Python,您希望打开文件来写;因此,Python 在写模式下打开文件。这种模式允许我们对所讨论的文件进行更改或添加内容。
或者,我们可以使用'x'模式,它允许我们创建并写入一个新文件。但是,它以独占方式创建文件,这意味着如果文件名已经存在,它将失败并导致错误。要使用它,我们只需将代码改为:
open("CreatedFile.txt", 'x')
接下来,在我们的代码中,我们想要向新创建的文件中添加一些内容;当然,我们没有必要这样做,我们可以让它保持空白。然而,我们也可以在打开的时候放些东西进去。
该行中的.write方法:
newFile.write("Look, we created a brand new file using Python code!")
用于存储或写入文本“看,我们使用 Python 代码创建了一个全新的文件!”到新创建的CreatedFile.txt文件中。
最后,我们总是希望在完成后关闭我们打开或创建的任何文件,以确保它不会以任何我们不希望的方式被损坏、更改或影响。为此,我们使用了close()函数,如下所示:
newFile.close()
用 Python 读取文件
除了创建文件和写入文件之外,我们还可以读取文件。现在我们已经创建了新文件CreatedFile.txt,让我们创建一个程序来读取它。将以下代码添加到您的FunWithFiles.py文件中:
# Open the file CreatedFile.txt
read_me_seymour = open("CreatedFile.txt", 'r')

# Read the contents of the file

print(read_me_seymour.read())
这里,我们使用了open()来打开我们之前创建的文件,并向它传递了'r'或 read 参数。然后,我们使用了print()函数。 read 方法将文本打印到屏幕上,这样我们就可以看到我们文件的内容。
当我们在一个文件中只有一行文本时,这很好,但是如果我们有多行呢?
更改FunWithFiles.py文件中的代码,使其与以下示例相匹配:
# This code is used to open a file
# However, since the file does not already exist
# Python instead creates it for us
# Remember, if the file name already exists, it will overwrite the existing one, erasing its contents in the process.
newFile = open("CreatedFile.txt", 'w')

# This code is similar to a print() statement
# However, instead of writing text or output to a user's computer screen
# It writes it to a file instead
newFile.write("Look, we created a brand new file using Python code!")
newFile.write("Here is a second line of text!")

# The close() function closes the file we are working on and saves it
# It is important to always close a file when we are finished with it
# To ensure we do not make any additions or mess up the file in anyway
newFile.close()

# Open the file CreatedFile.txt
read_me_seymour = open("CreatedFile.txt", 'r')

# Read the contents of the file

print(read_me_seymour.read())
我们添加到代码中的只有这一行:
newFile.write("Here is a second line of text!")
当我们运行该文件时,我们期望看到两行文本,例如:
Look, we created a brand new file using Python code!
Here is a second line of text!
然而,事实并非如此。相反,我们得到的输出是:
Look, we created a brand new file using Python code!Here is a second line of code!
但这是为什么呢?
有两个答案,我们都会讨论。首先,当我们最初向新创建的文件中写入文本时,我们没有为它提供任何格式;。write 不在文本末尾使用回车符或换行符(相当于您在键入一个句子后按下 Enter 按钮)。
为了确保我们的行不会连在一起,因此,我们必须确保在我们的文本末尾添加一个\n 换行符。本质上,你想修改这两个。编写如下语句:
newFile.write("Look, we created a brand new file using Python code!\n")
newFile.write("Here is a second line of text!\n")
继续更改您的FunWithFiles.py文件,使其与这些更改相匹配。现在尝试再次运行该程序。这一次,你应该有结果了:
Look, we created a brand new file using Python code!
Here is a second line of text!
使用 readline()和 readlines()
有时候,您只想读取文本文件中的一个或几个特定行。.read方法读取文件的全部内容,因此在这个场景中不适用。相反,我们需要使用 readlines()。
为了看到这一点,让我们修改我们的代码
print(read_me_seymour.read())
到
print(read_me_seymour.readline())
现在,当您运行该程序时,您的结果将是:
Look, we created a brand new file using Python code!
这是因为readline()一次只读取一行文本。要读取文件中的下一行文本,只需添加另一个readline()实例。继续操作,确保您当前的FunWithFiles.py副本与此代码匹配:
# This code is used to open a file
# However, since the file does not already exist
# Python instead creates it for us
newFile = open("CreatedFile.txt", 'w')

# This code is similar to a print() statement
# However, instead of writing text or output to a user's computer screen
# It writes it to a file instead
newFile.write("Look, we created a brand new file using Python code!\n")
newFile.write("Here is a second line of text!\n")

# The close() function closes the file we are working on and saves it
# It is important to always close a file when we are finished with it
# To ensure we do not make any additions or mess up the file in anyway
newFile.close()

# Open the file CreatedFile.txt
read_me_seymour = open("CreatedFile.txt", 'r')

# Read the contents of the file

# Read the first line in the txt file
print(read_me_seymour.readline())

# Read the second line in the txt file
print(read_me_seymour.readline())

# Close the file again
read_me_seymour.close()
除了 readline()之外,还有一个名为 readlines()的函数,尽管看起来几乎相同,但它的操作略有不同。如果我们改变我们的代码(不要)说print(read_me_seymour.readlines()),而不是从我们指定的 txt 文件中打印出一行文本,它将打印出文件中的一系列行。结果会是这样的:
['Look, we created a brand new file using Python code!\n', 'Here is a second line of text!\n']
关于读写文件的警告
在我们进一步学习之前,我们应该讨论一下写入文件是如何工作的。当您第一次写入文件时,一切都很好。但是,如果我们尝试打开一个文件并第二次写入它——使用“w”参数——您实际上将覆盖您尝试写入的文件中当前存在的任何内容。
例如,如果您编写了代码:
# This code is used to open a file
# However, since the file does not already exist
# Python instead creates it for us
newFile = open("CreatedFile.txt", 'w')

# This code is similar to a print() statement
# However, instead of writing text or output to a user's computer screen
# It writes it to a file instead
newFile.write("Look, we created a brand new file using Python code!\n")
newFile.write("Here is a second line of text!\n")

# Opening the File to add more text
addingToFile = open("CreatedFile.txt", 'w')

# Writing more text
addingToFile.write("This is new text.\n")

addingToFile.close()
并试图打印出结果,你认为结果会是什么?
虽然您可能认为它是类似于以下内容的东西:
Look, we created a brand new file using Python code!
Here is a second line of text!
This is new text.
这是错误的。实际上,当我们第二次打开文件并开始写入时,我们会覆盖任何已经存在的文本并插入新的文本行。在这种情况下,真正的答案应该是:
This is new text.
所以,这个故事的寓意很简单:当你处理文件的时候,一定要知道你处于什么模式。
附加到文件
为了解决如何在不覆盖文件中任何现有文本的情况下写入文件的难题,我们只需从'w'参数切换到'a'或 append 参数。
假设我们想在文件FunWithFiles.py.中添加另一行文本,我们需要做的就是重新打开文件,进入追加模式。让我们修改我们的程序,使其符合以下内容:
# This code is used to open a file
# However, since the file does not already exist
# Python instead creates it for us
newFile = open("CreatedFile.txt", 'w')

# This code is similar to a print() statement
# However, instead of writing text or output to a user's computer screen
# It writes it to a file instead
newFile.write("Look, we created a brand new file using Python code!\n")
newFile.write("Here is a second line of text!\n")

# The close() function closes the file we are working on and saves it
# It is important to always close a file when we are finished with it
# To ensure we do not make any additions or mess up the file in anyway
newFile.close()

# Open the file CreatedFile.txt
read_me_seymour = open("CreatedFile.txt", 'r')

print("THE ORIGINAL TEXT IN THE FILE")
print(read_me_seymour.readline())
print(read_me_seymour.readline())

# Closing the file
read_me_seymour.close()

# Opening the file again to write some text to it
addingToFile = open("CreatedFile.txt", 'a')

# Adding some text to the file in append mode
addingToFile.write("This is new text.")

# Closing the file
addingToFile.close()

# Opening the file yet again, to read it
# Now that we have appended a line

print("THE TEXT IN THE FILE AFTER WE APPEND")
appendedFile = open("CreatedFile.txt", 'r')

# This is another way we can print from a file
# Here we are using a for loop
# And using the keywords in and line to print each line
# In the text file

for line in appendedFile:
    print(line)

# Closing the file again
appendedFile.close()
我们在这一轮做了相当多的补充。然而,由于可靠的文档实践,应该相当清楚做了什么更改以及它们做了什么。
尽管如此,我们还是来讨论一下添加的一些代码。
首先,简要概述代码及其用途。该守则的目的是:
-
创建新的 txt 文件
-
向文件中写入两行文本
-
以读取模式打开文件以读取文件
-
打印出文件中的行
-
以追加模式打开文件
-
向文件追加新的一行文本
-
打印出修改文件的内容
在这些步骤之间,我们还关闭了文件。所以对于每一个打开读、写或追加的实例,我们总是想确定我们练习了良好的编码并关闭了文件。这可能不是对文件进行编码的最有效的方式,但是对于我们这里的目的——简单地学习基本语言、编码原则和理论——这是最好的方式。
最后,您可能已经注意到,我们在代码末尾附近偷偷加入了一个小的for循环。这是我们打印文本文件中的行的另一种方式。
使用目录
正如我们前面讨论的,到目前为止,我们只在最初安装 Python 的目录中工作。在本节中,我们将学习如何打开计算机上其他文件夹或目录中的文件。
然而,在我们这样做之前,让我们看一个简单的方法来确定我们当前在哪个目录中。创建一个名为WorkingWithDirectories.py的新 Python,并键入以下代码:
# Import the module os
# This is used to work with operating system information
import os

# Use the getcwd() method of the os module
# To see what directory we are in
os.getcwd()
当你运行这段代码时,你会得到一个类似于我的结果;它会有所不同,因为我们的计算机系统和设置是不同的,但它应该是这样的:
C:\Users\James\AppData\Local\Programs\Python\Python36-32
这是手头上的重要信息,因为我们可能在不同的目录中有文件。如果我们试图打开当前目录中的一个文件,而它并不存在,我们将要么以一个错误结束,要么意外地创建该文件的一个新版本。当然,如果我们在不同的目录中有一个文件的多个副本,这会使事情变得混乱。
现在我们知道了当前的目录,我们可以切换到另一个目录并从那里打开一个文件。我说“可能”是因为在我们实际尝试之前,我们需要创建一个新的目录来更改。如果你还记得,在这一章的开始,我向你展示了我当前的 Python 目录是什么样子的。这张图片有点误导,因为它没有包括我所有的目录或文件夹。这是我的真实样子(见图 10-2 ):
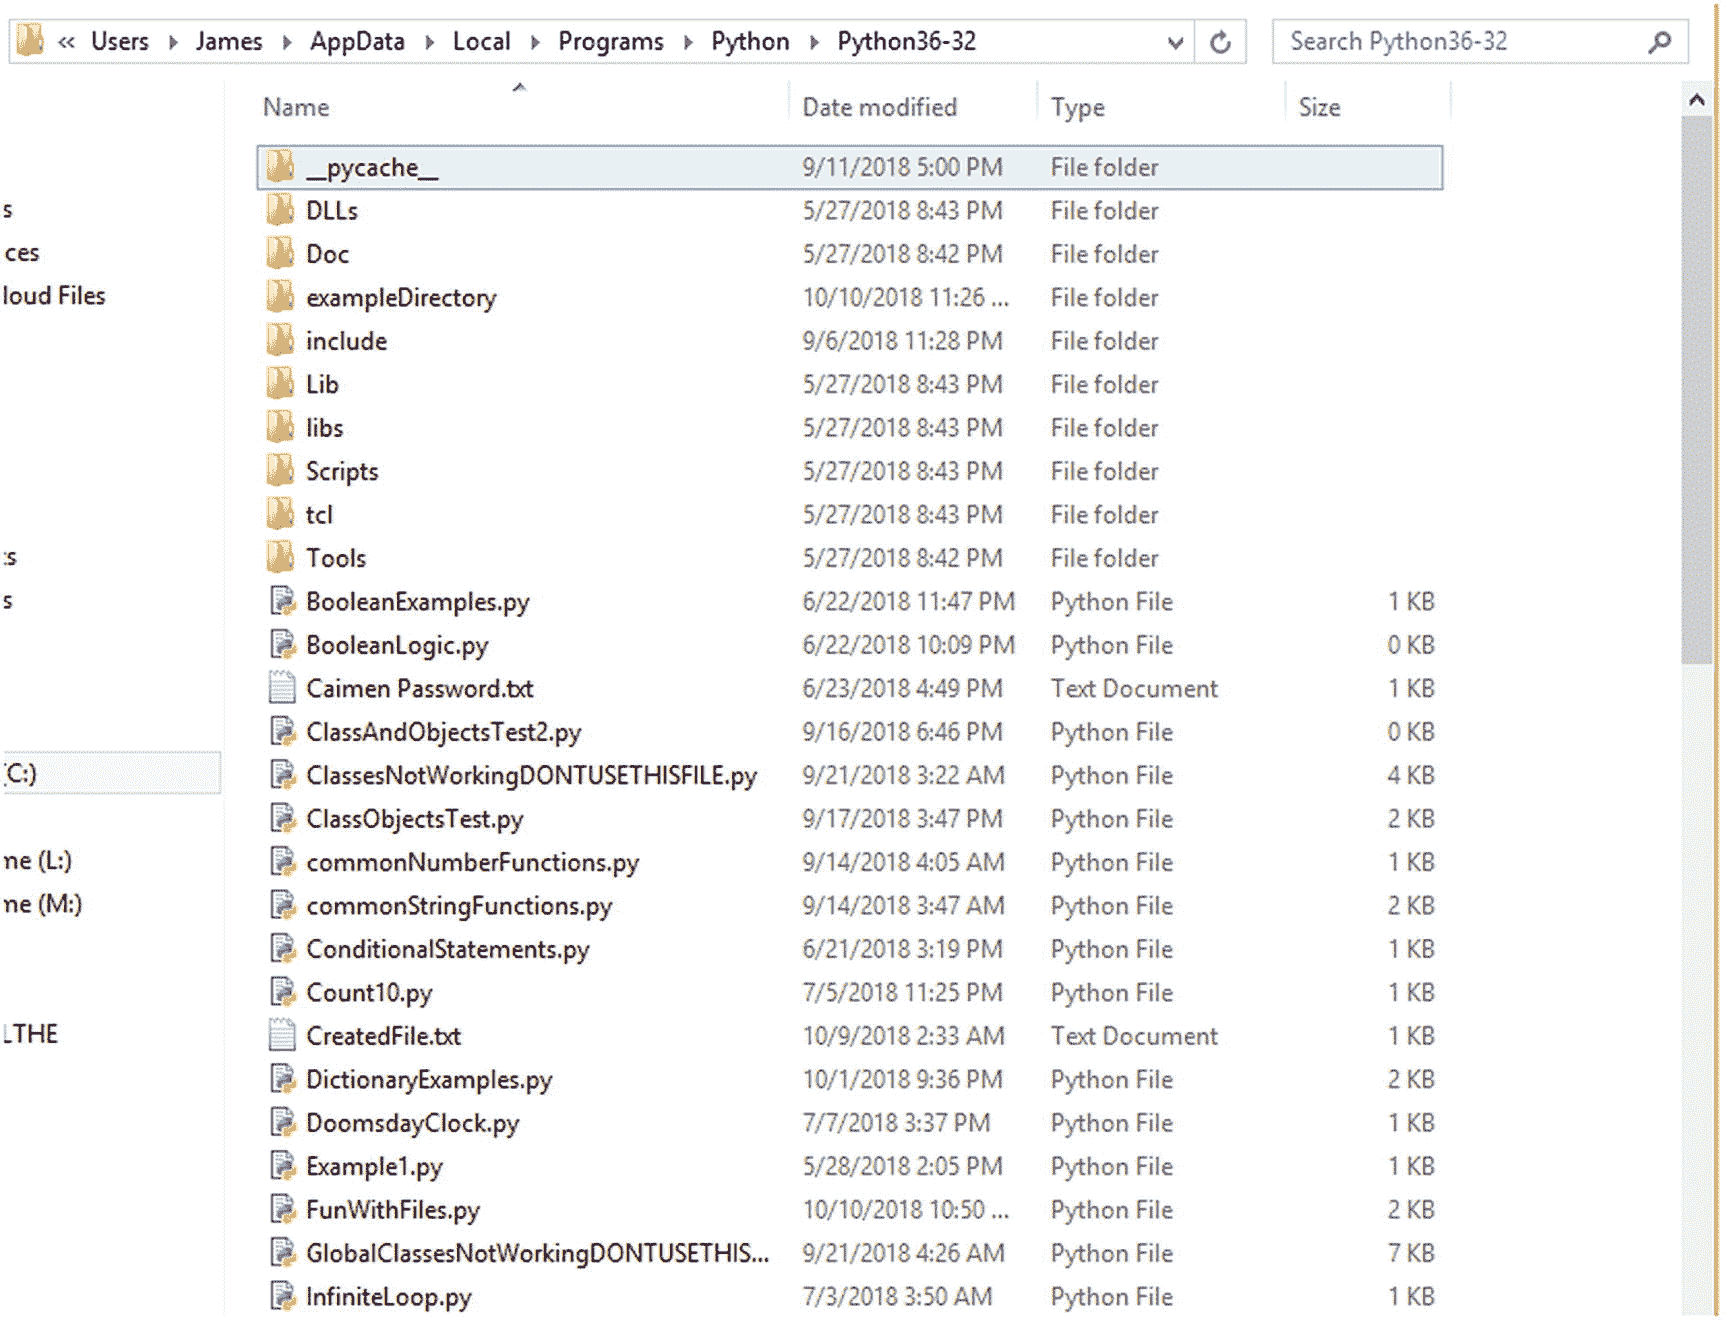
图 10-2。
我的真实 Python 目录视图,显示文件和文件夹
如果你已经按照这本书的建议创建了文件,你的看起来会很相似,只是少了一两个文件。
让我们继续创建一个新目录,我们将使用os的mkdir()方法将其命名为 new directory。将这段代码添加到您的WorkingWithDirectories.py文件中:
# Create a new directory or folder
os.mkdir("newDirectory")
现在,运行文件,这将创建一个名为newDirectory的新文件夹。如果你打开你的 Python 目录文件夹,你应该看到它被添加到列表中,类似于我的(见图 10-3 ):
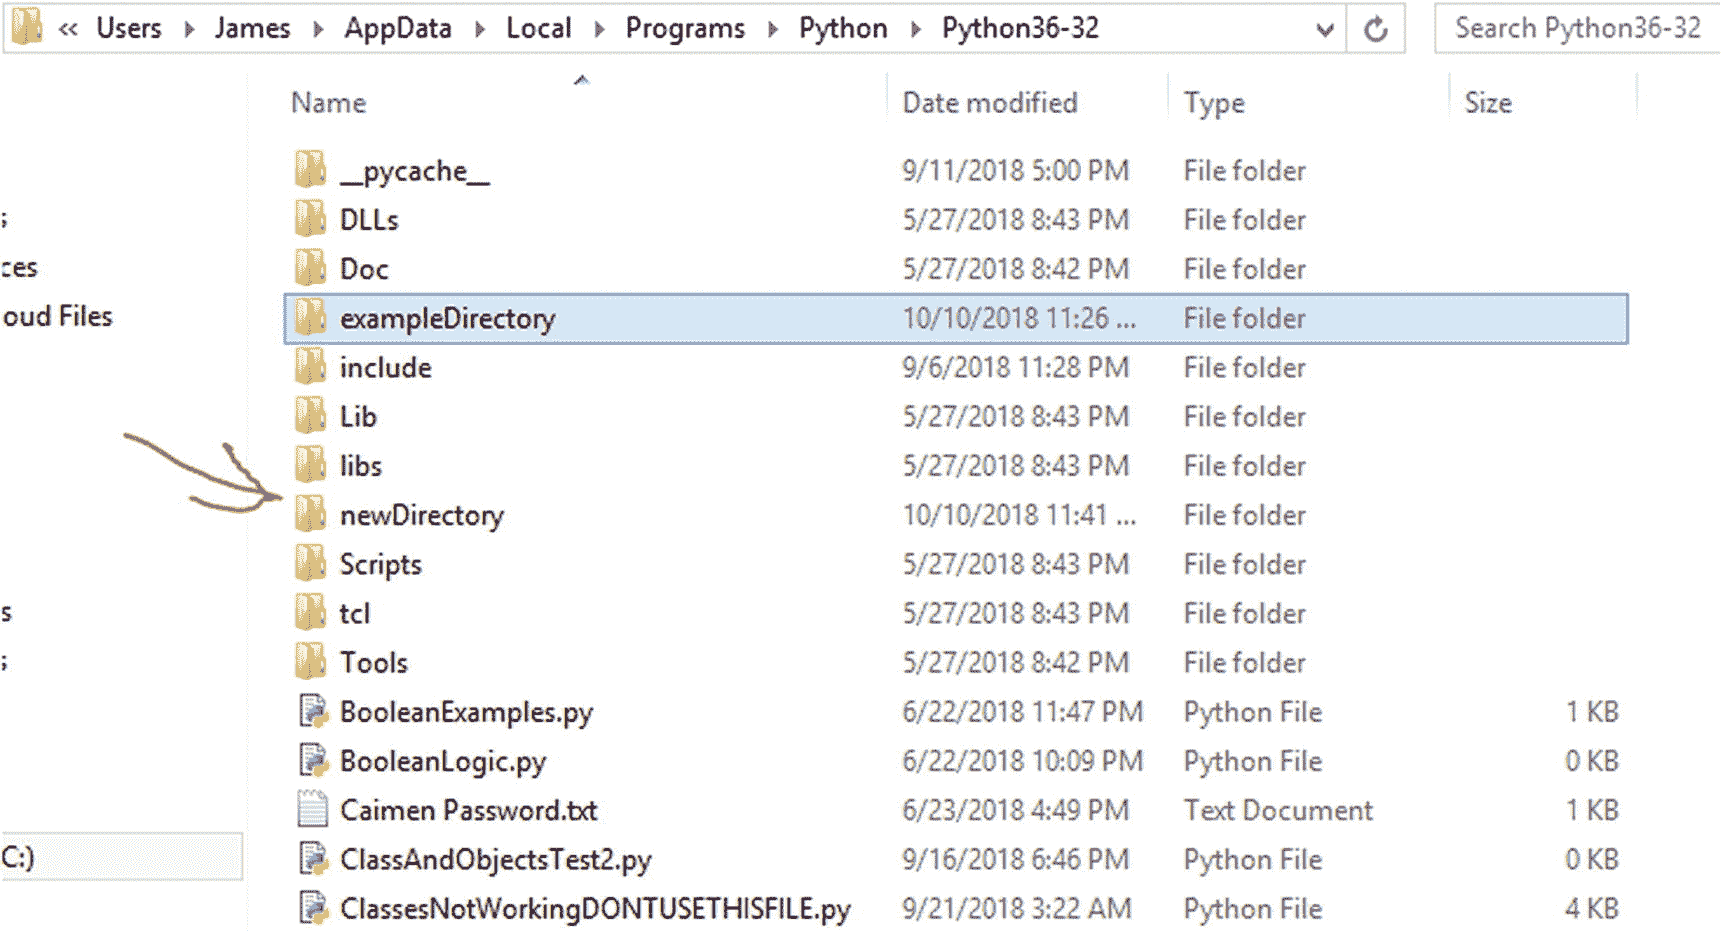
图 10-3。
新创建的“新目录”文件夹
现在,下一部分很重要!在更改目录之前,我们现在要注释掉刚刚添加的代码。我们这样做,因为如果我们不这样做,我们将收到一个错误消息。为什么?因为 Python 不会创建一个已经存在的目录。既然我们刚刚创建了它,那么,你就明白了!
修改你的代码,使之与我的相匹配,然后运行程序。
注意
确保(" C:/Users/James/AppData/Local/Programs/Python/Python 36-32/new directory ")与您的目录匹配,而不是我的目录;您可以使用本节第一个示例中返回的值,我们在第一个示例中学习了如何使用 os.getcwd()。否则,您会得到一个错误。此外,确保将目录路径中的改为/,否则也会收到错误。
下面是代码:
# Import the module os
# This is used to work with operating system information
import os

# Use the getcwd() method of the os module
# To see what directory we are in
os.getcwd()

# Create a new directory or folder
# We commented this out because we created the directory earlier
# If we don't, Python will try to create it again
# Causing an error

# os.mkdir("newDirectory")

# Using the chdir() method to change directories
os.chdir("C:/Users/James/AppData/Local/Programs/Python/Python36-32/newDirectory")

print(os.getcwd())
警告!如果您收到错误消息,原因很可能是您试图更改的目录不正确。如果您编写的代码与我的代码完全匹配,情况肯定是这样。记住,我们的目录是不同的,所以你必须插入你的目录。例如:
os.chdir("C:/Users/James/AppData/Local/Programs/Python/Python36-32/newDirectory")
这是我如何改变我的目录;你的可能更像:
os.chdir("C:/Users/YourName/Programs/Python/Python36-32/newDirectory")
它应该与本节第一个例子中的os.getcwd()例子返回的内容相匹配,再加上/newDirectory.
另外,记得把你的反斜杠改成正斜杠。例如,我的原始目录是:
C:\Users\James\AppData\Local\Programs\Python\Python36-32
但是当我们用代码写的时候,应该是:
C:/Users/YourName/Programs/Python/Python36-32/
一旦您的代码被整理出来并运行它,您将会收到与此类似的输出:
c:\ Users \ James \ AppData \ Local \ Programs \ Python \ Python 36-32 \ new directory
显示您切换到的目录。只要最后一部分说\newDirectory,我们就知道代码工作了。
既然我们已经知道了如何创建一个新目录以及如何切换到一个不同的目录,那么让我们切换回原来的目录,这样我们就可以继续处理我们在本书中已经创建的代码。
要切换回来,我们只需再次使用 chdir()方法,这次将它指向我们的原始目录。记住,用你原来的目录代替我为自己写的目录:
# Using the chdir() method to change directories
print("Changing to the newDirectory folder: ")
os.chdir("C:/Users/James/AppData/Local/Programs/Python/Python36-32/newDirectory")

# Print out the current directory to verify it changed
print(os.getcwd())

# Switching back to the original directory
# Remember to use your own directory, not mine!
os.chdir("C:/Users/James/AppData/Local/Programs/Python/Python36-32")

# Verifying that we are back to the original directory
print("Back to the original directory: " )
print(os.getcwd())
这里,我们添加了几个print()函数来显示我们处于目录切换的哪个阶段。我们还添加了一个最终的目录更改,以返回到我们的原始目录。运行时,结果应该类似于:
Changing to the newDirectory folder:
C:\Users\James\AppData\Local\Programs\Python\Python36-32\newDirectory
Back to the original directory:
C:\Users\James\AppData\Local\Programs\Python\Python36-32
在我们结束关于创建目录和在目录之间来回切换的讨论之前,还有最后一件事。为了避免将来出现任何混淆,让我们继续删除 newDirectory 文件夹。我们只需打开 Python 文件夹,单击该文件夹并选择“删除”即可。然而,我们现在是程序员了,而且,正如众所周知的程序员所做的那样,我们应该使用代码来为我们做艰苦的工作!
要删除目录,只需将以下代码添加到文件中:
# Deleting the newDirectory directory
# Using the rmdir() method

os.rmdir('newDirectory')
一旦运行了这段代码,如果查看 Python 文件夹,就会发现newDirectory文件夹已经不存在了。注意,我们不需要使用 Python 的完整路径来查找目录。这是因为该文件夹存在于我们指示 Python 在其中进行搜索的当前根文件夹中(即C:\Users\James\AppData\Local\Programs\Python\Python36-32)。如果您要将文件夹更改为“newDirectory”,那么在使用 mkdir 和 chdir 时也是如此
奖励回合!
在这一章中,我们学习了很多关于使用文件和导航目录的知识,但是仍然有一些事情我们需要学习如何去做。我不想用太多的信息淹没你,所以我将使这个特殊的超级秘密奖金回合简短而甜蜜。
在上一节中我们学习了如何删除目录,但是删除文件呢?删除文件非常简单;我们所做的就是使用remove()方法,如下所示:
# import os
import os

# Remove a file use the remove() method
os.remove('test.txt')
这段代码将从当前的目录中删除文件test.txt。如果文件位于当前目录之外的目录,我们可以切换到该目录,然后使用 remove()或者我们可以只给 remove()方法提供文件路径和名称,如下所示:
# import os
import os

# Remove a file use the remove() method
# If the file existed in the newDirectory folder
os.remove('C:\Users\James\AppData\Local\Programs\Python\Python36-32\newDirectory\test.txt')
其中目录将等于文件所在的目录路径。
最后,有时您可能希望更改文件的名称。我们可以使用另一种方法:
# import os
import os

# Rename the file using the rename() method
# Rename requires two arguments
# The current filename and the new filename

os.rename('test.txt', 'newTest.txt')
这段代码将我们当前目录中的文件test.txt重命名为newTest.txt。
FunWithFiles.py 代码
这是我们的FunWithFile.py文件中所有代码的编译副本。请随意更改这段代码并进行试验,经常运行它以查看更改的结果!
# This code is used to open a file
# However, since the file does not already exist
# Python instead creates it for us
newFile = open("CreatedFile.txt", 'w')

# This code is similar to a print() statement
# However, instead of writing text or output to a user's computer screen
# It writes it to a file instead
newFile.write("Look, we created a brand new file using Python code!\n")
newFile.write("Here is a second line of text!\n")

# The close() function closes the file we are working on and saves it
# It is important to always close a file when we are finished with it
# To ensure we do not make any additions or mess up the file in anyway
newFile.close()

# Open the file CreatedFile.txt
read_me_seymour = open("CreatedFile.txt", 'r')

print("THE ORIGINAL TEXT IN THE FILE")
print(read_me_seymour.readline())
print(read_me_seymour.readline())

# Closing the file
read_me_seymour.close()

# Opening the file again to write some text to it
addingToFile = open("CreatedFile.txt", 'a')

# Adding some text to the file in append mode
addingToFile.write("This is new text.")

# Closing the file
addingToFile.close()

# Opening the file yet again, to read it
# Now that we have appended a line

print("THE TEXT IN THE FILE AFTER WE APPEND")
appendedFile = open("CreatedFile.txt", 'r')

# This is another way we can print from a file
# Here we are using a for loop
# And using the keywords in and line to print each line

# In the text file

for line in appendedFile:
    print(line)

# Closing the file again
appendedFile.close()
WorkingWithDirectories.py
下面是来自WorkingWithDirectories.py文件的完整代码。请注意,有些代码被注释掉了,因为多次使用它会导致错误。这与我们何时创建和删除新目录特别相关,如果我们试图创建一个已经存在的目录,将会导致错误。
再次强调,请随意试验这段代码,最重要的是,从中获得乐趣。毕竟,破解代码——然后修复它——是我们成为真正强大的编码超级英雄的方法!
# Import the module os
# This is used to work with operating system information
import os

# Use the getcwd() method of the os module
# To see what directory we are in
os.getcwd()

# Create a new directory or folder
# We commented this out because we created the directory earlier
# If we don't, Python will try to create it again
# Causing an error

# os.mkdir("newDirectory")

# Using the chdir() method to change directories
print("Changing to the newDirectory folder: ")
os.chdir("C:/Users/James/AppData/Local/Programs/Python/Python36-32/newDirectory")

# Print out the current directory to verify it changed
print(os.getcwd())

# Switching back to the original directory
# Remember to use your own directory, not mine!
os.chdir("C:/Users/James/AppData/Local/Programs/Python/Python36-32")

# Verifying that we are back to the original directory
print("Back to the original directory: " )
print(os.getcwd())

# Deleting the newDirectory directory
# Using the rmdir() method

os.rmdir('newDirectory')
在这一集里!
你在这次冒险中真的很勇敢,年轻的英雄!你学到的足以让聪明的伊诺布瑞恩嫉妒。顺便说一句,你应该看看那个家伙的额头——很大!
尽管你很聪明,很有天赋,但是对你所学的知识进行一点复习总是一个好主意。所以,事不宜迟——在恶魔偷走你的荣耀之前——以下是这一集的总结:
-
Python 能够处理许多文件类型,包括。py,。txt,。html,。c、CSV 和 JSON。
-
open()用于打开一个文件;如果不存在同名文件,也可以使用 open()创建文件。
-
使用 open()的例子:open("CreatedFile.txt ",’ w ')。
-
“w”参数用于以写模式打开文件。
-
“x”参数用于以创建/写入模式打开文件。
-
那个。write 方法允许我们向文件中添加文本。
-
使用的示例。write 方法:newFile.write(“这里是一些文本。”).
-
当您使用完一个文件时,请务必使用 close()函数关闭它。
-
使用 close()的示例:newFile.close()。
-
参数“r”用于打开文件进行读取。
-
那个。read()方法读取文件中的所有文本。
-
使用的示例。read()方法:print(readMe.read())。
-
我们使用 readline()来读取文件中的一行。
-
readline()的一个例子:print(readMe.readline())。
-
append 参数“a”应该用于写入现有文件。使用“w”将覆盖现有文件的内容。
-
要使用目录,我们必须导入操作系统。
-
我们使用 getcwd()来查看我们当前的目录。
-
使用 getcwd()的示例:os.getcwd()。
-
我们使用 mkdir()创建一个新目录。例如:os.mkdir("newDirectory ")。
-
我们使用 chdir()来改变目录。例如:os.chdir(“C:/Users/YourName/”)。
-
我们可以使用 rmdir()移除或删除一个目录。例如:os.rmdir("newDirectory ")。
-
我们可以使用 os.remove()删除文件。比如:os.remove('test.txt ')。
-
我们可以使用 os.rename()来重命名文件。比如:os.rename('test.txt ‘,’ newTest.txt ')。
十一、Python 游戏
我们专门有一章讨论用 Python 创作视频游戏是非常合适的——毕竟,正是这种兴趣让我在小时候就开始编程。从那以后,事情有了很大进展;当时,PC 游戏是基于文本的,仅有的图像由质量很差的图形组成,或者更糟糕的是,由 ASCII 字符组成。
甚至连声音都非常基本:想想单音数字 boops、beep 和 borps。还有动画?嗯,它们在技术上是存在的——对于我那个时代的真正高科技电脑游戏的一个很好的例子,可以看看 YouTube 上的游戏视频,比如《卡门·圣地亚哥在哪里》和我最喜欢的《俄勒冈小径》。
去吧,我等着。笑完了?好,我们继续。
这并不是说没有质量更好的视频游戏。雅达利在这一点上已经存在了很长时间,任天堂娱乐系统(NES)、世嘉和 Commodore 都可以使用。我甚至拥有一台任天堂,对它的高科技 8 位图形和尖端的声音惊叹不已。
虽然这些游戏很棒——其中一些至今仍然存在,而且比我在 PS4 上运行的许多游戏都有趣——但这些主机游戏缺少我的 PC 游戏所具备的一项功能;我能够破解它们,更重要的是,在电脑上创建我自己的版本。
现在情况不同了。如果你愿意,你可以为主要的主机购买一个开发人员控制台,如果有合适的资源和技能,开始开发你自己的游戏。这些游戏是否会在任何游戏商店出现,谁也说不准,但关键是,从技术上讲,现在你可以创建主机游戏。
那时候,在我这个年纪,你不能。
视频游戏是学习计算机编程技能的好方法。给定一个足够复杂的视频游戏,你真的可以弯曲你的编码肌肉。你开始以你通常不会想到的方式使用代码,你真的需要在编写代码之前为游戏计划好代码——这一部分非常重要,尤其是如果你创建了一个背后有故事情节的游戏。
然而,对我来说,更重要的是电子游戏可以灌输给一个人的激情。我希望,如果这本书里没有任何东西真正激发你的想象力或者让你对编程感兴趣,那么创建你自己的游戏将会。
即使你没有创作游戏的欲望,而对安全、桌面应用、数据科学或使用 web 框架更感兴趣,我仍然鼓励你继续阅读本章。虽然不会涉及大量的深入编码,但我们确实涵盖了一些可以在游戏之外使用的概念,例如处理声音、图像甚至动画。
此外,每个英雄都需要尽可能多地了解他们的力量。我的意思是,他们说超人可以跳过高楼,但你多久能看到他这样做?
尽管如此,有一天可能会发生一些事情,他再也不能飞行了(也许他会失去他的飞行员执照),然后他将如何到达一座建筑物的顶部,以阻止那个有着巨大大脑的巨型猿在大都会市区举办一场非常酷但完全邪恶的屋顶派对?
游戏用 Python
诚然,当你想到视频游戏编程时,Python 不是第一个想到的语言。也就是说,它被用在一些大型游戏中——《战地》就是一个很好的例子,它在 PC 和游戏机上使用 Python。
如果你真的想成为一名游戏开发者,你会想尽可能多地学习 C++ 和 JAVA。这是目前大多数游戏使用的两种顶级语言。其他的,比如 C#(用 Python 扩展的)也在使用,但是实际上,你应该关注 C++,特别是如果你想追求主机和 PC 游戏。
如果你计划编写基于网络的游戏,那么你需要 HTML5、CSS3、JavaScript 和 SQL(一种数据库语言)。
当然,你可以用多种语言来开发游戏,但是这里列出的是最重要的语言。
也就是说,如果你想学习核心概念,甚至创建自己的游戏——无论是为了娱乐,与朋友分享,还是作为你投资组合的一部分,Python 都是一个不错的选择。Python 比 C++ 容易学得多,如果你已经学了这么多,你已经很好地掌握了编码基础。
Python 还有非常方便的pygame模块,我们在书的前面安装了它,它实际上是一堆不同模块的集合,让你可以用 Python 创建自己的游戏和动画。
因为这是一本关于 Python 的书,我们将关注如何用 Python 创建游戏;但是我不希望你忽视这样一个事实,一旦你掌握了 Python,你应该增加其他语言到你的技能中。
可以用 Python 编码的游戏类型
你可以用 Python 创作的游戏类型没有限制——至少在理论上是这样。可以做角色扮演游戏(RPG)、第一人称射击游戏(FPS)、平台、益智游戏等等。这些游戏可以是基于文本的,混合了简单的图形、声音和文本,动画,2D 侧滚动条(想想像 NES 上的魂斗罗这样的游戏),甚至 3D 游戏。
如果你想拓展到制作 3D 游戏,你需要学习一些额外的技术,比如 Panda3D ( www.panda3d.org/ )。我们在这里不会深入到游戏开发中,但是要知道这个选项是存在的。
虽然 Python 可以帮助你制作出优秀的游戏,但真正的资源密集型游戏——需要大量内存和处理能力的游戏——最好用 C++ 来制作,这样你就可以更好地使用处理和图形硬件。
要真正了解你可以用 Python 开发什么类型的游戏——特别是你可以用本章将要介绍的pygame模块编写什么类型的程序——访问 Pygame 官方网站的项目库,浏览那里托管的大量游戏: www.pygame.org/tags/all 。
可以按类型、使用的库等查看 Python 程序员开发的游戏。这是一个获得一些想法和灵感的好地方,也是玩一些游戏和享受乐趣的好地方!
游戏简介
如果你一直在阅读本书,我们已经安装了pygame模块,但是不要担心——如果你跳过了这一部分或者想再次学习如何安装,我们将再次安装它。
然而,首先我们应该谈谈 Pygame 的历史以及它到底是什么。
虽然我们将pygame称为一个模块,但实际上,它是一组专门为视频游戏开发而创建的模块。由 Pete Shinners 开发,第一个版本发布于 2000 年 10 月。这些模块是使用 Python、C 和 Assembly 混合制作的。
除了 PC 上的游戏,Pygame 还可以用于使用一个称为 PGS4A 的子集为 Android 设备开发游戏;您可以通过访问 http://pygame.renpy.org/ 来了解更多关于使用这个特定子集为移动开发编程游戏的信息。
安装 Pygame
如前所述,我们已经安装了pygame模块。然而,为了清楚起见,这里是如何再次安装它,以防你不想把几章翻到第七章的。
要安装一个模块——特别是pygame——打开命令或 CMD 窗口,在命令提示符下输入以下内容:
python -m pip install Pygame
如果您还没有安装 pygame,您将在 CMD 窗口中看到软件包的下载和安装过程。该消息将类似于图 11-1 :
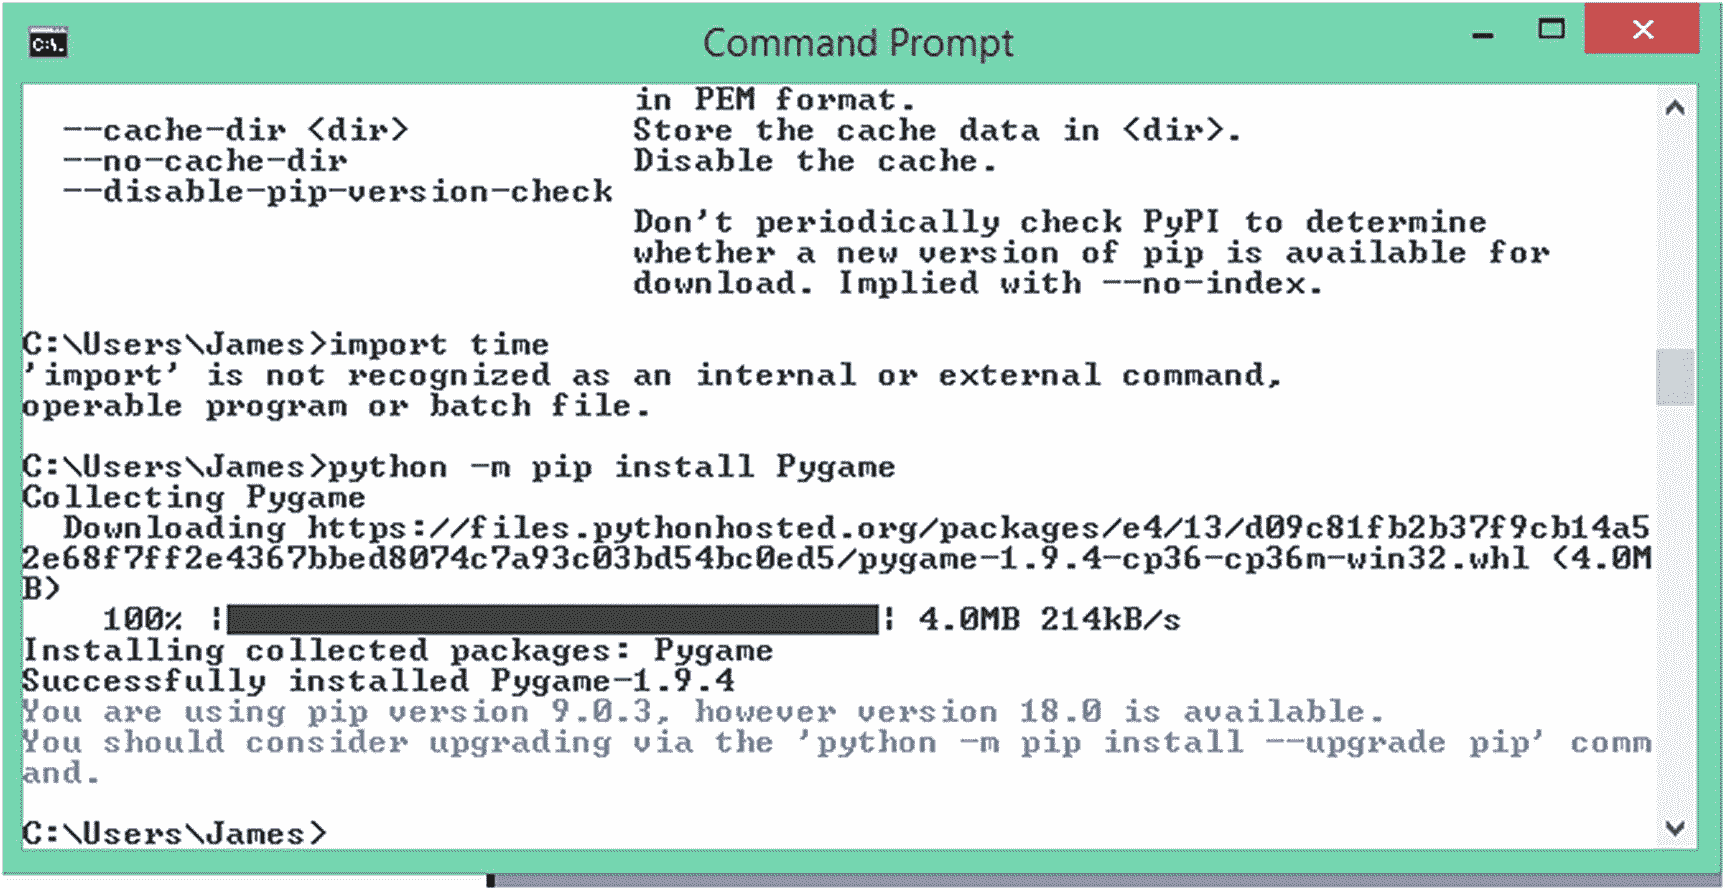
图 11-1。
安装 pygame
就是这么简单!
为游戏设置 Pygame 的基本框架
我们首先需要一个结构来创建我们的 Pygames。为此,我们可以使用一个最基本的引擎——因为没有更好的词,它看起来像这样:
import pygame
from pygame.locals import *
import sys

# Initialize all of the Pygame modules so we can use them later on
pygame.init()

# Create the game screen and set it to 800 x 600 pixels
screen = pygame.display.set_mode((800, 600))

# Create a loop that will keep the game running
# Until the user decides to quit

while True:
# Get feedback from the player in the form of events
    for event in pygame.event.get():
        # If the player clicks the red 'x', it is considered a quit event
        if event.type == QUIT:
            pygame.quit()
            sys.exit()
这是一个使用pygame模块的游戏的非常简单的版本。虽然这段代码中没有技术上可玩的游戏,但它确实为我们创建了一个构建游戏的系统。代码的工作方式如下。
在导入我们需要的模块——pygame和sys—之后,我们还要导入pygame中包含的所有额外模块。导入pygame应该足够了,但是有时——取决于您的系统——与pygame捆绑在一起的所有模块都无法加载,所以我们使用
from pygame.locals import *
确保我们进口的所有东西都是以防万一。
既然我们的模块已经加载,我们需要初始化所有的pygame模块。我们使用代码:pygame.init()这样做。
到目前为止,在我们的程序中,我们已经使用 IDLE 运行了代码,并在 Python Shell 中显示了结果。然而,当我们使用 Pygame 编写游戏时,由于我们处理的是图形,我们需要创建一个实际的屏幕来显示我们的程序。我们使用。display.set_mode()创建一个窗口或屏幕。这行:screen = py game . display . set _ mode((800,600))
创建宽度和高度为 800 x 600 像素的屏幕或窗口。我们稍后将在这个屏幕上绘制我们的图像、图形和文本。
这段代码的最后一部分——也是你需要为所有游戏创建的部分——被称为游戏循环。这个结构的目的非常简单:以鼠标点击和键盘/按键的形式接收用户的输入,这被称为事件。
当我们创建一个交互式游戏时,我们需要一种方式让用户告诉游戏他们已经玩完了并退出。游戏循环也服务于这个目的。
以while True开头的while循环开始游戏循环。然后程序等待用户采取行动——创建一个事件。现在,我们所有的游戏设置都是为了寻找一个QUIT事件。
一个QUIT事件意味着用户已经使用窗口右上角的红色 X 关闭了窗口。一旦发生这种情况,我们再次使用所有 Pygames 都必须具备的两个重要功能:pygame.quit()和sys.exit()。这两个事件分别结束 Pygame 和退出游戏。你必须两者兼得;如果没有,你的窗户将冻结或挂起。
如果你现在运行这个程序,会弹出一个黑色背景的窗口。不会有别的事情发生。当你点击红色的 X 时,窗口会关闭,程序会结束。
加入我们的游戏框架
现在我们的 Pygame 游戏框架已经就位,如果我们想增加一点趣味,我们可以给它添加一点活力。毕竟我们是超级英雄,没有一点点天赋的英雄算什么?
首先,我们创建一个名为pygameExample.py的新文件。向其中添加以下代码:
import pygame
from pygame.locals import *
import sys

# Creating a tuple to hold the RGB (Red, Green Blue) values
# So that we can paint our screen blue later
colorBLUE = (0, 0, 255)

# Initialize all of the Pygame modules so we can use them later on
pygame.init()

# Create the game screen and set it to 800 x 600 pixels
screen = pygame.display.set_mode((800, 600), 0, 32)

# Set a caption to our window
pygame.display.set_caption("Super Sidekick: Sophie the Bulldog!")

# Draw a blue background onto our screen/window
screen.fill(colorBLUE)

# Draw the now blue window to the screen
pygame.display.update()

# Create a variable to hold the value of whether
# The game should end or not
running = True

# Create a loop that will keep the game running
# Until the user decides to quit
# When they do, it will change the value of running
# To False, ending the game

while True:
# Get feedback from the player in the form of events
    for event in pygame.event.get():
        # If the player clicks the red 'x', it is considered a quit event
        if event.type == QUIT:
            pygame.quit()
            sys.exit()
这段代码类似于我之前展示的例子。我确实在代码中添加了几行代码,目的是美化窗口,让它看起来更好一些。
我添加的第一段代码是:
colorBLUE = (0, 0, 255)
如注释所示,这是一个元组,它的值代表 RGB(红、绿、蓝)值,我们稍后将使用这些值来给屏幕着色。我们必须将这些值作为元组值传递给我们的screen对象/变量,因为这是它接受的数据类型。
RGB 值背后的理论是这样的:使用红色、绿色和蓝色的组合,你可以使任何颜色对人眼可见。在我们的例子中,0的第一个值意味着我们的颜色中没有红色。第二个值0意味着我们的颜色中没有绿色。最后,第三个值255是我们可以添加的最大蓝色量。举例来说,如果我们使用(0,0,0)来代替,我们最终会得到黑色,这是一种没有任何颜色的颜色。另一方面,(255,255,255)等同于白色,因为白色是所有颜色的组合。
接下来,我们想给我们创建的窗口添加一个标题,我们通过使用。display.set_caption(),如这行:
pygame.display.set_caption("Super Sidekick: Sophie the Bulldog!")
这段代码将创建一个标题,位于窗口的顶部,如图 11-2 所示:

图 11-2。
窗口标题的示例
之后,我们要用蓝色填充背景/屏幕。为此,我们使用了.fill():
screen.fill(colorBLUE)
请注意,这实际上并没有向窗口添加任何内容。在实际绘制蓝色背景之前,我们需要使用.display.update()更新显示:
pygame.display.update()
现在,当我们保存并运行我们的程序时,会弹出一个蓝屏,与之前的黑屏不同,并带有我们程序的标题。去试试吧;只要记得点击红色的 X 退出程序。
在 Pygame 中添加图像和精灵
现在我们知道了如何格式化我们的游戏窗口和建立一个基本的游戏循环,接下来我们要做的是学习如何处理图像。毕竟,使用pygame模块的全部目的是为了让我们可以创建视频游戏,对吗?
当我们讨论二维或 2D 视频游戏中的图像时,我们称之为精灵。这是一个关于精灵是什么的简单的观点,但是对于我们的目的来说,它会工作得很好。
电子游戏中的精灵通常是指代表玩家的角色、敌人或图像。精灵也是游戏中的物体,比如子弹、树、石头等等。
这些精灵可以是静态的——不动的——也可以是动态的。在这一节中,我们将简单地讨论一个静态精灵。你可能已经注意到我们的窗口说明/标题是:超级助手:斗牛犬索菲;这不是意外!
很多超级英雄都有动物伙伴。由于害怕被起诉,害怕失去我的巨额财富和收藏的老式助力车,我不敢说出任何一辆,但相信我,有很多这样的车。
你和我有什么不同?难道我们不应该有一个伙伴动物吗?我的刚好是一只叫苏菲的牛头犬,它的超能力是打嗝,睡觉,咬我的脚趾,还打很响的呼噜。
对于这部分代码,我将在游戏窗口中添加一张斗牛犬索菲的图片。如果你愿意,你可以跟着去。更好的是,如果你有一张你的动物的图片——或者任何你想成为你伙伴的动物——把图片保存在你的pygameExample.py文件所在的文件夹中;如果不这样做,你的程序就找不到它。
最后一点:确保你使用的是你的文件名,而不是我在程序中输入的文件名。比如我正在使用的图像命名为,“SophieTheBullDog.jpg”;你的名字可能不同。
将下面的代码添加到您的pygameExample.py文件中,就在您使用screen.fill的部分下面,在您使用pygame.display.update()之前:
sidekick = pygame.Rect(100,100, 200, 200)
sophie = pygame.image.load('SophieTheBullDog.jpg')
thumbnail_sophie = pygame.transform.scale(sophie, (200,200))
screen.blit(thumbnail_sophie, sidekick)
在解释完这一部分之后,我将发布完整的更新代码,这样您就可以将您的文件与我的文件进行比较。
我们要做的第一件事是创建另一个表面,在上面绘制我们的图像。我们在下面的代码行中实现了这一点:sidekick = pygame.Rect(100,100, 200, 200)。
这一行代码创建了一个矩形窗口,它位于屏幕的 100 x 100 的 XY 坐标处,大小为 200 x 200 像素(高和宽)。
XY 坐标与对象出现在屏幕上的位置相关。我们在 Pygame 中创建的表面由像素组成,每个像素位于一个与其 XY 位置相关的网格上。窗口的左上角位于 XY 位置(0,0)。因此,当我们在位置(100,100)绘制矩形时,我们实际上是在说,它将位于第 100 个像素处和第 100 个像素处。
如果那一点很混乱,不用太担心;几分钟后你运行这个程序就会明白了。
下一行代码:
sophie = pygame.image.load('SophieTheBullDog.jpg')
将名为'SophieTheBullDog.jpg'的图像存储在变量sophie中。同样,您的图像名称将与我的不同,所以只需用您的名称替换我的图像名称。
由于我的'SophieTheBullDog.jpg'图像相当大——它的尺寸为 1400 x 1400——它太大了,以目前的尺寸无法在游戏窗口中显示——更不用说在我们为它创建的矩形表面上了。因此,我们需要缩小它的尺寸。
我们使用.transform.scale()来实现这一点,它通过将图像缩放到我们给定的大小来转换图像。
我们的产品线:
thumbnail_sophie = pygame.transform.scale(sophie, (200,200))
将图像缩小到 200 x 200 像素,大小与我们创建的sidekick对象矩形曲面完全相同;如果我们将它放大到比表面更大,我们将无法看到整个图像,因此请始终确保图像的尺寸或大小与您创建的用于显示图像的表面相匹配。
最后,最后一步将是实际绘制——或者blit,记住——调整大小的图像到我们创建的sidekick矩形表面。为此,我们键入:
screen.blit(thumbnail_sophie, sidekick)
括号()中的第一个参数是我们要blit的对象的名称;第二个参数是我们想要将图像放到的对象(包括它的位置)。
下面是最终代码的样子;修改你的代码,使它看起来像我的,确保把你的图片的名字改成你的图片的名字。还要确保将您的图像移动到与您的pygameExample.py文件相同的文件夹中,否则,同样无法工作:
import pygame
from pygame.locals import *
import sys

# Creating a tuple to hold the RGB (Red, Green Blue) values
# So that we can paint our screen blue later
colorBLUE = (0, 0, 255)

# Initialize all of the Pygame modules so we can use them later on
pygame.init()

# Create the game screen and set it to 800 x 600 pixels
screen = pygame.display.set_mode((800, 600), 0, 32)

# Set a caption to our window
pygame.display.set_caption("Super Sidekick: Sophie the Bulldog!")

# Draw a blue background onto our screen/window
screen.fill(colorBLUE)

# Create a surface to hold our image
sidekick = pygame.Rect(100,100, 200, 200)

# create an object to load our image into
sophie = pygame.image.load('SophieTheBullDog.jpg')

# Resize our image so it fits the surface we are going to
# blit or paint our image onto
thumbnail_sophie = pygame.transform.scale(sophie, (200,200))

# blit or paint the image to the screen
screen.blit(thumbnail_sophie, sidekick)

# Draw the now blue window to the screen
pygame.display.update()

# Create a variable to hold the value of whether
# The game should end or not
running = True

# Create a loop that will keep the game running
# Until the user decides to quit
# When they do, it will change the value of running
# To False, ending the game

while True:
# Get feedback from the player in the form of events
    for event in pygame.event.get():
        # If the player clicks the red 'x', it is considered a quit event
        if event.type == QUIT:
            pygame.quit()
            sys.exit()
保存代码并运行它。您的结果看起来将与我的不同,因为我使用的图像与您的不同,但您的结果应该类似于图 11-3 。

图 11-3。
向 Pygame 游戏窗口添加图像
在我们继续之前,请确保更改 sidekick 矩形表面的 XY 坐标,以便您可以看到 XY 坐标是如何工作的。例如,将该行改为:
sidekick = pygame.Rect(100,100, 200, 200)
到
sidekick = pygame.Rect(200,200, 200, 200)
等等。
向我们的 Pygame 游戏窗口添加文本
在我们的游戏中加入图像很棒,但是文本呢?我们也可以添加文本,这正是我们将在本节中做的。
在你的 Pygame 游戏窗口中添加文本和添加图片的过程类似;也就是说,你必须首先创建一个表面来绘制它们。然后,在你向它发送文本之前,你指定这个表面将出现在窗口的什么地方。
将下面的代码添加到pygameExample.py文件中,就在我们使用screen.fill(colorBLUE)代码的地方的下面:
# Prepare our font for text
myFont = pygame.font.SysFont('None', 40)

# Create a text object
firstText = myFont.render("Sophie The Bulldog", True, colorRED, colorBLUE)

# Create the surface to write our text onto and its position
firstTextRect = firstText.get_rect()
firstTextRect.left = 100
firstTextRect.top = 75

# blit our text to the window
screen.blit(firstText, firstTextRect)
我们还将定义一种新的颜色colorRED,用于我们的文本。将此文本放在您定义colorBLUE的地方:
colorRED = (255, 0, 0)
在我解释完这些最新版本后,我将显示当前编辑过的代码供您比较。
首先,我们创建了一个对象来存储我们的字体,一旦我们创建了文本对象,它将被应用到我们的文本对象中。我们在生产线上这样做:
myFont = pygame.font.SysFont('None', 40)
pygame.font.SysFont()的自变量是'None'和40。第一个参数告诉 Pygame 使用什么字体。我们可以使用一个字体名称,比如'Arial',但是我选择了'None',允许 Pygame 使用默认的系统字体。参数40告诉 Pygame 在呈现(或绘制)我们的文本时使用什么大小的字体。
接下来,我们实际创建我们的文本对象:
firstText = myFont.render("Sophie The Bulldog", True, colorRED, colorBLUE)
在本例中,myFont.render()有两个参数。第一个是我们实际想要打印到屏幕上的文本。第二个参数—True—告诉 Pygame 您是否希望您的文本抗锯齿。这意味着你是否希望它是平滑的;True意为顺利,False意为不顺利。
第三个参数(colorRED)是我们希望文本呈现的颜色,它基于我们在程序开始时声明的颜色元组。第四个也是最后一个参数是我们的文本背景应该是什么颜色。我把它设置为colorBLUE,这样它就可以和我们窗口的颜色相匹配。
接下来,我们定义我们的表面,它是一个矩形,我们将在其上打印我们的文本对象。然后我们设置表面的位置,类似于我们决定图像出现的位置。
告诉 Pygame 在距离屏幕左侧 100 像素处绘制矩形表面。firstTextRect.top = 75告诉 Pygame 从屏幕顶部向下 75 像素绘制矩形表面。
重要的是,我们要记住我们之前画的图像与我们放置文本的位置之间的关系。
例如,您可能还记得,我们的图像被放置在下方 100 像素和左侧 100 像素处。
通过将文本表面设置为距离左侧 100 像素,我们也确保了它与我们的图像正确对齐。我们将文本的顶部设置为 75,这样它就位于图像的正上方。
最后,我们使用screen.blit(firstText, firstTextRect)将文本绘制到屏幕上。
这是我的图像在应用新代码后的样子——你的看起来应该类似于图 11-4 。
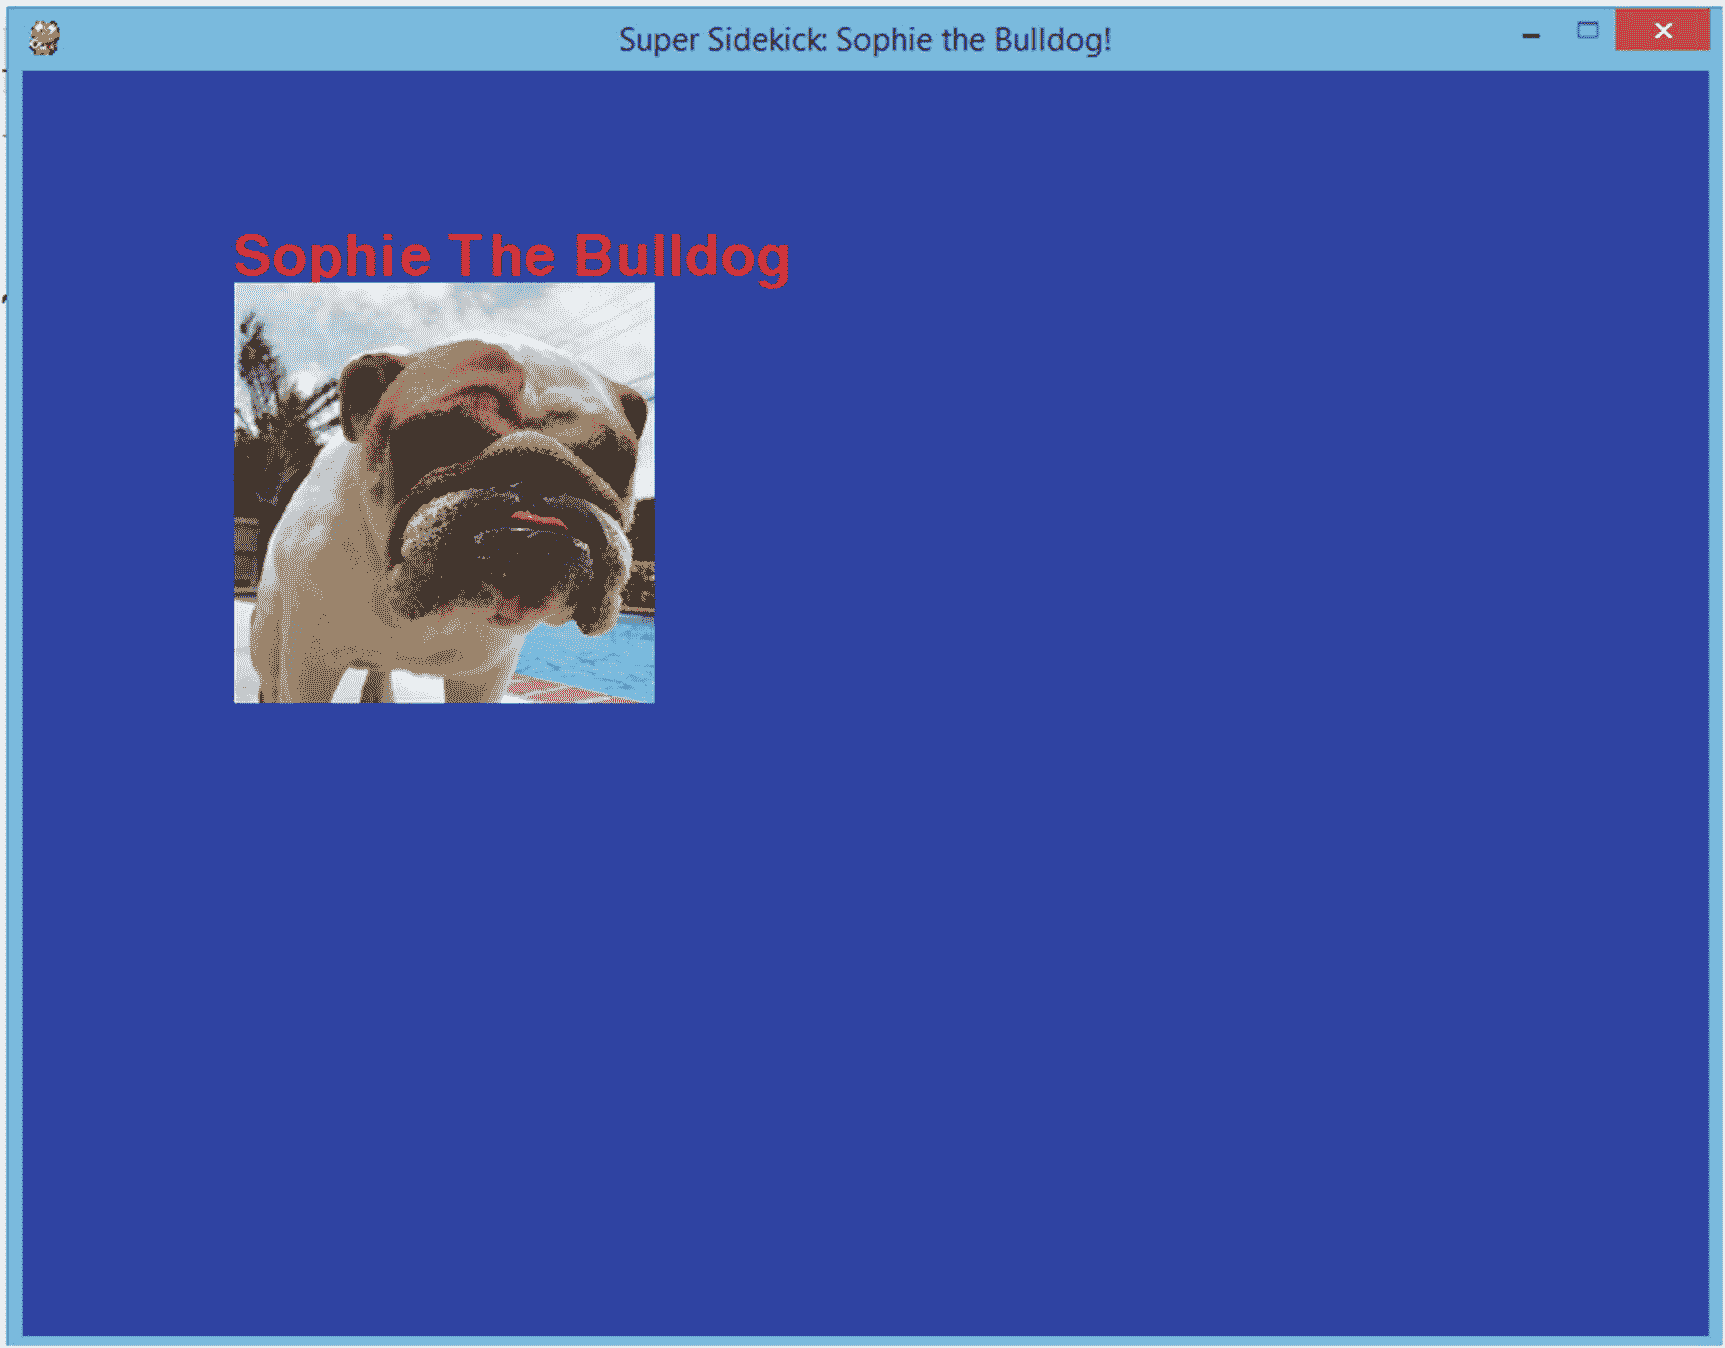
图 11-4。
向我们的 Pygame 游戏窗口添加文本
这是添加我们的图像和文本后的代码的当前版本。确保您的代码与我的代码匹配:
import pygame
from pygame.locals import *
import sys

# Creating a tuple to hold the RGB (Red, Green Blue) values
# So that we can paint our screen blue later
# And our text red
colorBLUE = (0, 0, 255)
colorRED = (255, 0, 0)

# Initialize all of the Pygame modules so we can use them later on
pygame.init()

# Create the game screen and set it to 800 x 600 pixels
screen = pygame.display.set_mode((800, 600), 0, 32)

# Set a caption to our window
pygame.display.set_caption("Super Sidekick: Sophie the Bulldog!")

# Draw a blue background onto our screen/window

screen.fill(colorBLUE)

# Prepare our font for text
myFont = pygame.font.SysFont('None', 40)

# Create a text object
firstText = myFont.render("Sophie The Bulldog", True, colorRED, colorBLUE)

# Create the surface to write our text onto and its position
firstTextRect = firstText.get_rect()
firstTextRect.left = 100
firstTextRect.top = 75

# blit our text to the window
screen.blit(firstText, firstTextRect)

# Create a surface to hold our image
sidekick = pygame.Rect(100,100, 200, 200)

# create an object to load our image into
sophie = pygame.image.load('SophieTheBullDog.jpg')

# Resize our image so it fits the surface we are going to
# blit or paint our image onto
thumbnail_sophie = pygame.transform.scale(sophie, (200,200))

# blit or paint the image to the screen
screen.blit(thumbnail_sophie, sidekick)

# Draw the now blue window to the screen
pygame.display.update()

# Create a variable to hold the value of whether
# The game should end or not
running = True

# Create a loop that will keep the game running
# Until the user decides to quit
# When they do, it will change the value of running
# To False, ending the game

while True:
# Get feedback from the player in the form of events
    for event in pygame.event.get():
        # If the player clicks the red 'x', it is considered a quit

event
        if event.type == QUIT:
            pygame.quit()
            sys.exit()
在 Pygame 中绘制形状
在你的 Pygame 游戏中插入图像和精灵是添加场景、人物和物品的好方法,但是当涉及到图形时,它不是你唯一的选择,也不总是你最好的选择。您还可以使用一些相当简单的代码来绘制形状。
让我们从给我们的程序增加一些颜色开始。在我们定义先前颜色的位置下面,添加以下代码:
colorPINK = (255,200,200)
colorGREEN = (0,255,0)
colorBLACK = (0,0,0)
colorWHITE = (255,255,255)
colorYELLOW = (255,255,0)
接下来,我们将画出我们的第一批图形。我们将画三个圆——每个都以独特的方式与众不同。将以下代码添加到您的文件中,就在pygame.display.update()行之前:
# Drawing a circle

pygame.draw.circle(screen, colorRED, (330, 475), 15, 1)
pygame.draw.circle(screen, colorYELLOW, (375, 475), 15, 15)
pygame.draw.circle(screen, colorPINK, (420, 475), 20, 10)
.draw.circle方法有几个参数。第一个是我们想在什么表面上画圆;在本例中,我们将它绘制在screen上,这是我们之前为保存程序的表面对象而创建的变量的名称。
下一个参数是颜色,我们用colorRed定义了颜色。接下来,我们告诉 Python 我们希望圆位于哪个像素或 XY 坐标——在本例中,是圆心。
最后两个参数决定了我们的圆的半径(在这个例子中是 ??)和线条的粗细。
这里要注意的有趣的事情是,如果我们只在创建第一个圆后运行程序,我们会看到一个没有填充颜色的圆。这是因为我们将最后一个参数——线条粗细——设置为1。如果我们想用颜色填满我们的圆,我们可以让线条的粗细等于半径。
作为比较,我们展示了一个例子,在我们画的第二个圆中,它的半径是15,厚度也是15。
最后,我们画第三个圆,这一次,我们将圆的厚度设为半径的一半,这样我们就可以看到会发生什么。作为猜测,我会说我们最后的圆圈看起来像一个油炸圈饼。让我们看看我是不是对的。保存程序并运行它。您应该会看到类似于图 11-5 的结果:
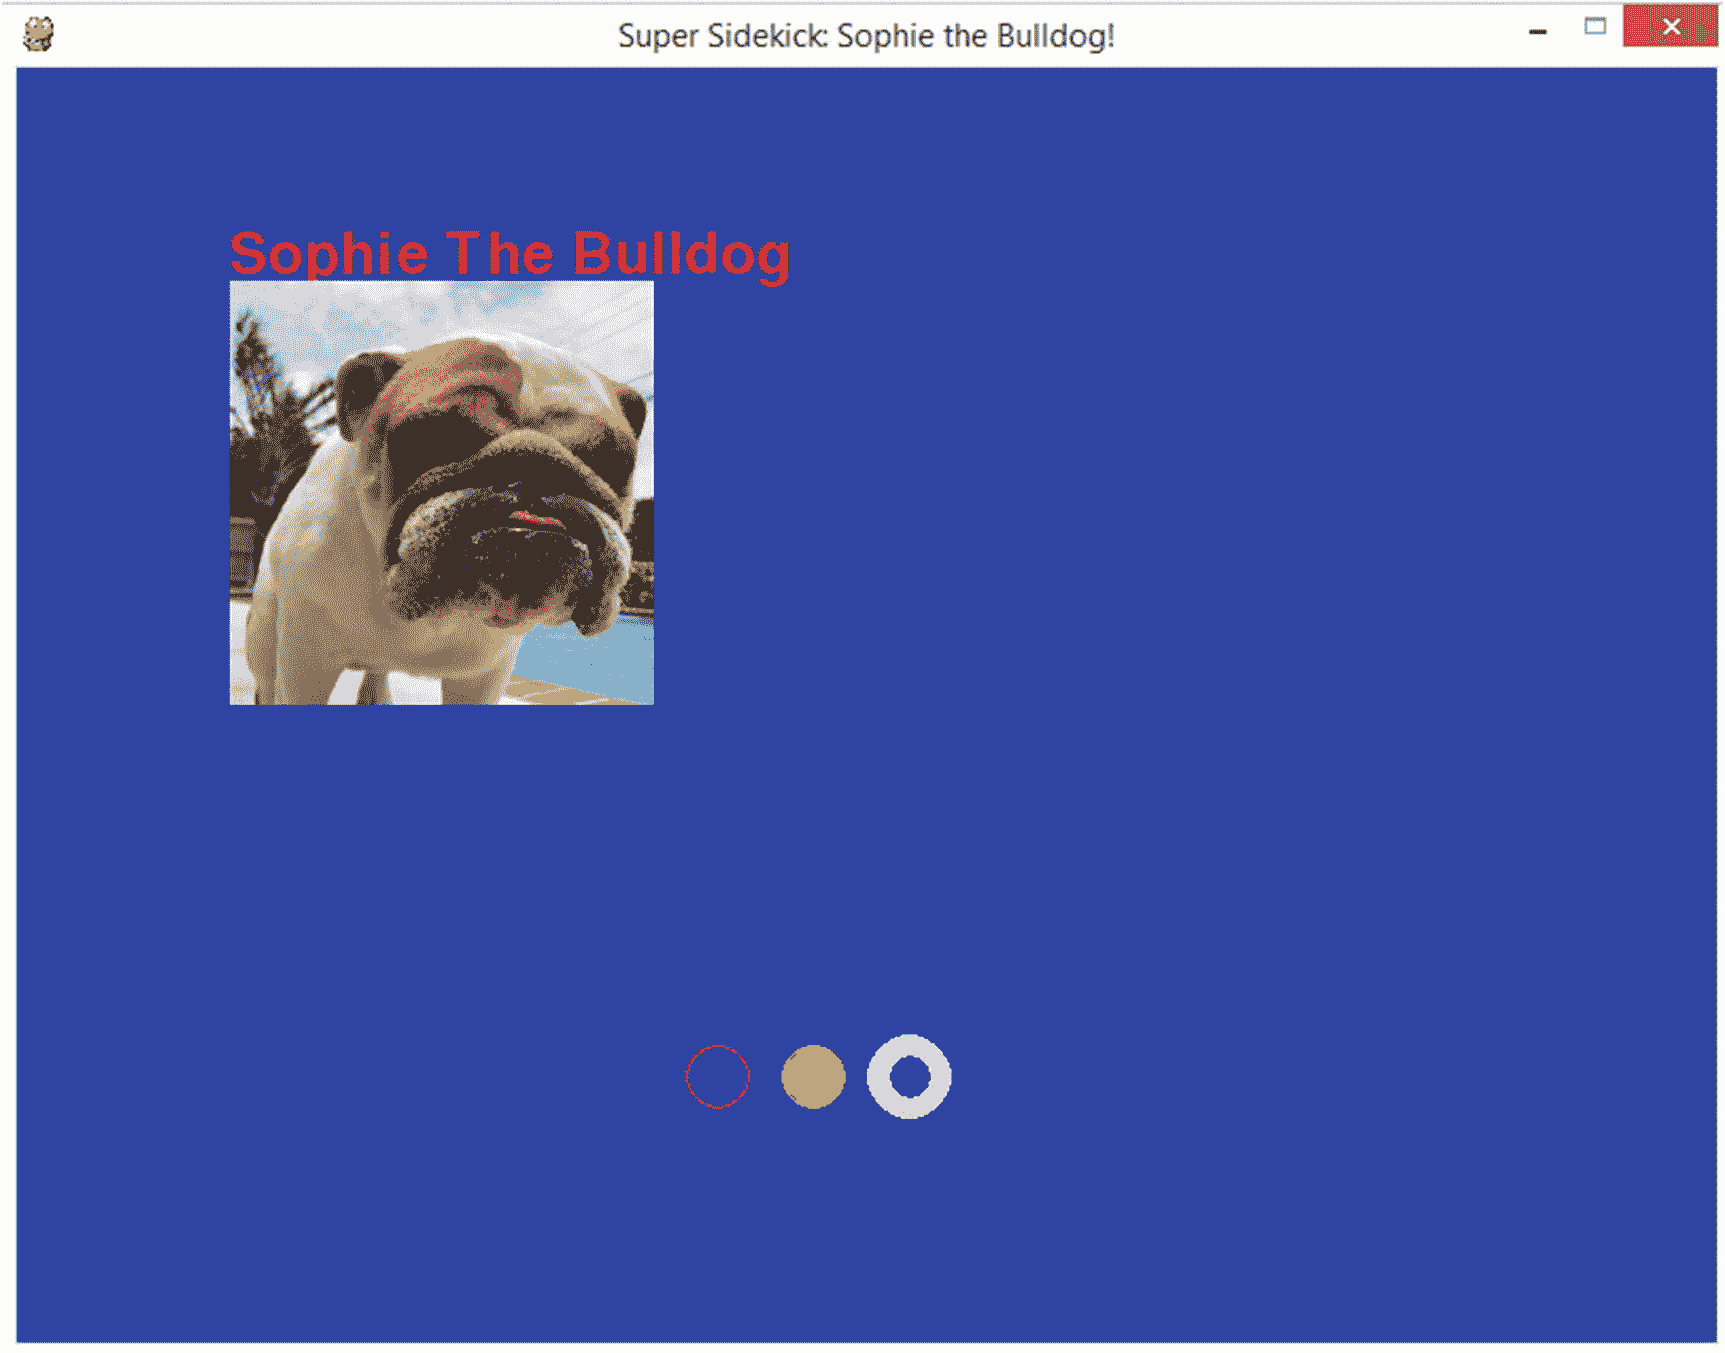
图 11-5。
在我们的 Pygame 游戏窗口上绘制图形
你的结果应该和我的差不多。
这里有一些你可以画的不同形状的例子(暂时不要把它们添加到你的文件中):
- Circles: pygame.draw.lines(表面、颜色、(x,y)、半径、厚度)
示例:pygame.draw.circle(screen,colorYELLOW,(375,475),15,15)
- Rectangle: pygame.draw.rect(表面,颜色,(x,y,宽度,高度),厚度)
示例:pygame.draw.rect(screen,colorYELLOW,(455,470,20,20),4)
- Line: pygame.draw.line(表面,颜色,(X,Y 坐标为线的起点),(X,Y 坐标为线的终点),粗细)
示例:pygame.draw.line(screen,colorRED,(300,500),(500,500),1)
继续将以下代码行添加到您的文件中,就在我们放置代码以创建我们的圆的位置的下方:
pygame.draw.rect(screen, colorYELLOW, (455, 470, 20, 20), 4)
pygame.draw.line(screen, colorRED, (300, 500), (500,500),1)
pygame.draw.line(screen, colorYELLOW, (300, 515), (500,515),1)
pygame.draw.line(screen, colorRED, (300, 530), (500,530),1)
如果您运行这段代码,您的结果将类似于图 11-6 :
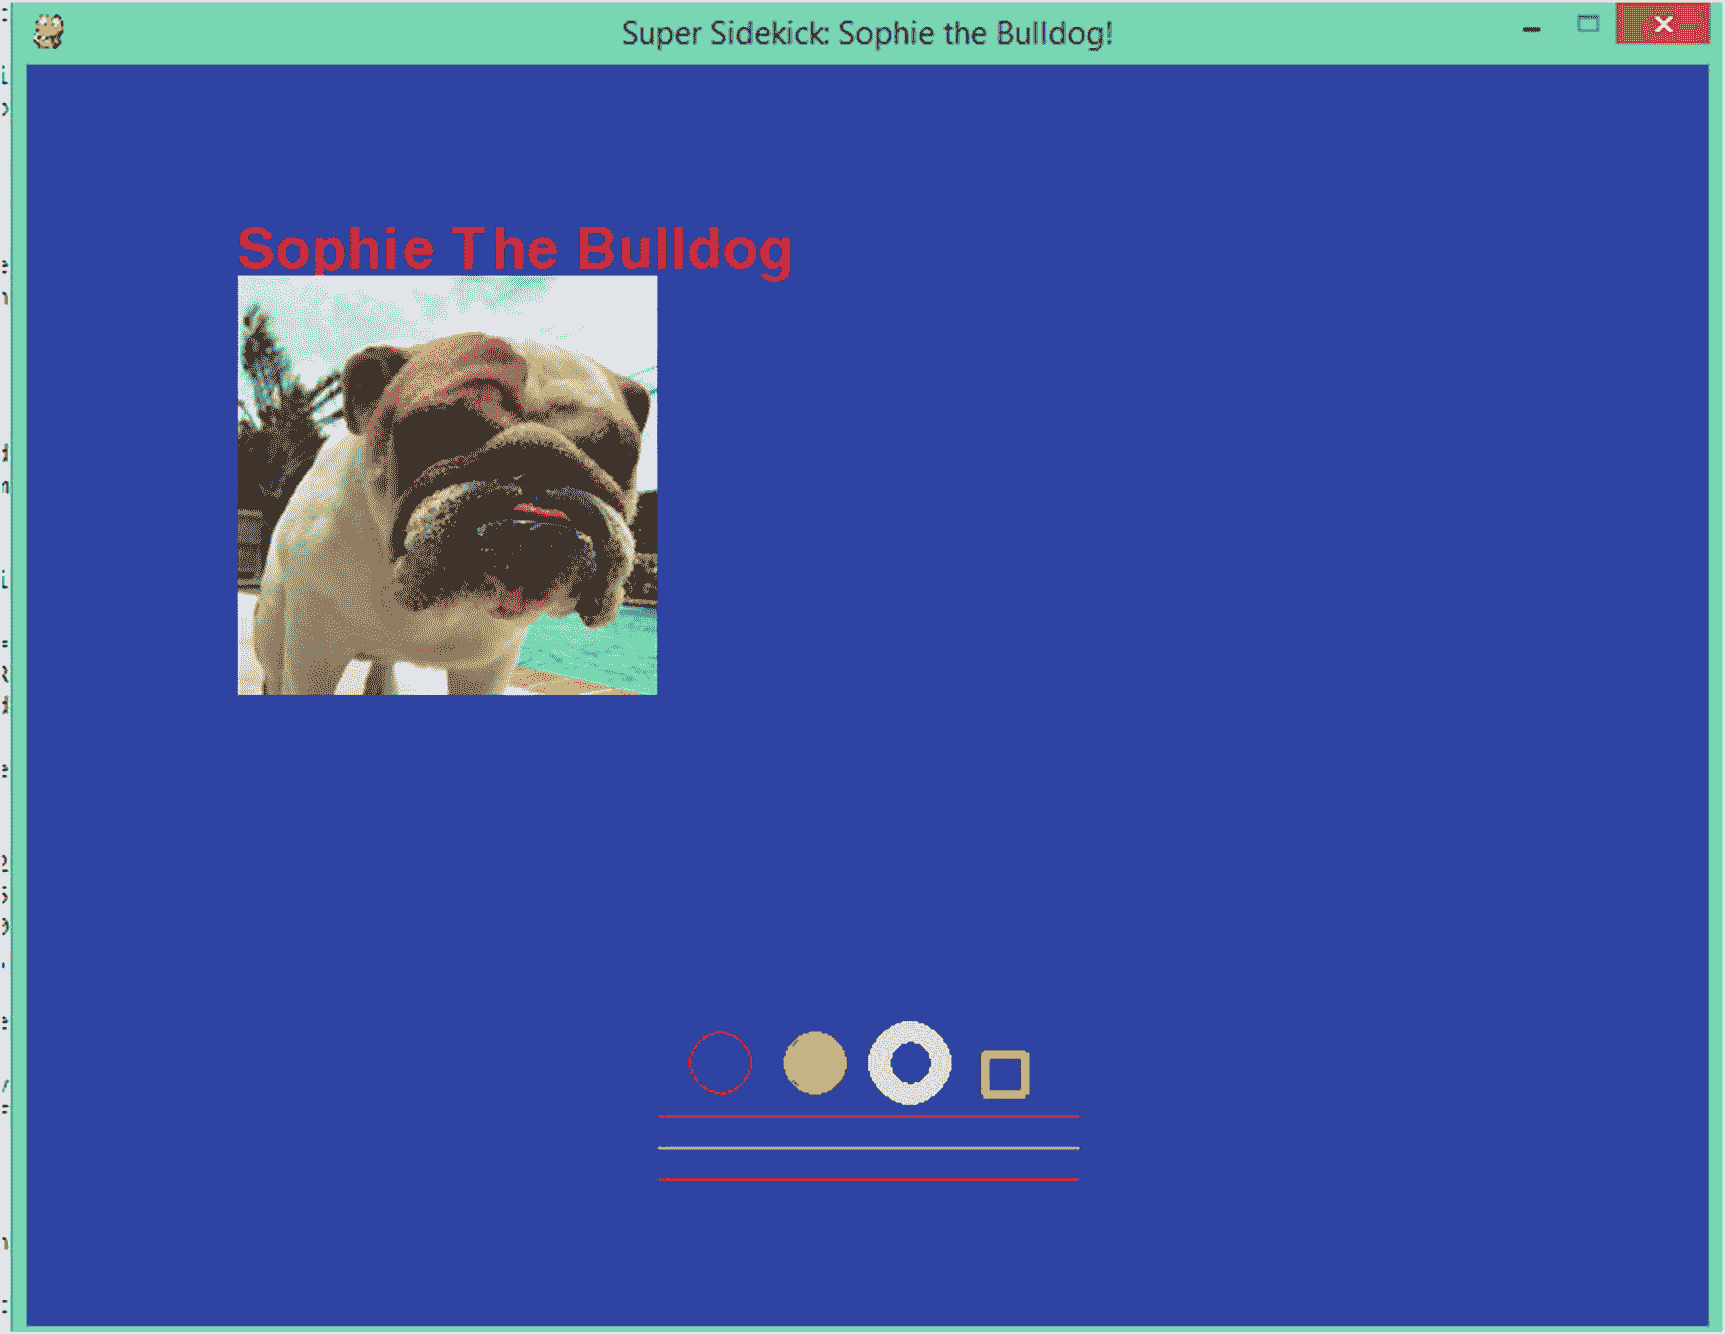
图 11-6
给我们的 Pygame 游戏窗口添加一些线条
添加更多事件
如果一个游戏不回应用户,那它有什么用?此外,什么样的程序只允许用户通过点击屏幕右上角的红色“X”来退出——这不是很直观,不是吗?
Pygame 程序能够对大量事件做出反应。这些事件可以是从点击鼠标、滚动滚轮、按下键盘上的箭头,或者按下标准键盘周期上的任何键,等等。
在我们离开我们的pygameExample.py文件之前,让我们再给程序添加几个事件,以便我们对事件如何操作有一个更好的感觉。
如果您一直在跟进,您的pygameExample.py代码应该与下面的代码相匹配;如果没有,花点时间确保它有:
import pygame
from pygame.locals import *
import sys
import random

# Creating a tuple to hold the RGB (Red, Green Blue) values
# So that we can paint our screen blue later
# And our text red
colorBLUE = (0, 0, 255)
colorRED = (255, 0, 0)
colorPINK = (255,200,200)
colorGREEN = (0,255,0)
colorBLACK = (0,0,0)
colorWHITE = (255,255,255)
colorYELLOW = (255,255,0)

# Initialize all of the Pygame modules so we can use them later on
pygame.init()

# Create the game screen and set it to 800 x 600 pixels
screen = pygame.display.set_mode((800, 600), 0, 32)

# Set a caption to our window
pygame.display.set_caption("Super Sidekick: Sophie the Bulldog!")

# Draw a blue background onto our screen/window
screen.fill(colorBLUE)

# Prepare our font for text
myFont = pygame.font.SysFont('None', 40)

# Create a text object
firstText = myFont.render("Sophie The Bulldog", True, colorRED, colorBLUE)

# Create the surface to write our text onto and its position

firstTextRect = firstText.get_rect()
firstTextRect.left = 100
firstTextRect.top = 75

# blit our text to the window
screen.blit(firstText, firstTextRect)

# Create a surface to hold our image
sidekick = pygame.Rect(100,100, 200, 200)

# create an object to load our image into
sophie = pygame.image.load('SophieTheBullDog.jpg')

# Resize our image so it fits the surface we are going to
# blit or paint our image onto
thumbnail_sophie = pygame.transform.scale(sophie, (200,200))

# blit or paint the image to the screen
screen.blit(thumbnail_sophie, sidekick)

# Drawing shapes

pygame.draw.circle(screen, colorRED, (330, 475), 15, 1)
pygame.draw.circle(screen, colorYELLOW, (375, 475), 15, 15)
pygame.draw.circle(screen, colorPINK, (420, 475), 20, 10)
pygame.draw.rect(screen, colorYELLOW, (455, 470, 20, 20), 4)
pygame.draw.line(screen, colorRED, (300, 500), (500,500),1)
pygame.draw.line(screen, colorYELLOW, (300, 515), (500,515),1)
pygame.draw.line(screen, colorRED, (300, 530), (500,530),1)

# Draw the now blue window to the screen
pygame.display.update()

# Create a variable to hold the value of whether
# The game should end or not
running = True

# Create a loop that will keep the game running
# Until the user decides to quit
# When they do, it will change the value of running
# To False, ending the game

while True:
# Get feedback from the player in the form of events
    for event in pygame.event.get():
        # If the player clicks the red 'x', it is considered a quit event
        if event.type == QUIT:
            pygame.quit()
            sys.exit()
我们将要添加事件的代码部分是我们的游戏循环,为了提醒您,这部分代码是:
# Create a variable to hold the value of whether
# The game should end or not
running = True

# Create a loop that will keep the game running
# Until the user decides to quit
# When they do, it will change the value of running
# To False, ending the game

while True:
# Get feedback from the player in the form of events
    for event in pygame.event.get():
        # If the player clicks the red 'x', it is considered a quit event
        if event.type == QUIT:
            pygame.quit()
            sys.exit()
对于游戏循环来说,这是非常简单的。如上所述,它只有一个事件。我们要做的第一件事是为用户添加另一种退出应用的方式。为此,我们将使用两种方法。首先,如果用户按下键盘上的“q ”,应用将会关闭。第二,如果用户按下 ESC 键,游戏也会关闭。一旦我们的代码被更新,用户将有三种方式退出我们的应用。
修改代码的游戏循环部分,使其与下面的代码相匹配。注意:非常注意正确的缩进:
# Create a variable to hold the value of whether
# The game should end or not
running = True

# Create a loop that will keep the game running
# Until the user decides to quit
# When they do, it will change the value of running
# To False, ending the game

while True:
# Get feedback from the player in the form of events
    for event in pygame.event.get():
        # If the player clicks the red 'x', it is considered a quit event
        if event.type == QUIT:
            pygame.quit()
            sys.exit()
        if event.type == pygame.KEYDOWN:
            if event.key == pygame.K_q:
                pygame.quit()
                sys.exit()
        if event.type == pygame.KEYDOWN:
            if event.key == pygame.K_ESCAPE:
                pygame.quit()
                sys.exit()
保存代码并多次运行您的程序。确保在重新运行程序时按下'q',点击红色的'X',并按下ESC键,以确保每个退出选项都有效。
注意,在我们的新代码中,我们有两个新的事件类型。第一个是pygame.KEYDOWN,当我们等待——或倾听——用户按下键盘上的按键时使用。
缩进在our pygame.KEYDOWN下面的事件类型是event.key,它定义了程序正在监听的确切的键。键盘上的大多数字母和数字是通过键入pygame.K_然后是字母或数字来定义的。
例如,要监听一个'a',您可以使用:
if event.type == pygame.KEYDOWN:
       if event.key == pygame.K_a:
             do something...
您可以通过访问 www.pygame.org/docs/ref/key.html 查看键盘常量的完整列表。此外,这里列出了一些您可以监听的更常用的键盘常量:
-
向上箭头:K_UP
-
向下箭头:K_DOWN
-
右箭头:K_RIGHT
-
左箭头:K_LEFT
-
空格键:K_SPACE
-
输入或返回:K_RETURN
-
数字:K_0,K_1,K_2 等。
-
字母:K_a,K_b,K_c,K_d 等。
在我们进入下一节之前,让我们向我们的pygameExample.py文件添加一个东西。让我们来听另一个事件——键盘字符“b”。当用户按下那个按钮时,程序会在屏幕上打印出一些文本。
为了实现这一点,让我们将以下内容添加到我们的游戏循环中,就在最后一个 if 块的下面:
if event.type == pygame.KEYDOWN:
            if event.key == pygame.K_b:
                barkText = myFont.render("Bark!", True, colorRED, colorBLUE)
                barkTextRect = barkText.get_rect()
                barkTextRect.left = 300
                barkTextRect.top = 175
                screen.blit(barkText, barkTextRect)
                pygame.display.update()
到目前为止,您应该对这段代码的作用有了很好的理解。如果没有,那也没关系,我们会一步一步来。
首先,我们监听一个KEYDOWN事件类型——也就是说,有人按下了键盘上的一个键。接下来,我们告诉 Pygame 我们在听什么调:
if event.key == pygame.K_b:
这一行表示我们正在寻找被按下的'b'键。请务必注意KEYDOWN事件和KEYUP事件之间的区别。如上所述,当用户按下键盘上的给定键时,会发生一个KEYDOWN事件;当他们释放该键时,就会发生一个KEYUP事件。如果没有监听到KEYUP事件,那么一旦用户释放该键,什么也不会发生。
接下来,我们定义如果用户按下'b'键会发生什么。首先,创建一个名为barkText的文本对象。我们为文本对象设置参数——文本应该说什么,是否消除锯齿,文本的颜色,以及文本背景的颜色。
接下来,在该行中:
barkTextRect = barkText.get_rect()
我们定义了文本将驻留的表面。从那里,我们使用以下方式指示表面的位置:
barkTextRect.left = 300
barkTextRect.top = 175
最后,我们将文本对象及其表面放到屏幕上,并更新显示以显示我们新创建的文本。
如果您保存并运行这段代码,您将得到类似于图 11-7 的结果,只要您在应用加载后按下'b'键:
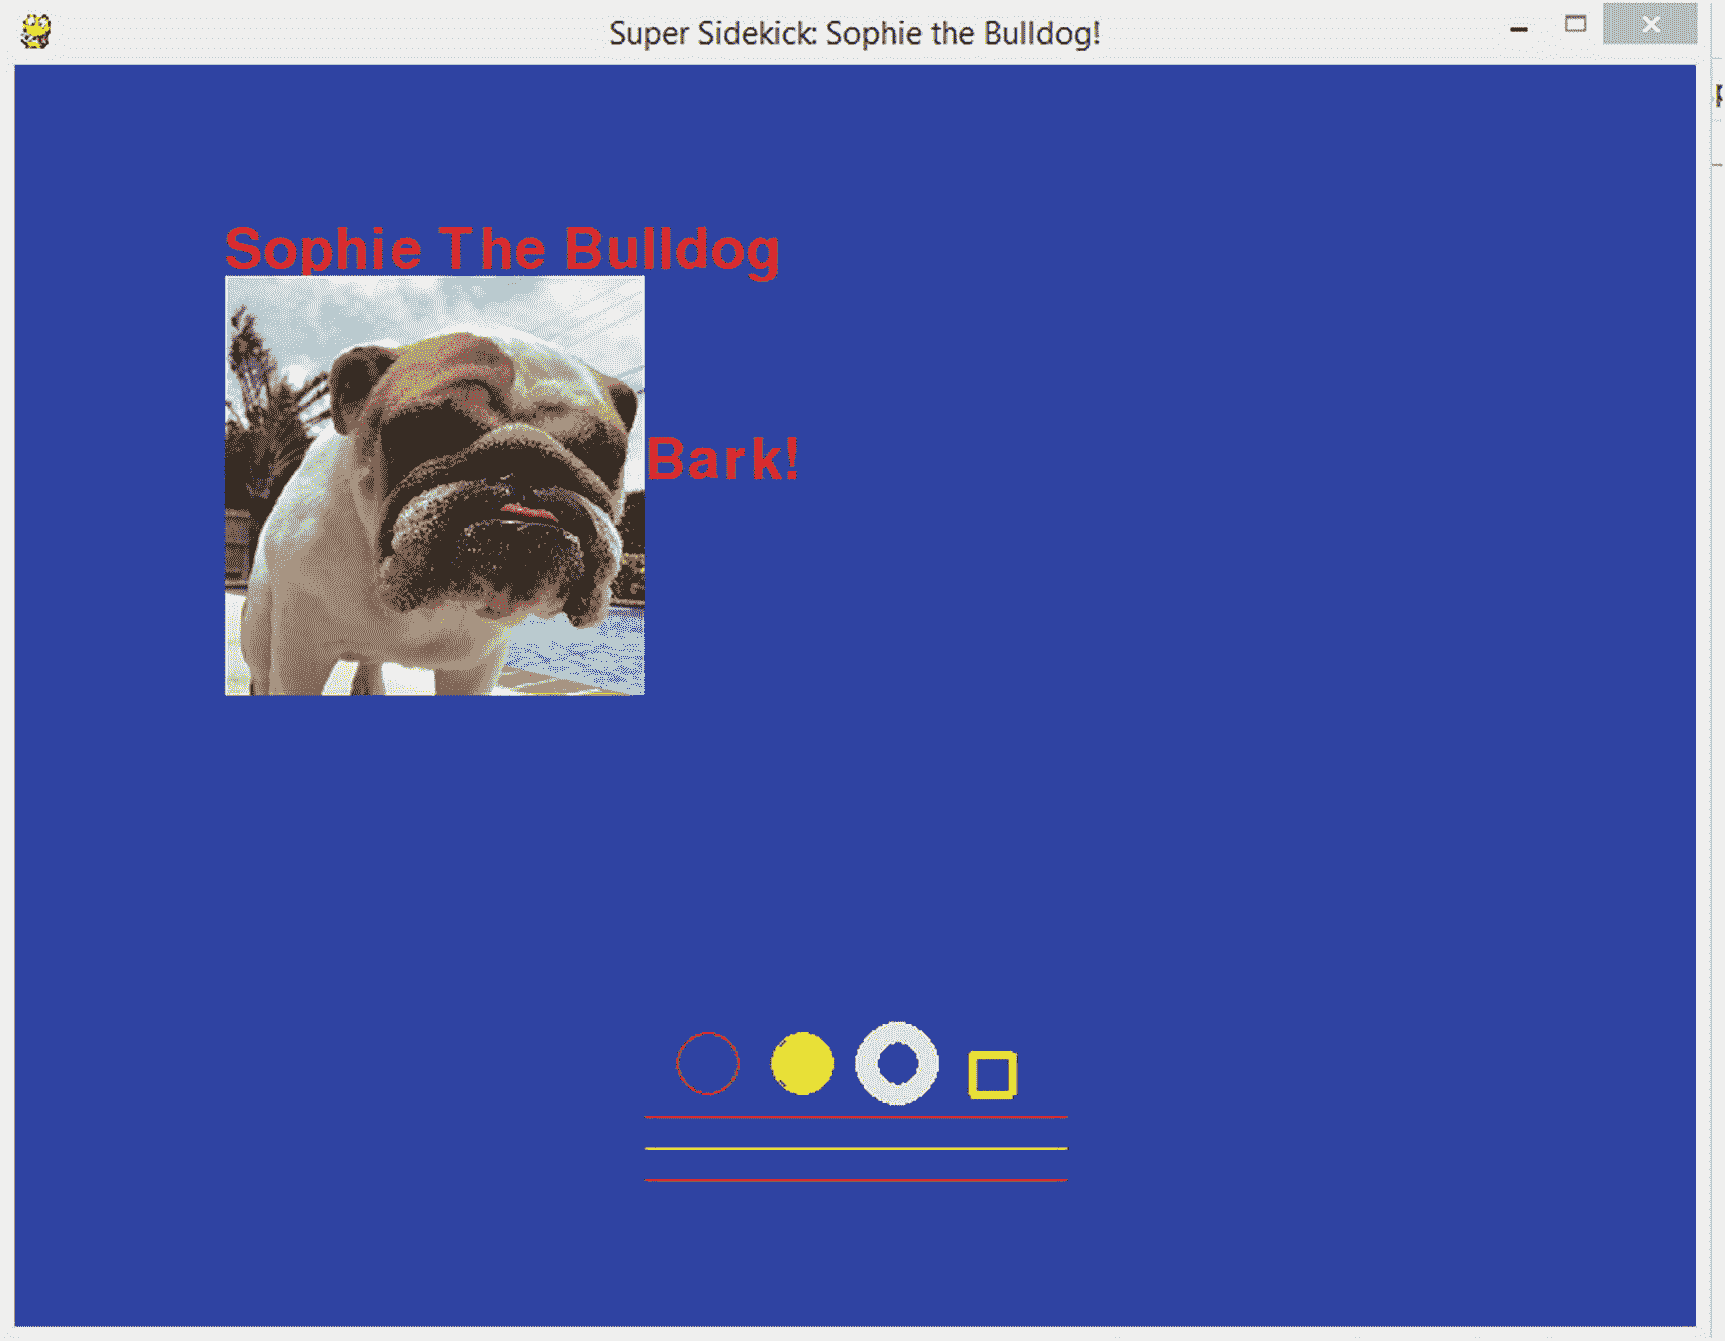
图 11-7。
让“斗牛犬索菲”吠叫!
没错——斗牛犬索菲吠叫了!显然她不喜欢我们之前画的那些讨厌的圆形、矩形和线条!
由于我们的'b'按钮事件中的“吠叫”文本已经被放置在我们的游戏循环中,从技术上来说,每次你按下'b',文本都会重新加载到屏幕上。然而,你将看不到这种情况发生,因为替换的“树皮”会立即出现,并且是同样的大小、形状和颜色。
每当用户按下'b'键时,有许多方法可以让文本出现。最简单的方法之一就是使用幻觉——这无疑会让阴险的数学魔术师 ?? 引以为豪!
为了营造这种错觉,我们将添加另一个按键事件。键仍然是'b',但是我们将添加一个KEYUP事件,而不是KEYDOWN事件。
这下一部分代码背后的想法很简单:一旦用户释放'b'按钮,“吠!”会消失。
事实是,我们只是改变了“树皮”这个词的颜色与背景颜色完全相同,使它看起来好像消失了,而实际上,它只是隐藏在背景中。
当用户再次按下'b'时,颜色将再次变为红色并再次可见。每当用户按下'b'时,这个循环将继续,直到他们退出应用。
将这段代码添加到您定义最后一个KEYDOWN事件的地方,保存它,然后运行程序。一定要多次按下“b”键,直到你看厌了苏菲的叫声!
注意
确保正确缩进,以便第一个 if 语句与前一个 if 语句对齐。
        if event.type == pygame.KEYUP:
            if event.key == pygame.K_b:
                barkText = myFont.render("Bark!", True, colorBLUE, colorBLUE)
                barkTextRect = barkText.get_rect()
                barkTextRect.left = 300
                barkTextRect.top = 175
                screen.blit(barkText, barkTextRect)
                pygame.display.update()
如果您的代码不起作用,请花时间确保它与下面的代码匹配。以下是我们所有最新版本的pygameExample.py的完整代码:
import pygame
from pygame.locals import *
import sys
import random

# Creating a tuple to hold the RGB (Red, Green Blue) values
# So that we can paint our screen blue later
# And our text red
colorBLUE = (0, 0, 255)
colorRED = (255, 0, 0)
colorPINK = (255,200,200)
colorGREEN = (0,255,0)
colorBLACK = (0,0,0)
colorWHITE = (255,255,255)
colorYELLOW = (255,255,0)

# Initialize all of the Pygame modules so we can use them later on
pygame.init()

# Create the game screen and set it to 800 x 600 pixels
screen = pygame.display.set_mode((800, 600), 0, 32)

# Set a caption to our window
pygame.display.set_caption("Super Sidekick: Sophie the Bulldog!")

# Draw a blue background onto our screen/window
screen.fill(colorBLUE)

# Prepare our font for text
myFont = pygame.font.SysFont('None', 40)

# Create a text object
firstText = myFont.render("Sophie The Bulldog", True, colorRED, colorBLUE)

# Create the surface to write our text onto and its position

firstTextRect = firstText.get_rect()
firstTextRect.left = 100
firstTextRect.top = 75

# blit our text to the window
screen.blit(firstText, firstTextRect)

# Create a surface to hold our image
sidekick = pygame.Rect(100,100, 200, 200)

# create an object to load our image into
sophie = pygame.image.load('SophieTheBullDog.jpg')

# Resize our image so it fits the surface we are going to
# blit or paint our image onto
thumbnail_sophie = pygame.transform.scale(sophie, (200,200))

# blit or paint the image to the screen
screen.blit(thumbnail_sophie, sidekick)

# Drawing shapes

pygame.draw.circle(screen, colorRED, (330, 475), 15, 1)
pygame.draw.circle(screen, colorYELLOW, (375, 475), 15, 15)
pygame.draw.circle(screen, colorPINK, (420, 475), 20, 10)
pygame.draw.rect(screen, colorYELLOW, (455, 470, 20, 20), 4)
pygame.draw.line(screen, colorRED, (300, 500), (500,500),1)
pygame.draw.line(screen, colorYELLOW, (300, 515), (500,515),1)
pygame.draw.line(screen, colorRED, (300, 530), (500,530),1)

# Draw the now blue window to the screen
pygame.display.update()

# Create a variable to hold the value of whether
# The game should end or not
running = True

# Create a loop that will keep the game running
# Until the user decides to quit
# When they do, it will change the value of running
# To False, ending the game

while True:
# Get feedback from the player in the form of events
    for event in pygame.event.get():
        # If the player clicks the red 'x', it is considered a quit event
        if event.type == QUIT:
            pygame.quit()
            sys.exit()
        if event.type == pygame.KEYDOWN:
            if event.key == pygame.K_q:
                pygame.quit()
                sys.exit()
        if event.type == pygame.KEYDOWN:
            if event.key == pygame.K_ESCAPE:
                pygame.quit()
                sys.exit()
        if event.type == pygame.KEYDOWN:
            if event.key == pygame.K_b:
                barkText = myFont.render("Bark!", True, colorRED, colorBLUE)
                barkTextRect = barkText.get_rect()
                barkTextRect.left = 300
                barkTextRect.top = 175
                screen.blit(barkText, barkTextRect)
                pygame.display.update()
        if event.type == pygame.KEYUP:
            if event.key == pygame.K_b:
                barkText = myFont.render("Bark!", True, colorBLUE, colorBLUE)
                barkTextRect = barkText.get_rect()
                barkTextRect.left = 300
                barkTextRect.top = 175
                screen.blit(barkText, barkTextRect)
                pygame.display.update()
在这一集中
哇,多么激动人心的一章啊!如果你通过了这一章,只是因为头轻轻地撞在桌子上而有轻微的擦伤和瘀伤,干得好!本章涵盖的主题可能是最难掌握的;如果没有别的,它们和类和对象一样复杂,可能是你用 Python 思考过的最具挑战性的东西。
干得好!
但是现在还不要固步自封。下一章继续我们对 Pygame 的讨论,并深入到创建你自己的游戏的两个更困难——但强大且有益的方面:动画和碰撞检测。如果你想成为一名游戏开发者或者想要一个编程的挑战,你肯定不想跳过下一章!
因为这一章和下一章放在一起,而且是如此广泛的主题,我们将跳过通常在每一章结束时所做的总结;在要点中总结重要的谈话要点并不能恰当地表达主题。
相反,练习你在这一章学到的技能和你将在下一章学到的技能,并根据你的需要经常重读它们。
而且一如既往的实验,实验。
这就是游戏的名字!
十二、动画游戏
我看你回来是为了更多的惩罚——真有你的!如果我自己这么说的话,最后一章相当令人兴奋。你不仅学到了一些核心的游戏开发理论和实践,还实际编写了一些代码!
最重要的是,你要见见我的斗牛犬索菲。当她睡觉的时候,她是一只好狗,而且她是一个极好的宠物伙伴。我的意思是,当然,她倾向于睡觉,通过所有的行动,但如果你需要有人吃所有的食物和打嗝很多,嗯,你不能要求一个更好的合作伙伴。
上一期,我们学习了在游戏中绘制图形和插入图像。我们还学习了游戏循环和创建事件以允许用户与我们的游戏互动。
这一轮,我们学到了游戏开发的两个更重要的方面。首先是动画,这意味着让物体在屏幕上移动。第二种被称为碰撞检测,这是当两个或更多的物体接触或当一个物体接触到你的游戏窗口的边界时发生的事情。
我不会用冗长的介绍来烦你——哦,你说太晚了?
让我们开始吧,自作聪明的家伙!
在 Pygame 中创建动画
在学习游戏设计的一些核心概念以及如何使用pygame模块在 Python 中创建我们自己的游戏方面,我们已经走了很长的路。到目前为止,我们已经学会了如何创建背景、添加图像或精灵、插入文本,以及监听——更重要的是,响应——按键之类的事件。
创建一个可视化的 2D 游戏的真正关键在于动画,这是我们将在下一节讨论的内容。和所有 Python 的东西一样,在我们的 Pygames 中有许多实现动画的方法,但是因为这是一本初学者的书,我们将只看最简单的方法。
我们的最后一个应用pygameExample.py,变成了一个相当大的文件。为了避免混乱和节省空间,让我们创建一个名为pygameAnimations.py.的全新文件
我们将回收一些来自pygameExample.py, so don't fret if some of the code looks a bit familiar. Remember: we always want to reuse our code whenever possible and appropriate.的代码,特别是一些颜色变量和模块导入/初始化部分。
我们将对游戏结构本身以及游戏循环做一点改变。由于处理动画可能有点复杂,我想让我们的文件简洁明了,以便更好地解释事情是如何工作的。除此之外,动画的结构往往不同于静态图像和文本。
将以下代码添加到您的pygameAnimation.py文件中,以设置框架:
# import our modules
import pygame
from pygame.locals import *
import sys
import random

# Initialize our pygame modules
pygame.init()

# Create tuples for our colors
colorWHITE = (255,255,255)
colorBLACK = (0,0,0)
colorRED = (255,0,0)

# Create our main game window - last time we named it screen
# Let's give it a different name this time
gameWindow = pygame.display.set_mode((800,600))

# Set the caption/title for our animation
pygame.display.set_caption('Box Animator 5000')
因为我们已经在之前的应用中编写了该代码的一个版本,所以没有必要再重复一遍。只需知道是基本代码设置了我们的屏幕,定义了我们在图像和文本上使用的颜色,并导入和初始化了我们的模块。我们还将窗口的标题改为“Box Animator 5000”
接下来,我们想再创建几个变量:
gameQuit = False

move_x = 300
move_y = 300
第一个变量gameQuit将存储我们的游戏循环检查的值,以查看程序是否应该结束。只要gameQuit不等于 True,游戏就会继续;一旦它的值改为True,游戏就结束了。
接下来的两个变量—move_x和move_y—用于设置我们将要绘制的矩形对象的初始位置。我们将这些值放在一个变量中,而不是直接在矩形的参数中定义它们,因为我们将在应用的后面更改对象的 XY 坐标值。
move_x代表对象的 X 位置,而move_y用于其 Y 位置。
接下来将是我们的动画游戏的游戏循环。我们添加了一些新的事件,我们将详细讨论这些事件。将以下内容添加到您的代码中:
# Game Loop
while not gameQuit:
    for event in pygame.event.get():
        if event.type == pygame.QUIT:
            gameQuit = True
            pygame.quit()
            sys.exit()
        # If the player presses 'q', it is considered a quit event
        if event.type == pygame.KEYDOWN:
            if event.key == pygame.K_q:
                pygame.quit()
                sys.exit()
        # If the player presses 'ESC', it is considered a quit event
        if event.type == pygame.KEYDOWN:
            if event.key == pygame.K_ESCAPE:
                pygame.quit()
                sys.exit()
        # If arrow key left is pressed, move the object left
        if event.type == pygame.KEYDOWN:
            if event.key == pygame.K_LEFT:
                move_x -= 10
        # If arrow key right is pressed, move the object right
            if event.key == pygame.K_RIGHT:
                move_x += 10
        # If arrow key up is pressed, move the object up
        if event.type == pygame.KEYDOWN:
            if event.key == pygame.K_UP:
                move_y -=10
        # If arrow key down is pressed, move the object down
            if event.key == pygame.K_DOWN:
                move_y +=10
这个游戏循环的大部分应该是熟悉的。我们有几个事件涵盖了用户退出的方式——他们可以按下ESC或'q',或者点击红色的'X'。
然后我们为LEFT、RIGHT、UP和DOWN箭头创建按键事件。如果按下这些按钮中的任何一个,将会发生以下情况:
-
如果按下左键,move_x 的值减少 10,将对象向左移动 10 个像素。
-
如果按下右键,move_x 的值增加 10,将对象向右移动 10 个像素。
-
如果按下向上键,move_y 的值将减少 10,将对象向上移动 10 个像素。
-
如果按下向下键,move_y 的值增加 10,将对象向下移动 10 个像素。
既然我们的游戏循环和事件已经就绪,剩下的最后一件事就是创建我们的窗口,用颜色填充它,blit 我们的形状,并更新显示:
    # Fill the gameWindow with the color white
    gameWindow.fill(colorWHITE)

    # Blit a black rectangle object
    pygame.draw.rect(gameWindow, colorBLACK, [move_x,move_y,50,50])

    # Update our screen
    pygame.display.update()
这就是我们的第一个动画游戏!继续运行程序并测试它。确保按下每个箭头键,然后再运行几次,以测试我们的每个“退出”事件。
您的屏幕看起来应该类似于图 12-1 :
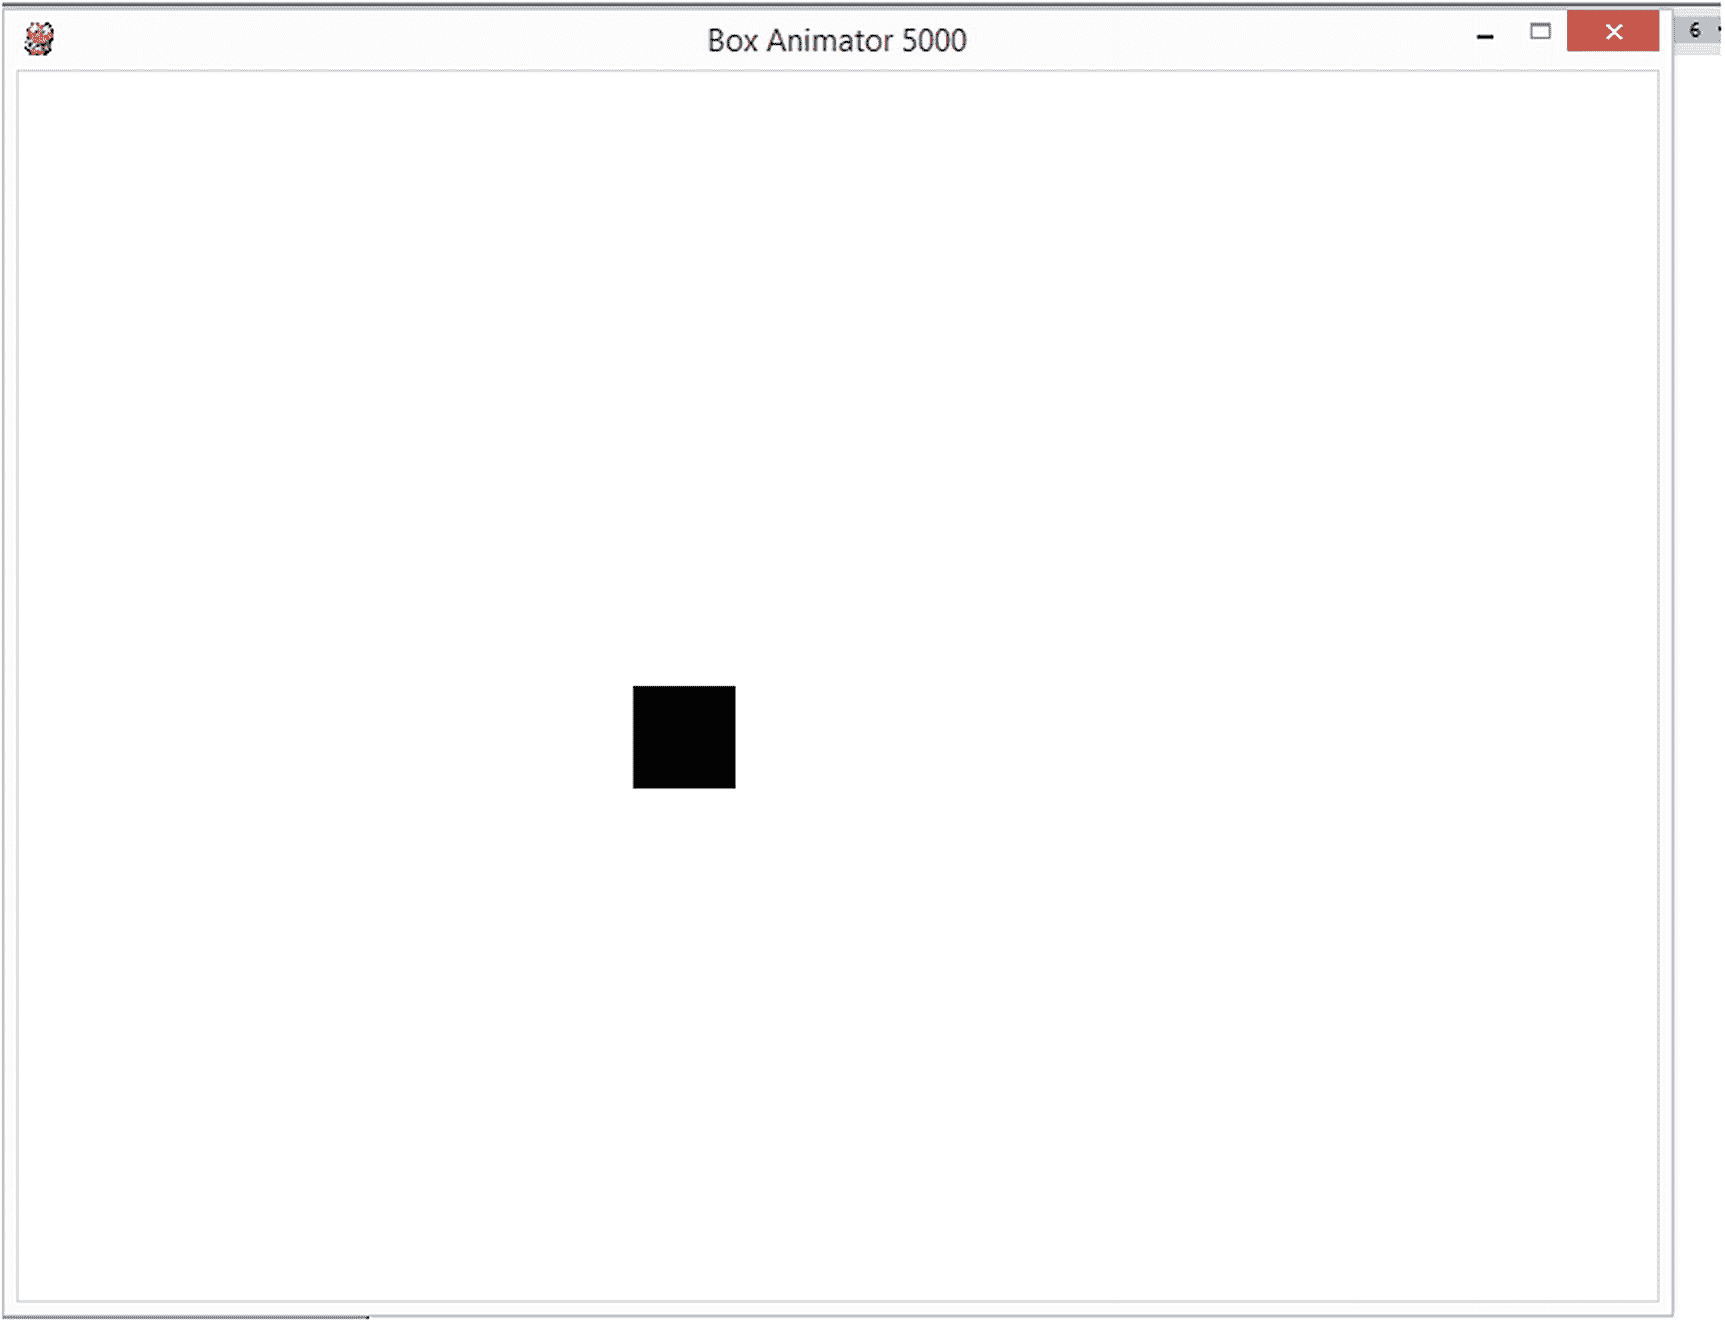
图 12-1。
测试退出事件
很酷吧。这种类型的动画逻辑可以应用于各种游戏。例如,您可以制作一个赛车游戏,其中一辆汽车必须在街道上移动,一个格斗游戏,其中角色在棋盘上移动,等等。
当然,现在我们的游戏很无聊,但是这里要学习的主要概念是在棋盘上移动一个物体。
尽管这段代码很简洁,但它确实缺少一些东西。你可能已经注意到了一件事,如果你向任何方向移动盒子太远,它会离开屏幕,最终消失。从技术上讲,只要你向相反的方向移动它,它就会回来,但是你可以看到这会给我们的游戏带来怎样的问题。
有几种方法可以解决这个问题,我们将在下一节讨论。然而现在,让我们为矩形增加一种移动方式——随机传送!说说超能力吧!
在其余事件的底部添加以下代码片段:
        # if 't' is pressed, randomly teleport the object
        if event.type == pygame.KEYDOWN:
            if event.key == pygame.K_t:
                move_y = int(random.randint(1,600))
                move_x = int(random.randint(1,600))
敏锐的观察者可能已经注意到,我们在程序开始时导入了random;原因如下。我们想在用户按下't'时随机生成矩形对象的 XY 坐标。为了做到这一点,我们使用了random.randint(),就像前面的例子一样。我们为它提供了一系列的1和600像素,以确保它永远不会完全从屏幕上消失。
现在,您的代码应该是这样的;如果没有,或者如果您的代码不起作用,请确保所有内容都匹配,并且您的缩进设置正确:
# import our modules
import pygame
from pygame.locals import *
import sys
import random

# Initialize our pygame modules
pygame.init()

# Create tuples for our colors
colorWHITE = (255,255,255)
colorBLACK = (0,0,0)
colorRED = (255,0,0)

# Create our main game window - last time we named it screen
# Let's give it a different name this time
gameWindow = pygame.display.set_mode((800,600))

# Set the caption/title for our animation
pygame.display.set_caption('Box Animator 5000')

gameQuit = False

move_x = 300
move_y = 300

# Game Loop
while not gameQuit:
    for event in pygame.event.get():
        if event.type == pygame.QUIT:
            gameQuit = True
            pygame.qui()
            sys.exit()
        # If the player presses 'q', it is considered a quit event
        if event.type == pygame.KEYDOWN:
            if event.key == pygame.K_q:
                pygame.quit()
                sys.exit()
        # If the player presses 'ESC', it is considered a quit event
        if event.type == pygame.KEYDOWN:
            if event.key == pygame.K_ESCAPE:
                pygame.quit()
                sys.exit()
        # If arrow key left is pressed, move the object left
        if event.type == pygame.KEYDOWN:
            if event.key == pygame.K_LEFT:
                move_x -= 10
        # If arrow key right is pressed, move the object right

            if event.key == pygame.K_RIGHT:
                move_x += 10
        # If arrow key up is pressed, move the object up
        if event.type == pygame.KEYDOWN:
            if event.key == pygame.K_UP:
                move_y -=10
        # If arrow key down is pressed, move the object down
            if event.key == pygame.K_DOWN:
                move_y +=10
        # if 't' is pressed, randomly teleport the object
        if event.type == pygame.KEYDOWN:
            if event.key == pygame.K_t:
                move_y = int(random.randint(1,600))
                move_x = int(random.randint(1,600))

    # Fill the gameWindow with the color white
    gameWindow.fill(colorWHITE)

    # Blit a black rectangle object
    pygame.draw.rect(gameWindow, colorBLACK, [move_x,move_y,50,50])

    # Update our screen
    pygame.display.update()
运行代码和传送,直到你的大脑爆炸!
碰撞检测:从墙上反弹
当我们在游戏中创建更多的对象时,我们不可避免地会遇到处理对象相互接触时的行为问题。例如,如果我们有两个移动到窗口中心的动画矩形,在某个时候,它们的路径会相交。
我们可以忽略这种联系,在某些情况下,这可能是最好的选择。不过,更有可能的是,我们希望让我们的对象检测到这种碰撞,并以某种方式做出反应。
碰撞检测是一种编程艺术,让对象“意识到”它们何时与另一个对象发生碰撞,然后做出适当的反应。在某些情况下,我们可能希望我们的对象停止朝那个方向移动。在其他情况下,我们可能希望它们反弹几步,就好像它们遇到了一个强大的力场。
冲突也可能因为其他原因而发生。例如,你可能创造了一个角色必须通过的迷宫。如果我们不设置碰撞检测,角色可能会直接穿过我们的墙壁。门也是如此。
事实上,即使屏幕上没有墙或门,或任何其他物体,设置碰撞检测也是一个好主意。为什么呢?当我们制作矩形动画的时候,我们非常简短地提到了这个话题;我们创造的能够移动的物体可以——也将会——超越我们定义的屏幕边界。
虽然窗本身没有墙边界,但实际上它们有边界。在这些情况下,窗口的高度和宽度就是边界。例如,假设我们有一个 800 x 600 像素的窗口。我们可以沿着这个窗口的侧面、顶部和底部设置应用的边界,使我们的对象在越过边界时被它们弹开。
最后,我们可能需要注意的另一种碰撞形式是有意碰撞。想象一个游戏,你正在向敌人射击子弹。每当这些子弹击中目标——或者碰撞——我们都会希望它们做一些事情,比如造成伤害、得分或者引发某种反应。
用最基本的术语来说,每当两个或更多的物体有意或无意地相互接触时,就会发生碰撞。
碰撞检测:检测窗口边界
当我们创建 Pygame 应用时,我们需要记住窗口的边界。在大多数情况下,我们希望我们的对象保持在窗口或游戏屏幕的宽度和高度之内。有些情况下不会这样,但出于我们的目的,我们将专注于当我们想要确保我们的对象留在玩家的视野内时该做什么。
对于我们的下一部分代码,我们将检查以确保我们的矩形对象没有超出我们的窗口的宽度或高度。要做到这一点,我们必须检查我们的矩形在棋盘上移动时的位置,并让我们的程序在矩形触及边界时做出响应。
为了实现这一点,我们将使用一系列的if语句,我们将把它们放在游戏循环和事件监听器下面,就在我们创建gameWindow.fill(colorWHITE)之前。
添加以下代码,确保正确缩进:
  # Check to see if we collide with the right screen end
        if move_x > 750:
            move_x -= 50
            pygame.display.set_caption('Right Collision')
        if move_x < 1:
            move_x += 50
        # Check to see if we collide with the left screen end
            pygame.display.set_caption('Left Collision')
        # Check to see if we collide with the bottom of the screen
        if move_y > 550:
            move_y -= 50
            pygame.display.set_caption('Bottom Collision')
        # Check to see if we collide with the top of the screen
        if move_y < 1:
            move_y += 50
            pygame.display.set_caption('Top Collision')
对于这么少的代码,它当然做了很多。让我们走一遍这些步骤。
我们的第一个if语句声明如果我们的矩形对象位于 750 像素或更大的空间,那么将我们的矩形对象向相反方向移动 50 像素,创建一个反弹效果。这是通过从move_x变量中减去50 (-=50来实现的,正如您所记得的,这个变量代表我们矩形对象的X坐标。
您可能已经注意到,我们没有让程序检查我们的对象是否位于高于800 X的像素坐标处。你可能会问,这是为什么?简单:我们必须时刻记住我们要检测碰撞的物体的大小。我们必须从最高坐标值中减去它的大小——在本例中为50。因此,如果我们的矩形是50像素,我们的屏幕是800像素宽,为了让我们的矩形接触边界而不超出边界,我们必须检查750或更大的X坐标。
我们代码的下一部分再次在X坐标上工作。这一次,我们正在检查与屏幕左侧的碰撞。这里我们要检查小于1的值(记住:屏幕左侧的边框位于X坐标0);同样,如果我们碰到这堵“墙”,矩形会向相反的方向反弹50像素。
我们也为Y坐标继续这个逻辑,检查我们窗口的顶部和底部碰撞。同样,如果检测到碰撞,我们的矩形将向相反的方向反弹50像素——这次相应地向上或向下。
最后,为了给程序增加一点趣味,如果检测到碰撞,每个if检查也会改变窗口的标题,提醒你碰撞发生在哪个方向——上、下、左或右。
这就是我们的第一个碰撞检测功能!
继续保存程序并测试它,确保碰到每面墙以确保程序正常工作。如果不匹配,请确保它与以下完整的程序代码匹配:
# import our modules
import pygame
from pygame.locals import *
import sys
import random

# Initialize our pygame modules
pygame.init()

# Create tuples for our colors
colorWHITE = (255,255,255)
colorBLACK = (0,0,0)
colorRED = (255,0,0)

# Create our main game window - last time we named it screen
# Let's give it a different name this time
gameWindow = pygame.display.set_mode((800,600))

# Set the caption/title for our animation
pygame.display.set_caption('Box Animator 5000')

gameQuit = False

move_x = 300
move_y = 300

# Game Loop
while not gameQuit:
    for event in pygame.event.get():
        if event.type == pygame.QUIT:
            gameQuit = True
            pygame.qui()
            sys.exit()
        # If the player presses 'q', it is considered a quit event
        if event.type == pygame.KEYDOWN:
            if event.key == pygame.K_q:
                pygame.quit()
                sys.exit()
        # If the player presses 'ESC', it is considered a quit event
        if event.type == pygame.KEYDOWN:
            if event.key == pygame.K_ESCAPE:
                pygame.quit()
                sys.exit()
        # If arrow key left is pressed, move the object left
        if event.type == pygame.KEYDOWN:
            if event.key == pygame.K_LEFT:
                move_x -= 10
        # If arrow key right is pressed, move the object right
            if event.key == pygame.K_RIGHT:
                move_x += 10
        # If arrow key up is pressed, move the object up
        if event.type == pygame.KEYDOWN:
            if event.key == pygame.K_UP:
                move_y -=10
        # If arrow key down is pressed, move the object down
            if event.key == pygame.K_DOWN:
                move_y +=10
        # if 't' is pressed, randomly teleport the object
        if event.type == pygame.KEYDOWN:
            if event.key == pygame.K_t:
                move_y = int(random.randint(1,600))
                move_x = int(random.randint(1,600))

        # Check to see if we collide with the right screen end
        if move_x > 750:
            move_x -= 50
            pygame.display.set_caption('Right Collision')
        if move_x < 1:
            move_x += 50
        # Check to see if we collide with the left screen end
            pygame.display.set_caption('Left Collision')
        # Check to see if we collide with the bottom of the screen
        if move_y > 550:
            move_y -= 50
            pygame.display.set_caption('Bottom Collision')
        # Check to see if we collide with the top of the screen
        if move_y < 1:
            move_y += 50
            pygame.display.set_caption('Top Collision')

    # Fill the gameWindow with the color white
    gameWindow.fill(colorWHITE)

    # Blit a black rectangle object
    pygame.draw.rect(gameWindow, colorBLACK, [move_x,move_y,50,50])

    # Update our screen
    pygame.display.update()
碰撞两个物体
现在我们已经设置了边界检测,我们可以继续进行另一种重要的碰撞检测——检测两个对象何时发生碰撞。如前所述,您可能希望检查多个对象之间的碰撞有许多原因。除了查看两个角色是否接触或武器是否击中目标,碰撞检测对于确定物体在感知空间中的位置也很有用。
例如,如果你有一个游戏,其中一个角色必须跳到物体的顶部——就像你在平台游戏中所做的那样——你的游戏如何知道这个角色是站在一片草地上还是站在一个盒子顶上?您可以使用碰撞检测或点击检测来实现这一目的。
在下一个例子中,我们将创建一个名为objectCollisionExample.py的全新 Python 文件。我们将从我们的pygameAnimations.py程序中借用一些代码。我将从粘贴整个程序开始,而不是向您介绍代码的每一部分,然后逐步介绍我们对旧代码所做的新的添加和修改。
花点时间创建新文件,并将以下代码复制到其中。在我解释之前,请务必阅读评论,看看您是否能弄清楚该程序的目的以及它是如何工作的。像往常一样,确保正确缩进代码,否则会收到错误:
# import our modules
import pygame
from pygame.locals import *
import sys

# Initialize our pygame modules
pygame.init()

# Create tuples for our colors
colorWHITE = (255,255,255)
colorBLACK = (0,0,0)
colorRED = (255,0,0)

# Create our main game window - last time we named it screen
# Let's give it a different name this time
gameWindow = pygame.display.set_mode((800,600))

# Set the caption/title for our animation
pygame.display.set_caption('Colliding Objects')

gameQuit = False

# Create two variables that will store sprite rectangle objects
rect1 = pygame.sprite.Sprite()
rect1.rect = pygame.Rect(300,300,50,50)

rect2 = pygame.sprite.Sprite()
rect2.rect = pygame.Rect(100,100, 100,150)

# Game Loop
while not gameQuit:
    for event in pygame.event.get():
        if event.type == pygame.QUIT:
            gameQuit = True
            pygame.quit()
            sys.exit()
        # If the player presses 'q', it is considered a quit event
        if event.type == pygame.KEYDOWN:
            if event.key == pygame.K_q:
                pygame.quit()
                sys.exit()
        # If the player presses 'ESC', it is considered a quit event
        if event.type == pygame.KEYDOWN:
            if event.key == pygame.K_ESCAPE:
                pygame.quit()
                sys.exit()
        # If arrow key left is pressed, move the object left
        if event.type == pygame.KEYDOWN:
            if event.key == pygame.K_LEFT:
                rect1.rect.x = rect1.rect.x - 10
        # If arrow key right is pressed, move the object right
            if event.key == pygame.K_RIGHT:
                rect1.rect.x = rect1.rect.x +10
        # If arrow key up is pressed, move the object up
        if event.type == pygame.KEYDOWN:
            if event.key == pygame.K_UP:
                rect1.rect.y = rect1.rect.y -10
        # If arrow key down is pressed, move the object down
            if event.key == pygame.K_DOWN:
                rect1.rect.y = rect1.rect.y +10

        # Check for collision between our two rect objects
        # using collide_rect
        # If a collision is detected, we relocate rect1
        # by changing its y and x coordinates
        if pygame.sprite.collide_rect(rect1, rect2):
            rect1.rect.y = 400
            rect1.rect.x = 400

        # Check to see if we collide with the right screen end
        # If it does, we move rect1 back to X coordinate 740
        if rect1.rect.x > 750:
            rect1.rect.x = 740
            pygame.display.set_caption('Right Collision')
        if rect1.rect.x < 1:
            rect1.rect.x = 51
        # Check to see if we collide with the left screen end
            pygame.display.set_caption('Left Collision')
        # Check to see if we collide with the bottom of the screen
        if rect1.rect.y > 550:
            rect1.rect.y = 540
            pygame.display.set_caption('Bottom Collision')
        # Check to see if we collide with the top of the screen
        if rect1.rect.y < 1:
            rect1.rect.y = 50
            pygame.display.set_caption('Top Collision')

    # Fill the gameWindow with the color white
    gameWindow.fill(colorWHITE)

    # Blit our rectangle objects
    pygame.draw.rect(gameWindow, colorBLACK, rect1)
    pygame.draw.rect(gameWindow, colorRED, rect2)

    # Update our screen
    pygame.display.update()
这段代码在大多数方面都像前面的程序一样;我们创建一个矩形对象——这次插入到一个 sprite 中——我们将使用箭头键在窗口中移动它。如果矩形接触到窗口的任何边缘或边界,矩形将从“墙”反弹几个像素
除此之外,我们还创建了第二个矩形对象——rect2——它是静态的,不会在棋盘上移动。我们还设置了代码来检查rect1是否碰到 rect2 如果是这样,那么我们改变 rect1 的X和Y坐标的值——就好像它撞到了一堵墙。
这段代码与前面的点击检测示例的主要区别在于我们创建矩形对象的方式。这一次我们不是简单地使用.rect来块化我们的矩形,而是想要实际创建一个变量来保存我们的矩形对象。
此外,我们制作这些矩形精灵,这样我们就可以访问一些pygame.sprite.Sprite()自带的内置函数。有许多内置函数伴随着pygame.sprite模块,不幸的是我们在本书中没有足够的空间来涵盖它们。然而,我们将触及一个非常重要的问题,它的目的是帮助碰撞检测。
通过将矩形对象存储在变量中并使它们成为精灵,我们可以通过直接访问这些属性来改变它们的 XY 坐标。
比如在程序的代码中,你可能会看到类似于rect1.rect.x = 100的东西。这段代码基本上是说,您想要获取名为rect1的变量,访问存储在其中的rect对象,并将它的x值更改为100。
我们代码的这一部分:
rect1 = pygame.sprite.Sprite()
rect1.rect = pygame.Rect(300,300,50,50)

rect2 = pygame.sprite.Sprite()
rect2.rect = pygame.Rect(100,100, 100,150)
用于创建我们的两个矩形对象—rect1和rect2。请务必注意,当我们使用pygame.Rect时,与我们在rect1.rect中使用时相比,“R”是大写的。未能正确利用它将导致错误。
下一个变化是我们如何定义对象(尤其是 rect1)在窗口中移动的方式。
由于我们的rect对象现在是一个精灵,我们必须以不同的方式访问它的参数——比如它的 XY 坐标。现在,要让物体移动,我们用这个方法:
        # If arrow key left is pressed, move the object left
        if event.type == pygame.KEYDOWN:
            if event.key == pygame.K_LEFT:
                rect1.rect.x = rect1.rect.x - 10
请注意如何不使用?move_ip 方法,我们现在只需将 rect1.rect.x 的值重新分配给一个新值,如下所示:
rect1.rect.x = rect1.rect.x - 10
它表示获取rect1的当前X坐标值,并从中减去10。
我们对四个方向箭头的每个按键事件都这样做,并根据用户移动矩形的方向来改变rect1.rect.x和rect1.rect.y的值。
请记住,X值代表左右移动,而Y值代表上下移动。
下一步是使用碰撞检测来查看rect1是否曾经接触过rect2。这就是将矩形对象定义为精灵派上用场的地方。sprite 对象的内置函数之一是collide_rect,它有两个参数:您希望检测碰撞的两个对象的名称。
我们在一个if语句中使用这个,这样我们就可以检查对象是否曾经接触过彼此。如果他们这样做,我们改变 rect1 的X和Y坐标的值为400 x 400,传送它远离rect2物体。这一切都是通过这段简单的代码完成的:
        if pygame.sprite.collide_rect(rect1, rect2):
            rect1.rect.y = 400
            rect1.rect.x = 400
最后,我们对代码做的最后一个改变是我们处理游戏窗口边界冲突的方式。它与之前基本相同,除了,再次,不是改变move_x和move_y的值来改变坐标或我们的矩形,我们直接访问矩形的 XY 参数。
如果检测到墙壁碰撞,我们只需将矩形向后移动几个空格:
例如:
if rect1.rect.x > 750:
            rect1.rect.x = 740
            pygame.display.set_caption('Right Collision')
表示如果 rect1 的 X 坐标大于750,则将 rect1 移回 X 坐标740,然后将窗口标题改为“右碰撞”
继续测试该程序,通过尝试从顶部、底部、左侧和右侧将 rect1 对象移动到 rect2 对象,确保检查碰撞检测对两个对象的所有四个侧面都有效。
然后测试窗口边界的碰撞检测,确保再次检查顶部、底部、左侧和右侧边界。
如果代码不起作用,重读一遍并进行比较,确保它匹配。
和往常一样,要注意缩进。
在这一集里!
在过去的两章中,你完成了一些真正令人惊讶的事情,看起来你正在成为一个不可阻挡的英雄!虽然我们没有在最后两章中涵盖所有可能的游戏主题——这需要一整本书(如果不是更多的话)来完成——但我们确实触及了足够的信息,让你设计一个基本的视频游戏,更重要的是,开始做你自己的研究来创建你自己的复杂游戏。
你的作业?走出去,创造一个有趣的游戏,或者至少是一个游戏的框架。我期待着当你成为世界著名的游戏开发者时,在 Playstation 402 或任何系统上玩它!


 635
635

 被折叠的 条评论
为什么被折叠?
被折叠的 条评论
为什么被折叠?
 到【灌水乐园】发言


