


利用MMDetection已训练出来的权重,分析目标检测各项重要评价指标
mAP,Precision,Recall,FPS,FLOPs
1. 打印 mAP
执行tools/test.py
需要确定3个关键参数
# 测试算法的配置路径
parser.add_argument('--config', help='test config file path')
# 已经训练好的权重路径
parser.add_argument('--checkpoint', help='checkpoint file')
# 使用COCO的评估测试方式 bbox
parser.add_argument('--eval',default='bbox',type=str,nargs='+',help='evaluation metrics, which depends on the dataset, e.g., "bbox",'' "segm", "proposal" for COCO, and "mAP", "recall" for PASCAL VOC')
python tools/test.py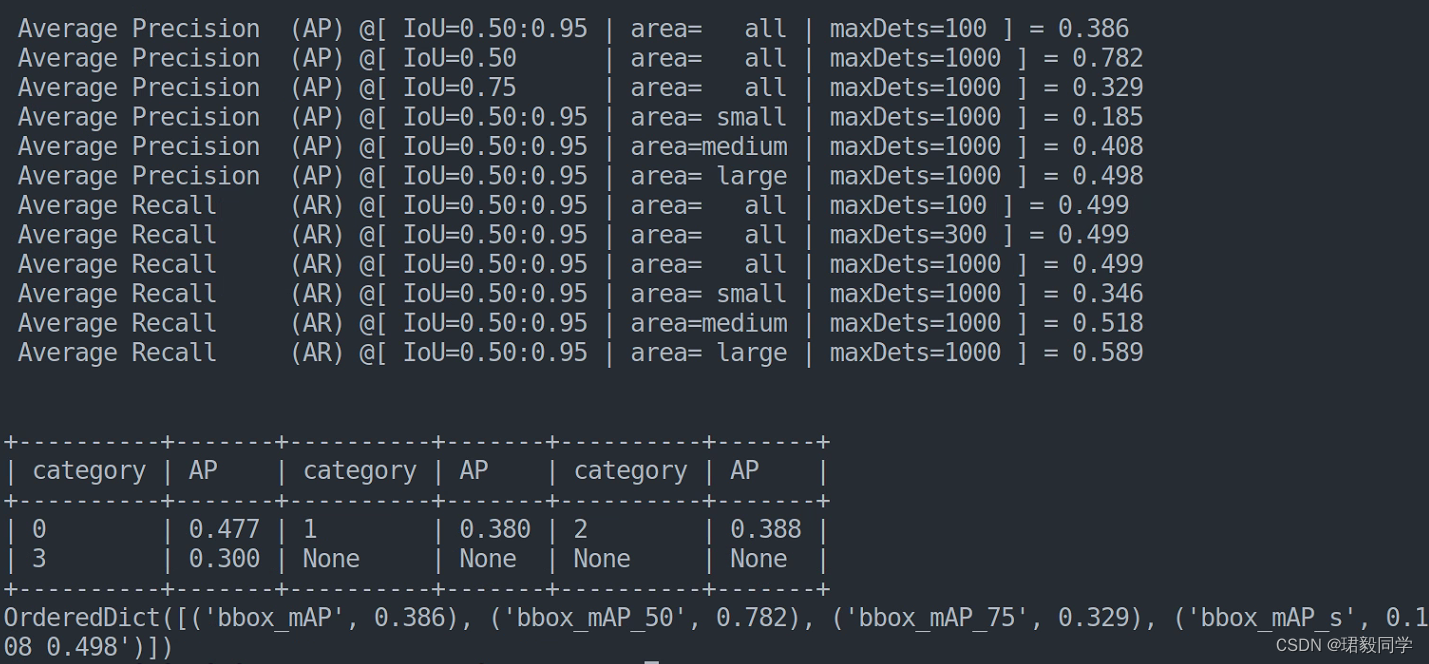
2. 打印 Precision, Recall, F1, AP, AR
需改tools/analysis_tools/confusion_matrix.py文件,在底部添加代码
要跟上面的代码进行对其缩进
TP = np.diag(confusion_matrix)
FP = np.sum(confusion_matrix, axis=0) - TP
FN = np.sum(confusion_matrix, axis=1) - TP

precision = TP / (TP + FP)
recall = TP / (TP + FN)
average_precision = np.mean(precision)
average_recall = np.mean(recall)
f1 = 2* (average_precision * average_recall) / (average_precision + average_recall)


print('AP:', average_precision)
print('AR:', average_recall)
print('F1:', f1)
print('Precision', precision)
print('Recall', recall)

# print('TP:', TP)
# print('FP:', FP)
# print('FN', FN)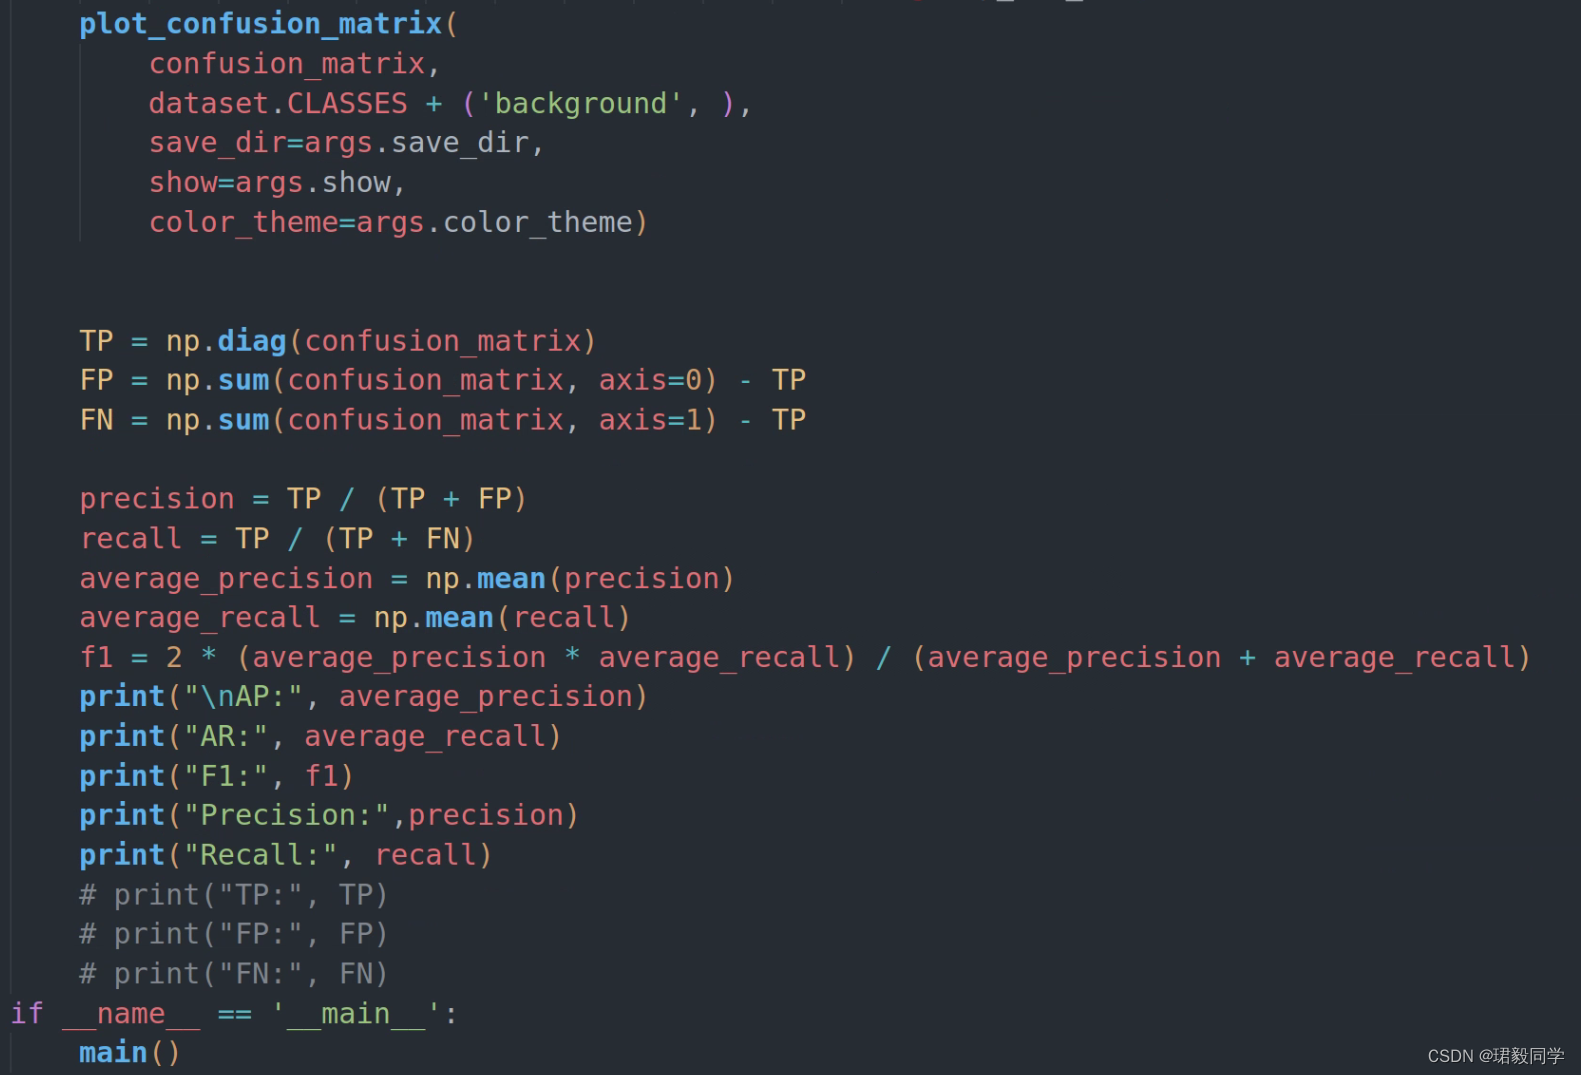
确定tools/test.py 重要参数,生成 .pkl文件用于分析上述各个指标
# 测试算法的配置路径
parser.add_argument('--config', default='文件路径', help='test config file path')
# 已经训练好的权重路径
parser.add_argument('--checkpoint', default='训练权重', help='checkpoint file')
# 使用COCO的评估测试方式 bbox
parser.add_argument('--eval',default='bbox',type=str,nargs='+',help='evaluation metrics, which depends on the dataset, e.g., "bbox",'' "segm", "proposal" for COCO, and "mAP", "recall" for PASCAL VOC')

# 关键参数,生成xxx.pkl文件
parser.add_argument('--out', default='workdir/cascadercnn/cascadercnn.pkl' help='output result file in pickle format')
确定 tools/analysis_tools/confusion_matrix.py 关键参数
# 算法配置文件路径
parser.add_argument('--config', default='你的算法文件路径' help='test config file path')
# 上一步已生成的 pkl文件路径
parser.add_argument('--prediction_path', default='workdir/cascadercnn/cascadercnn.pkl', help='prediction path where test .pkl result')
# 文件保存地址
parser.add_argument('--save_dir', default='workdir/cascadercnn', help='directory where confusion matrix will be saved')
# 运行 confusion_matrix.py
python tools/analysis/confusion_matrix.py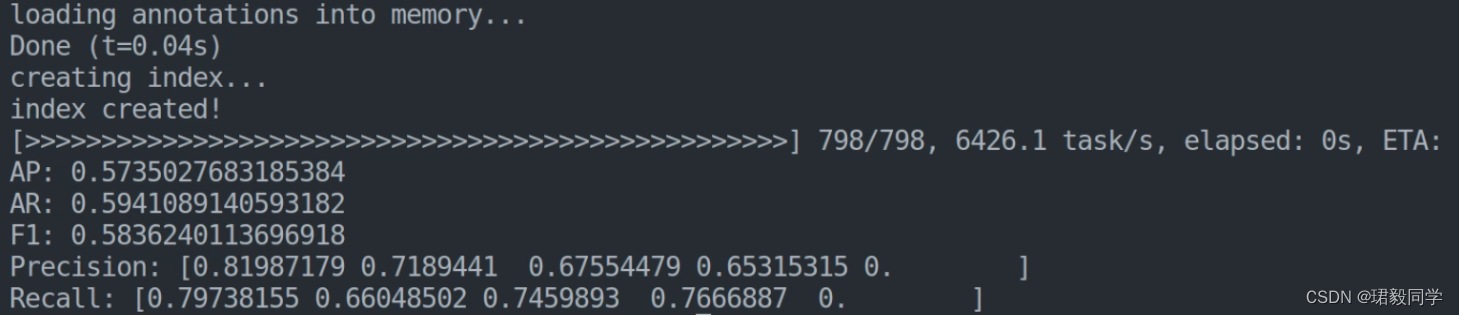
3. 打印FPS
找到 tools/analysis_tools/benchmark.py,修改关键参数
# 算法配置文件路径
parser.add_argument('--config', default='算法配置文件路径', help='test config file path')
# 训练好的权重路径
parser.add_argument('--checkpoint', default='训练好的权重路径', help='checkpoint file')

# 选择pytorch
parser.add_argument(
        '--launcher',
        default = 'pytorch', # 填写pytorch
        choices=['none', 'pytorch', 'slurm', 'mpi'],
        default='none',
        help='job launcher')
运行一下代码
python -m torch.distributed.launch --nproc_per_node=1 --master_port=29500 tools/analysis_tools/benchmark.py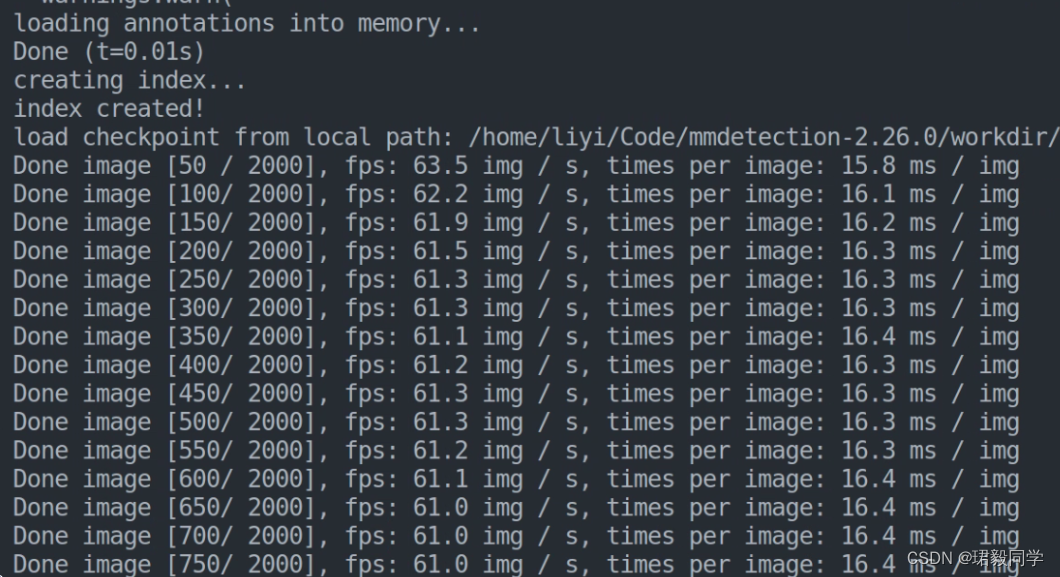
4. 获取模型FLOPs
找到tools/analysis_tools/get_flops.py确定关键参数
# 算法配置文件地址
parser.add_argument('--config', default='算法配置文件地址', help='train config file path')
parser.add_argument(
        '--shape',
        type=int,
        nargs='+',
        default=[1233, 800], # 输入大小,可调整
        help='input image size')
# 运行 get_flops.py
python tools/analysis_tools/get_flops.py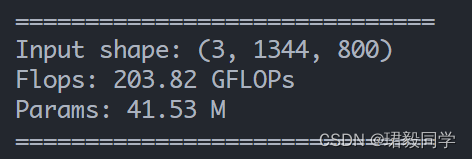
以上就是使用MMDetection,获取到目标检测相关数据评价指标的操作指南~


 2609
2609

 被折叠的 条评论
为什么被折叠?
被折叠的 条评论
为什么被折叠?
 到【灌水乐园】发言


