


3.1.1.CRNN介绍
通过CNN将图片的特征提取出来后采用RNN对序列进行预测,最后通过一个CTC的翻译层得到最终结果。说白了就是CNN+RNN+CTC的结构。
Git 地址https://github.com/bgshih/crnn
论文:paper http://arxiv.org/abs/1507.05717.
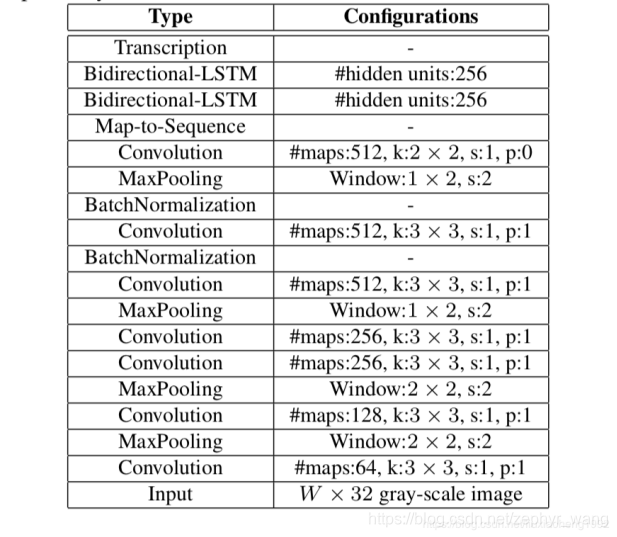
3.1.2.CNN介绍
CNN结构采用的是VGG的结构,并且文章对VGG网络做了一些微调
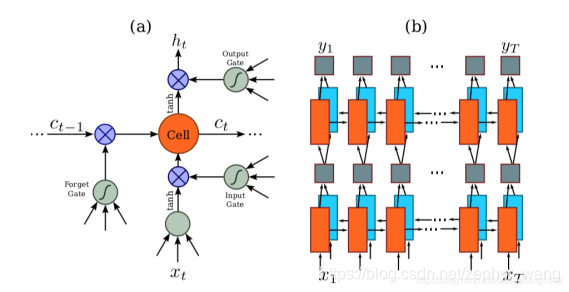
3.1.3.RNN介绍
RNN网络是对于CNN输出的特征序列,每一个输入都有一个输出yt。为了防止训练时梯度的消失,文章采用了LSTM神经单元作为RNN的单元。文章认为对于序列的预测,序列的前向信息和后向信息都有助于序列的预测,所以文章采用了双向RNN网络。LSTM神经元的结构和双向RNN结构如下图所示。
3.1.4.CTC翻译层
测试时,翻译分为两种,一种是带字典的,一种是没有字典的。
带字典的就是在测试的时候,测试集是有字典的,测试的输出结果计算出所有字典的概率,取最大的即为最终的预测字符串
不带字典的,是指测试集没有给出测试集包含哪些字符串,预测时就选取输出概率最大的作为最终的预测字符串。
3.1.5.调试基于tensorflow的crnn
1.首先从git下载
Git地址:https://github.com/MaybeShewill-CV/CRNN_Tensorflow
2.下载预训练好的模型,自己训练的话,就不用下载了,训练数据几个GB呢。
The pretrained crnn model weights on Synth90k dataset can be found here
3.下载完就可以直接使用了,使用下面命令:
python tools/test_shadownet.py --image_path data/test_images/test_01.jpg --weights_path model/crnn_synth90k/shadownet.ckpt --char_dict_path data/char_dict/char_dict_en.json --ord_map_dict_path data/char_dict/ord_map_en.json
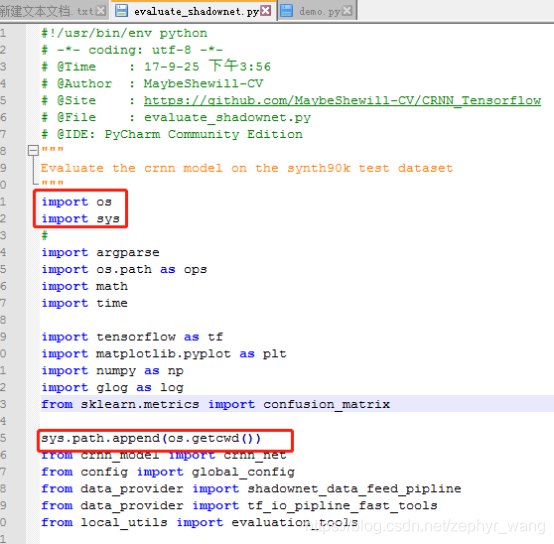
4.一些坑
(1)修改tools的py文件,添加下面代码。我是windows直接运行,主要是为了找到相关目录。
os.getcwd() 方法用于返回当前工作目录。
2.windows创建进程没有fork方法,默认是spawn,而linux创建进程默认是fork方法。会报下面错误:
The “freeze_support()” line can be omitted if the program
is not going to be frozen to produce an executable.
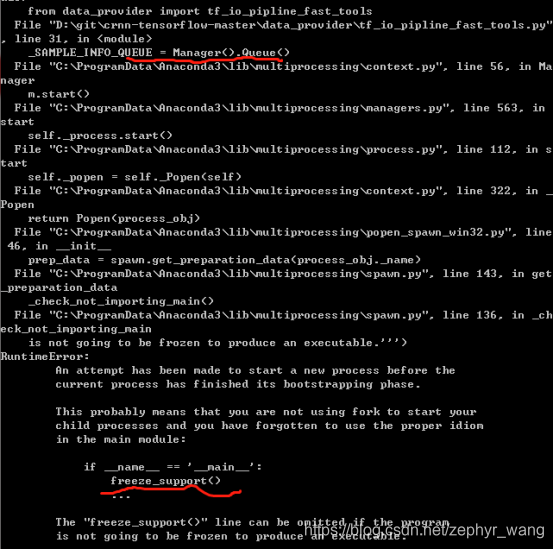
修改data_provider/tf_io_pipline_fast_tools.py文件,添加“if name == ‘main’:”,如下所示。
if name == ‘main’:
_SAMPLE_INFO_QUEUE = Manager().Queue()
_SENTINEL = ("", [])
3.1.6.英文OCR运行成功
python tools/test_shadownet.py --image_path data/test_images/test_01.jpg --weights_path model/crnn_synth90k/shadownet.ckpt --char_dict_path data/char_dict/char_dict_en.json --ord_map_dict_path data/char_dict/ord_map_en.json

发现只有用训练数据,识别才好。

3.1.7.中文OCR运行成功
1.下载预训练好的模型
I have uploaded a newly trained crnn model on chinese dataset which can be found here. Sorry for not knowing the owner of the dataset. But thanks for his great work. If someone knows it you’re welcome to let me know. The pretrained weights can be found here
2.修改配置文件config/global_config.py:
__C.ARCH.NUM_CLASSES = 5825 # cn dataset
#__C.ARCH.NUM_CLASSES = 37 # synth90k dataset
3.运行demo
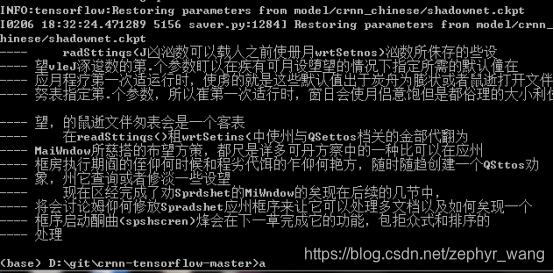
python tools/recongnize_chinese_pdf.py -c ./data/char_dict/char_dict_cn.json -o ./data/char_dict/ord_map_cn.json --weights_path model/crnn_chinese/shadownet.ckpt --image_path data/test_images/test_pdf.png --save_path data/test_images/pdf_recognize_result.txt
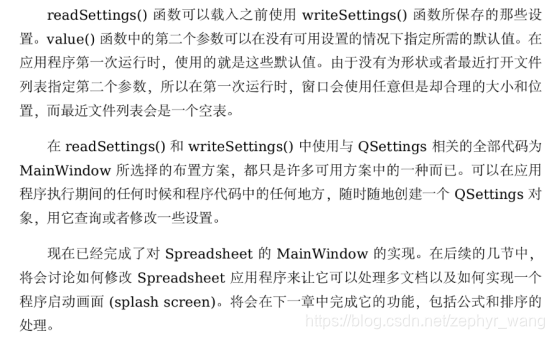
我的识别效果没有git上显示的好。自己准备数据,自己训练就更好吧。


 818
818

 被折叠的 条评论
为什么被折叠?
被折叠的 条评论
为什么被折叠?
 到【灌水乐园】发言


