


1、虚拟机安装
VMware+Ubuntu14.04
建议:
(1)Ubuntu下载Linux64位版本
(2)虚拟机文件夹英文命名
(3)Ubuntu简易安装可能出现无法安装虚拟机工具,无法从主机向虚拟机复制文件,可插优盘传递文件,也可在安装时选择暂时不装系统,这点可百度解决,博文很丰富。
2.Anaconda安装
下载Anaconda的Linux64位版本,Ubuntu14.04自带Python2.7
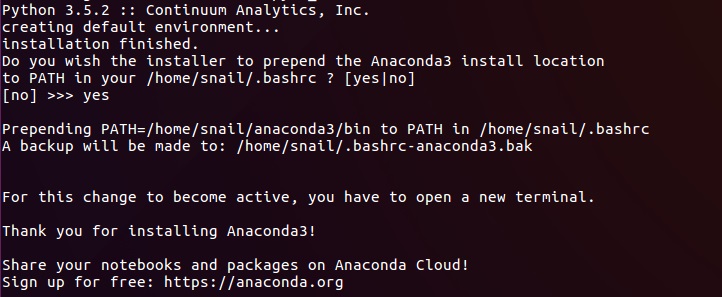
【1】安装
¥bash Anaconda2-4.3.1-Linux-x86_64.sh直接复制下载的文件名即可
yes
默认安装路径

添加环境变量yes
测试是否安装成功
$conda --version若显示出版本号则安装成功
建议:重启虚拟机后才可以使用,即安装后重启再进行测试
【2】添加conda环境
$ conda create -n tensorflow python=2.7【3】激活环境
$ source activate tensorflow(tensorflow)$ pip install --ignore-installed --upgrade https://storage.googleapis.com/tensorflow/linux/cpu/tensorflow-0.8.0rc0-cp27-none-linux_x86_64.whl
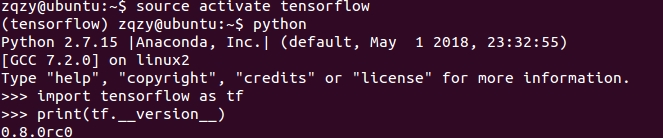
【4】测试(必须先在TensorFlow环境中运行,才可以)
先执行 “source activate tensorflow”(一定要先执行这句话,否则显示“ImportError: No module named tensorflow”)
$ python >>> import tensorflow as tf>>> print(tf.__version__) [双下划线]>>> print(tf.__path__) [双下划线]>>> hello = tf.constant('Hello, TensorFlow!') >>> sess = tf.Session() >>> print sess.run(hello) Hello, TensorFlow! >>> a = tf.constant(10) >>> b = tf.constant(32) >>> print sess.run(a+b) 42
建议
(1)退出Python环境,Ctrl+D或者输入quit
(2)不用TF时关闭环境
$ source deactivate(3)使用时激活
source activate tensorflow


 343
343


 被折叠的 条评论
为什么被折叠?
被折叠的 条评论
为什么被折叠?
 到【灌水乐园】发言


