This is the code of the implementation of the underwater image enhancement network (Water-Net) described in
"Chongyi Li, Chunle Guo, Wenqi Ren, Runmin Cong, Junhui Hou, Sam Kwong, Dacheng Tao , IEEE TIP 2019".
If you use our code or dataset for academic purposes, please consider citing our paper. Thanks.
这里说明了版本要求(requirement.txt里面有环境配置要求)
TensorFlow 1.x, Cuda 8.0, and Matlab. The missed vgg.py has been added.
The requirement.txt has been added.
github
https://github.com/Li-Chongyi/Water-Net_Code
安装环境过程
0 https://blog.csdn.net/zjc910997316/article/details/110249205
(环境搭建五) ubunut安装gpu版本tensorflow(已经装好GPU版本的pytorch的情况下-即已经装好cuda-cudnn)
1 安装pip install tensorflow-gpu==1.13.1 (作者的requirement里面写的是1.4.0但是我安装不了)
2 pip install matplotlib
3 pip install scipy==1.2.1 不要安装最新的
直接pip install scipy 会有以下问题
这是作者主页可以下载所有数据
https://li-chongyi.github.io/proj_benchmark.html
原尺寸大小
测试流程

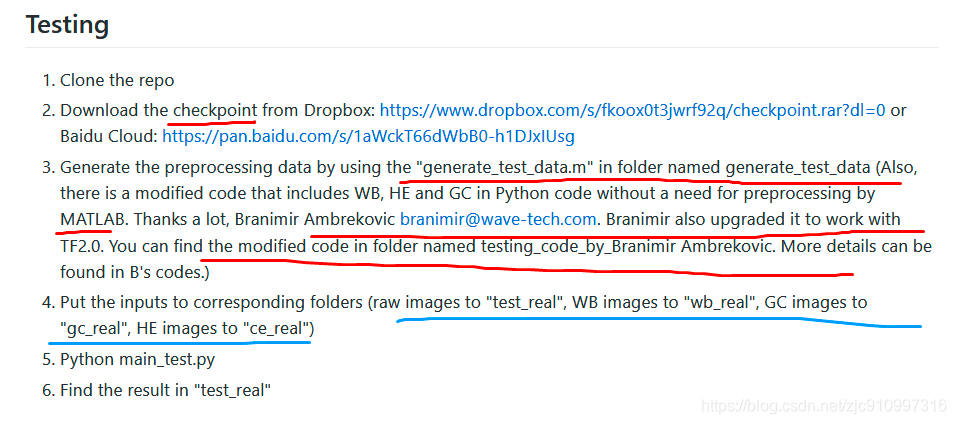
Testing
- Clone the repo
- Download the checkpoint from Dropbox: https://www.dropbox.com/s/fkoox0t3jwrf92q/checkpoint.rar?dl=0 or Baidu Cloud: https://pan.baidu.com/s/1aWckT66dWbB0-h1DJxIUsg
下载检测点(模型的训练好的结果) - Generate the preprocessing data by using the "generate_test_data.m" in folder named generate_test_data (Also, there is a modified code that includes WB, HE and GC in Python code without a need for preprocessing by MATLAB. Thanks a lot, Branimir Ambrekovic branimir@wave-tech.com. Branimir also upgraded it to work with TF2.0.
(generate_test_data.m是一个产生预先处理数据的matlab工具,这里也有WB,HE,GC三个python代码不需要matlab处理,tf2版本的可以去这个BA作者网页找到)
You can find the modified code in folder named testing_code_by_Branimir Ambrekovic. More details can be found in B's codes.) - Put the inputs to corresponding folders (raw images to "test_real", WB images to "wb_real", GC images to "gc_real", HE images to "ce_real")
(把raw WB白平衡 GC HE放到对应文件夹)
原图 ->test_real
白平衡 ->wb_real
伽马矫正 ->gc_real
直方图均衡化 ->ce_real - Python main_test.py
- Find the result in "test_real"
训练流程
Training

- Clone the repo
- Download the VGG-pretrained model from Dropbox: https://drive.google.com/open?id=1asWe_rCduu6f09uiAz_aEP4KAiuoVSRS or Baidu Cloud: https://pan.baidu.com/s/1seDVBooFkmaJ6qF5kuAIsQ (Password: c0nj) (It's preparing for perception loss.) 这里是vgg网络的预训练模型,是为了获得目标的纹理信息,可以在训练的loss里面看到,作者使用了两种loss
- Set the network parameters, including learning rate, batch, weights of losses, etc., according to the paper
- Generate the preprocessing training data by using the "generate_training_data.m" in folder named generate_test_data
- Put the training data to corresponding folders (raw images to "input_train", WB images to "input_wb_train", GC images to "input_gc_train", HE images to "input_ce_train", Ground Truth images to "gt_train"); We randomly select the training data from our released dataset. The performance of different training data is almost same
训练集设置 800张
raw ---> "input_train",
WB ---> "input_wb_train",
GC ---> "input_gc_train",
HE ---> "input_ce_train",
Ground Truth ---> "gt_train" - In this code, you can add validation data by preprocessing your validation data (with GT)
by the "generate_validation_data.m" in folder named generate_test_data,
then put them to the corresponding folders
(raw images to "input_test", WB images to "input_wb_test", GC images to "input_gc_test", HE images to "input_ce_test", Ground Truth images to "gt_test")
验证集设置 90张
raw --> input_test
WB --> input_wb_test
GC --> input_gc_test
HE --> input_ce_test
GT --> gt_test - For your convenience, we provide a set of training and testing data. You can find them by unziping "a set of training and testing data". However, the training data and testing data are diffrent from those used in our paper.
- Python main_.py
- Find checkpoint in the ./checkpoint/coarse_112


 1992
1992

 被折叠的 条评论
为什么被折叠?


