


ardupilot相信大家都不会陌生这里就不做过多介绍,更多的时候我们也称它为APM
ardupilot是3DR的无人机开源项目,其中包括:
AntennaTracker、ArduPlane、APMrover2、ArduCopter
其中ArduPlane是固定翼飞机,APMrover2是小车,ArduCopter是旋翼飞机
如下是ardupilot的官方链接,你可以在里面找到非常多的有用信息,已经该项目的详细介绍:
http://ardupilot.cn/
Ardupilot是一个非常稳定可靠的无人机项目,并且拥有配套的地面站,周边配件,ardupilot原版2.5版本硬件结构非常简单,由一片atmega2560作为主控,MPU6000陀螺仪(spi连接)、MS5611高精度气压计(spi连接)、HMC5843磁力计(i2c连接)另外还有一片atmega32U2作为usb转串口,并且提供PWM到PPM编码
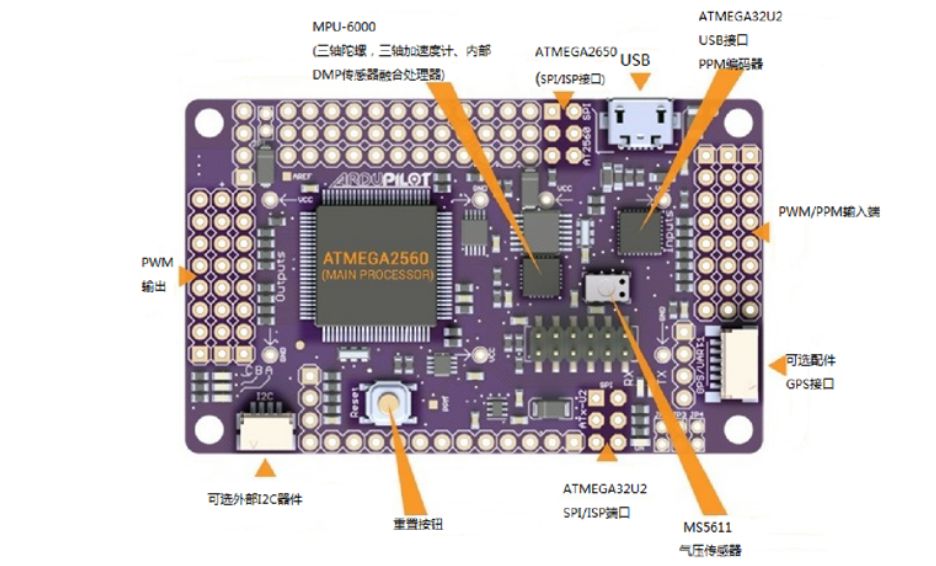
atmega2560这是一个8位的单片机,外部晶振16M,在这个前提下,飞行性能居然能如此稳定可靠,必然与其优秀的算法密不可分,当然后面与另一个开源项目共同推出了pixhawk,算是一个完美的升级
最近几年的MCU领域发展也非常迅速,ST公司就是其中一家他们推出廉价的stm8、stm32f1、stm32f4等系列在国内推广非常普及,并且价格低廉,很多的大学里都能接触到,我们何不将Ardupilot移植到stm32f1系列上,而且比起atmega2560便宜不少,固件的烧录也相对简单很多,于是动起来手来打造一个stm32f103的ardupilot
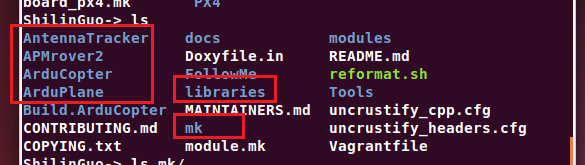
动手之前先来简单的分析一下ardupilot的源码结构:
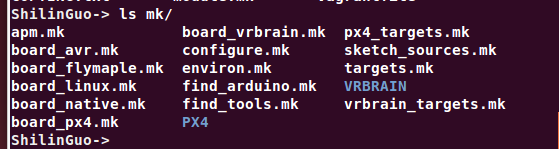
AntennaTracker、ArduPlane、APMrover2、ArduCopter这个上面已经介绍过,他对应的就是相应的固件,车、固定翼、多旋翼他们是相互独立的,他们共同依赖于libraries ,libraries就是我们移植的重点,ardupilot在libraries实现了一个硬件抽象层,以兼容不同的硬件平台,然后调用mk目录下对应的编译文件,最后将ArduCopter等对应的飞行相关的控制已经通信内容一起连接为最终的固件
我们了解了大致原理后开始动手打造吧,非常幸运的是在ardupilot的源码中已经支持对f103平台移植,该项目名称Flymaple 关于Flymaple的介绍可以到如下链接详细了解:http://www.dfrobot.com/wiki/index.php?title=Flymaple_V1.1(SKU:DFR0188)
首先我们需要解决的是bootloader问题
这里需要感谢万能的github
git clone https://github.com/leaflabs/maple-bootloader
</pre><p><span style="font-size:18px;"><span style="font-size:18px;"><span style="font-size:18px;"><span style="font-size:18px;"><span style="font-size:18px;"></span></span></span></span></span></p><p><span style="font-size:18px;"><span style="font-size:18px;"><span style="font-size:18px;"><span style="font-size:18px;"><span style="font-size:18px;"><img src="https://img-blog.csdn.net/20160525172102456" alt="" /></span></span></span></span></span></p><p><span style="font-size:18px;"><span style="font-size:18px;"><span style="font-size:18px;"><span style="font-size:18px;"><span style="font-size:18px;">拿到代码后暂时先不编译,目前还没有搭建编译环境</span></span></span></span></span></p><p><span style="font-size:18px;"><span style="font-size:18px;"><span style="font-size:18px;"><span style="font-size:18px;"><span style="font-size:18px;"></span></span></span></span></span></p><p><span style="font-size:18px;"><span style="font-size:18px;"><span style="font-size:18px;"><span style="font-size:18px;"><span style="font-size:18px;">下面的步骤摘录于apm官网对Flymaple的移植:</span></span></span></span></span></p><p><span style="font-size:18px;"><span style="font-size:18px;"><span style="font-size:18px;"><span style="font-size:18px;"><span style="font-size:18px;">Main developer wiki: http://dev.ardupilot.org</span></span></span></span></span></p><p><span style="font-size:18px;"><span style="font-size:18px;"><span style="font-size:18px;"><span style="font-size:18px;"><span style="font-size:18px;">首先需要到github获取<span style="font-size:18px;">libmaple</span>代码:</span></span></span></span></span></p><p><span style="font-size:18px;"><span style="font-size:18px;"><span style="font-size:18px;"><span style="font-size:18px;"><span style="font-size:18px;">cd ~git clone https://github.com/mikemccauley/libmaple.git</span></span></span></span></span></p><p><span style="font-size:18px;"><span style="font-size:18px;"><span style="font-size:18px;"><span style="font-size:18px;"><span style="font-size:18px;"></span></span></span></span></span></p><p><span style="font-size:18px;">继续获取<span style="font-size:18px;">ardupilot的代码:</span></span></p><p><span style="font-size:18px;"><span style="font-size:18px;"><span style="font-size:18px;"><span style="font-size:18px;"><span style="font-size:18px;">cd ~git clone https://github.com/ArduPilot/ardupilot.git</span></span></span></span></span></p><p><span style="font-size:18px;"><span style="font-size:18px;"><span style="font-size:18px;"><span style="font-size:18px;"><span style="font-size:18px;"></span></span></span></span></span></p><p><span style="font-size:18px;"><span style="font-size:18px;"><span style="font-size:18px;"><span style="font-size:18px;"><span style="font-size:18px;">获取到所有代码<span style="font-size:18px;">后需要搭建相应的编译环境,官方说明里这里无法获取相应的编译器:</span></span></span></span></span></span></p><p><span style="font-size:18px;"><span style="font-size:18px;"><span style="font-size:18px;"><span style="font-size:18px;"><span style="font-size:18px;"><span style="font-size:18px;"></span></span></span></span></span></span><pre style="box-sizing: border-box; font-family: Consolas, 'Andale Mono WT', 'Andale Mono', 'Lucida Console', 'Lucida Sans Typewriter', 'DejaVu Sans Mono', 'Bitstream Vera Sans Mono', 'Liberation Mono', 'Nimbus Mono L', Monaco, 'Courier New', Courier, monospace; margin-top: 0px; margin-bottom: 0px; padding: 12px; line-height: 1.5; overflow: auto; color: rgb(64, 64, 64); background-color: rgb(255, 255, 255);">wget http ://static.leaflabs.com/pub/codesourcery/gcc-arm-none-eabi-latest-linux32.tar.gz
tar xvzf gcc-arm-none-eabi-latest-linux32.tar.gz
于是这里我们需要自己解决相应该编译器问题
我们可以到如下链接获取编译器
https://launchpad.net/gcc-arm-embedded/5.0/5-2016-q1-update/+download/gcc-arm-none-eabi-5_3-2016q1-20160330-linux.tar.bz2
下载后将其解压缩,放到工作目录下

并且将编译器添加到环境变量
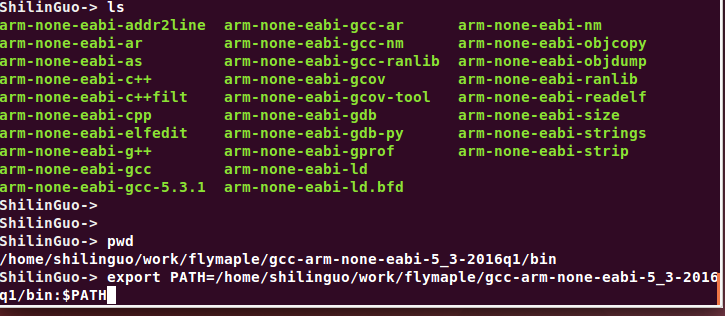
比如我的编译器路径在:/home/shilinguo/work/flymaple/gcc-arm-none-eabi-5_3-2016q1/bin
于是使用如下命令:export PATH=/home/shilinguo/work/flymaple/gcc-arm-none-eabi-5_3-2016q1/bin:$PATH
然后回到我们的maple-bootloader目录下
cd ~/maple-bootloader
make
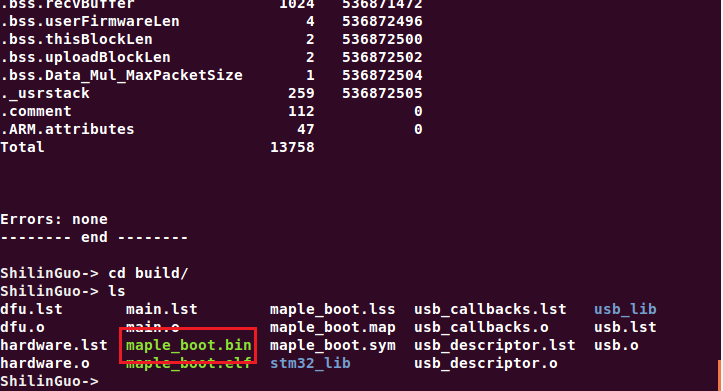
编译完成后我们将可以在build目录下得到maple_boot.bin文件,然后使用jlink等工具将该文件烧录到0x8000000地址
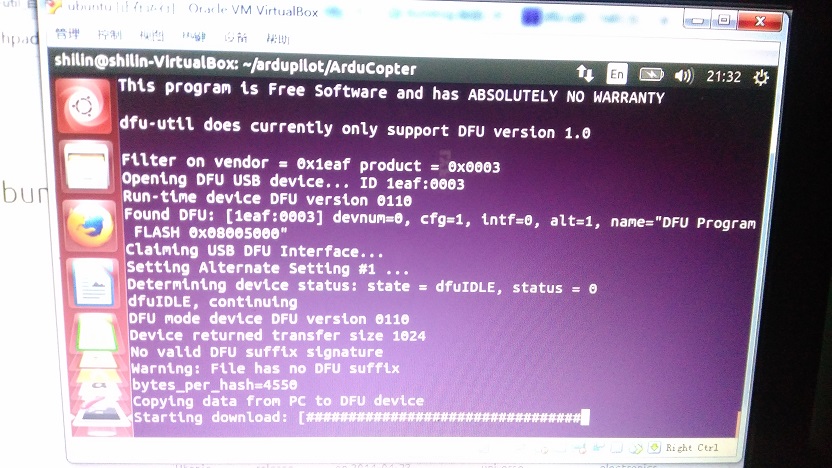
按下复位键,接上USB,就可以在PC端看到USB设备,并且烧录固件
接下来我们需要编译libmaple
cd ~/libmaple
cp main.cpp.example main.cpp
make
make install
上传固件到芯片
上述验证ok后,我们就开始编译flymaple的飞控固件
cd ~/ardupilot/
git checkout ArduCopter-3.2 (这里基于3.2移植,后面的版本变化有点大)
vim config.mk
将下面的内容复制到config.mk中
#config.mk START
# Select maple_RET6 for Flymaple
BOARD = maple_RET6
# HAL_BOARD determines default HAL target.
HAL_BOARD ?= HAL_BOARD_FLYMAPLE
# The communication port used to communicate with the Flymaple
PORT = /dev/ttyACM0
# You must provide the path to the libmaple library directory:
LIBMAPLE_PATH = $(HOME)/libmaple
# Also, the ARM compiler tools MUST be in your current PATH like:
# export PATH=$PATH:~/libmaple/arm/bin
#config.mk END
cd ~/ardupilot/ArduCopter/
make flymaple
make upload
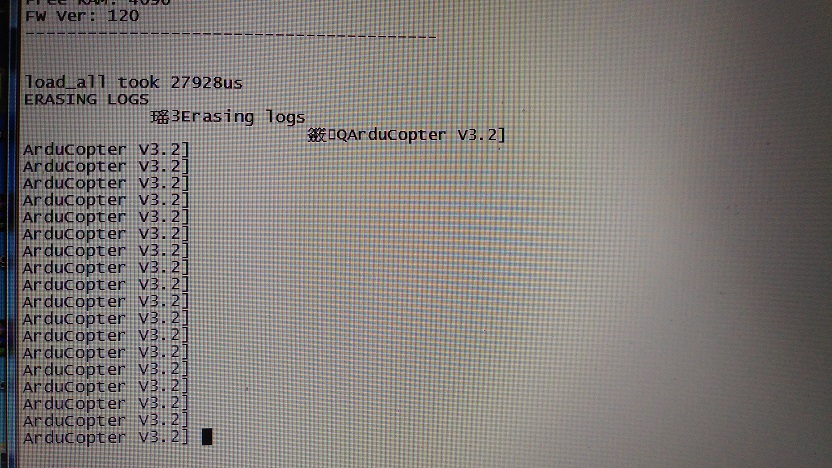
然后重启芯片,接上串口,长按空格键,就会进入到调试终端
到此关于编译部分已经全部完成,在后续文章中将介绍相关sensor的移植,以最终将飞机送上天空


 1010
1010

 被折叠的 条评论
为什么被折叠?
被折叠的 条评论
为什么被折叠?
 到【灌水乐园】发言


