


实验要求:
Objective:
To observe how the lowpass filtering smoothes an image.
Main requirements:
Ability of programming with C, C++, or Matlab.
Instruction manual:
(a) Implement the Gaussian lowpass filter in Eq. (4.3-7). You must be able to specify the size, M x N, of the resulting 2D function. In addition, you must be able to specify where the 2D location of the center of the Gaussian function.
(b) Download Fig. 4.11(a) [this image is the same as Fig. 4.18(a)] and lowpass filter it to obtain Fig. 4.18(c).
实验要求我们通过在频域的高斯低通滤波器对图像进行低通滤波。
频域滤波的处理可以参考前面的实验04-01实现。(点我打开链接)
实验代码:
% PROJECT 04-03 Lowpass Filtering
close all;
clc;
clear all;

%
img = imread('Fig4.11(a).jpg');
img = mat2gray(img);
figure;
subplot(1,3,1);
imshow(img);
title('原图像');

% 产生滤波函数
[M, N] = size(img);
P = 2 * M;
Q = 2 * N;

alf = 100;
H = zeros(P, Q);
for i = 1:P
    for j = 1:Q
        H(i, j) = exp(-((i-P/2)^2 + (j-Q/2)^2) / (2 * alf^2));
    end
end

% H = ones(P, Q);
subplot(1,3,2);
imshow(H);
title('滤波函数');

%
% 图像填充
[M, N] = size(img);
P = 2 * M;
Q = 2 * N;

img_fp = zeros(P, Q);
img_fp(1:M, 1:N) = img(1:M, 1:N);

% [X, Y] = meshgrid(1:P, 1:Q);
% ones = (-1)^(X+Y);

% img_f = ones .* img_fp;
img_f = zeros(P, Q);
for x = 1:P
    for y = 1:Q
        img_f(x, y) = img_fp(x, y) .* (-1)^(x+y);
    end
end

img_F = fft2(img_f);

img_G = img_F .* H;
img_g = real(ifft2(img_G));

% img_g = ones .* img_g;

for x = 1:P
    for y = 1:Q
        img_g(x, y) = img_g(x, y) .* (-1)^(x+y);
    end
end

img_o = img_g(1:M, 1:N);

subplot(1,3,3);
imshow(img_o, []);
title('高斯低通滤波后的图像');
其中套用公式产生高斯滤波函数的代码如下:
[M, N] = size(img);
P = 2 * M;
Q = 2 * N;

alf = 100;
H = zeros(P, Q);
for i = 1:P
    for j = 1:Q
        H(i, j) = exp(-((i-P/2)^2 + (j-Q/2)^2) / (2 * alf^2));
    end
end
其余部分就是频率域滤波的流程,不做赘述。
实验结果:
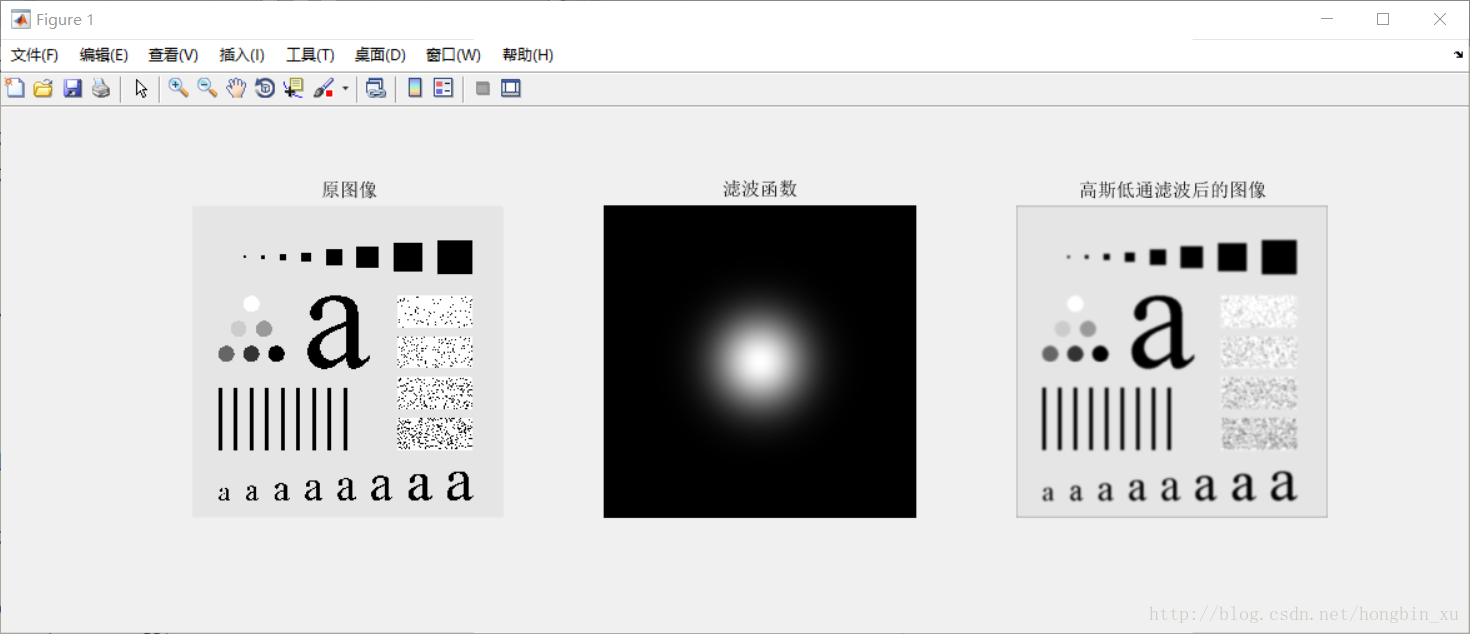
说明:
第一幅图是原始图像;
第二幅是高斯低通滤波器;
第三幅是低通滤波处理后的结果,其较原始图像明显变得更模糊。


 2981
2981

 被折叠的 条评论
为什么被折叠?
被折叠的 条评论
为什么被折叠?
 到【灌水乐园】发言


