


1,dlib库的安装
准备工具:
(1)cmake,https://cmake.org/download/
(2)dlib库,http://dlib.net/,19.2的版本需要vs2015才可以支持,我这里安装的是18.17,http://download.csdn.net/detail/qq_14845119/9717274只需vs2013就可以支持。
开始编译,
这里,需要使用cmake编译2个东东,一个是dlib的库,生成vs可以使用的.sln工程,另一个就是examples,同样生成vs可以使用的.sln工程。
where is the source code 和where tobuild the binaries可以参考本人的配置,配置好后,点击Configure,选择vs2013编译器,完毕后,点击Generate,到此就可以在build路径下生成Project.sln,build_examples路径下生成examples.sln
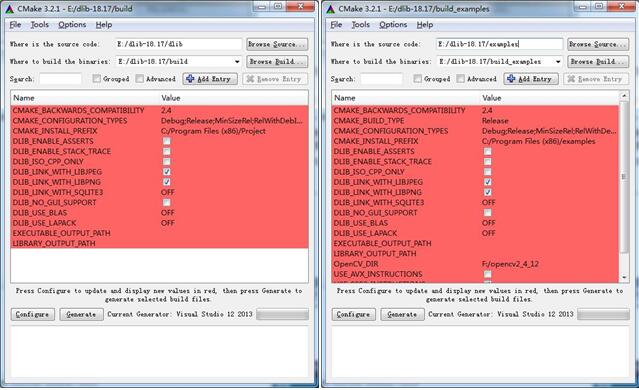
用vs2013点击上面的sln分别打开,然后选择ALL_BUILD,右键生成即可。完毕后就可以生成,dlib.lib和各个examples的exe文件。
2,人脸检测+对齐
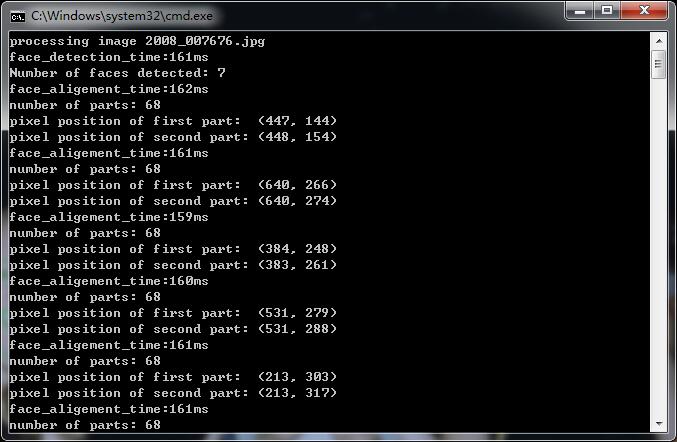
这里检测用的hog特征进行的人脸检测,本人测试是150MS的样子,
对齐使用的是2014的cvpr,One Millisecond FaceAlignment with an Ensemble of Regression Trees by Vahid Kazemi and JosephineSullivan,对齐速度,本人测试也是150MS的样子。
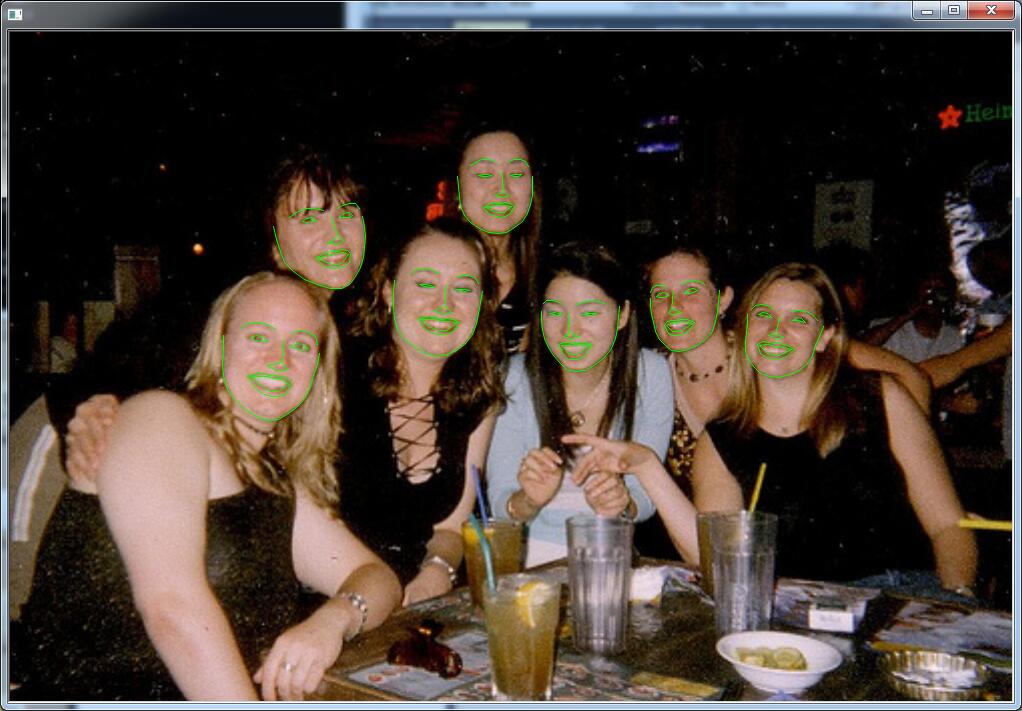
对齐效果还是很不错的。
训练好的对齐模型需要自行下载,http://dlib.net/files/shape_predictor_68_face_landmarks.dat.bz2,95M的样子。
VS配置:
vc++目录:
E:\dlib-18.17\
E:\dlib-18.17\dlib\external\libjpeg
C/C++,链接,输入:
dlib.lib
程序代码:
#define DLIB_JPEG_SUPPORT
#include <dlib/image_processing/frontal_face_detector.h>
#include <dlib/image_processing/render_face_detections.h>
#include <dlib/image_processing.h>
#include <dlib/gui_widgets.h>
#include <dlib/image_io.h>
#include <iostream>

using namespace dlib;
using namespace std;

int main(int argc, char** argv)
{
	argc = 3;
	argv[1] = "shape_predictor_68_face_landmarks.dat";
	argv[2] = "2008_007676.jpg";

	try
	{
		// This example takes in a shape model file and then a list of images to
		// process.  We will take these filenames in as command line arguments.
		// Dlib comes with example images in the examples/faces folder so give
		// those as arguments to this program.
		if (argc == 1)
		{
			cout << "Call this program like this:" << endl;
			cout << "./face_landmark_detection_ex shape_predictor_68_face_landmarks.dat faces/*.jpg" << endl;
			cout << "\nYou can get the shape_predictor_68_face_landmarks.dat file from:\n";
			cout << "http://dlib.net/files/shape_predictor_68_face_landmarks.dat.bz2" << endl;
			return 0;
		}

		// We need a face detector.  We will use this to get bounding boxes for
		// each face in an image.
		frontal_face_detector detector = get_frontal_face_detector();
		// And we also need a shape_predictor.  This is the tool that will predict face
		// landmark positions given an image and face bounding box.  Here we are just
		// loading the model from the shape_predictor_68_face_landmarks.dat file you gave
		// as a command line argument.
		shape_predictor sp;
		deserialize(argv[1]) >> sp;


		image_window win, win_faces;
		// Loop over all the images provided on the command line.
		for (int i = 2; i < argc; ++i)
		{
			cout << "processing image " << argv[i] << endl;
			array2d<rgb_pixel> img;
			load_image(img, argv[i]);
			// Make the image larger so we can detect small faces.
			pyramid_up(img);

			// Now tell the face detector to give us a list of bounding boxes
			// around all the faces in the image.
			clock_t start2, end2;
			start2 = clock();
			std::vector<rectangle> dets = detector(img);
			end2 = (double)(1000 * (clock() - start2) / CLOCKS_PER_SEC);
			cout << "face_detection_time:" << end2 <<"ms"<< std::endl;

			cout << "Number of faces detected: " << dets.size() << endl;

			// Now we will go ask the shape_predictor to tell us the pose of
			// each face we detected.
			std::vector<full_object_detection> shapes;
			for (unsigned long j = 0; j < dets.size(); ++j)
			{
				clock_t start2, end2;
				start2 = clock();
				std::vector<rectangle> dets = detector(img);

				full_object_detection shape = sp(img, dets[j]);

				end2 = (double)(1000 * (clock() - start2) / CLOCKS_PER_SEC);
				cout << "face_aligement_time:" << end2 <<"ms"<< std::endl;

				cout << "number of parts: " << shape.num_parts() << endl;
				cout << "pixel position of first part:  " << shape.part(0) << endl;
				cout << "pixel position of second part: " << shape.part(1) << endl;
				// You get the idea, you can get all the face part locations if
				// you want them.  Here we just store them in shapes so we can
				// put them on the screen.
				shapes.push_back(shape);
			}

			// Now let's view our face poses on the screen.
			win.clear_overlay();
			win.set_image(img);
			win.add_overlay(render_face_detections(shapes));

			// We can also extract copies of each face that are cropped, rotated upright,
			// and scaled to a standard size as shown here:
			dlib::array<array2d<rgb_pixel> > face_chips;
			extract_image_chips(img, get_face_chip_details(shapes), face_chips);
			win_faces.set_image(tile_images(face_chips));

			cout << "Hit enter to process the next image..." << endl;
			cin.get();
		}
	}
	catch (exception& e)
	{
		cout << "\nexception thrown!" << endl;
		cout << e.what() << endl;
	}
}
实验结果:
程序+论文下载链接:
http://download.csdn.net/detail/qq_14845119/9717266


 2416
2416


 被折叠的 条评论
为什么被折叠?
被折叠的 条评论
为什么被折叠?
 到【灌水乐园】发言


