


 本文介绍了Unity中通过指定不同的渲染通道实现多效果输出的方法。详细解释了如何在Shader中设置多个Pass,并通过C#脚本在运行时切换不同的Pass以达到不同的渲染效果。
上一篇博客讲了MRT多重渲染,这篇接着学习通过一个shader输出不同效果的另一种方法——指定不同的渲染通道。
渲染通道在unity Shader中就是SubShader中的Pass。之前的shader中都只有一个Pass,也就是单通道渲染,这样的话如果要对同一个RenderTexture在不同的时刻进行不同的渲染效果输出就需要不停的更换shader。当然,也可以使用多重渲染,但是如果一次只用一个效果,用多重渲染则有些浪费。这个时候就需要多通道渲染。
多通道渲染就是在一个shader中有多个Pass,玩家可以根据需求设定通过哪个Pass来进行渲染,从而实现在不同的时候对使用同一个shader对同一个对象进行不同的效果处理。
1. Shader
先上Shader代码:
Shader "Custom/PassTest" {
    Properties{
        _MainTex("Base (RGB)", 2D) = "white" {}
    }

        CGINCLUDE

        #include "UnityCG.cginc"

        sampler2D _CameraDepthTexture;
        uniform sampler2D _MainTex;

        struct v2f {
            float4 pos : SV_POSITION;
            float4 scrPos:TEXCOORD0;
            float2 uv : TEXCOORD1;
        };
        //Vertex Shader
        v2f vert(appdata_base v) {
            v2f o;
            o.pos = mul(UNITY_MATRIX_MVP, v.vertex);
            o.scrPos = ComputeScreenPos(o.pos);
            o.uv = v.texcoord.xy;
            return o;
        }

        //Reverse frag
        float4 fragReverse(v2f i) :COLOR{
            fixed4 col = tex2D(_MainTex, i.uv);
            // just invert the colors
            col = 1 - col;
            return col;
        }
        //Dept frag
        float4 fragDepth(v2f i) :COLOR{
            float depthValue = 1 - Linear01Depth(tex2Dproj(_CameraDepthTexture, UNITY_PROJ_COORD(i.scrPos)).r);
            return float4(depthValue, depthValue, depthValue, 1.0f);
        }

        ENDCG

    Subshader {
        Tags{ "RenderType" = "Opaque" }
        //Pass 0
        Pass{
            ZTest Always Cull Off ZWrite Off
            Fog{ Mode off }

            CGPROGRAM
            #pragma glsl
            #pragma fragmentoption ARB_precision_hint_fastest
            #pragma vertex vert
            #pragma fragment fragReverse
            #pragma target 3.0
            ENDCG
        }
        //Pass 1
        Pass{
            ZTest Always Cull Off ZWrite Off
            Fog{ Mode off }

            CGPROGRAM
            #pragma glsl
            #pragma fragmentoption ARB_precision_hint_fastest
            #pragma vertex vert
            #pragma fragment fragDepth
            #pragma target 3.0
            ENDCG
        }
    }

    Fallback "Diffuse"
}
shader并不难,所有的方法和变量都放在了SubShader外面,其中,vert是顶点方法,fragReverse是颜色反向的片段方法,fragDepth是深度图的片段方法。
在SubShader中有两个Pass,从上到下分别对应0,1,2……。Shader的主体,包括顶点和片段方法的指定都在这些对应的Pass中。这里由于两个Pass共用同一个顶点方法,所以vertex都是vert,第一个Pass调用fragReverse来实现颜色反向效果,二第二个Pass调用fragDepth来输出深度图。
现在shader有了,再来看看如何在脚本中修改渲染通道。
2. 修改渲染通道
先上代码:
using System.Collections;
using System.Collections.Generic;
using UnityEngine;

public enum PassType
{
    Reverse,
    Depth
}
public class CameraRanderPass : MonoBehaviour {

    public PassType showType = PassType.Reverse;
    public Material Mat;

    void OnRenderImage(RenderTexture src, RenderTexture dest)
    {
        Graphics.Blit(src, dest, Mat, (int)showType);
    }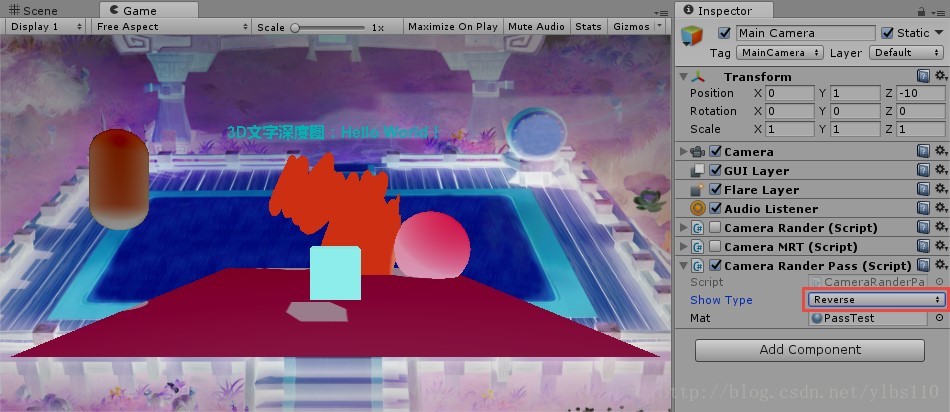
}C#脚本也很简单,和之前差不多,关键的不同是Graphics.Blit(src, dest, Mat, (int)showType);的最后多了个参数。Graphics.Blit的第四个参数是通道指定参数,可省略,默认为0,也就是第一个Pass。
通常写shader都只有一个Pass,省略这个参数将会默认调用这个Pass,现在有了两个Pass,我们就可以通过传入不同的值(int)来指定通过不同的通道进行渲染。在这里,为了方便调用,我定义了一个PassType枚举,Reverse表示颜色反向,Depth表示深度,和Shader中对应。
转载请注明出处:http://blog.csdn.net/ylbs110/article/details/53560444
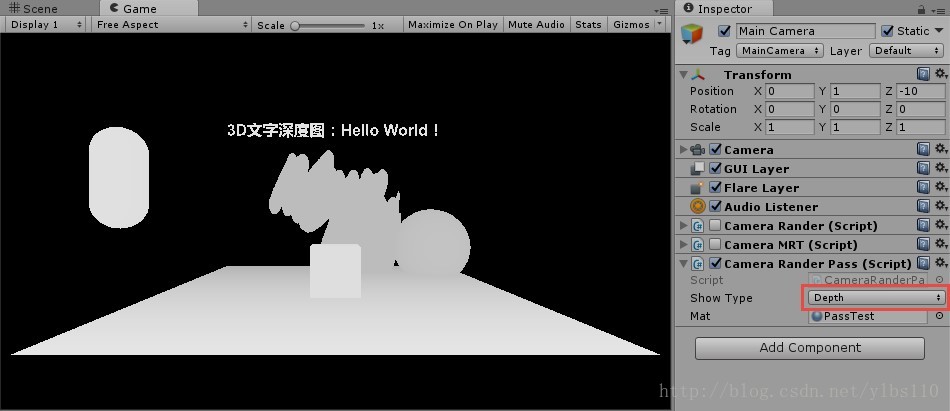
下面来看看选择这两个Pass后的不同输出效果:
Reverse:
Depth:


 299
299

 被折叠的 条评论
为什么被折叠?
被折叠的 条评论
为什么被折叠?
 到【灌水乐园】发言


