


使用PyTorch框架来实现行人图像检测和行人特征提取 如何构建基于深度学习的行人重识别系统,并建立GUI界面 使用openCV调用基于多尺度检测的改进的YOLO算法模型来进行行人检测
深度学习行人重识别
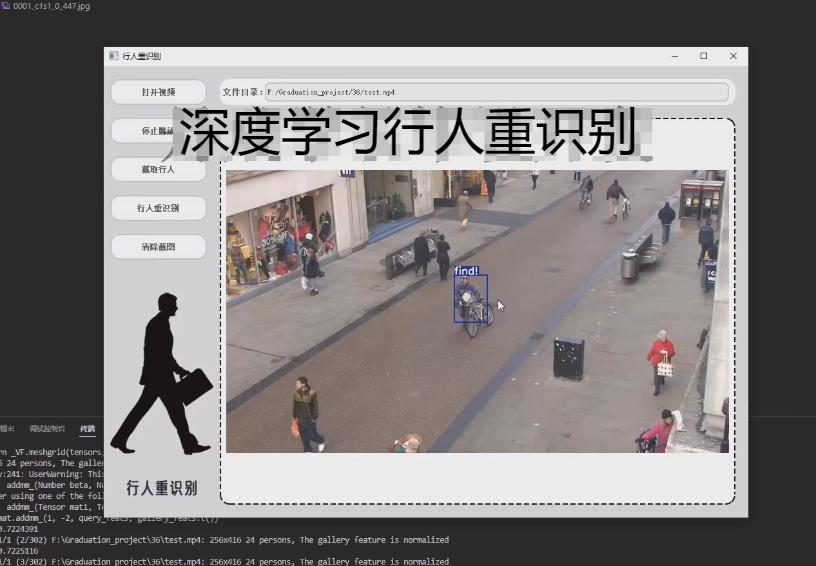
实现功能
行人重识别系统基于PyTorch框架实现,首先,需要使用PyTorch来实现行人图像检测和行人特征提取。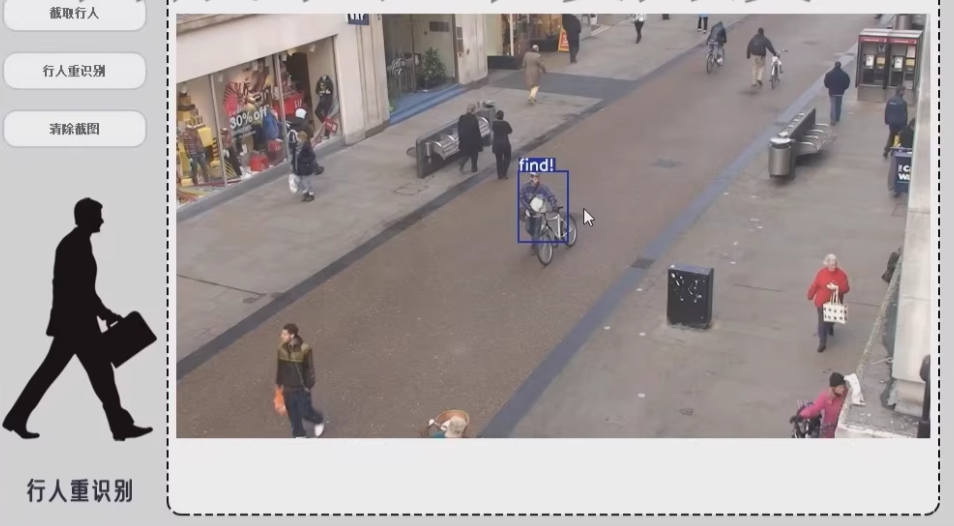
对于检测部分,使用openCV调用基于多尺度检测的改进的YOLO算法模型来进行行人检测。在检测到行人后,对行人图像区域进行截取并进行大小规范化。对于特征提取部分,使用预先训练好的引入空洞卷积的resnet-50卷积神经网络来提取行人图像的视觉特征。接下来,需要对特征进行比对。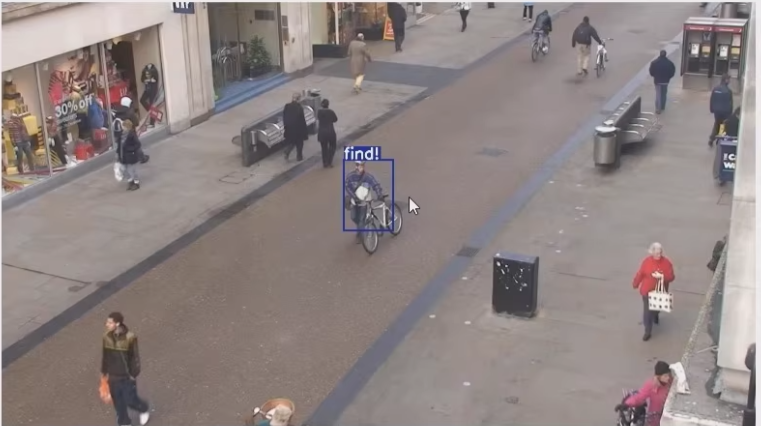
使用欧氏距离来计算两个特征之间的相似度。如果两个特征之间的距离小于特定的阈值,就认为这两个特征来自同一个行人,否则我们认为它们来自不同行人。
最后,对于界面部分,使用PyQt5来构建交互式界面。在界面上显示行人图像和识别结果,并提供一些按钮来让用户进行相应的操作。
构建一个基于深度学习的行人重识别系统是一个复杂的任务,涉及到多个步骤:行人检测、特征提取、特征比对以及用户界面设计。
以下关键代码仅供参考。
1. 环境配置
确保安装了必要的库:
pip install torch torchvision opencv-python PyQt5 numpy scikit-learn
2. 行人检测
使用OpenCV调用改进的YOLO算法模型进行行人检测。
import cv2

def detect_pedestrians(image_path, yolo_model_path):
    net = cv2.dnn.readNet(yolo_model_path)
    layer_names = net.getLayerNames()
    output_layers = [layer_names[i[0] - 1] for i in net.getUnconnectedOutLayers()]

    image = cv2.imread(image_path)
    height, width, channels = image.shape

    blob = cv2.dnn.blobFromImage(image, 0.00392, (416, 416), (0, 0, 0), True, crop=False)
    net.setInput(blob)
    outs = net.forward(output_layers)

    class_ids = []
    confidences = []
    boxes = []

    for out in outs:
        for detection in out:
            scores = detection[5:]
            class_id = np.argmax(scores)
            confidence = scores[class_id]
            if confidence > 0.5 and class_id == 0:  # Assuming class 0 is 'person'
                center_x = int(detection[0] * width)
                center_y = int(detection[1] * height)
                w = int(detection[2] * width)
                h = int(detection[3] * height)

                x = int(center_x - w / 2)
                y = int(center_y - h / 2)

                boxes.append([x, y, w, h])
                confidences.append(float(confidence))
                class_ids.append(class_id)

    indexes = cv2.dnn.NMSBoxes(boxes, confidences, 0.5, 0.4)

    pedestrians = []
    for i in range(len(boxes)):
        if i in indexes:
            x, y, w, h = boxes[i]
            cropped_image = image[y:y+h, x:x+w]
            pedestrians.append(cropped_image)

    return pedestrians
3. 特征提取
使用引入空洞卷积的ResNet-50模型提取行人图像的视觉特征。
import torch
import torch.nn as nn
from torchvision import models, transforms

class ResNet50WithDilatedConv(nn.Module):
    def __init__(self):
        super(ResNet50WithDilatedConv, self).__init__()
        resnet = models.resnet50(pretrained=True)
        self.features = nn.Sequential(*list(resnet.children())[:-2])
        self.avgpool = nn.AdaptiveAvgPool2d((1, 1))

    def forward(self, x):
        x = self.features(x)
        x = self.avgpool(x)
        x = torch.flatten(x, 1)
        return x

def extract_features(pedestrian_images):
    model = ResNet50WithDilatedConv().eval()
    transform = transforms.Compose([
        transforms.Resize((224, 224)),
        transforms.ToTensor(),
        transforms.Normalize(mean=[0.485, 0.456, 0.406], std=[0.229, 0.224, 0.225]),
    ])

    features = []
    with torch.no_grad():
        for img in pedestrian_images:
            img_tensor = transform(img).unsqueeze(0)
            feature = model(img_tensor)
            features.append(feature.numpy())

    return np.array(features)
4. 特征比对
使用欧氏距离计算两个特征之间的相似度。
from scipy.spatial.distance import cdist

def compare_features(query_feature, gallery_features, threshold=0.7):
    distances = cdist(query_feature, gallery_features, metric='euclidean')
    min_distance = np.min(distances)
    if min_distance < threshold:
        return True, min_distance
    else:
        return False, min_distance
5. 用户界面设计
使用PyQt5构建交互式界面。
import sys
from PyQt5.QtWidgets import QApplication, QMainWindow, QPushButton, QLabel, QVBoxLayout, QWidget, QFileDialog, QLineEdit
from PyQt5.QtGui import QPixmap, QImage

class PersonReIDApp(QMainWindow):
    def __init__(self):
        super().__init__()
        self.initUI()

    def initUI(self):
        self.setWindowTitle('行人重识别')
        self.setGeometry(100, 100, 800, 600)

        self.image_label = QLabel(self)
        self.image_label.setGeometry(100, 100, 600, 400)

        self.load_button = QPushButton('打开视频', self)
        self.load_button.move(100, 550)
        self.load_button.clicked.connect(self.load_video)

        self.detect_button = QPushButton('行人检测', self)
        self.detect_button.move(300, 550)
        self.detect_button.clicked.connect(self.detect_pedestrians)

        self.file_path_edit = QLineEdit(self)
        self.file_path_edit.setGeometry(100, 510, 600, 30)

    def load_video(self):
        options = QFileDialog.Options()
        file_name, _ = QFileDialog.getOpenFileName(self, "选择视频", "", "Videos (*.mp4 *.avi);;All Files (*)", options=options)
        if file_name:
            self.file_path_edit.setText(file_name)

    def detect_pedestrians(self):
        video_path = self.file_path_edit.text()
        if video_path:
            cap = cv2.VideoCapture(video_path)
            ret, frame = cap.read()
            if ret:
                pedestrians = detect_pedestrians(frame, 'yolov3.weights')
                features = extract_features(pedestrians)
                # 进一步处理和显示结果
                cap.release()

if __name__ == '__main__':
    app = QApplication(sys.argv)
    ex = PersonReIDApp()
    ex.show()
    sys.exit(app.exec_())
如何构建基于深度学习的行人重识别系统,并附带了一个简单的GUI界面。你可以根据实际需求调整模型结构、优化超参数或改进GUI布局,


 4万+
4万+

 被折叠的 条评论
为什么被折叠?
被折叠的 条评论
为什么被折叠?
 到【灌水乐园】发言


