


先导知识
PWM
- 通过数字技术实现模拟结果。通过数字控制创建方波,高电平相当于开关开,低电平相当于开关关,进行来回切换。通过控制方波出现的频率来实现对电压高低的模拟。就拿小灯泡来说,频率越低,灯越暗,相当于电压越低。频率越高,灯越亮,相当于电压高。类比,来控制风扇的快慢和方向。
ULN2003驱动板
- ULN2003驱动的图示
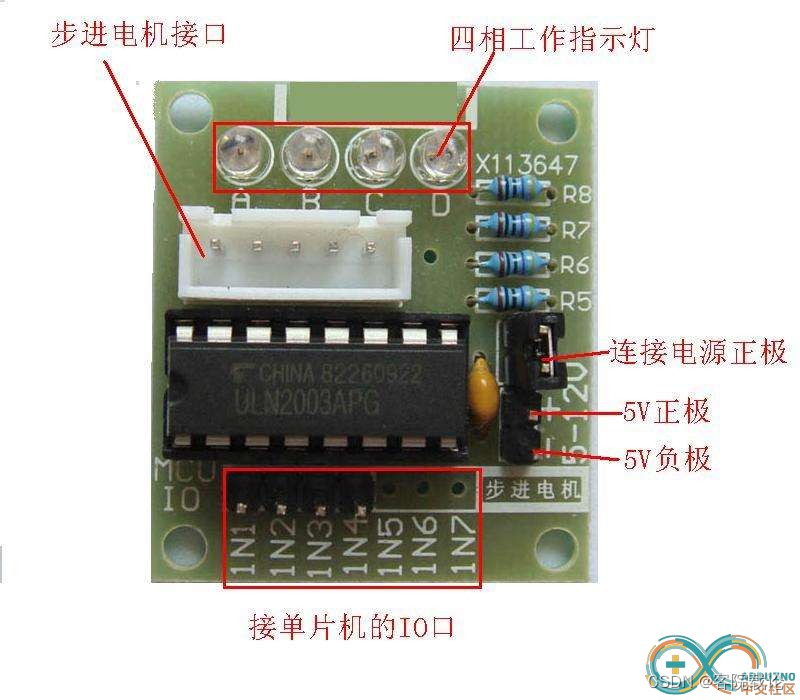
- ULN2003驱动的电路图
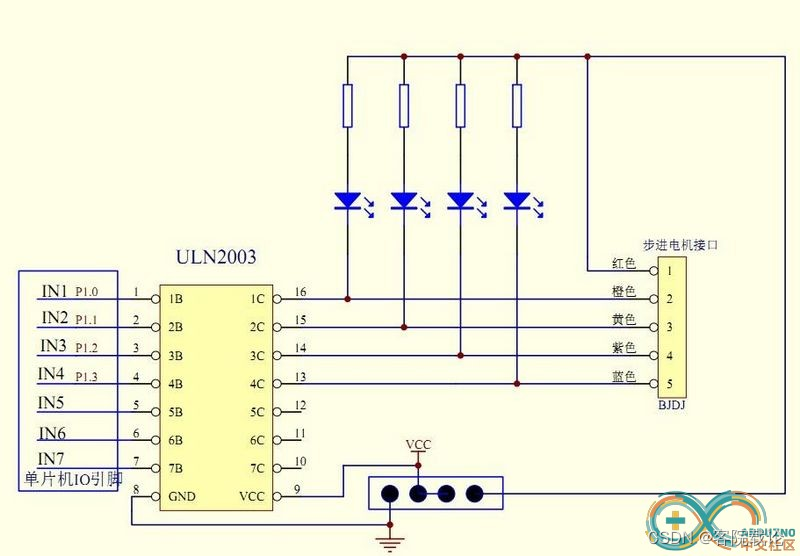
- 对照这个电路图,就可以知道这个怎么利用ULN2003芯片,怎么实现接线,见下图。
实际接线
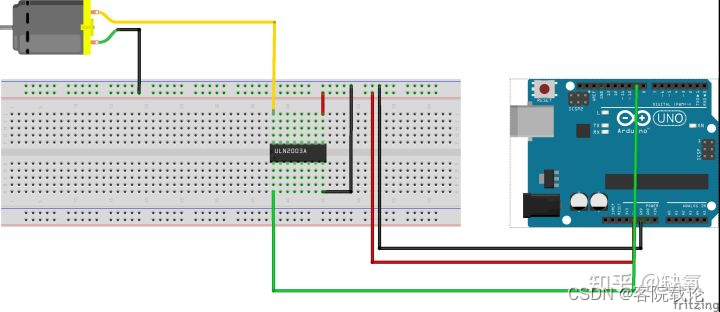
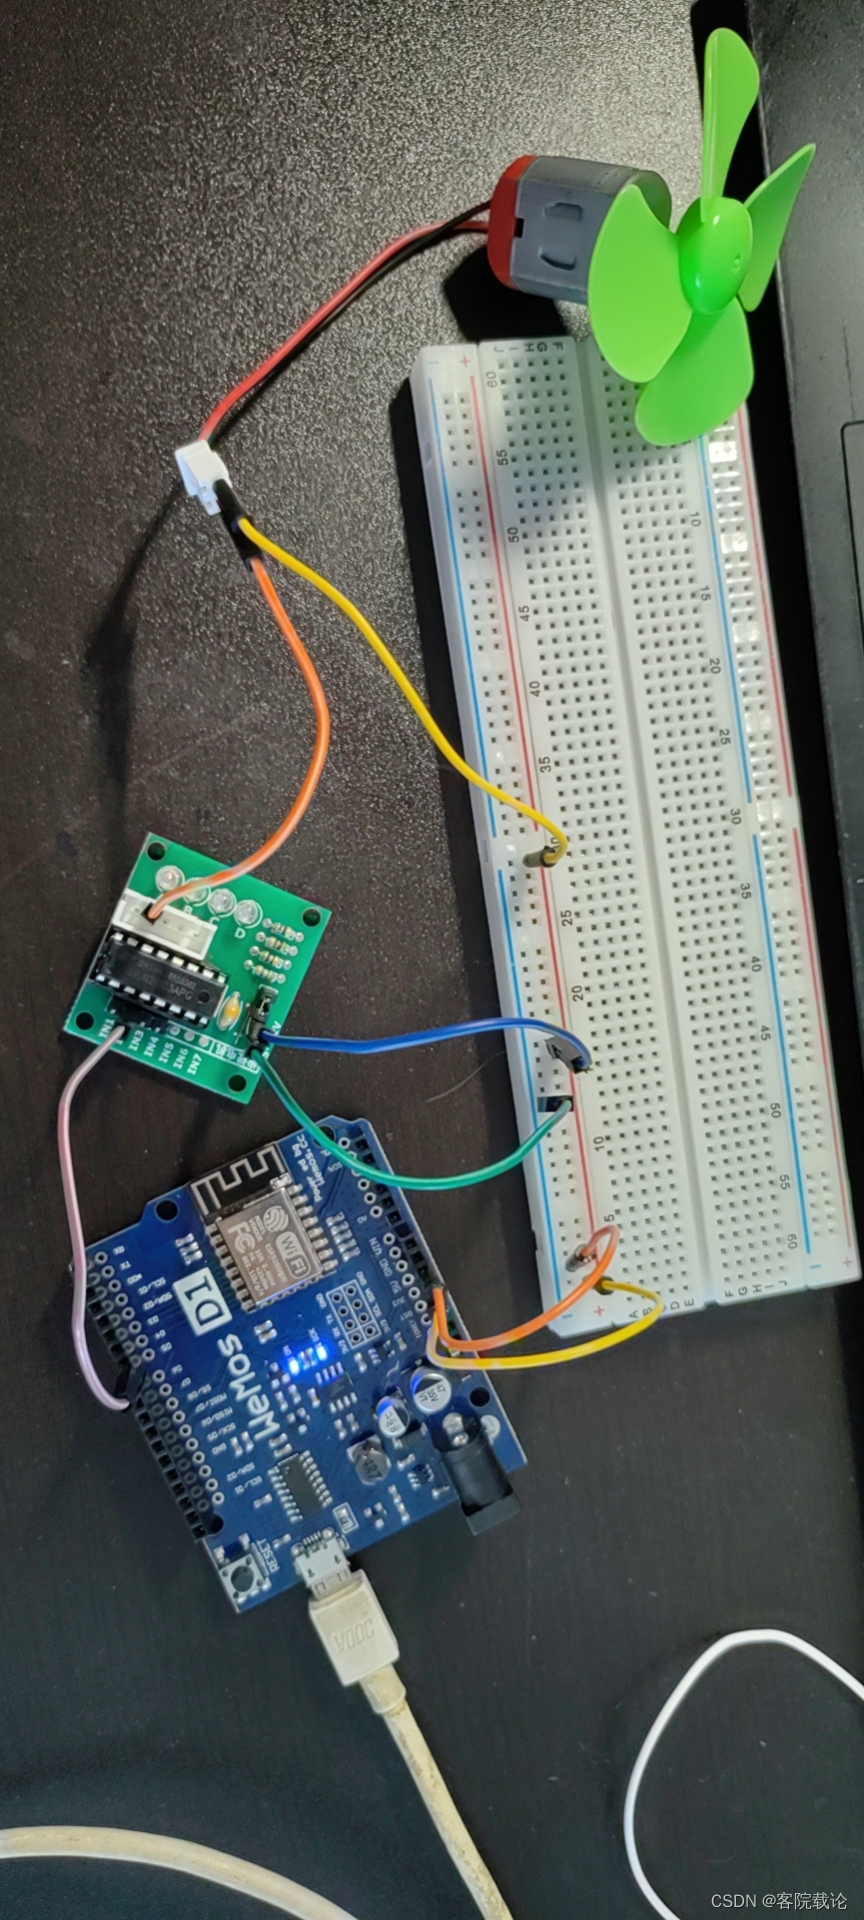
- 按照下图进行接线
- 运行代码
#define MotorPin D5

void setup() {
  // put your setup code here, to run once:
  pinMode(MotorPin,OUTPUT);
  Serial.begin(9600);
}

void ControlFans(int LastTime){
  analogWrite(MotorPin,1200);
  delay(LastTime * 1000);
  analogWrite(MotorPin,0);
}
void loop() {
  ControlFans(10);
}
结果
- 最终风扇会运行10秒钟,然后停下,然后再运行10秒钟。
参考
- https://blog.csdn.net/hypecycle/article/details/110674844
- https://zhuanlan.zhihu.com/p/444385188
- https://www.arduino.cn/thread-91049-2-1.html


 1912
1912

 被折叠的 条评论
为什么被折叠?
被折叠的 条评论
为什么被折叠?
 到【灌水乐园】发言


