


目录
前言
关于音乐和音效的部分因为不是这次实验的主要内容,所以没有特别的描述怎么配置使用,如果对此感兴趣的同学可以参考我另一篇文章。传送门在这
一、实验目的与要求
1.熟悉交互界面设计原理。
2.了解Cocos2d-x中的用户交互、触摸事件、碰撞检测机制。
二、实验内容与方法
1.完成游戏编译 (20分)
仿照实验一“英雄快跑”实验,将教材源码和素材文件复制到自己的项目中,成功编译并运行本次实验----“贪食豆”游戏。
2.修改游戏显示名称 (5分)
通过修改游戏代码,使自己的学号姓名(中文)替换原“MyGame”字样出现在标题栏左上角。
3.增加摇杆上下移动功能 (5分)
修改游戏代码,使贪食豆在屏幕范围内能上下左右移动。
4.增加计分板功能 (5分)
修改游戏代码,增加计分板功能。
5.增加 UI 登录界面(含 Play 按钮) (10分)
请自行下载素材,用Cocos Studio UI Editor设计个性化登录界面(含按钮),并在项目中加载该登录界面,实现开始游戏(Play)功能。
6.增加Replay按钮(5分)
在游戏结束时添加Replay按钮,实现重新开始游戏(Replay)功能。
7. 游戏优化(5分)
自行发挥想象力,检查并优化游戏功能。
8.录制通关视频 (5分)
录制游戏通关视频,上传至BB系统。
9.完成实验报告 (40分)
截图记录关键步骤,分析实验结果,撰写心得体会。
三、实验步骤与过程
1. 完成游戏编译
首先我们使用 cocos new MyGame -p com.2020152011.edu -l cpp -d Experiment_2 命令创建新项目。

(图1.1 - PowerShell窗口)
创建结果如下:
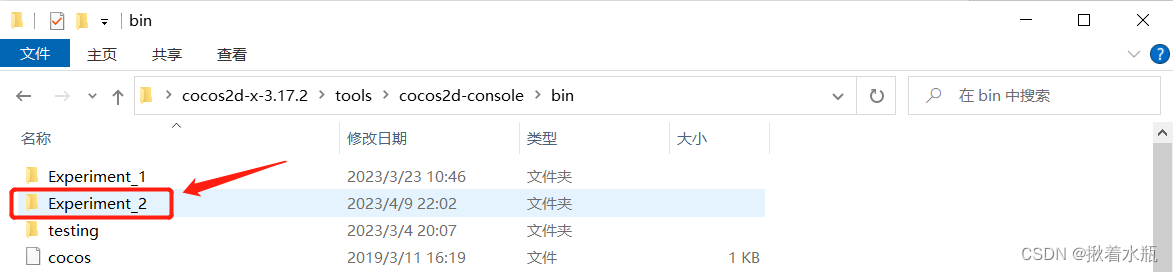
(图1.2 - 创建结果截图)
接着我们把本次实验的代码内容复制替换到生成的项目中的"Classes"文件夹内。
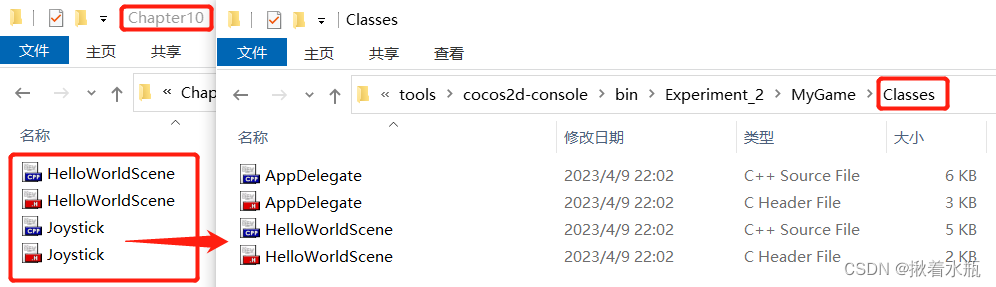
(图1.3 - "Classes"文件夹)
下面同样我们把实验内容中的图片、地图、字体资源复制到生成的项目中的"Resources"文件夹内。
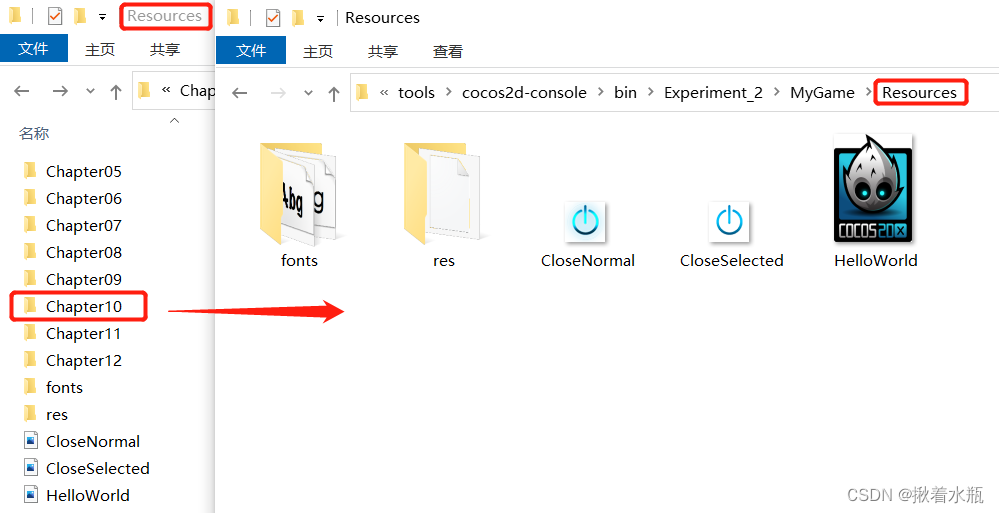
(图1.4 - " Resources "文件夹)
接下来打开Visual Studio,添加、删除现有项(类)。
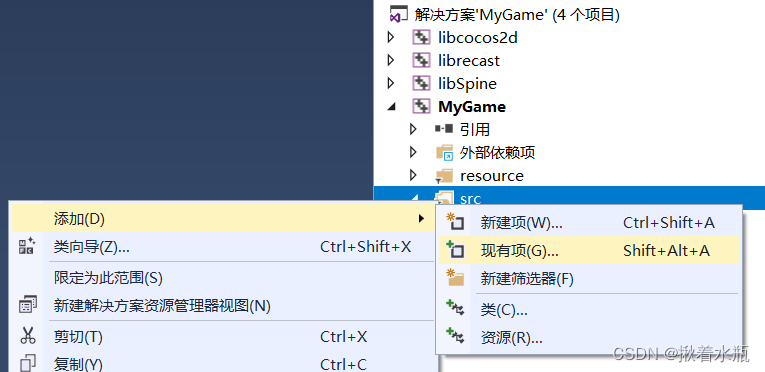
(图1.5 - Visual Studio窗口)
最后点击调试器按钮,稍等片刻,即可成功运行本次实验游戏。
(图1.6 - 调试器按钮)
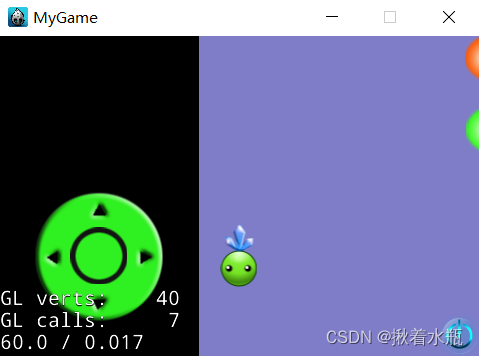
(图1.7 - 游戏运行成功初始画面)
2. 修改游戏显示名称
尝试修改在AppDelegate.cpp中的applicationDidFinishLaunching函数。
略
(图2.1 - AppDelegate.cpp - applicationDidFinishLaunching函数)
运行后可以看到如图2.2,中文无法正常显示,通过查阅资料发现,这是因为VisualStudio 的默认编码方式为 GBK 格式,而 cocos2d x 引擎的默认编码格式为 UTF-8 格式,故中文会出现无法兼容的情况,所以需要将 GBK 编码转为 UTF-8 编码。
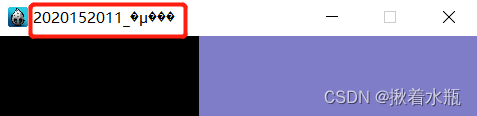
(图2.2 - 第一次修改后的运行窗口)
我们在AppDelegate.cpp中添加用于把GBK转换成UTF-8的代码,如下图2.3所示:
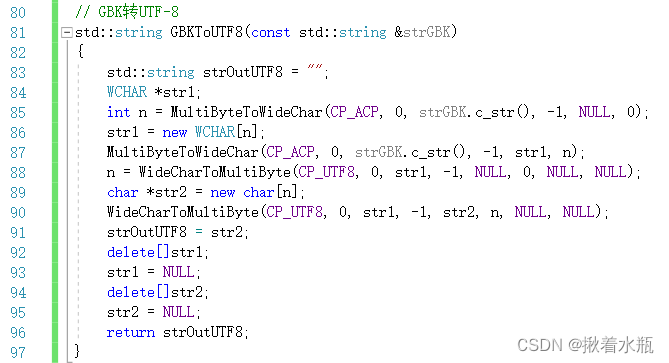
(图2.3 - AppDelegate.cpp - GBKToUTF8函数)
接着再次修改applicationDidFinishLaunching函数,对于中文的部分调用上述的转换函数,之后点击调试器按钮,可以看到如图2.5,中文正常显示。
略
(图2.4 - AppDelegate.cpp - applicationDidFinishLaunching函数)
略
(图2.5 - 第二次修改后的运行窗口)
3. 增加摇杆上下移动功能
为了增加摇杆上下移动功能,我们首先观察Joystick.h的源代码,发现其声明了一个枚举类型enum Joystick_dir{_LEFT,_RIGHT,_STOP}; 再结合其余文件的代码可知,该枚举类型的作用是用来判断移动精灵的左右移动。
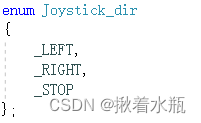
(图3.1 - Joystick.h - enum Joystick_dir)
注意到源代码中只会返回LEFT、RIGHT、STOP,三种状态。如果需要增加上下移动,则需要进一步增加返回的数据量。
然而,我打算设计一种“直接根据摇杆的移动角度来确定移动精灵的移动方向”的新的角色移动方案,来替代掉上面这种方向枚举的方法。
首先我们在Joystick.h摇杆文件中加入一个新的变量angle,以及用于获取该变量值的函数getAngle() ;变量angle用来记录摇杆的弧度,取值范围是:-π ~ π。。
![]()
(图3.2 - Joystick.h - 新的变量与函数)
接着在HelloWorldScene.cpp文件中获取angle值,根据角度(弧度)值,我们就可以确定bean的移动方向了,设其每次的移动距离为6,则可确定其在x轴和y轴上的移动距离了。代码内容如下:

(图3.3 - HelloWorldScene.cpp - 修改后的update函数1/2)
同时我们也要限定bean的上下左右移动范围,不能让bean超出范围,如果超出,会将bean重新退回规定区域内。代码内容如下:
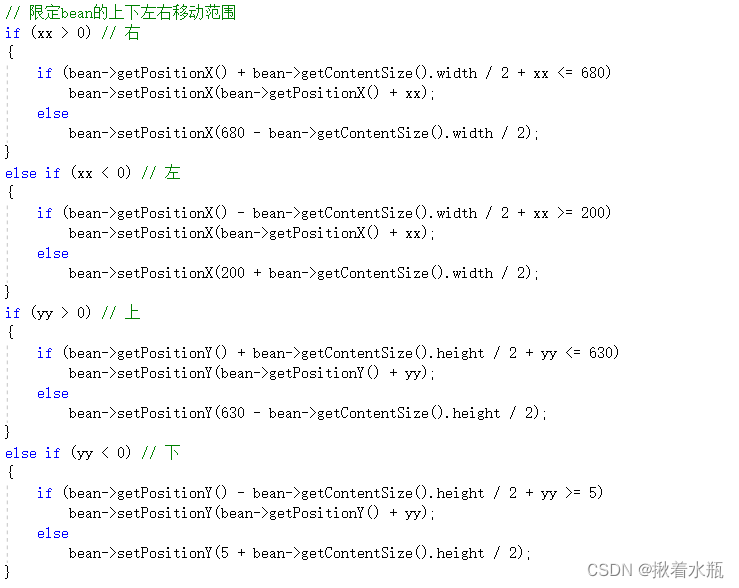
(图3.4 - HelloWorldScene.cpp - 修改后的update函数2/2)
4. 增加计分板功能
为了在游戏加入计分功能,我们在HelloWorldScene.cpp文件的addBall函数中创建小球的精灵后,通过ball->setTag(int)给小球精灵设置识别标签。

(图4.1 - HelloWorldScene.cpp - 修改后的allBall函数)
然后我们新增一个更新得分函数updateScore(ball),该函数在update函数中通过遍历所有的球,检验出角色与小球相碰后调用,其功能为通过getTag() 获取碰到的小球的tag,然后识别角色碰到是哪一个球,再增加适当的分数(白球增加1分,红球2分,绿球3分)。
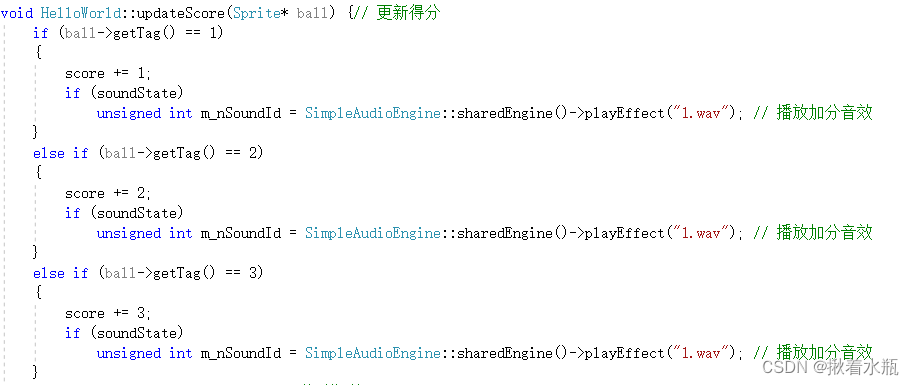
(图4.2 - HelloWorldScene.cpp - updateScore函数1/2)
关于得分的显示则可用如下图4.3中的Label类型的Label::createWithSystemFont(...)来实现 ,并且每次更新得分后,通过windows提供的itoa函数把得分变量score转换为字符串类型,再用Label->setString(str) 设置新的得分内容即可(图4.4内容)。
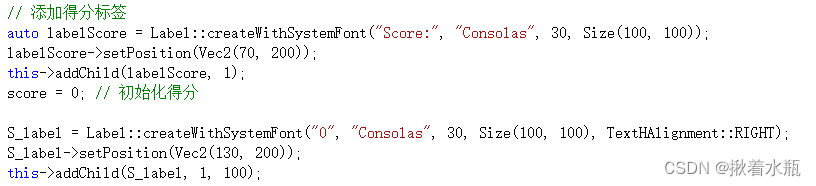
(图4.3 - HelloWorldScene.cpp - init函数中的添加得分标签部分)

(图4.4 - HelloWorldScene.cpp - updateScore函数2/2)
效果如下图4.5:

(图4.5 - 效果图)
5. 增加 UI 登录界面(含 Play 按钮)
首先我们使用Cocos Studio UI Editor设计一个登录界面。
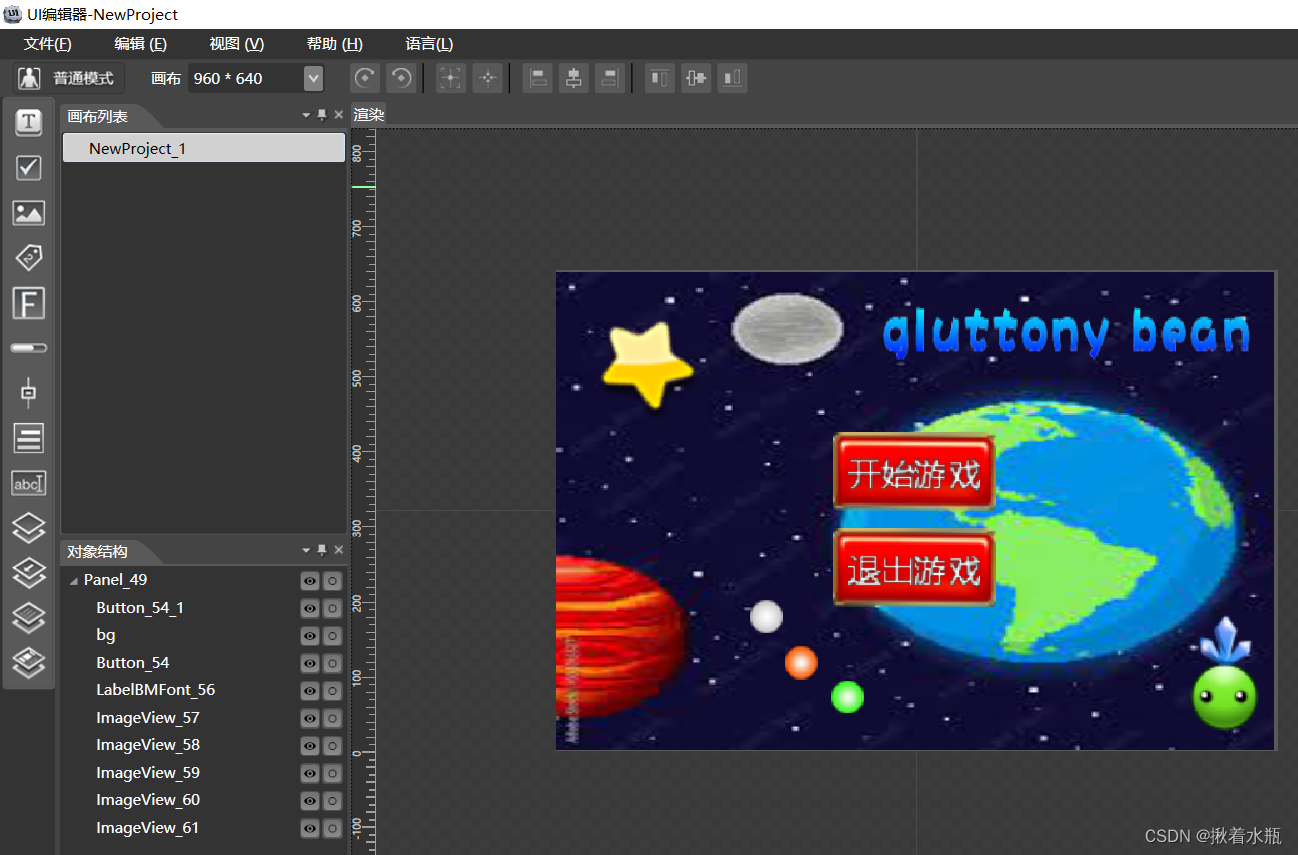
(图5.1 - Cocos Studio UI Editor窗口)
接着在项目中加载该登录界面。这里我参考了HelloWorldScene.h与HelloWorldScene.cpp写了一个类似的用于加载登录界面的UIScene.h与UIScene.cpp。

(图5.2 - UIScene.h)
在UIScene.cpp文件中,我们要在init函数中导入UI文件(图5.3),以及绑定按钮事件(图5.4 )。共有两个按钮,一个是开始游戏,即跳转到游戏界面,另一个是退出游戏。
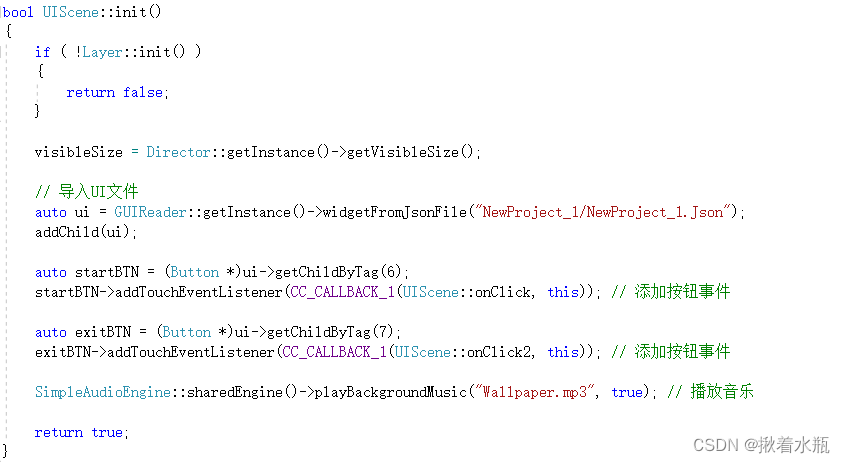
(图5.3 - UIScene.cpp - init函数)

(图5.4 - UIScene.cpp - 按钮回调函数)
最后我们还要在AppDelegate.cpp中将首个场景设置为登录界面UIScene。

(图5.5 - AppDelegate.cpp - applicationDidFinishLaunching函数)
6. 增加Replay按钮
因为要在游戏结束时添加Replay按钮,实现重新开始游戏功能,而原本游戏没有结束标志,是一直运行的,所以我们得先设计让游戏结束的条件,这里我设计了两种结束的方法:
一种是在原来白红绿三球的基础上,加上第四个球——炸弹。创建函数addBomb与其他创建小球的函数几本一样,当移动角色碰到炸弹时,角色通过setVisible(false)函数隐藏,并创建新的精灵“爆炸”图案,在当前角色的位置显示,以表示“角色碰到炸弹后爆炸”。

(图6.1 - HelloWorldScene.cpp - addBomb函数)
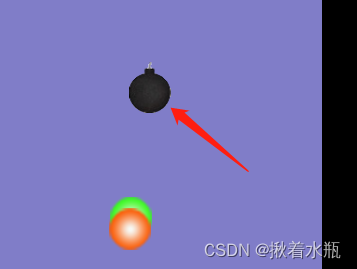
(图6.2 - 新增的炸弹球)

(图6.3 - 爆炸图案)
当碰到炸弹后,通过调用新增的gameover函数,其中语句this->unscheduleAllSelectors()用于停止所有的定时器调用,停止后就不会再生成新的球了。并且,通过Label::createWithSystemFont(...)创建新的文字显示,内容为“Game Over!”。当前状态即为游戏结束状态,接着在游戏底部添加replay按钮,并为其绑定相对应的函数。
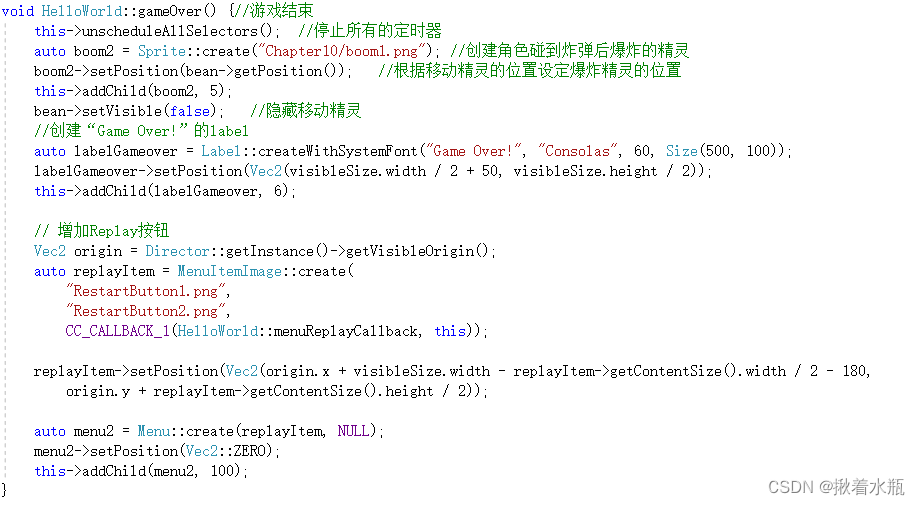
(图6.4 - HelloWorldScene.cpp - gameover函数)

(图6.5 - 游戏结束显示文字)
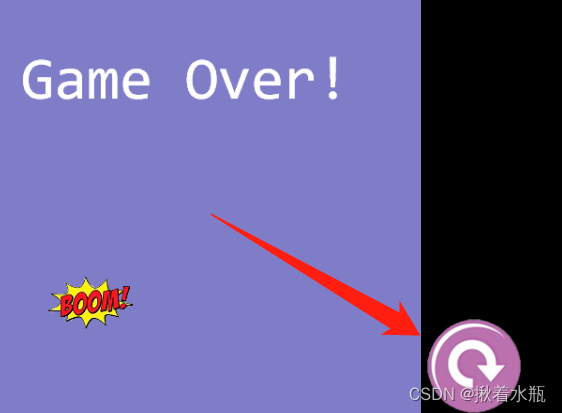
(图6.6 - replay按钮)
replay按钮回调函数负责重置分数等级以及重置场景,让游戏重新开始。
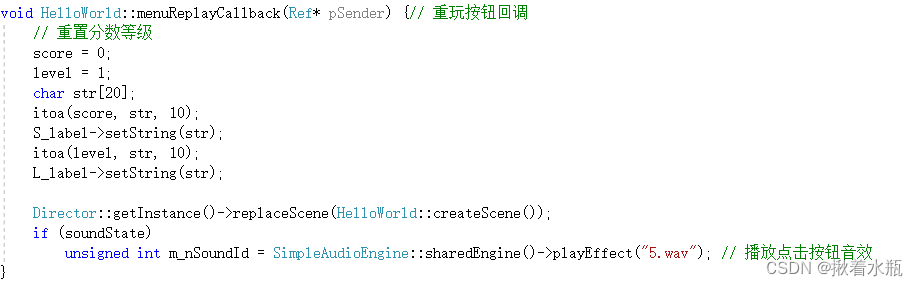
(图6.7 - HelloWorldScene.cpp - menuReplayCallback函数)
还要在原来的updateScore函数中加入对炸弹的判断,如果碰到的是炸弹,则调用上述gameover函数。

(图6.8 - HelloWorldScene.cpp - updateScore函数的新增部分)
第二种让游戏结束的方法因为涉及到其他游戏优化的部分,所以放到下一部分讲解。
7. 游戏优化
1) 修改游戏窗口大小
注意到窗口起始大小只有480x320,导致部分地图不能完整体现,为了给予玩家更好的游戏体验,我们来修改游戏窗口大小。
修改在AppDelegate.cpp中的designResolutionSize参数。

(图7.1 - AppDelegate.cpp - 修改后的designResolutionSize参数)
效果如下图:
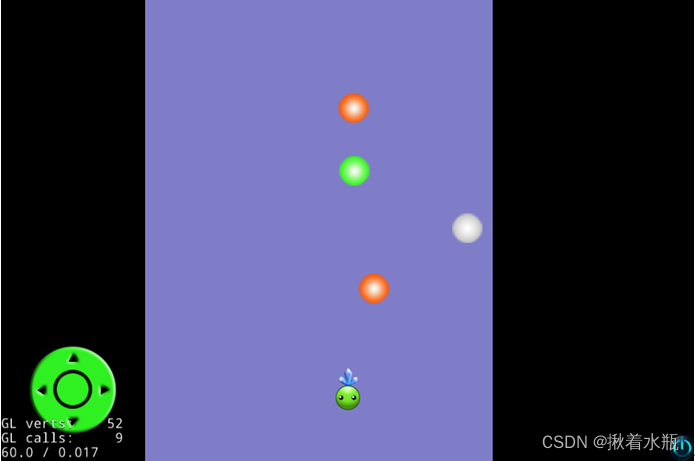
(图7.2 - HelloWorldScene.cpp - 修改后的游戏运行画面)
可以看到游戏场景完整呈现。
2) BUG修改
注意到在游戏过程中,在生成球的时候会有一闪而过的情况,这明显不属于正常情况,我们来观察以下生成球的代码:

(图7.3 - HelloWorldScene.cpp - 修改前的addBall函数)
其中,create的第一个参数描述了小球持续动作的时间。注意到当rand()%5的随机值取到0时,游戏逻辑是错误的,运行程序后,会发现动作持续时间为0的小球出现一下就消失了,并没有掉落动作。
显然,解决方法就是把该代码中的“rand()%5”修改为“rand()%5 + 1”,这样就能确保小球的动作时间至少是1。
![]()
(图7.4 - HelloWorldScene.cpp - 修改后的addBall函数)
再次运行程序,小球就不会再有一闪而过的情况了。
3) 增加等级制度
为了让游戏难度有所变化,增加游戏多元性,我设计了一套等级制度,一共有5个等级,游戏刚开始为等级1,最高等级5,每当玩家达到20、40、60、80分的时候,等级就会提升一级,游戏难度就会有所增加,而游戏难度主要体现在炸弹的掉落速度,我们用一个标号level表示游戏的等级,在实现炸弹的运动中,用6 - level来表示运动的持续时间,这样就能实现当等级提升时,炸弹的掉落速度就会因运动持续时间缩短而加快。

(图7.5 - HelloWorldScene.cpp - addBomb函数)
等级的显示类似于得分的显示,这里不做过多的叙述。
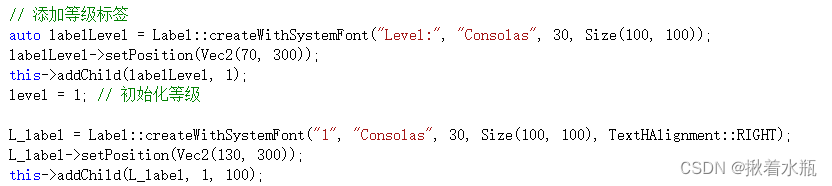
(图7.6 - HelloWorldScene.cpp - init函数中的添加等级标签部分)
我们还需要一个用于更新等级level的更新函数updateLevel,并在update函数中一直调用,其内容如下:
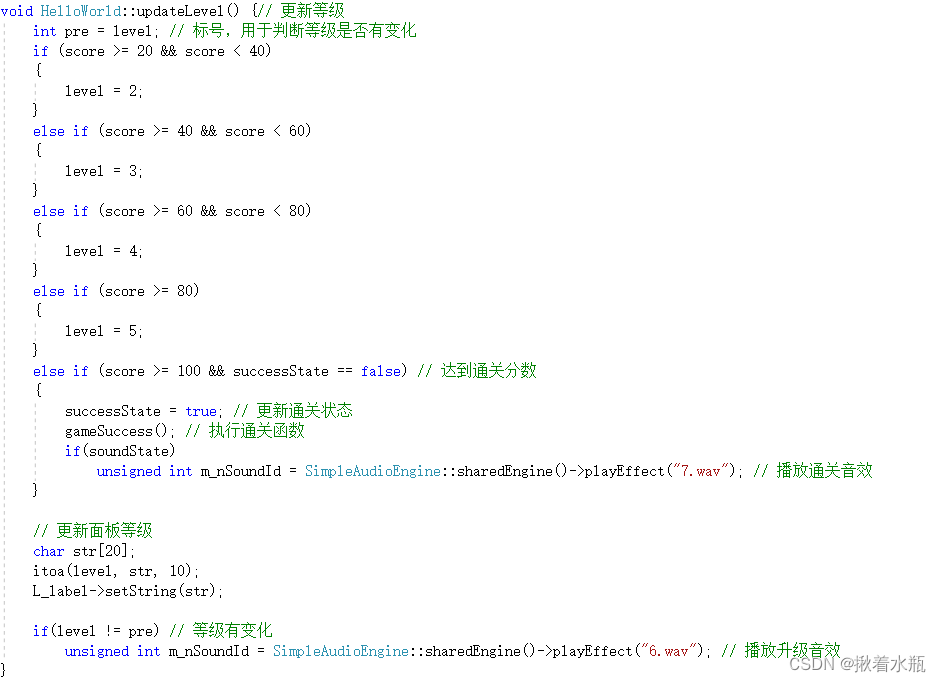
(图7.7 - HelloWorldScene.cpp - updateLevel函数)
具体效果见通关视频。
4) 增加通关制度
这也是第二种让游戏结束的方法,如上述中的updateLevel函数,其中有对于分数score的判断,我们设计当分数达到100时视为通关,并执行通关函数gamesuccess,通关函数与gameover函数类似,主要区别为多了一个继续游戏按钮,我设计了当游戏通关后,玩家除了可以选择重新开始玩,也可以选择继续游玩,挑战更高的分数,只不过等级就不会再增加了,也不会再次通关了。
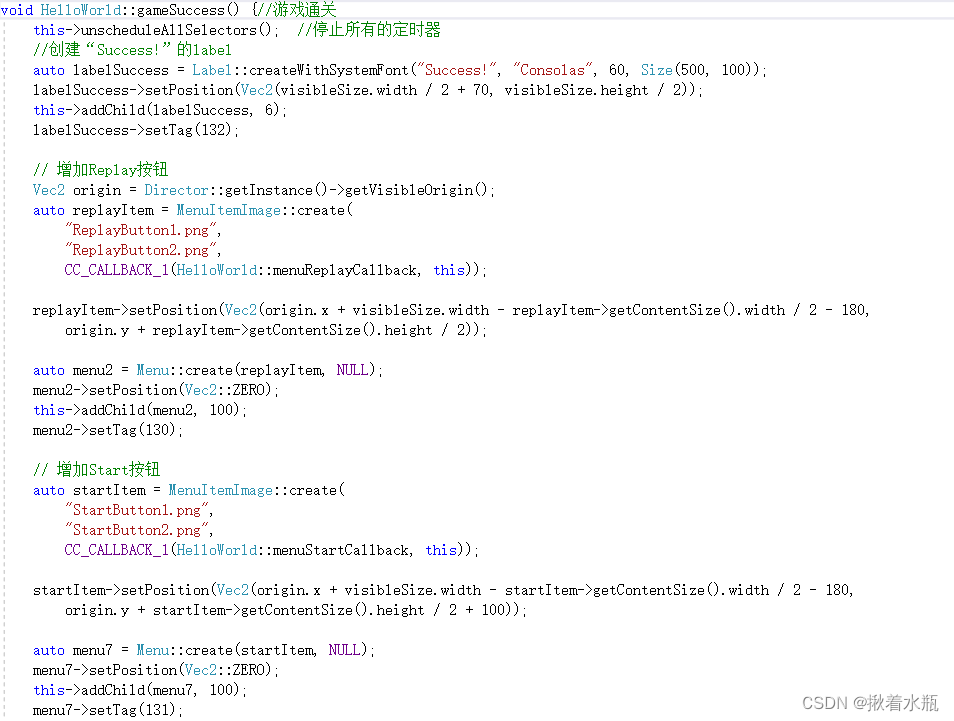
(图7.8 - HelloWorldScene.cpp - gamesuccess函数)
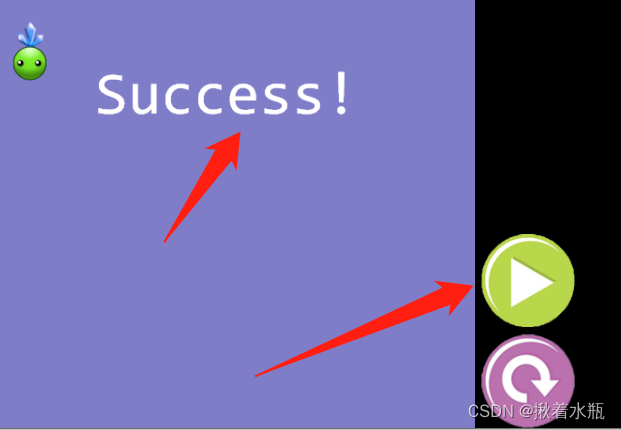
(图7.8 - 通关后画面)
5) 增加暂停功能
我添加了一个暂停按钮,主要根据暂停状态标号pauseState来实现暂停功能,暂停的时候会创建“Pause!”的label显示在中间。
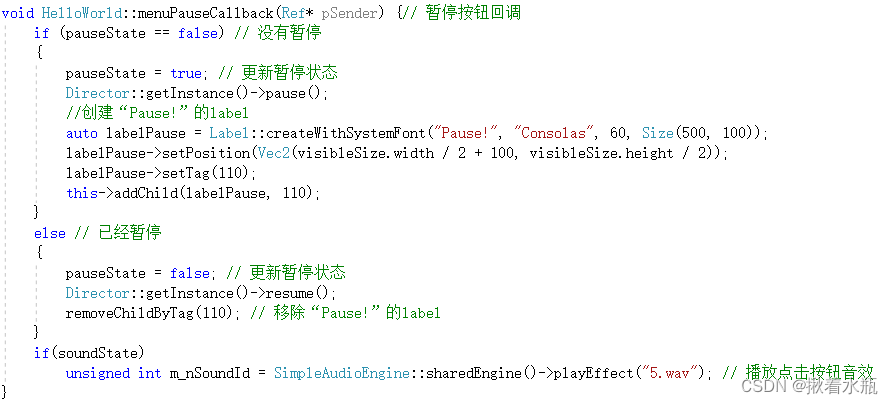
(图7.9 - HelloWorldScene.cpp - menuPauseCallback函数)
6) 增加返回按钮
我添加了一个返回按钮,主要功能为切换场景,返回到首个场景,

(图7.10 - HelloWorldScene.cpp - menuReturnCallback函数)
7) 增加音乐以及音效
从上述的代码截图中不难发现,我为场景中的交互都添加了对应的音响效果,比如背景音乐、按钮点击音效、碰到小球炸弹音效等等,具体效果见通关视频。另外,我也设计了用于控制音乐和音效的按钮,主要根据两个状态标号musicState和soundState来控制音乐和音效的播放。
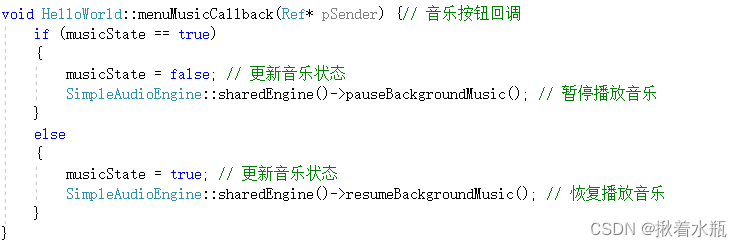
(图7.11 - HelloWorldScene.cpp - menuMusicCallback函数)

(图7.12 - HelloWorldScene.cpp - menuSoundCallback函数)
四、实验结论或心得体会
根据实验指引顺利的完成了实验,通过这次实验,我熟悉了cocos2d-x的交互界面设计原理,对Cocos2d-x中的用户交互、触摸事件、碰撞检测机制有所了解,并根据以上知识完成了实验。
这次实验完成时间比较长,用了比较多心机去完成,透过上网找资料实现了一些自己想要的功能,总的来说是一次不错的体验,期待未来能够做出更多有趣的游戏。


 2107
2107

 被折叠的 条评论
为什么被折叠?
被折叠的 条评论
为什么被折叠?
 到【灌水乐园】发言


