


1. 前言
在前一篇文章中,我们已经实现了本地化LLM接入知识库实现了RAG搜索。不过上篇我们只是走完整个流程而已,还有很多需优化的环节。
本文将在前篇基础之上,引入数据库和向量索引持久化机制,embedding优化技巧,提供会话、历史消息的支持、打造可定制的可视化交互UI界面。
待优化部分:
1)每次启动服务,都要重新构建知识库向量索引(build_vector_index方法),耗时造成不必要的性能浪费,如果每次只针对新加入的知识库文件做向量索引,只做增量索引,这样就好很多了。
2)embedding有待优化,模型选择,分词器选择怎样才适合?
3)打造一个UI界面进行交互,为交付奠定基础
4)引入数据库,为后续会话管理、知识库管理打好基础
接下去我们就针对以上待优化部分进行实现:
2. 向量索引持久化
我们引入pickle模块来进行向量的序列化与反序列化操作。通过pickle.dump将通过FAISS构建好的向量索引持久化到文件中。
# 保存向量化数据和文件列表的文件路径
VECTOR_INDEX_FILE = '../data/vector_index.pkl'
FILE_LIST_FILE = '../data/file_list.pkl'
增加一个方法:load_or_build_vector_index(directory): 目的是先检查是否存在索引持久化文件,不存在的话,从头开始创建(调用之前的build_vector_index方法),如果存在,就只查找新增的知识库文件并增量索引。
已经序列化过的文件列表,会存储在FILE_LIST_FILE中。
# 异步加载或构建向量索引
async def load_or_build_vector_index(directory):
    if os.path.exists(VECTOR_INDEX_FILE) and os.path.exists(FILE_LIST_FILE):
        # 加载之前保存的向量索引和文件列表
        with gzip.open(VECTOR_INDEX_FILE, 'rb') as f:
            docsearch = pickle.load(f)
        with open(FILE_LIST_FILE, 'rb') as f:
            old_file_list = pickle.load(f)

        # 获取当前知识库目录下的文件列表
        current_file_list = []
        for root, dirs, files in os.walk(directory):
            for file in files:
                current_file_list.append(os.path.join(root, file))

        # 找出新增的文件
        new_files = [file for file in current_file_list if file not in old_file_list]

        if new_files:
            logger.info(f"Found {len(new_files)} new files. Incrementally building vector index...")
            # 对新增的文件进行向量化处理
            embeddings = HuggingFaceEmbeddings(model_name=EMBEDDING_MODEL_NAME)
            new_documents = []

            # 改进:捕获单个文件处理异常
            for file in new_files:
                try:
                    if file.endswith('.pdf'):
                        loader = PyPDFLoader(file)
                        new_documents.extend(loader.load())
                    elif file.endswith('.docx'):
                        loader = Docx2txtLoader(file)
                        new_documents.extend(loader.load())
                    elif file.endswith('.md'):
                        loader = TextLoader(file, encoding='utf-8')
                        doc = loader.load()[0]
                        hospital_name = get_hospital_name_from_md(file)
                        doc.metadata = {"hospital_name": hospital_name}
                        new_documents.append(doc)
                except Exception as e:
                    logger.error(f"Error processing file {file}: {e}")
                    # 继续处理其他文件

            # 检查是否有有效文档
            if not new_documents:
                logger.warning("No valid documents found in new files. Keeping existing index.")
                return docsearch

            text_splitter = MarkdownTextSplitter(chunk_size=CHUNK_SIZE, chunk_overlap=CHUNK_OVERLAP)
            new_texts = text_splitter.split_documents(new_documents)

            # 检查拆分后是否还有文本
            if not new_texts:
                logger.warning("No valid text chunks after splitting. Keeping existing index.")
                return docsearch

            # 打印调试信息
            logger.info(f"Creating embeddings for {len(new_texts)} text chunks")

            # 尝试创建索引
            try:
                # 合并新的向量索引到已有的索引中
                docsearch.add_documents(new_texts)

                # 更新文件列表
                old_file_list.extend(new_files)
                with open(FILE_LIST_FILE, 'wb') as f:
                    pickle.dump(old_file_list, f)

                # 将 GPU 索引转换回 CPU 索引
                if torch.cuda.is_available():
                    docsearch.index = faiss.index_gpu_to_cpu(docsearch.index)

                # 保存更新后的向量索引
                # 使用 gzip 和 pickle 进行压缩并保存
                with gzip.open(VECTOR_INDEX_FILE, 'wb') as f:
                    pickle.dump(docsearch, f)

                # 如果有 GPU,再将索引迁移回 GPU
                if torch.cuda.is_available():
                    res = faiss.StandardGpuResources()
                    docsearch.index = faiss.index_cpu_to_gpu(res, 0, docsearch.index)
            except Exception as e:
                logger.error(f"Error creating FAISS index: {e}")
                # 如果发生错误,返回现有索引
                logger.warning("Using existing index due to error")
                return docsearch
    else:
        logger.info("No existing vector index found. Building vector index from scratch...")
        try:
            docsearch = await build_vector_index(directory)

            # 将 GPU 索引转换回 CPU 索引
            if torch.cuda.is_available():
                docsearch.index = faiss.index_gpu_to_cpu(docsearch.index)

            # 保存向量索引和文件列表
            file_list = []
            for root, dirs, files in os.walk(directory):
                for file in files:
                    file_list.append(os.path.join(root, file))
            with gzip.open(VECTOR_INDEX_FILE, 'wb') as f:
                pickle.dump(docsearch, f)
            with open(FILE_LIST_FILE, 'wb') as f:
                pickle.dump(file_list, f)

            # 如果有 GPU,再将索引迁移回 GPU
            if torch.cuda.is_available():
                res = faiss.StandardGpuResources()
                docsearch.index = faiss.index_cpu_to_gpu(res, 0, docsearch.index)
        except Exception as e:
            logger.error(f"Error building vector index from scratch: {e}")
            # 创建一个空的FAISS索引作为后备
            embeddings = HuggingFaceEmbeddings(model_name=EMBEDDING_MODEL_NAME)
            docsearch = FAISS(embedding_function=embeddings)

    return docsearch

# 异步加载本地知识库
docsearch = asyncio.run(load_or_build_vector_index(KNOWLEDGE_BASE_DIR))
3. Embedding优化
此处我们优化了build_vector_index方法,将CharacterTextSplitter替换成了MarkdownTextSplitter,因为知识库文件是Markdown格式,采用MarkdownTextSplitter更适合。
 async def build_vector_index(directory):
    # 加载 BAAI/bge-large-zh-v1.5 嵌入模型
    embeddings = HuggingFaceEmbeddings(model_name=EMBEDDING_MODEL_NAME)
    documents = []
    for root, dirs, files in os.walk(directory):
        for file in files:
            file_path = os.path.join(root, file)
            if file.endswith('.pdf'):
                loader = PyPDFLoader(file_path)
                documents.extend(loader.load())
            elif file.endswith('.docx'):
                loader = Docx2txtLoader(file_path)
                documents.extend(loader.load())
            elif file.endswith('.md'):
                loader = TextLoader(file_path, encoding='utf-8')
                doc = loader.load()[0]
                # 从 md 文件中获取公司名称
                company_name= get_company_name_from_md(file_path)
                doc.metadata = {"company_name": company_name}
                documents.append(doc)

    text_splitter = MarkdownTextSplitter(chunk_size=CHUNK_SIZE, chunk_overlap=CHUNK_OVERLAP)
    texts = text_splitter.split_documents(documents)
    docsearch = FAISS.from_documents(texts, embeddings)
    # 将索引迁移到 GPU
    if torch.cuda.is_available():
        res = faiss.StandardGpuResources()  # 创建 GPU 资源
        index_gpu = faiss.index_cpu_to_gpu(res, 0, docsearch.index)  # 将 CPU 索引迁移到 GPU
        docsearch.index = index_gpu
    return docsearch
MarkdownTextSplitter的两个重要参数,往往会根据知识库内容的差异会有不同的经验值(这里我设置的是chunk_size=400,chunk_overlap=80):
chunk_size:这是一个参数,由 CHUNK_SIZE 变量指定。它表示每个分割后的文本块的最大字符数。例如,如果 CHUNK_SIZE 设为 500,那么每个分割后的文本块的字符数不会超过 500。
chunk_overlap:这也是一个参数,由 CHUNK_OVERLAP 变量指定。它表示相邻文本块之间重叠的字符数。例如,如果 CHUNK_OVERLAP 设为 50,那么相邻的两个文本块会有 50 个字符是相同的。设置重叠部分可以确保在分割文本时不会丢失重要信息,并且在后续的检索和处理中可以更好地捕捉上下文。
关于Embedding模型的选择:
推荐3个模型,请根据自己的场景选择:
| 模型名称 | 类型 | 优点 | 缺点 | 适用场景 | 资源需求 |
|---|---|---|---|---|---|
| sentence-transformers/paraphrase-multilingual-MiniLM-L12-v2 | 多语言模型 | - 支持多种语言 - 轻量高效,推理速度快 - 预训练数据广泛,语义理解强 | - 中文任务表现一般 - 模型容量有限,长文本处理受限 | 多语言场景(如跨国文档检索、国际新闻分类)、资源有限的实时应用(如聊天机器人) | 较低(适合轻量级设备) |
| BAAI/bge-large-zh-v1.5 | 中文优化模型 | - 中文任务表现优异 - 大模型参数,复杂语义理解强 - 融合最新技术 | - 计算资源需求高 - 不支持多语言 | 中文专业领域(医学、法律)、高精度任务(问答系统、语义相似度计算) | 高(需GPU支持) |
| shibing624/text2vec-base-chinese | 中文基础模型 | - 中文适配性好 - 易用性强,部署简单 - 社区支持丰富 | - 模型能力有限,复杂任务效果一般 - 功能扩展性不足 | 快速搭建中文系统(文本分类、情感分析)、初学者或轻量级应用 | 中等(无GPU可运行) |
4. 引入数据库
我们引入SQLAlchemy和Pydantic ,同时使用 SQLAlchemy 和 Pydantic 是为了分别处理数据库交互和数据验证与序列化,它们在不同层面发挥重要作用,结合使用能提高开发效率和代码的可维护性。
SQLAlchemy 是Python的一个持久层框架,具有ORM,多数据库支持、支持事务的特性。有点类似Java后端的Hibernate和Mybatis。
首先导入必要的库:
import datetime
from typing import Optional

from sqlalchemy import Column, Integer, String, TIMESTAMP, ForeignKey, Text, func
from sqlalchemy.orm import declarative_base
from pydantic import BaseModel然后使用一个单独的文件(entities.py)来定义实体类模型(这里已经给出了本系列教程所有需要用到的实体类,在系列3将不再重复描述):
import datetime
from typing import Optional

from sqlalchemy import Column, Integer, String, TIMESTAMP, ForeignKey, Text, func
from sqlalchemy.orm import declarative_base
from pydantic import BaseModel

Base = declarative_base()

# 定义数据库模型
class SessionModelDB(Base):
    __tablename__ = "session"
    id = Column(Integer, primary_key=True, index=True)
    session_id = Column(String(255), nullable=False)
    created_date = Column(TIMESTAMP, server_default=func.now())


class MessageDB(Base):
    __tablename__ = "message"
    id = Column(Integer, primary_key=True, index=True)
    content = Column(Text, nullable=False)
    type = Column(String(10), nullable=False)
    created_date = Column(TIMESTAMP, server_default=func.now())
    session_id = Column(Integer, ForeignKey("session.id", ondelete="CASCADE"))  # 会话删除,对话记录自动删除

# 定义 kb_files 表
class KbFile(Base):
    __tablename__ = "kb_files"
    id = Column(Integer, primary_key=True, index=True)
    name = Column(String(255), index=True)
    path = Column(String(255))
    created_date = Column(TIMESTAMP, server_default=func.now())

# #=========================================================================

# 定义 Pydantic 模型
class SessionModel(BaseModel):
    id: int
    session_id: str
    created_date: datetime

    model_config = {
        "from_attributes": True,
        "arbitrary_types_allowed": True
    }

class Message(BaseModel):
    id: int
    think: str # 思考部分,从<think>标签里拆解出来
    final_content: str # 正式回答部分
    type: str
    created_date: datetime
    session_id: int

    model_config = {
        "from_attributes": True,
        "arbitrary_types_allowed": True
    }

# 新增 Pydantic 的 KbFile 模型
class KbFileModel(BaseModel):
    id: int
    name: str
    path: str

    model_config = {
        "from_attributes": True,
        "arbitrary_types_allowed": True
    }
这样,在每次交互问答时,只需要将问答记录保存到数据库即可,实现了保存会话历史的功能:
# 保存问题和回答到数据库
question_message = MessageDB(content=question, type='question', session_id=session_id)
answer_message = MessageDB(content=answer, type='answer', session_id=session_id)
db.add(question_message)
db.add(answer_message)
db.commit()
服务端修改后的generate_answer方法完整代码:
# 异步生成回答(修改后的函数)
async def generate_answer(question, session_id, db: Session):
    global docsearch
    if docsearch is None:
        docsearch = await load_or_build_vector_index(KNOWLEDGE_BASE_DIR)
    try:
        logger.info(f"Received question: {question}")

        # 获取历史对话(排除当前尚未保存的问题)
        history_messages = db.query(MessageDB).filter(
            MessageDB.session_id == session_id,
            MessageDB.type.in_(['question', 'answer'])
        ).order_by(MessageDB.created_date).all()

        # 构造历史对话字符串
        history_str = ""
        for msg in history_messages:
            if msg.type == 'question':
                history_str += f"用户: {msg.content}\n"
            elif msg.type == 'answer':
                history_str += f"助手: {msg.content}\n"

        hospital_name = extract_hospital_name(question)
        logger.info(f"你要查询的医院是: {hospital_name}")

        # candidates = docsearch.similarity_search(question, k=10)
        candidates = docsearch.similarity_search_with_score(question, k=10)

        if candidates:
            logger.info(f"Found relevant documents in the knowledge base.{len(candidates)}")
            if hospital_name:
                # candidates = [doc for doc in candidates if doc.metadata.get("hospital_name") == hospital_name]
                # 当使用similarity_search_with_score时,它返回的是(document, score)形式的元组列表,而不是单纯的文档列表。您需要修改代码以提取元组中的文档部分。
                candidates = [doc_tuple[0] for doc_tuple in candidates if
                              doc_tuple[0].metadata.get("hospital_name") == hospital_name]


            ranked_candidates = await rerank(question, candidates)
            final_results = ranked_candidates[:3]
            logger.info(f"Final results: {final_results}")

            context = "\n".join([doc.page_content for doc in final_results]) if final_results else ""
        else:
            logger.info("No relevant documents found in the knowledge base.")
            context = ""

        # 构造完整提示(包含历史对话和上下文)
        full_prompt = prompt.format(
            history=history_str.strip(),
            context=context,
            question=question
        )

        # 流式请求Ollama(保持原有逻辑)
        url = 'http://localhost:11434/api/generate'
        headers = {'Content-Type': 'application/json'}
        data = {
            "model": OLLAMA_MODEL_NAME,
            "prompt": full_prompt,
            "parameters": {
                "max_tokens": 100,
                "temperature": 0.2
            },
            "stream": True
        }

        async with aiohttp.ClientSession() as session:
            async with session.post(url, headers=headers, json=data) as res:
                answer = ""
                async for line in res.content:
                    if line:
                        try:
                            chunk = json.loads(line)
                            result = await process_ollama_stream(chunk)
                            if result:
                                answer_chunk = result.decode('utf-8')
                                answer += answer_chunk
                                # 流式返回数据
                                yield answer_chunk.encode('utf-8')
                        except json.JSONDecodeError as e:
                            logger.error(f"JSON decoding error: {e}, line: {line}")

        # 保存问题和回答到数据库
        question_message = MessageDB(content=question, type='question', session_id=session_id)
        answer_message = MessageDB(content=answer, type='answer', session_id=session_id)
        db.add(question_message)
        db.add(answer_message)
        db.commit()

    except Exception as general_exception:
        error_message = f"General error occurred: {str(general_exception)}"
        logger.error(error_message)
        error_message_obj = MessageDB(
            content=error_message,
            type='error',
            session_id=session_id
        )
        db.add(error_message_obj)
        db.commit()
        yield error_message.encode('utf-8')
        return
5. 打造UI交互界面
对于熟悉前端的同学来说,搭建一个交互界面应该很容易,就算你对前端一窍不通,这个前端页面的构建任务只需要几句提示词就能让AI帮你完成:
笔者也是很久没写前端了,为了快速实现,让AI快速帮我生成了基于Vue的前端工程。

前端工程核心架构
让后我告诉AI我需要什么样的页面,通过提示词引导,一步步让AI帮我绘制出来,我全程没写过一行代码:
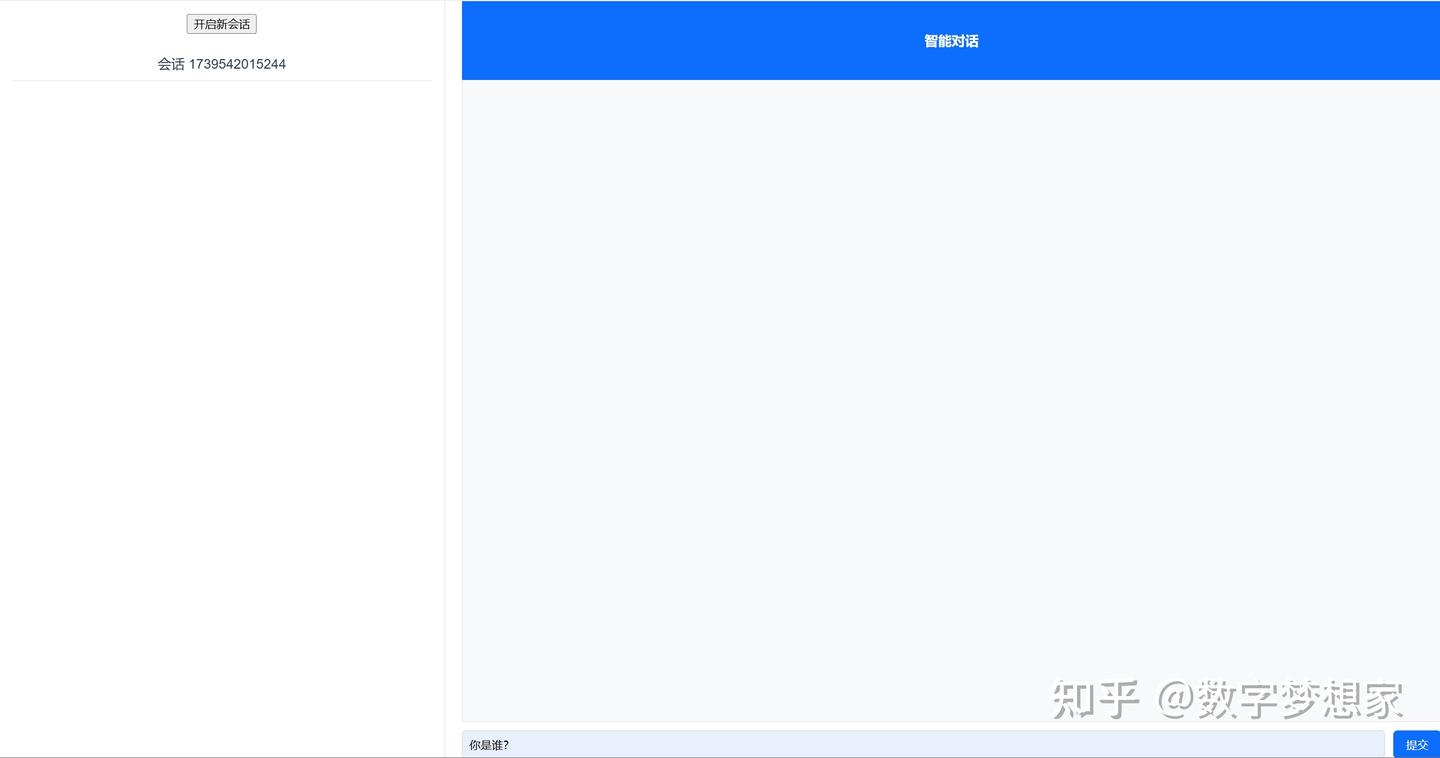
告诉AI你需要什么样的布局
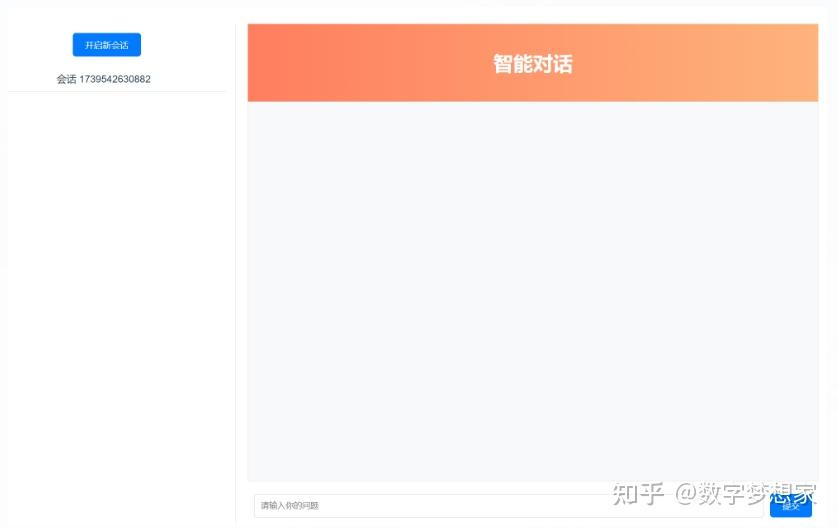
告诉AI你需要什么样的CSS风格
经过几步调整,最终AI帮我绘制了这样的界面,已经够用了:
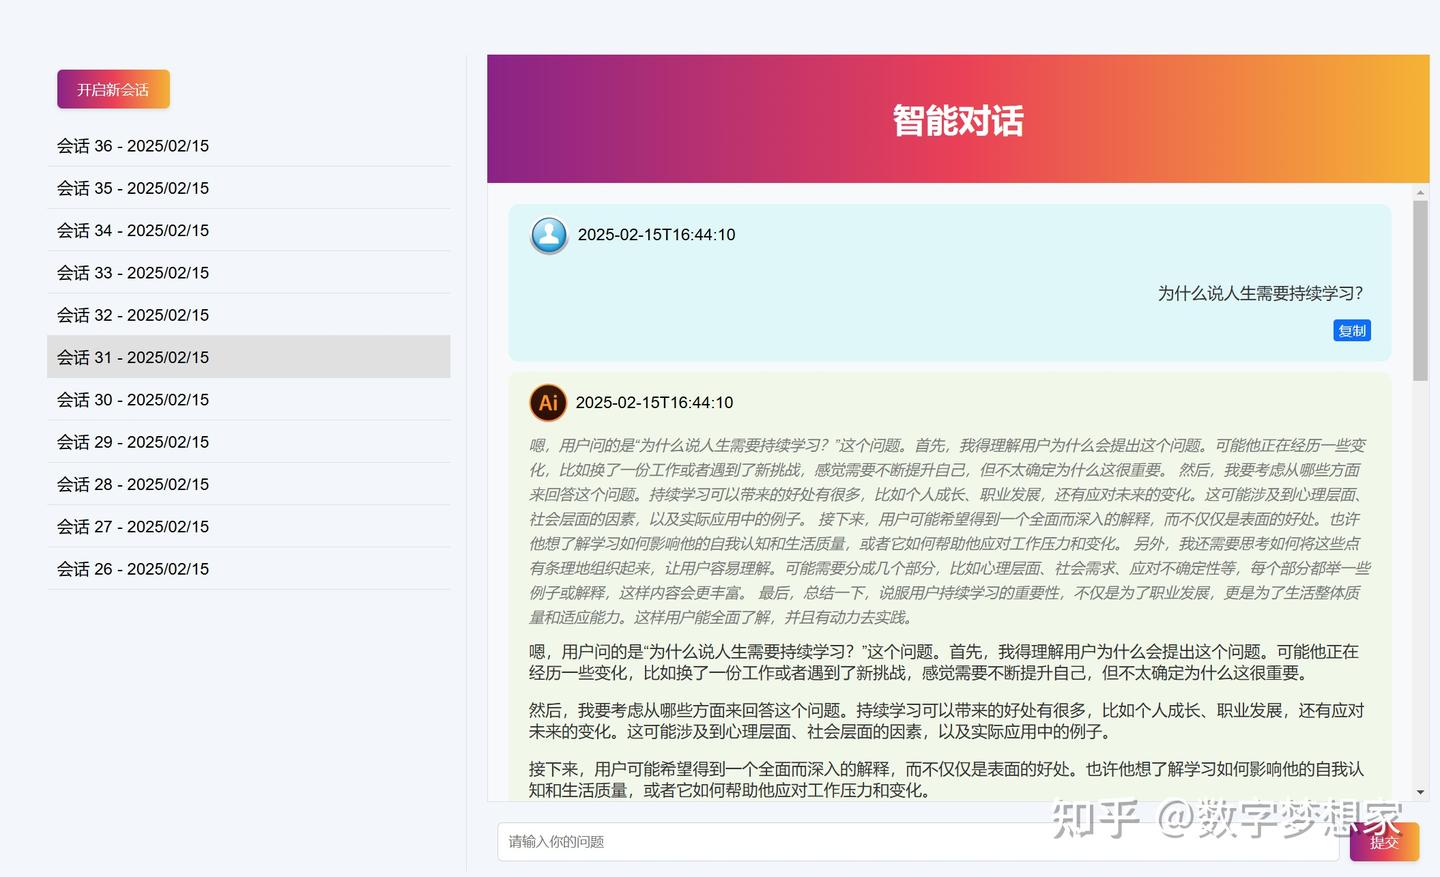
告诉UI统一修改所有的CSS风格
因为LLM返回的内容是Markdown格式,所以在右侧流式输出结果栏中,需要识别Markdown格式内容并正确渲染(包括对公式的支持):
渲染Markdown文本,支持数学公式
输入问题后,直接按回车即可与本地的AI进行交互了,按回车触发的核心前端方法如下:
async handleSubmit() {
            if (!this.question) return;

            if (!this.currentSessionId) {
                await this.startNewSession();
            }

            const currentSession = this.currentSession;
            const question = this.question;

            // 确保 currentSession 和 currentSession.messages 存在
            if (currentSession &&!currentSession.messages) {
                currentSession.messages = [];
            }

            if (currentSession && currentSession.messages) {
                // 推送用户问题消息
                currentSession.messages.push({
                    type: 'question',
                    final_content: question,
                    think: '',
                    id: Date.now()
                });
                this.scrollToBottom();
            }

            this.isLoading = true;
            this.answer = '';

            try {
                const response = await fetch(
                    `http://localhost:8000/ask?question=${encodeURIComponent(question)}&session_id=${this.currentSessionId}`,
                    {
                        method: 'GET',
                        headers: {
                            Accept: 'text/plain'
                        }
                    }
                );

                console.log('Response Status:', response.status);
                console.log('Response Headers:', response.headers);
                console.log('Response Type:', response.type);

                if (!response.ok) {
                    throw new Error(`HTTP error! status: ${response.status}`);
                }

                const reader = response.body.getReader();
                const decoder = new TextDecoder();
                let result = '';

                try {
                    let botMessageId = Date.now(); // 创建一个新的Bot消息ID
                    let thinkContent = ''; // 用于存储思考过程
                    let contentPart = ''; // 用于存储正式内容

                    if (currentSession && currentSession.messages) {
                        currentSession.messages.push({
                            type: 'answer',
                            final_content: '',
                            think: '',
                            id: botMessageId
                        });
                    }

                    for (;;) {
                        const { done, value } = await reader.read();
                        if (done) {
                            result += decoder.decode();
                            break;
                        }
                        const chunk = decoder.decode(value, { stream: true });
                        result += chunk;

                        // 动态拆分思考过程和正式内容
                        const parts = result.split(/<think>|<\/think>/);
                        if (parts.length >= 3) {
                            thinkContent = parts[1];
                            contentPart = parts[2];
                        } else if (parts.length === 2 && parts[0] === '') {
                            thinkContent = parts[1];
                            contentPart = '';
                        } else {
                            thinkContent = '';
                            contentPart = result;
                        }

                        // 更新Bot消息的内容
                        if (currentSession && currentSession.messages) {
                            const botMessageIndex = currentSession.messages.findIndex(
                                (msg) => msg.id === botMessageId
                            );
                            if (botMessageIndex !== -1) {
                                currentSession.messages[botMessageIndex].think = thinkContent;
                                currentSession.messages[botMessageIndex].final_content = contentPart;
                                this.scrollToBottom(); // 每次更新消息内容后滚动到最底部
                            }
                        }
                    }
                } finally {
                    reader.releaseLock();
                }
            } catch (error) {
                console.error('请求出错:', error);
                this.answer = '请求出错,请稍后再试。';

                if (currentSession && currentSession.messages) {
                    const botMessageId = Date.now(); // 创建一个新的Bot消息ID
                    currentSession.messages.push({
                        type: 'answer',
                        think: '',
                        final_content: '请求出错,请稍后再试。',
                        id: botMessageId
                    });
                    this.scrollToBottom(); // 出现错误时也滚动到最底部
                }
            } finally {
                this.isLoading = false;
                this.question = '';
                this.$nextTick(async () => {
                    await this.safeMathJaxTypeset();
                });
            }
        },
为了区分AI思考链内容和正式反馈的结果,前端需要通过两个变量分别来存储:
let thinkContent = ''; // 用于存储思考过程
let contentPart = ''; // 用于存储正式内容
前面提到的ChatView.vue代码:
<template>
<div id="app">
<div class="sidebar">
<button class="custom-btn" @click="startNewSession">开启新会话</button>
<button class="custom-btn" @click="goToKnowledgeBaseManagement">管理知识库</button>
<div id="sessionList" class="session-list">
<div
v-for="session in sessions"
:key="session.id"
class="session-item"
:class="{ 'active': String(session.id) === String(currentSessionId) }"
@click="loadSessionMsgs(session.id)"
>
会话 {{ session.id }} - {{ formatDate(session.created_date) }}
<!-- 添加删除按钮 -->
<button class="delete-session-btn" @click="deleteSession(session.id)">删除</button>
</div>
</div>
</div>
<div class="chat-container">
<div class="chat-header">
<h1>RAG知识库搜索 + 智能对话</h1>
</div>
<div class="chat-messages" id="chatMessages" ref="chatMessages">
<div
v-for="message in currentSession.messages"
:key="message.id"
class="message"
:class="{ 'user-message': message.type === 'question', 'bot-message': message.type === 'answer' }"
>
<div class="avatar" :class="{ 'user-avatar': message.type === 'question', 'bot-avatar': message.type === 'answer' }">
<img :src="message.type === 'question' ? require('@/assets/user-avatar.png') : require('@/assets/bot-avatar.png')" alt="Avatar">
<span>{{ message.created_date }}</span>
</div>
<div class="message-content" :class="{ 'user-message-content': message.type === 'question', 'bot-message-content': message.type === 'answer' }">
<div class="think-content" v-html="renderMarkdown(message.think)"> </div>
<div class="content-text" v-html="renderMarkdown(message.final_content)">
</div>
<button
v-if="message.type === 'question'"
class="copy-button"
@click="copyToClipboard(message.final_content)"
>
复制
</button>
</div>
</div>
</div>
<div class="chat-input">
<input
type="text"
id="question-input"
placeholder="请输入你的问题"
v-model="question"
@keyup.enter="handleSubmit"
/>
<button type="button" id="submit-button" @click="handleSubmit" class="custom-btn">
提交
</button>
</div>
</div>
</div>
</template>
<script>
import { marked } from 'marked';
import DOMPurify from 'dompurify';
import { useRouter } from 'vue-router';
// 配置 marked
marked.setOptions({
gfm: true,
breaks: true,
pedantic: false,
smartLists: true,
smartypants: false
});
// 配置 DOMPurify 允许数学相关字符
DOMPurify.addHook('uponSanitizeAttribute', (node, data) => {
if (data.attrName === 'class' && data.attrValue === 'math') {
return true; // 允许保留 math 类
}
});
DOMPurify.addHook('uponSanitizeElement', (node) => {
if(node.tagName === 'MATH') return false; // 保留MathJax元素
});
DOMPurify.setConfig({
ALLOWED_ATTR: ['class', 'style'], // 允许 class 和 style
ALLOWED_TAGS: ['span', 'div', 'p', 'br', 'strong', 'em', 'code'] // 添加必要标签
});
export default {
name: 'ChatView',
data() {
return {
question: '',
answer: '',
isLoading: false,
currentSessionId: null,
sessions: [], // 用于存储会话历史
mathJaxLoaded: false
};
},
setup() {
const router = useRouter();
const goToKnowledgeBaseManagement = () => {
router.push({ name: 'KnowledgeBaseManagement' });
};
return {
goToKnowledgeBaseManagement
};
},
computed: {
currentSession() {
return this.sessions.find((session) => session.id === this.currentSessionId) || {};
}
},
methods: {
async safeMathJaxTypeset() {
},
async loadSessions() {
//加载历史会话的代码
},
// 其他方法保持不变
async deleteSession(sessionId) {
//删除会话
},
async handleSubmit() {
if (!this.question) return;
if (!this.currentSessionId) {
await this.startNewSession();
}
const currentSession = this.currentSession;
const question = this.question;
// 确保 currentSession 和 currentSession.messages 存在
if (currentSession &&!currentSession.messages) {
currentSession.messages = [];
}
if (currentSession && currentSession.messages) {
// 推送用户问题消息
currentSession.messages.push({
type: 'question',
final_content: question,
think: '',
id: Date.now()
});
this.scrollToBottom();
}
this.isLoading = true;
this.answer = '';
try {
const response = await fetch(
`http://localhost:8000/ask?question=${encodeURIComponent(question)}&session_id=${this.currentSessionId}`,
{
method: 'GET',
headers: {
Accept: 'text/plain'
}
}
);
console.log('Response Status:', response.status);
console.log('Response Headers:', response.headers);
console.log('Response Type:', response.type);
if (!response.ok) {
throw new Error(`HTTP error! status: ${response.status}`);
}
const reader = response.body.getReader();
const decoder = new TextDecoder();
let result = '';
try {
let botMessageId = Date.now(); // 创建一个新的Bot消息ID
let thinkContent = ''; // 用于存储思考过程
let contentPart = ''; // 用于存储正式内容
if (currentSession && currentSession.messages) {
currentSession.messages.push({
type: 'answer',
final_content: '',
think: '',
id: botMessageId
});
}
for (;;) {
const { done, value } = await reader.read();
if (done) {
result += decoder.decode();
break;
}
const chunk = decoder.decode(value, { stream: true });
result += chunk;
// 动态拆分思考过程和正式内容
const parts = result.split(/<think>|<\/think>/);
if (parts.length >= 3) {
thinkContent = parts[1];
contentPart = parts[2];
} else if (parts.length === 2 && parts[0] === '') {
thinkContent = parts[1];
contentPart = '';
} else {
thinkContent = '';
contentPart = result;
}
// 更新Bot消息的内容
if (currentSession && currentSession.messages) {
const botMessageIndex = currentSession.messages.findIndex(
(msg) => msg.id === botMessageId
);
if (botMessageIndex !== -1) {
currentSession.messages[botMessageIndex].think = thinkContent;
currentSession.messages[botMessageIndex].final_content = contentPart;
this.scrollToBottom(); // 每次更新消息内容后滚动到最底部
}
}
}
} finally {
reader.releaseLock();
}
} catch (error) {
console.error('请求出错:', error);
this.answer = '请求出错,请稍后再试。';
if (currentSession && currentSession.messages) {
const botMessageId = Date.now(); // 创建一个新的Bot消息ID
currentSession.messages.push({
type: 'answer',
think: '',
final_content: '请求出错,请稍后再试。',
id: botMessageId
});
this.scrollToBottom(); // 出现错误时也滚动到最底部
}
} finally {
this.isLoading = false;
this.question = '';
this.$nextTick(async () => {
await this.safeMathJaxTypeset();
});
}
},
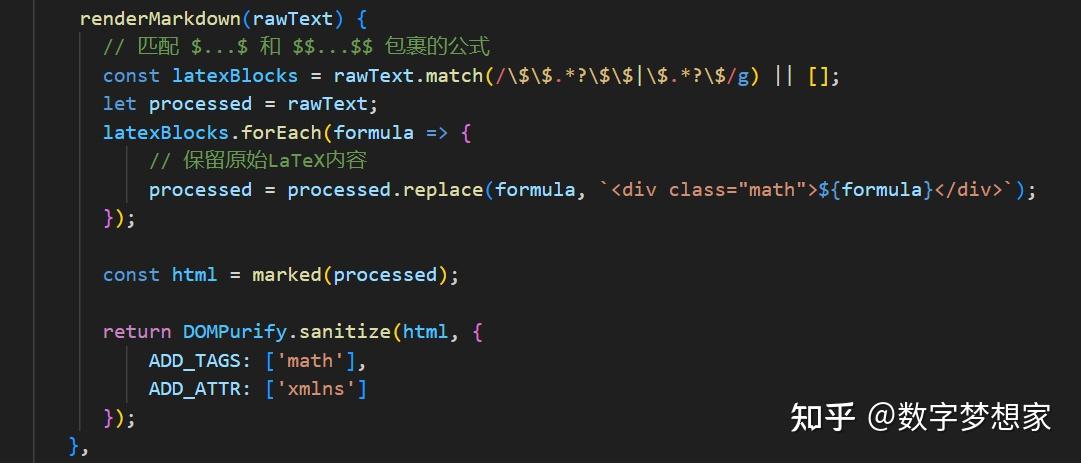
renderMarkdown(rawText) {
// 匹配 $...$ 和 $$...$$ 包裹的公式
const latexBlocks = rawText.match(/\$\$.*?\$\$|\$.*?\$/g) || [];
let processed = rawText;
latexBlocks.forEach(formula => {
// 保留原始LaTeX内容
processed = processed.replace(formula, `<div class="math">${formula}</div>`);
});
const html = marked(processed);
return DOMPurify.sanitize(html, {
ADD_TAGS: ['math'],
ADD_ATTR: ['xmlns']
});
},
async startNewSession() {
//开启一个新的会话
},
async loadSessionMsgs(sessionId) {
},
copyToClipboard(text) {
navigator.clipboard
.writeText(text)
.then(() => {
alert('已复制到剪贴板');
})
.catch((err) => {
console.error('复制失败:', err);
alert('复制失败,请重试。');
});
},
scrollToBottom() {
this.$nextTick(() => {
const chatMessages = this.$refs.chatMessages;
if (chatMessages) {
chatMessages.scrollTop = chatMessages.scrollHeight;
this.safeMathJaxTypeset(); // 滚动后触发公式渲染
}
});
},
formatDate(date) {
const d = new Date(date);
const year = d.getFullYear();
const month = String(d.getMonth() + 1).padStart(2, '0');
const day = String(d.getDate()).padStart(2, '0');
return `${year}/${month}/${day}`;
},
},
mounted() {
</script>
<style scoped>
@import '@/assets/styles.css';
</style>除此之外,可以按需添加自己需要的内容,此处不再赘述。
6. 总结
这个环节主要基于第(1)篇做了进一步优化,包括增量索引的支持、embedding的优化和模型选择、引入数据库、以及增加了UI交互界面。此篇已经将会话(SessionModelDB)、消息(MessageDB)、知识库(KbFile)对象提前建立,为后续功能完善做好铺垫。
在系列(3)我们将实现会话管理、历史消息的加载与删除、知识库的预览与管理操作。
如何系统的去学习大模型LLM ?
大模型时代,火爆出圈的LLM大模型让程序员们开始重新评估自己的本领。 “AI会取代那些行业?”“谁的饭碗又将不保了?”等问题热议不断。
事实上,抢你饭碗的不是AI,而是会利用AI的人。
继科大讯飞、阿里、华为等巨头公司发布AI产品后,很多中小企业也陆续进场!超高年薪,挖掘AI大模型人才! 如今大厂老板们,也更倾向于会AI的人,普通程序员,还有应对的机会吗?
与其焦虑……
不如成为「掌握AI工具的技术人」,毕竟AI时代,谁先尝试,谁就能占得先机!
但是LLM相关的内容很多,现在网上的老课程老教材关于LLM又太少。所以现在小白入门就只能靠自学,学习成本和门槛很高。
基于此,我用做产品的心态来打磨这份大模型教程,深挖痛点并持续修改了近70次后,终于把整个AI大模型的学习门槛,降到了最低!
在这个版本当中:
第一您不需要具备任何算法和数学的基础
第二不要求准备高配置的电脑
第三不必懂Python等任何编程语言
您只需要听我讲,跟着我做即可,为了让学习的道路变得更简单,这份大模型教程已经给大家整理并打包,现在将这份 LLM大模型资料 分享出来:包括LLM大模型书籍、640套大模型行业报告、LLM大模型学习视频、LLM大模型学习路线、开源大模型学习教程等, 😝有需要的小伙伴,可以 扫描下方二维码领取🆓↓↓↓

一、LLM大模型经典书籍
AI大模型已经成为了当今科技领域的一大热点,那以下这些大模型书籍就是非常不错的学习资源。

二、640套LLM大模型报告合集
这套包含640份报告的合集,涵盖了大模型的理论研究、技术实现、行业应用等多个方面。无论您是科研人员、工程师,还是对AI大模型感兴趣的爱好者,这套报告合集都将为您提供宝贵的信息和启示。(几乎涵盖所有行业)

三、LLM大模型系列视频教程

四、LLM大模型开源教程(LLaLA/Meta/chatglm/chatgpt)

五、AI产品经理大模型教程

LLM大模型学习路线 ↓
阶段1:AI大模型时代的基础理解
-
目标:了解AI大模型的基本概念、发展历程和核心原理。
-
内容:
- L1.1 人工智能简述与大模型起源
- L1.2 大模型与通用人工智能
- L1.3 GPT模型的发展历程
- L1.4 模型工程
- L1.4.1 知识大模型
- L1.4.2 生产大模型
- L1.4.3 模型工程方法论
- L1.4.4 模型工程实践
- L1.5 GPT应用案例
阶段2:AI大模型API应用开发工程
-
目标:掌握AI大模型API的使用和开发,以及相关的编程技能。
-
内容:
- L2.1 API接口
- L2.1.1 OpenAI API接口
- L2.1.2 Python接口接入
- L2.1.3 BOT工具类框架
- L2.1.4 代码示例
- L2.2 Prompt框架
- L2.3 流水线工程
- L2.4 总结与展望
阶段3:AI大模型应用架构实践
-
目标:深入理解AI大模型的应用架构,并能够进行私有化部署。
-
内容:
- L3.1 Agent模型框架
- L3.2 MetaGPT
- L3.3 ChatGLM
- L3.4 LLAMA
- L3.5 其他大模型介绍
阶段4:AI大模型私有化部署
-
目标:掌握多种AI大模型的私有化部署,包括多模态和特定领域模型。
-
内容:
- L4.1 模型私有化部署概述
- L4.2 模型私有化部署的关键技术
- L4.3 模型私有化部署的实施步骤
- L4.4 模型私有化部署的应用场景
这份 LLM大模型资料 包括LLM大模型书籍、640套大模型行业报告、LLM大模型学习视频、LLM大模型学习路线、开源大模型学习教程等, 😝有需要的小伙伴,可以 扫描下方二维码领取🆓↓↓↓


 669
669

 被折叠的 条评论
为什么被折叠?
被折叠的 条评论
为什么被折叠?
 到【灌水乐园】发言


