


One of the most popular requests in our end-year reader-satisfaction survey was more PHP 7 content. In this quick guide, we’ll cover two ways to bring a PHP 7 server online on DigitalOcean – a popular VPS provider.
在我们的年底读者满意度调查中 ,最受欢迎的请求之一是更多PHP 7内容。 在此快速指南中,我们将介绍两种在DigitalOcean上使PHP 7服务器联机的方法-流行的VPS提供程序。
We’ll use two approaches, the latter of which will be applicable to any Ubuntu installation whereas the former will only work on DigitalOcean. If you don’t have a DigitalOcean account but would like to follow along, feel free to grab two free months via this ref code.
我们将使用两种方法,后一种将适用于任何Ubuntu安装,而前一种仅适用于DigitalOcean。 如果您没有DigitalOcean帐户,但想继续,请随时通过此ref代码获取两个月的免费试用期 。
本地PHP 7 (PHP 7 Locally)
If you’d like to develop with PHP 7 locally, use our Homestead Improved – it’s already running PHP 7 by default. What’s more, it’s almost the exact same setup you’ll end up with by using Laravel Forge below.
如果您想在本地使用PHP 7进行开发,请使用我们的Homestead Enhanced –默认情况下已经在运行PHP 7。 更重要的是,使用下面的Laravel Forge几乎可以得到完全相同的设置。
拉拉夫(Laravel)Forge (Laravel Forge)
Laravel Forge is a commercial service for deploying and provisioning servers running PHP. It’s a common misconception that everything bearing the Laravel name is immediately related to Laravel and requires it, but this is not true. Laravel is just a brand at this point, one that encompasses many tools – much like one can use Zend Studio or Zend Server without using the Zend Framework. As such, Forge can, at the moment, be used to set up servers for DigitalOcean, AWS or Linode. Like we said in the introduction to this post, we’ll be using DigitalOcean.
Laravel Forge是一项商业服务,用于部署和配置运行PHP的服务器。 一个普遍的误解是,所有带有Laravel名称的东西都与Laravel直接相关并且需要它,但是事实并非如此。 此时,Laravel只是一个品牌,它包含许多工具-就像一个人可以使用Zend Studio或Zend Server而不使用Zend Framework。 因此,Forge目前可以用于为DigitalOcean,AWS或Linode设置服务器。 就像我们在这篇文章的简介中所说的那样,我们将使用DigitalOcean。
Once you sign up for Forge (there’s a 5-day trial) and set up your account, head on over to the server creation page.
注册Forge(有5天的试用期)并设置帐户后,请转到服务器创建页面。
Note that while 5 days may seem low, it’s enough for testing out a deployment or two. This doesn’t mean your server will be killed after 5 days – it merely means you won’t be able to manage it from Forge or make new ones after the trial expires. The trial actually does provide you with a full service. Unfortunately, it also requires a credit card – one can hope they’ll remove this requirement later on to ease onboarding of new users.
请注意,虽然5天似乎很短,但足以测试一两个部署。 这并不意味着您的服务器将在5天后被杀死–只是意味着您将无法在试用期满后通过Forge对其进行管理或创建新服务器。 试用实际上确实为您提供了全面的服务。 不幸的是,它也需要一张信用卡-可以希望他们以后再取消此要求,以简化新用户的入职手续。
If you’re following along just for the sake of this experiment, select the lowest-tier server. Modify other settings as you see fit.
如果您只是为了进行本实验而进行,请选择最低层的服务器。 根据需要修改其他设置。
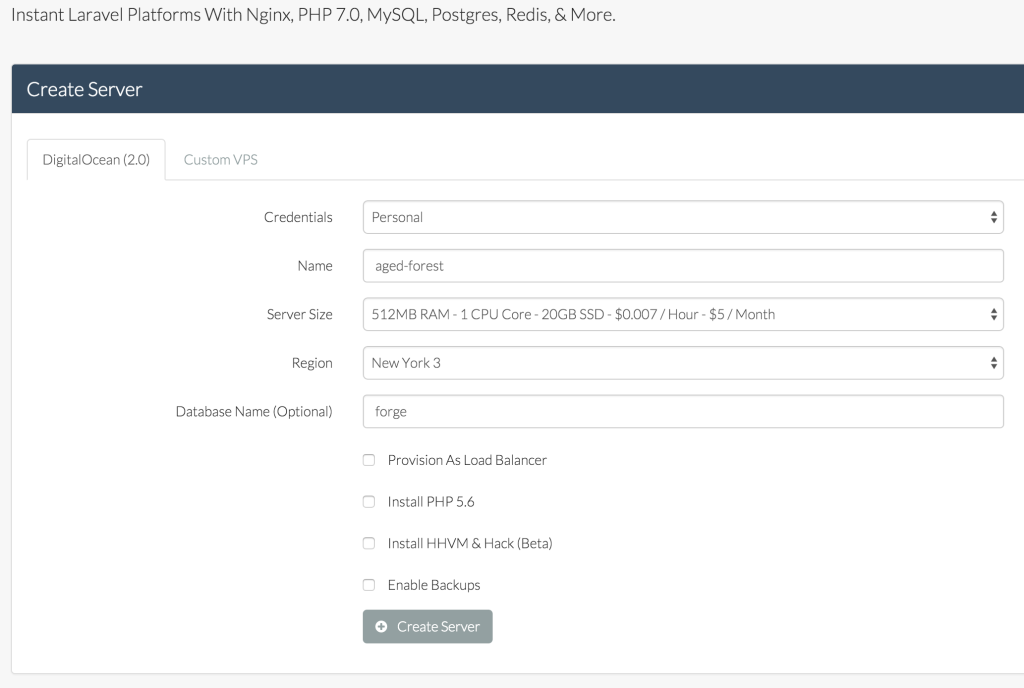
Leave all the checkboxes unchecked – the first one is only needed with high-load applications. The HHVM one is for people who like to live on the bleeding edge and experiment with alternative runtimes. Enable Backup is a DigitalOcean specific option which increases the price of the droplet by 20% and takes weekly snapshots of the Droplet so it can be easily restored if something goes awry.
取消选中所有复选框-只有高负载应用程序才需要第一个复选框。 HHVM适用于喜欢生活在前沿的人们并尝试使用其他运行时的人 。 启用备份是DigitalOcean的一个特定选项,它将液滴的价格提高20%,并每周对Droplet进行快照,以便在出现问题时可以轻松地将其还原。
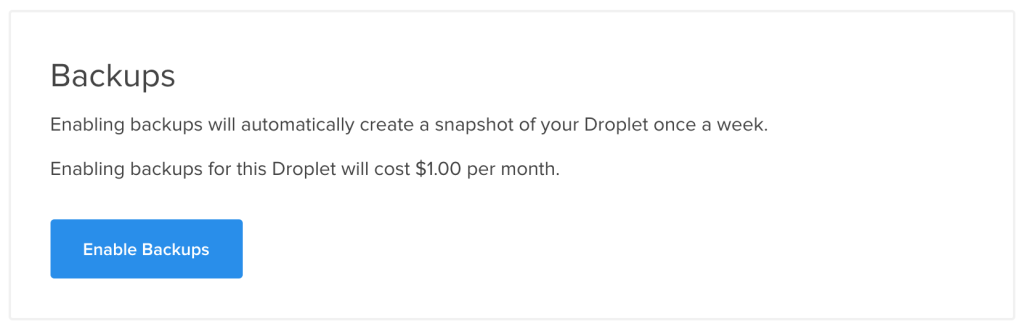
I do not recommend setting this option – it needlessly makes things more expensive, and weekly backups in a world as agile as ours aren’t that valuable – opting for a custom daily backup option instead would likely be a better idea. This is something which should definitely be pointed out in the server creation screen, as it has the potential to become an unanticipated cost. Besides, if needed, it can be activated post-creation on the droplet’s configuration screen in DigitalOcean’s control panel.
我不建议设置此选项-不必要地使事情变得更昂贵,而在我们这样敏捷的世界中,每周备份并不那么有价值-选择自定义的每日备份选项可能会是一个更好的主意。 在服务器创建屏幕中绝对应该指出这一点,因为它有可能成为意外成本。 此外,如果需要,可以在DigitalOcean的控制面板中的液滴配置屏幕上创建后激活它。
Once the Create Server button is clicked, the provisioning and creation process will begin. It might take a while.
单击“创建服务器”按钮后,预配和创建过程将开始。 这可能需要一段时间。

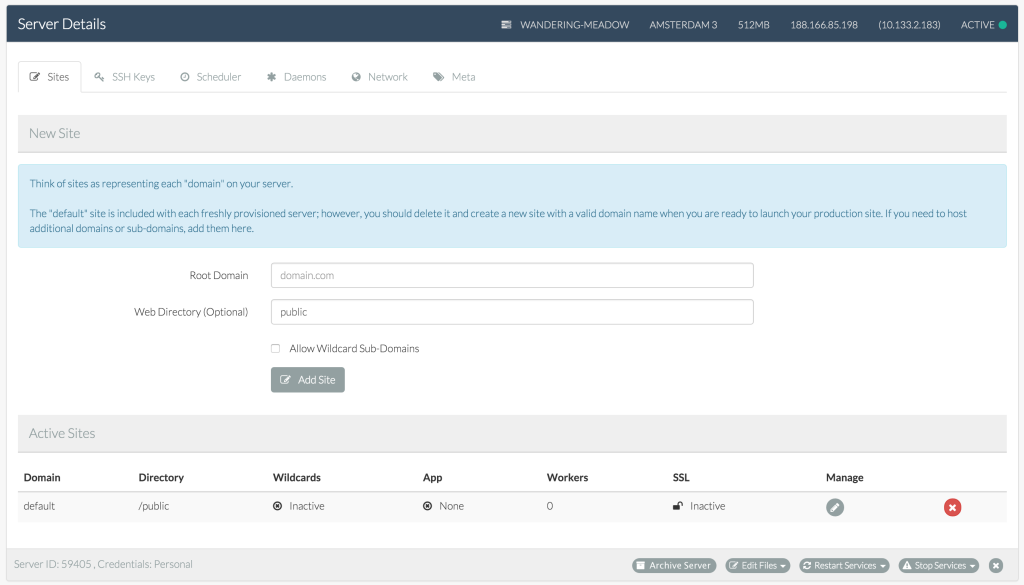
As soon as the server is provisioned, we can configure it via an interface reminiscent of tools like PuPHPet.
一旦配置好服务器,我们就可以通过让人想起PuPHPet之类的工具的界面对其进行配置。
At this point, Forge provides some incredibly practical features, arguably justifying its price in one fell swoop. From GUIs for editing PHP configuration…
在这一点上,Forge提供了一些令人难以置信的实用功能,可以一口气证明它的价格合理。 从GUI编辑PHP配置…
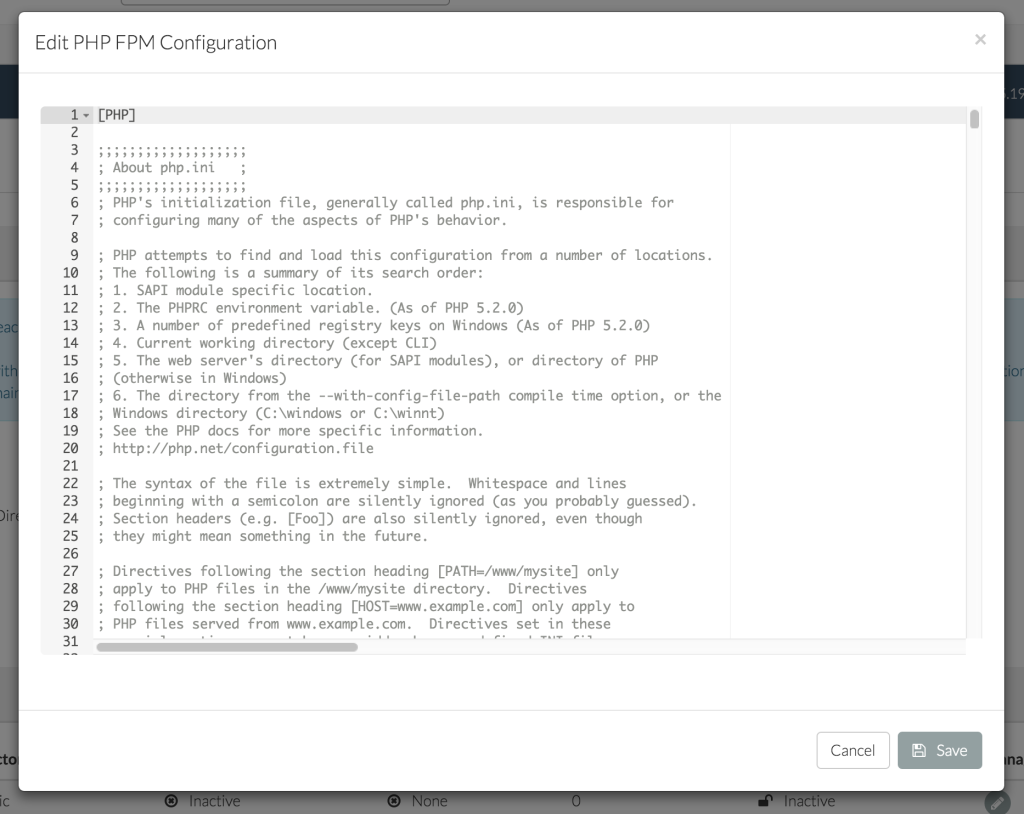
… to private network setups between servers (so it’s easy to add a separate server as a database only, or one for queues, for example), SSH key upload interfaces, daemons for keeping services alive, etc. Feel free to study them all at your own leisure.
…到服务器之间的专用网络设置(因此,很容易将单独的服务器仅添加为数据库,或将其添加为队列),例如SSH密钥上传接口,用于保持服务活动的守护程序等。随时可以在服务器上进行研究你自己的休闲。
For deploying, I’ve got a small Diffbot account dashboard I’m developing as I learn VueJS, and it seems like the perfect thing to try out. You can clone / fork it here.
为了进行部署,我在学习VueJS时正在开发一个小的Diffbot帐户仪表板,尝试一下似乎很完美。 您可以在此处克隆/派生它。
Let’s try it out. First, let’s make sure our server is up and running and serving PHP 7 content. We can do this by visiting the server’s IP address in the browser:
让我们尝试一下。 首先,让我们确保服务器已启动并正在运行并提供PHP 7内容。 我们可以通过在浏览器中访问服务器的IP地址来做到这一点:
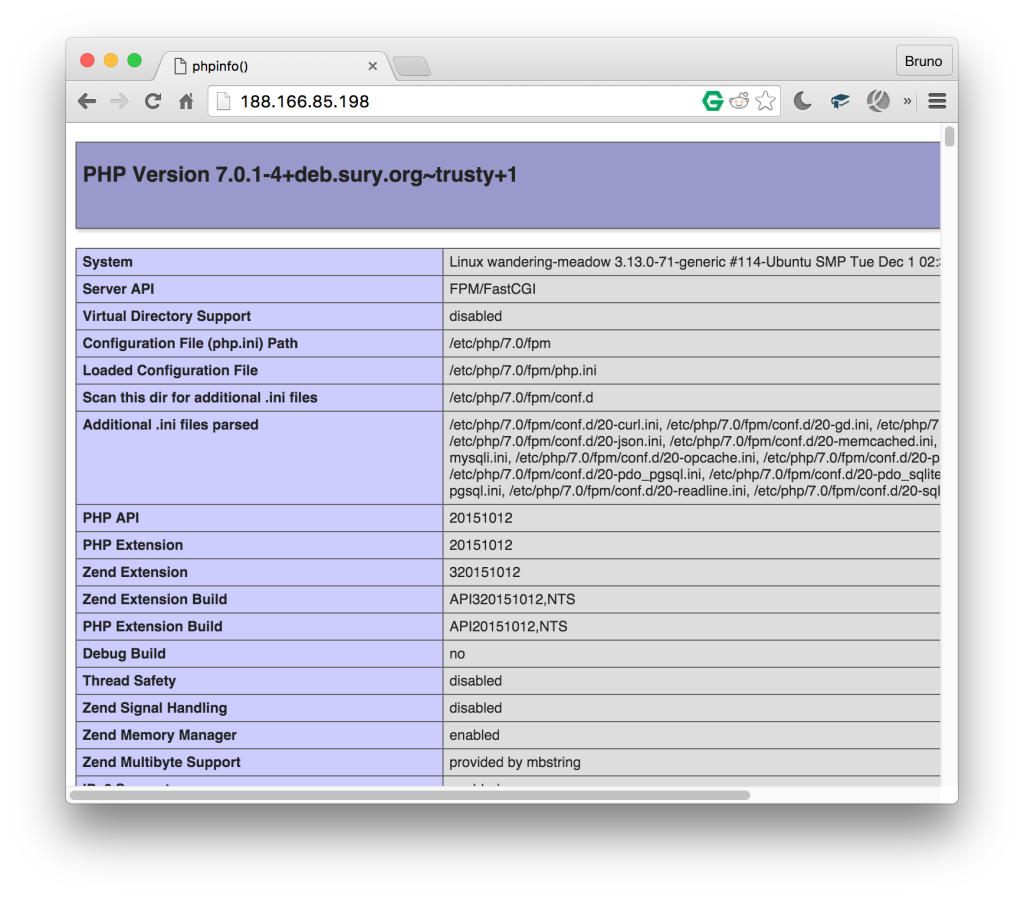
All good! Now, let’s add a new site. Without setting up a dedicated domain, let’s just use the IP and modify the default site added by forge by clicking the modify button. The very next screen will let us bind a Github repo to the app we’re creating – this is where the aforementioned Dash repo comes in.
都好! 现在,让我们添加一个新站点。 无需设置专用域,我们只需使用IP并通过单击“修改”按钮来修改伪造添加的默认站点即可。 接下来的屏幕将使我们将Github存储库绑定到我们正在创建的应用程序-这就是前面提到的Dash存储库的所在。
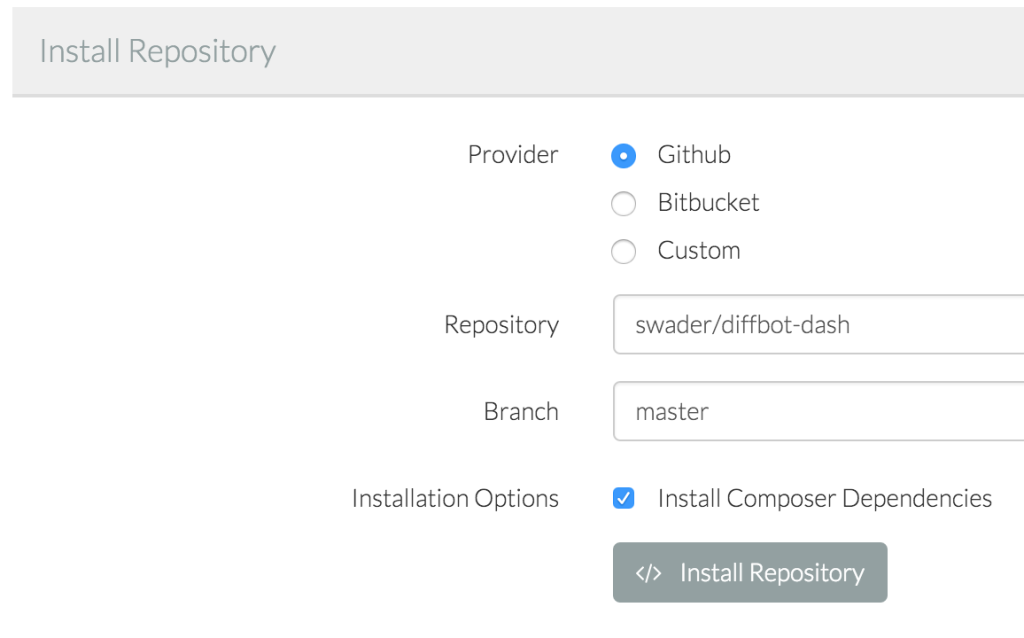
This type of binding will also let us set up auto-deployment (Quick Deploy, selectable on the next screen) which will re-deploy our app whenever a push to the repo is made. Before we deploy, we need to modify the deploy script slightly by removing the line mentioning artisan – we’re not using a Laravel app, so this would cause an error during deployment. Now we can hit “Deploy Now”.
这种类型的绑定还可以让我们设置自动部署(快速部署,在下一个屏幕上可以选择),每当推送到存储库时,它都会重新部署我们的应用程序。 在部署之前,我们需要通过删除提及artisan的行来稍微修改部署脚本-我们没有使用Laravel应用程序,因此这会在部署期间导致错误。 现在我们可以点击“立即部署”。
Unfortunately, there is no way of knowing if the deployment was successful – only errors are shown at the top of the screen – but a refresh of the IP in the browser reveals that everything is just fine.
不幸的是,无法知道部署是否成功-屏幕顶部仅显示错误-但是浏览器中IP的刷新显示一切都很好。
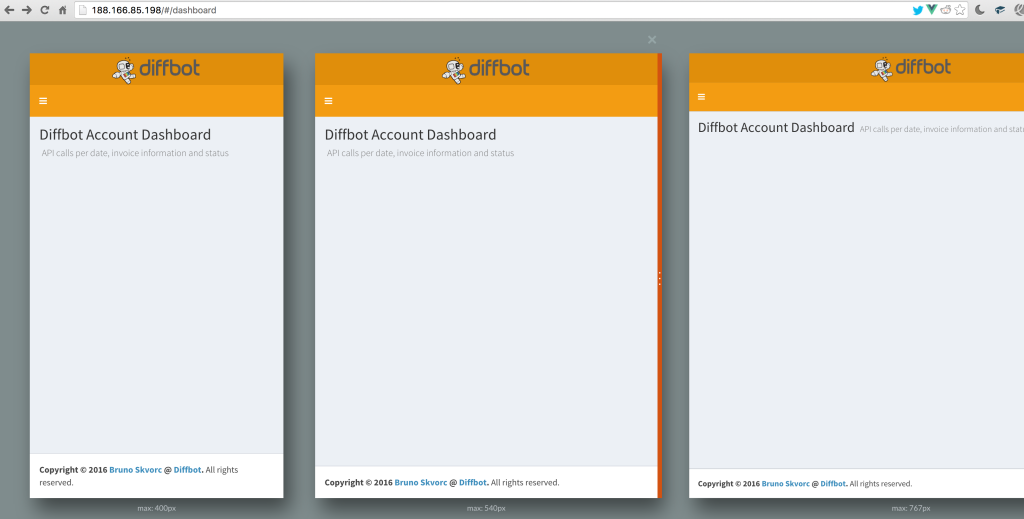
With Quick Deploy activated, any change we push will immediately be reflected on our app. Like we said, though, it’s a shame we aren’t notified of new successful deployments in any way. That’s it – it’s that simple to set up a basic app with Forge. Now let’s do the same thing manually – feel free to delete the server from the main Forge screen – it’ll conserve your account credits.
激活“快速部署”后,我们推送的任何更改都将立即反映在我们的应用程序中。 就像我们说的那样,很遗憾我们没有以任何方式收到新的成功部署的通知。 就是这样–使用Forge设置基本应用程序就这么简单。 现在,让我们手动执行相同的操作-随时从Forge主屏幕中删除服务器-这样可以节省您的帐户信用。
手动安装 (Manual Installation)
First, we manually create a new droplet at https://cloud.digitalocean.com/droplets/new. Same settings as in Forge – Ubuntu 14.04, closest region, lowest tier server ($5). All checkboxes can remain unchecked. Once the droplet has been created, there are several steps to go through. First and foremost, the server should be secured and additional tweaks performed. These steps are not necessary when creating the server with Forge.
首先,我们在https://cloud.digitalocean.com/droplets/new手动创建一个新的Droplet。 与Forge中的设置相同– Ubuntu 14.04,最近的区域,最低层的服务器($ 5)。 所有复选框都可以保持未选中状态。 创建小滴后,需要完成几个步骤。 首先, 应确保服务器安全并执行其他调整 。 使用Forge创建服务器时,无需执行这些步骤。
Then, we begin by installing the software which will power our app:
然后,我们首先安装将为我们的应用程序提供支持的软件:
sudo apt-get update
sudo apt-get install git nginx
After this, our server will be live and accessible via its IP address. Now let’s install PHP 7.
之后,我们的服务器将处于活动状态,并可以通过其IP地址进行访问。 现在让我们安装PHP 7。
sudo add-apt-repository ppa:ondrej/php-7.0
sudo apt-get update
sudo apt-get install php7.0-fpm
Now, we need to modify the vhost setup for Nginx’s default site.
现在,我们需要修改Nginx默认站点的虚拟主机设置。
sudo vim /etc/nginx/sites-available/defaultOnce we activate insert mode with i, we change the following:
使用i激活插入模式后,我们将更改以下内容:
under
index, we addindex.phpso that the line now looks like this:在
index下,我们添加index.php以便该行现在如下所示:index index.php index.html index.htm;`under the “PHP” block, we uncomment some lines and edit the
.sockone, so that the block now looks like this:在“ PHP”块下,我们取消注释一些行并编辑
.sock,因此该块现在如下所示:# pass the PHP scripts to FastCGI server listening on 127.0.0.1:9000 location ~ \.php$ { fastcgi_split_path_info ^(.+\.php)(/.+)$; # NOTE: You should have "cgi.fix_pathinfo = 0;" in php.ini # With php5-cgi alone: # fastcgi_pass 127.0.0.1:9000; # With php5-fpm: fastcgi_pass unix:/var/run/php/php7.0-fpm.sock; fastcgi_index index.php; include fastcgi_params; }
We exit insert mode with esc, then save and exit with :x. Finally, we restart the server with:
我们使用esc退出insert模式,然后保存并使用:x退出。 最后,我们使用以下命令重新启动服务器:
sudo service nginx restartIf we now add a phpinfo file into the location of this default server, we’ll see all is good:
如果现在将phpinfo文件添加到此默认服务器的位置,我们将看到一切都很好:
sudo vim /usr/share/nginx/html/index.php… and the file’s contents:
…以及文件内容:
<?php

phpinfo();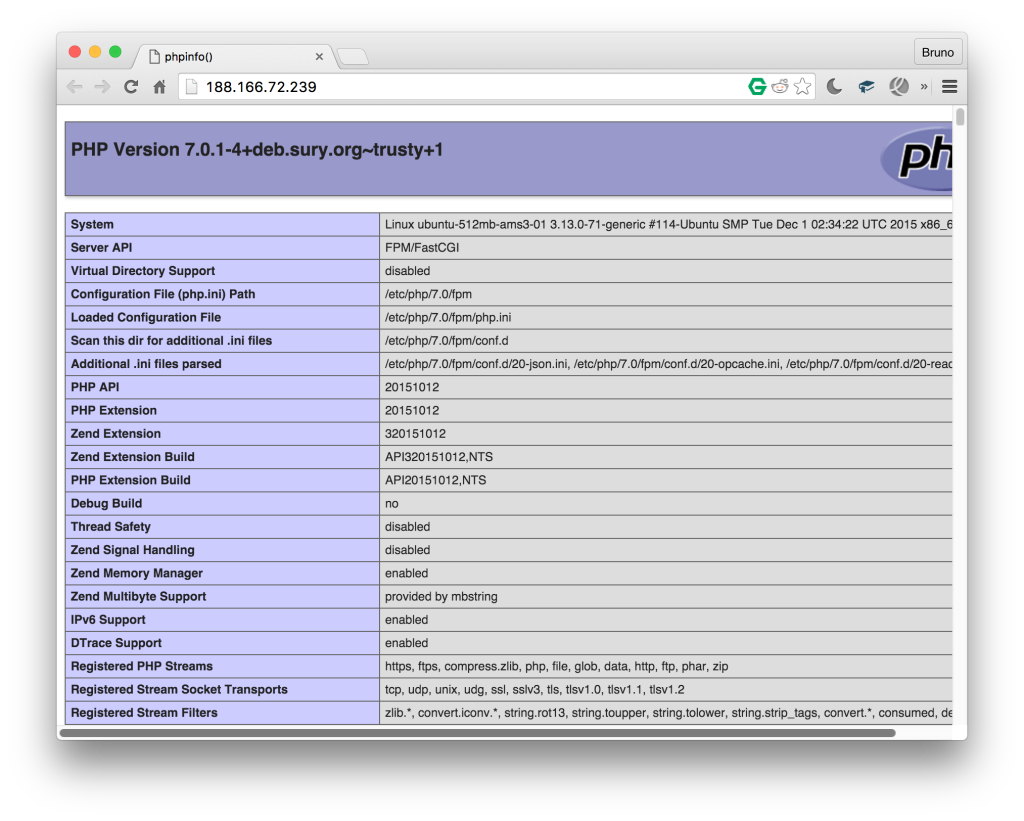
Now that PHP 7 is operational, let’s change the root location of the default server to /var/www/dash/public. Generally, we would be making a new configuration file with a custom root location for every app we deploy, but that would require a custom domain, too – something we don’t have prepared at this point.
现在PHP 7可以运行了,让我们将默认服务器的根目录更改为/var/www/dash/public 。 通常,我们将为我们部署的每个应用程序制作一个带有自定义根目录位置的新配置文件,但这也需要一个自定义域,这是我们目前尚未准备的。
Then, it’s just a matter of making the folder in question and cloning the app directly into it:
然后,只需要制作相关文件夹并将应用程序直接克隆到其中即可:
mkdir /var/www
git clone https://github.com/swader/diffbot-dash dash
sudo service nginx restart
Once this is done, the app should work just like with Forge – with one exception. Future pushes to the repo would have to be pulled to the server manually. Third party continuous deployment is outside the scope of this tutorial, but we’ve covered it before with tools like Deploybot.
完成此操作后,该应用程序应与Forge一样工作-除了一个例外。 将来对存储库的推送将必须手动拉至服务器。 第三方连续部署不在本教程的讨论范围之内,但是我们之前已经使用Deploybot之类的工具进行过介绍 。
Another difference from the Forge approach is the fact that we’ve only installed the bare minimum of software here – no MySQL, no Postgre, not even NodeJS and its hellish offspring, NPM. Everything is very, very manual – full fine-grained control, but admittedly not everyone’s cup of tea.
与Forge方法的另一个不同之处在于,我们在这里仅安装了最低限度的软件–没有MySQL,没有Postgre,甚至没有安装NodeJS及其后代NPM。 一切都是非常非常手工的–完全细粒度的控制,但不可否认不是每个人的喝杯茶。
You might be thinking that manual deployment almost seems simpler and cheaper than Forge and, in a way, you’d be right – for an app as simple as the one we’ve been dealing with, Forge is probably overkill. But when things get complicated, when you have to maintain several applications per server or deploy bigger, more advanced applications with database migrations, backups, and more – Forge’s advantages become apparent.
您可能会认为手动部署似乎比Forge更简单,更便宜,并且从某种意义上来说,您是对的-对于像我们一直在处理的应用那样简单的应用,Forge可能是过大了。 但是,当事情变得复杂时,当您必须为每台服务器维护多个应用程序或部署具有数据库迁移,备份等功能的更大,更高级的应用程序时– Forge的优势就变得显而易见。
结论 (Conclusion)
In this tutorial, we hosted our application on a PHP 7 server running on a DigitalOcean droplet using Laravel Forge, a popular server deployment service. We also deployed using the old school method of manual installation. The latter can be easily applied to any server running Ubuntu – so go forth and 7-ize!
在本教程中,我们使用流行的服务器部署服务Laravel Forge将应用程序托管在运行在DigitalOcean Droplet上PHP 7服务器上。 我们还使用传统的手动安装方法进行了部署。 后者可以轻松地应用于任何运行Ubuntu的服务器-因此继续进行7-ize!
For the sake of brevity, we skipped advanced steps like automated testing and deploy hooks, or database setups. If that’s something you’d be interested in, let us know in the comments below and we’ll publish a followup expanding on the two approaches above by deploying a more enterprisey application.
为简洁起见,我们跳过了自动测试和部署挂钩或数据库设置等高级步骤。 如果您对此感兴趣,请在下面的评论中告诉我们,我们将通过部署更具企业性的应用程序来发布有关上述两种方法的后续报告。
Do you use Laravel Forge? Or do you prefer to deploy another way? Let us know in the comments!
您是否使用Laravel Forge? 还是您喜欢采用其他方式? 让我们在评论中知道!
翻译自: https://www.sitepoint.com/setting-up-php-7-servers-with-laravel-forge-and-digitalocean/


 1346
1346

 被折叠的 条评论
为什么被折叠?
被折叠的 条评论
为什么被折叠?
 到【灌水乐园】发言


