You have just received a new computer with Windows 7 pre-installed on it, but you might still be fond of Vista and want to create a dual boot system. Today we take you through the process of creating a Windows 7 / Vista dual boot system without using any third party software.
您刚收到一台预装有Windows 7的新计算机,但是您可能仍然喜欢Vista,并希望创建双启动系统。 今天,我们将带您完成不使用任何第三方软件的Windows 7 / Vista双启动系统的创建过程。
Assign Drive Letters
分配驱动器号
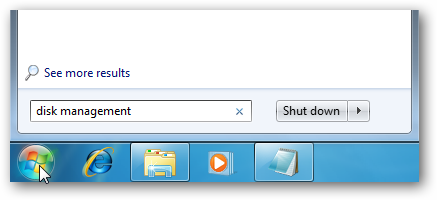
If you have extra drives like media card and optical disc drives, you might want to do a bit of renaming to keep them straight. Type Disk Management into the search box in the Start menu.
如果您有额外的驱动器(例如媒体卡和光盘驱动器),则可能需要重命名以使其保持直立状态。 在“开始”菜单的搜索框中键入“ 磁盘管理” 。
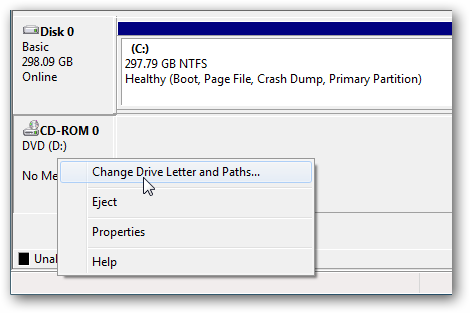
Then right-click on the drive you want to change and select Change Drive Letter and Paths.
然后,右键单击要更改的驱动器,然后选择“ 更改驱动器号和路径” 。
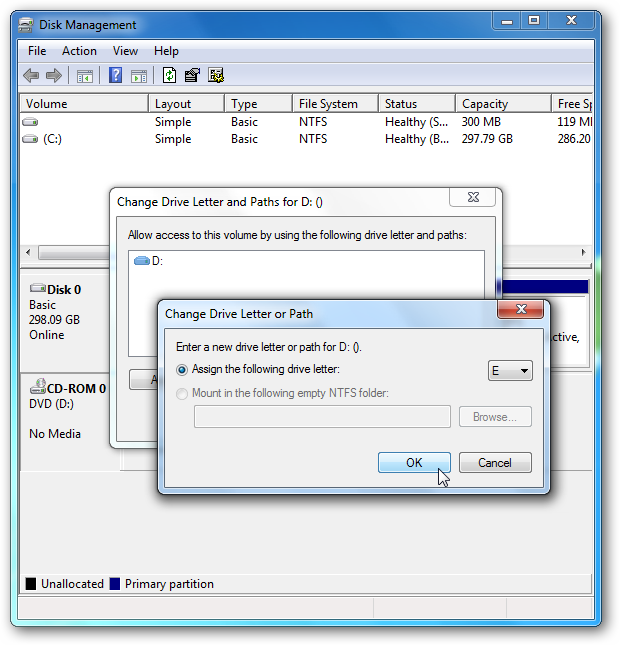
In this example we’re renaming the DVD drive to (E:) this way we can keep our main 2 partitions as (C:) for Windows 7 and (D:) for Vista.
在此示例中,我们将DVD驱动器重命名为(E :),这样我们就可以将主要的2个分区保留为Windows 7的(C :)和Vista的(D :)。
Create a New Partition
创建一个新分区
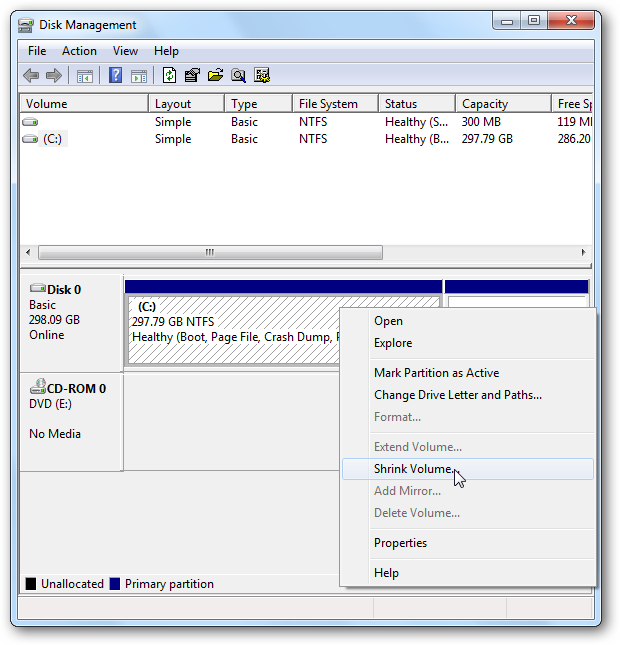
Now with Disk Management still open we need to right-click on the C: drive and select Shrink Volume.
现在,磁盘管理仍处于打开状态,我们需要右键单击C:驱动器,然后选择“ 收缩卷”。
A window pops up showing the drive is being queried for available space.
弹出一个窗口,显示正在查询驱动器的可用空间。

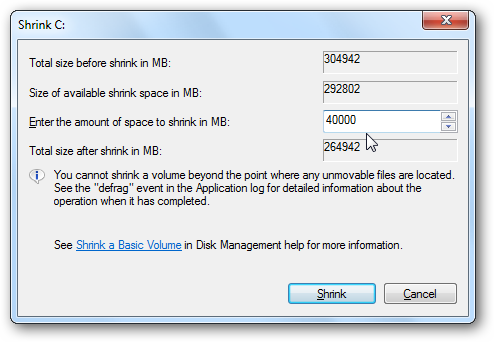
After it finishes, you want to enter the amount of space to shrink the volume by. Remember that the size you select is in MB so, like in this example. 40,000MB is equal to 40GB. The minimum to go with on a Vista install should be 20GB. Before choosing a size, you’ll want to plan ahead and think about how much data you’ll be adding to the Vista partition. You’ll also want to plan for how much space you want on the Windows 7 partition as well. Here we know we’re not going to be putting a whole lot of data on the Vista partition so it’s sized accordingly. When you have the amount of space entered in, click the Shrink button.
完成后,您要输入缩小卷的空间量。 请记住,您选择的大小以MB为单位,如本例所示。 40,000MB等于40GB。 安装Vista的最低容量应为20GB。 在选择大小之前,您需要先进行计划,然后考虑要向Vista分区中添加多少数据。 您还需要计划Windows 7分区上需要多少空间。 在这里,我们知道我们不会在Vista分区上放置大量数据,因此会相应调整大小。 输入足够的空间后,单击“缩小”按钮。
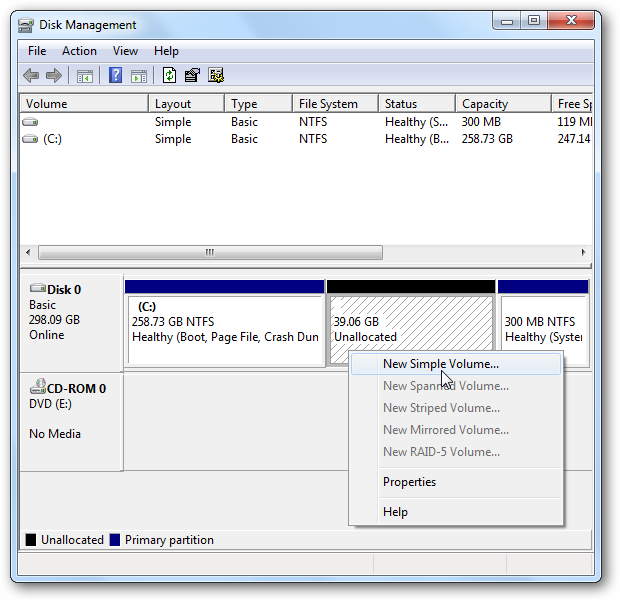
It will take a moment for the process to complete when it does you’ll see the new Unallocated space. Right-click on the Unallocated space select New Simple Volume.
当您看到新的未分配空间时,该过程将花一点时间完成。 右键单击未分配空间,选择新建简单卷 。
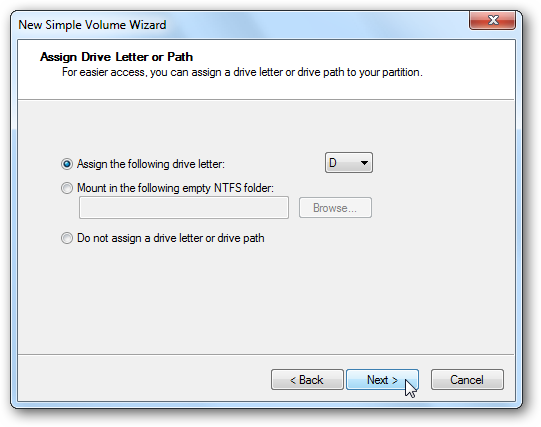
That starts up the New Simple Volume Wizard that is a straight forward process. When you get to the following window the drive letter D will be selected by default if you changed the drive letters in the steps above.
这将启动“新建简单卷向导”,该过程很简单。 当您进入以下窗口时,如果在上述步骤中更改了驱动器号,则默认情况下将选择驱动器号D。
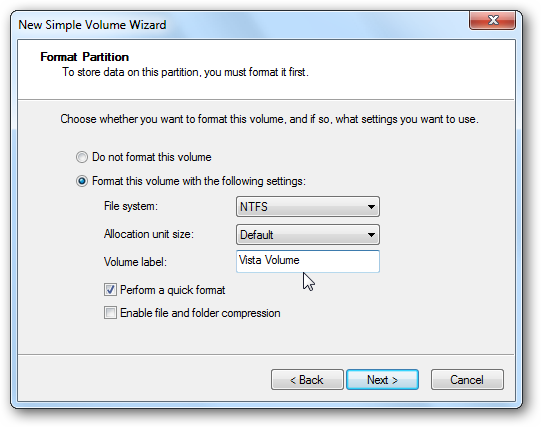
Then in the Format Partition screen you can leave the default settings how they are. One thing you might want to change though, is the Volume label. In this example we renamed it Vista Volume so it’s easier to identify when we start the Vista installation.
然后,在“格式化分区”屏幕中,可以保留默认设置。 但是,您可能要更改的一件事是音量标签。 在此示例中,我们将其重命名为Vista Volume,以便在启动Vista安装时更容易识别。
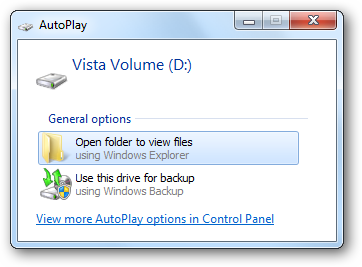
After its complete you’ll see the volume listed in Disk Management and if AutoPlay is enabled, it will pop up too.
完成后,您将在“磁盘管理”中看到该卷,并且如果启用了“自动播放”,它也会弹出。
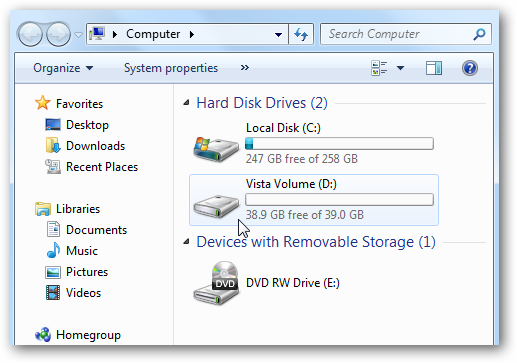
You will also see it listed in My Computer. Now everything looks good to go. The Windows 7 disk is label as (C:), The new Vista Volume as (D:), and the DVD drive as (E:).
您还将在“我的电脑”中看到它。 现在一切看起来都很顺利。 Windows 7磁盘的标签为(C :),新的Vista卷的标签为(D :),DVD驱动器的标签为(E :)。
Install Vista on the New Partition
在新分区上安装Vista
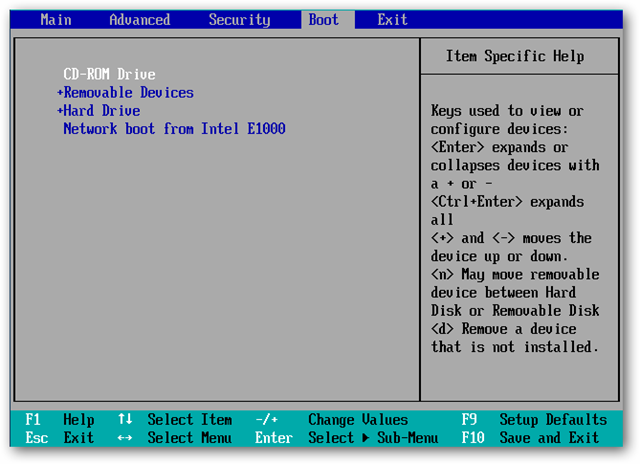
Now that we have our new partition it’s time to install Vista on it. You want to boot from the Vista disc that you have. Most computers will let you choose the boot option by hitting the F8 or F12 key during startup. Each computer varies so you might want to refer to the computer manual or watch the boot screen (it usually says which key to press to get the boot option). You can also go into the computer BIOS setting and select your CD/DVD drive as the first boot device.
现在我们有了新分区,是时候在其上安装Vista了。 您要从拥有的Vista光盘启动。 大多数计算机将在启动过程中按F8或F12键来选择启动选项。 每台计算机都各不相同,因此您可能需要参考计算机手册或观看引导屏幕(通常会说出按下哪个键以获取引导选项)。 您也可以进入计算机BIOS设置,然后选择CD / DVD驱动器作为第一个引导设备。
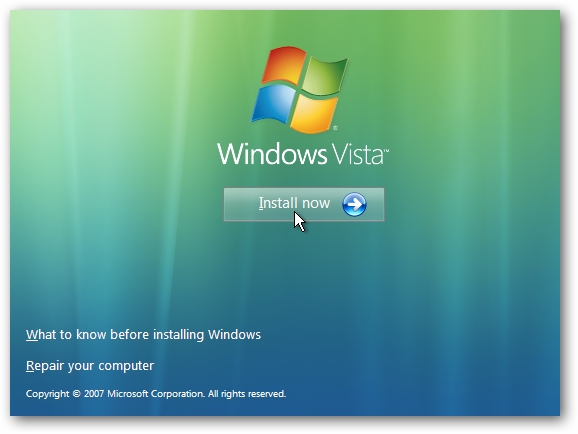
And kick off the installation as if you were doing a clean install of Vista.
然后像执行全新安装Vista一样开始安装。
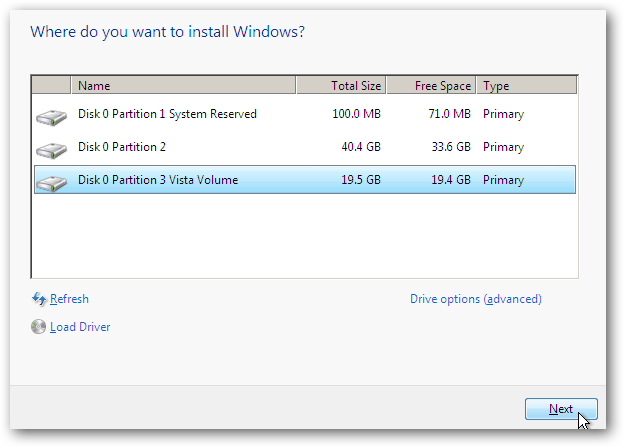
When you come to the screen to select where you want to install Vista, select the partition we created earlier.
当您进入屏幕选择想要安装Vista的位置时,请选择我们之前创建的分区。
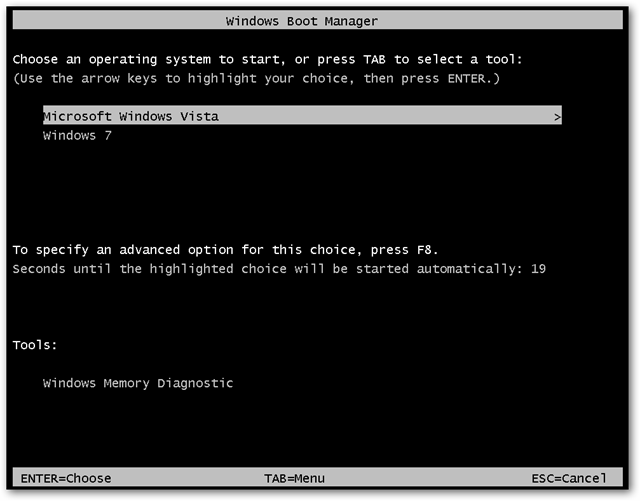
After the first time Vista reboots during the install process you’ll notice both Vista and Windows 7 in the Windows Boot Manager screen. It will still be there after the Vista installation is complete so you can chose either one at startup.
在安装过程中第一次重新引导Vista之后,您会在Windows Boot Manager屏幕中注意到Vista和Windows 7。 Vista安装完成后,它将仍然存在,因此您可以在启动时选择其中之一。
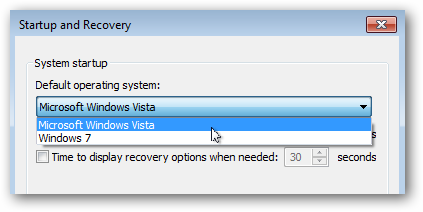
If you want to set up one or the other as the default OS, go into Advanced System Settings as explained in The Geek’s Article.
如果要将一个或另一个设置为默认操作系统,请按照The Geek's Article中的说明进入“高级系统设置”。
Conclusion
结论
Creating a Windows 7 / Vista dual boot system is a bit easier than Windows 7 / XP because Vista won’t overwrite the bootloader so you save a couple of steps. Of course you might want to use a third party utility to create your partitions, but with Windows 7, the functionality is already included and works well. If you want to create a Windows 7 / XP dual boot system we have a guide for that too.
创建Windows 7 / Vista双启动系统比Windows 7 / XP容易一些,因为Vista不会覆盖引导加载程序,因此您可以节省几个步骤。 当然,您可能希望使用第三方实用程序来创建分区,但是在Windows 7中,该功能已经包含在内并且可以正常使用。 如果要创建Windows 7 / XP双启动系统,我们也有相应的指南 。
翻译自: https://www.howtogeek.com/howto/8834/dual-boot-your-pre-installed-windows-7-computer-with-vista/


 233
233

 被折叠的 条评论
为什么被折叠?


