


1、位移
首先我们找到两张图片,一个大圆一个小圆,像这样:

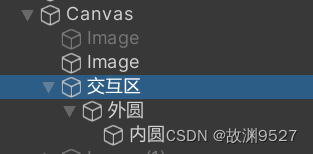
结构是这样的:
然后,新建一个场景,用胶囊去做玩家,摄像机在胶囊下,并且在场景中放两个cube作为参照物
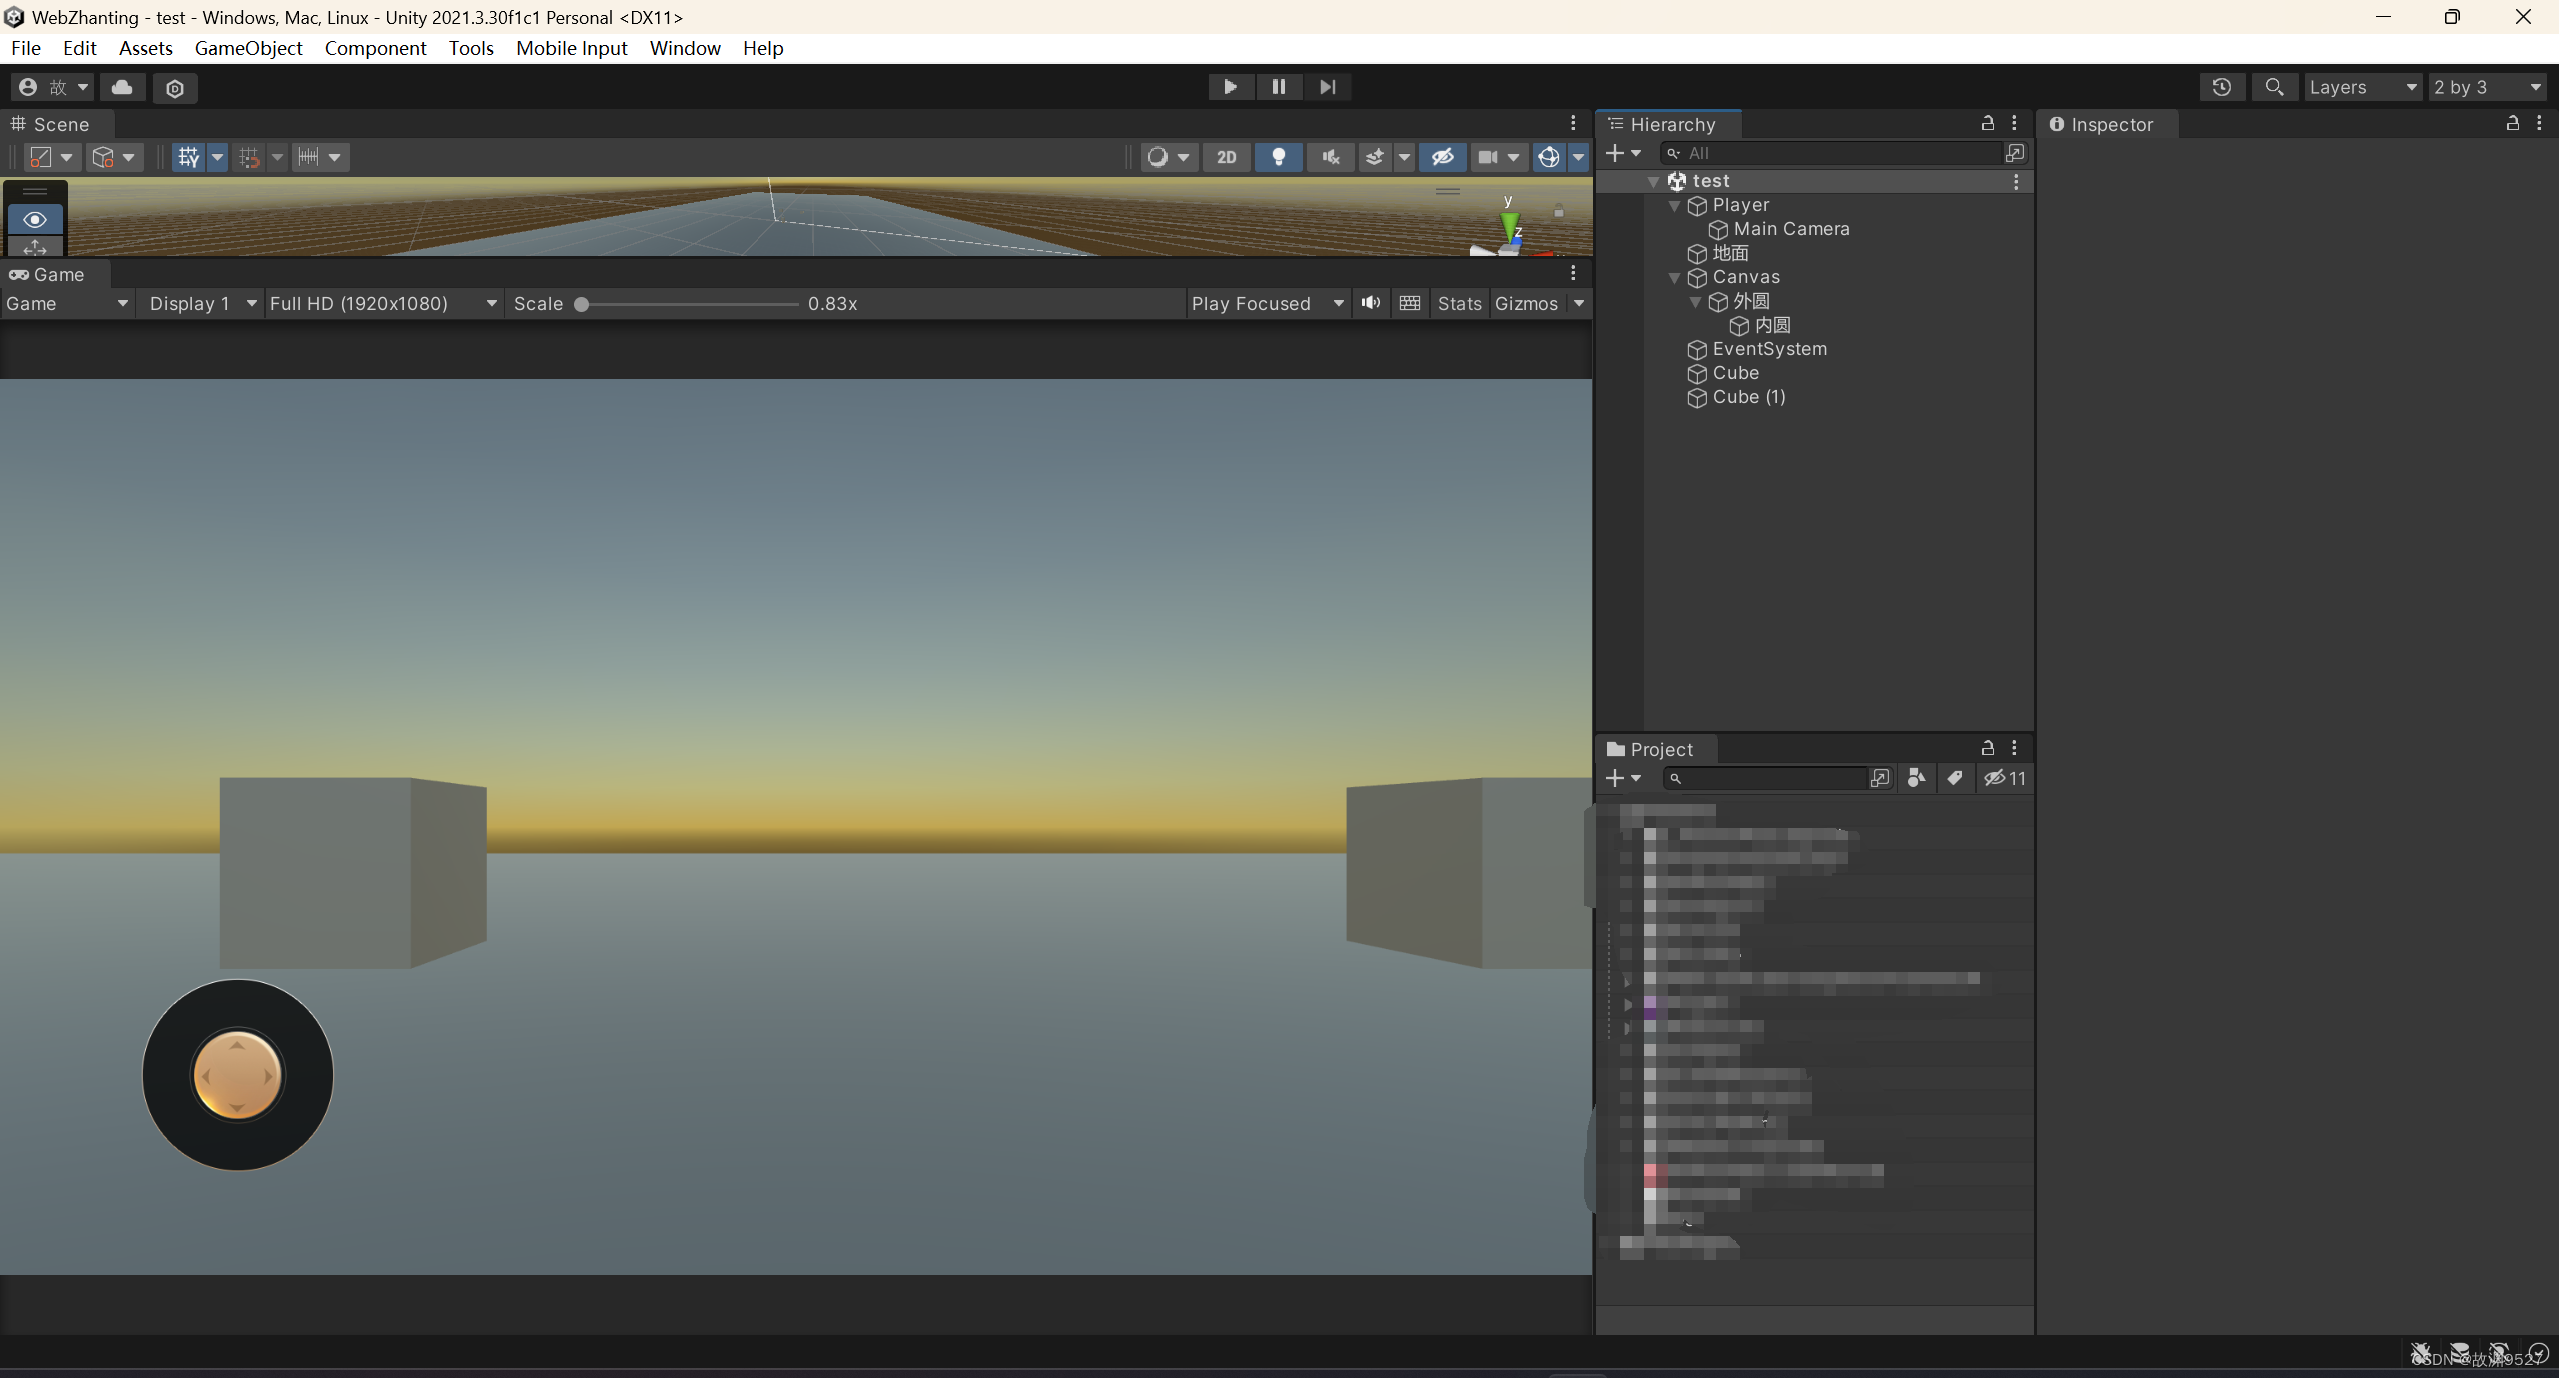
像这样搭好后,我们编写脚本,用ScrollRect去实现摇杆,新建ScrollCircle.cs脚本,继承ScrollRect:
using System.Collections;
using System.Collections.Generic;
using UnityEngine;
using UnityEngine.EventSystems;
using UnityEngine.UI;
public class ScrollCircle : ScrollRect
{
float radius = 0;
public Vector2 output;
void Start()
{
output = new Vector2();
radius = (transform as RectTransform).rect.size.x * 0.5f;
}
public override void OnDrag(PointerEventData eventData)
{
base.OnDrag(eventData);
Vector2 pos = content.anchoredPosition;
if (pos.magnitude > radius)
{
pos = pos.normalized * radius;
SetContentAnchoredPosition(pos);
}
}
public override void OnEndDrag(PointerEventData eventData)
{
base.OnEndDrag(eventData);
content.localPosition = Vector3.zero;
}
void Update()
{
output = content.localPosition / radius;
}
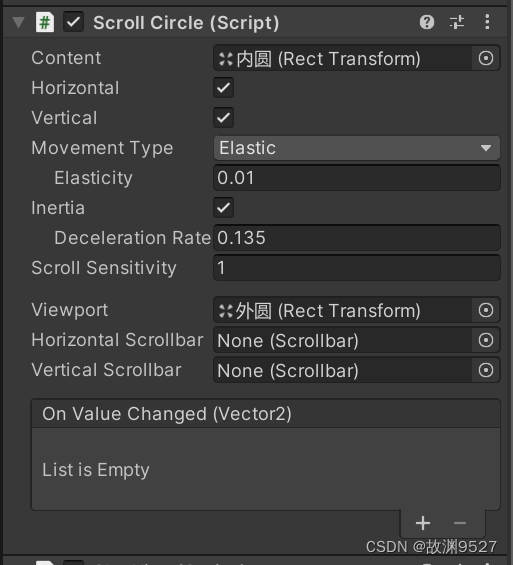
}编写完后,将脚本挂在交互区,然后参数按这样设置:
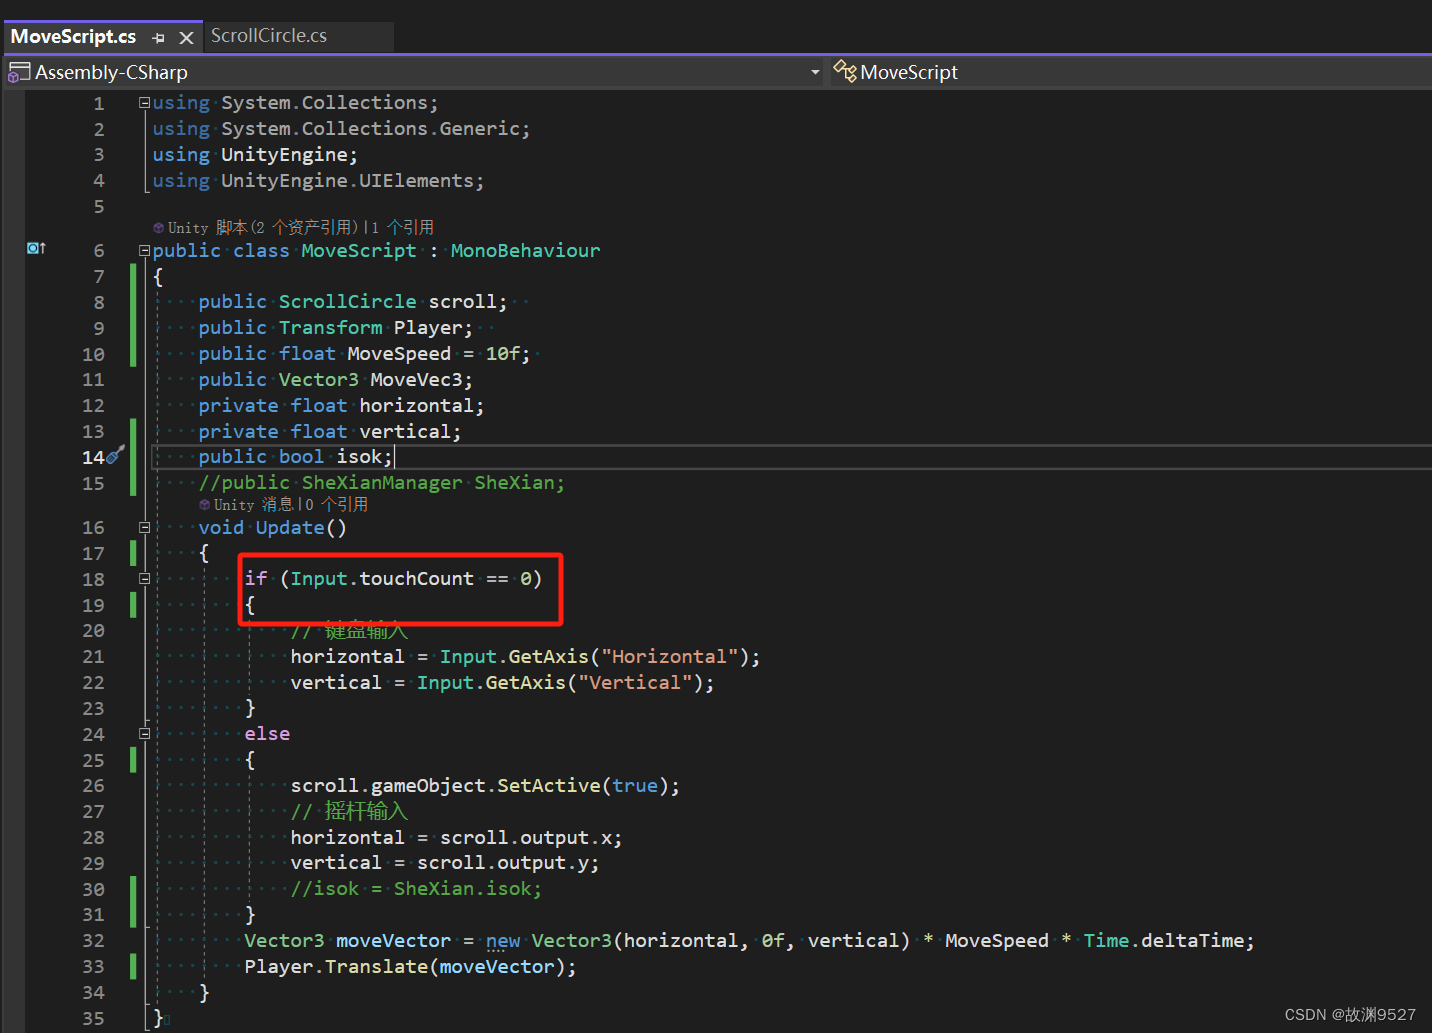
设置完后我们运行场景,会发现摇杆已经做好了,同时,我们开始编写位移等脚本,位移脚本也很简单,只需要把ScrollCircle里的output值拿到就行,新建脚本MoveScript.cs
using System.Collections;
using System.Collections.Generic;
using UnityEngine;
using UnityEngine.UIElements;
public class MoveScript : MonoBehaviour
{
public ScrollCircle scroll;
public Transform Player;
public float MoveSpeed = 10f;
public Vector3 MoveVec3;
private float horizontal;
private float vertical;
void Update()
{
if (Input.touchCount == 0)
{
// 键盘输入
horizontal = Input.GetAxis("Horizontal");
vertical = Input.GetAxis("Vertical");
}
else
{
scroll.gameObject.SetActive(true);
// 摇杆输入
horizontal = scroll.output.x;
vertical = scroll.output.y;
}
Vector3 moveVector = new Vector3(horizontal, 0f, vertical) * MoveSpeed * Time.deltaTime;
Player.Translate(moveVector);
}
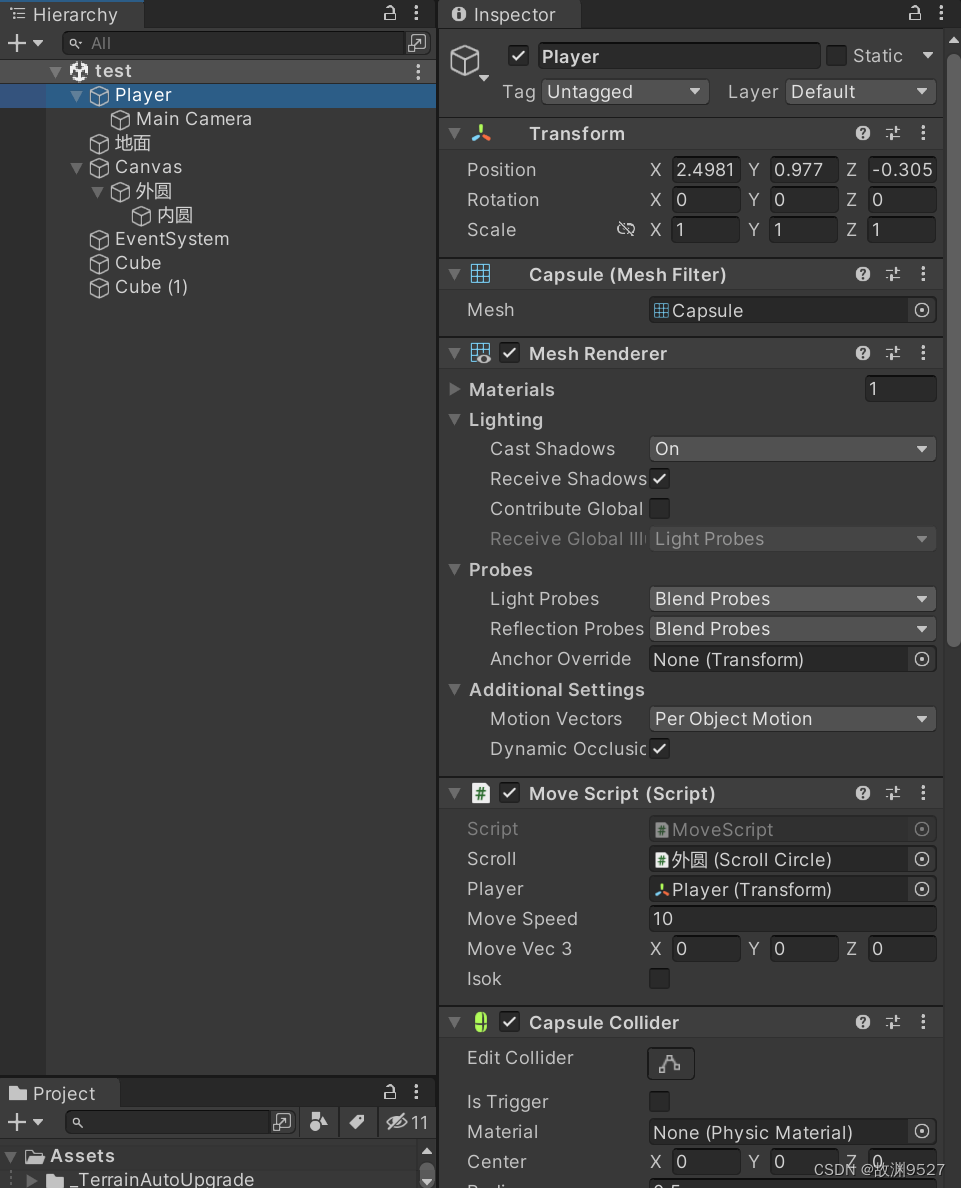
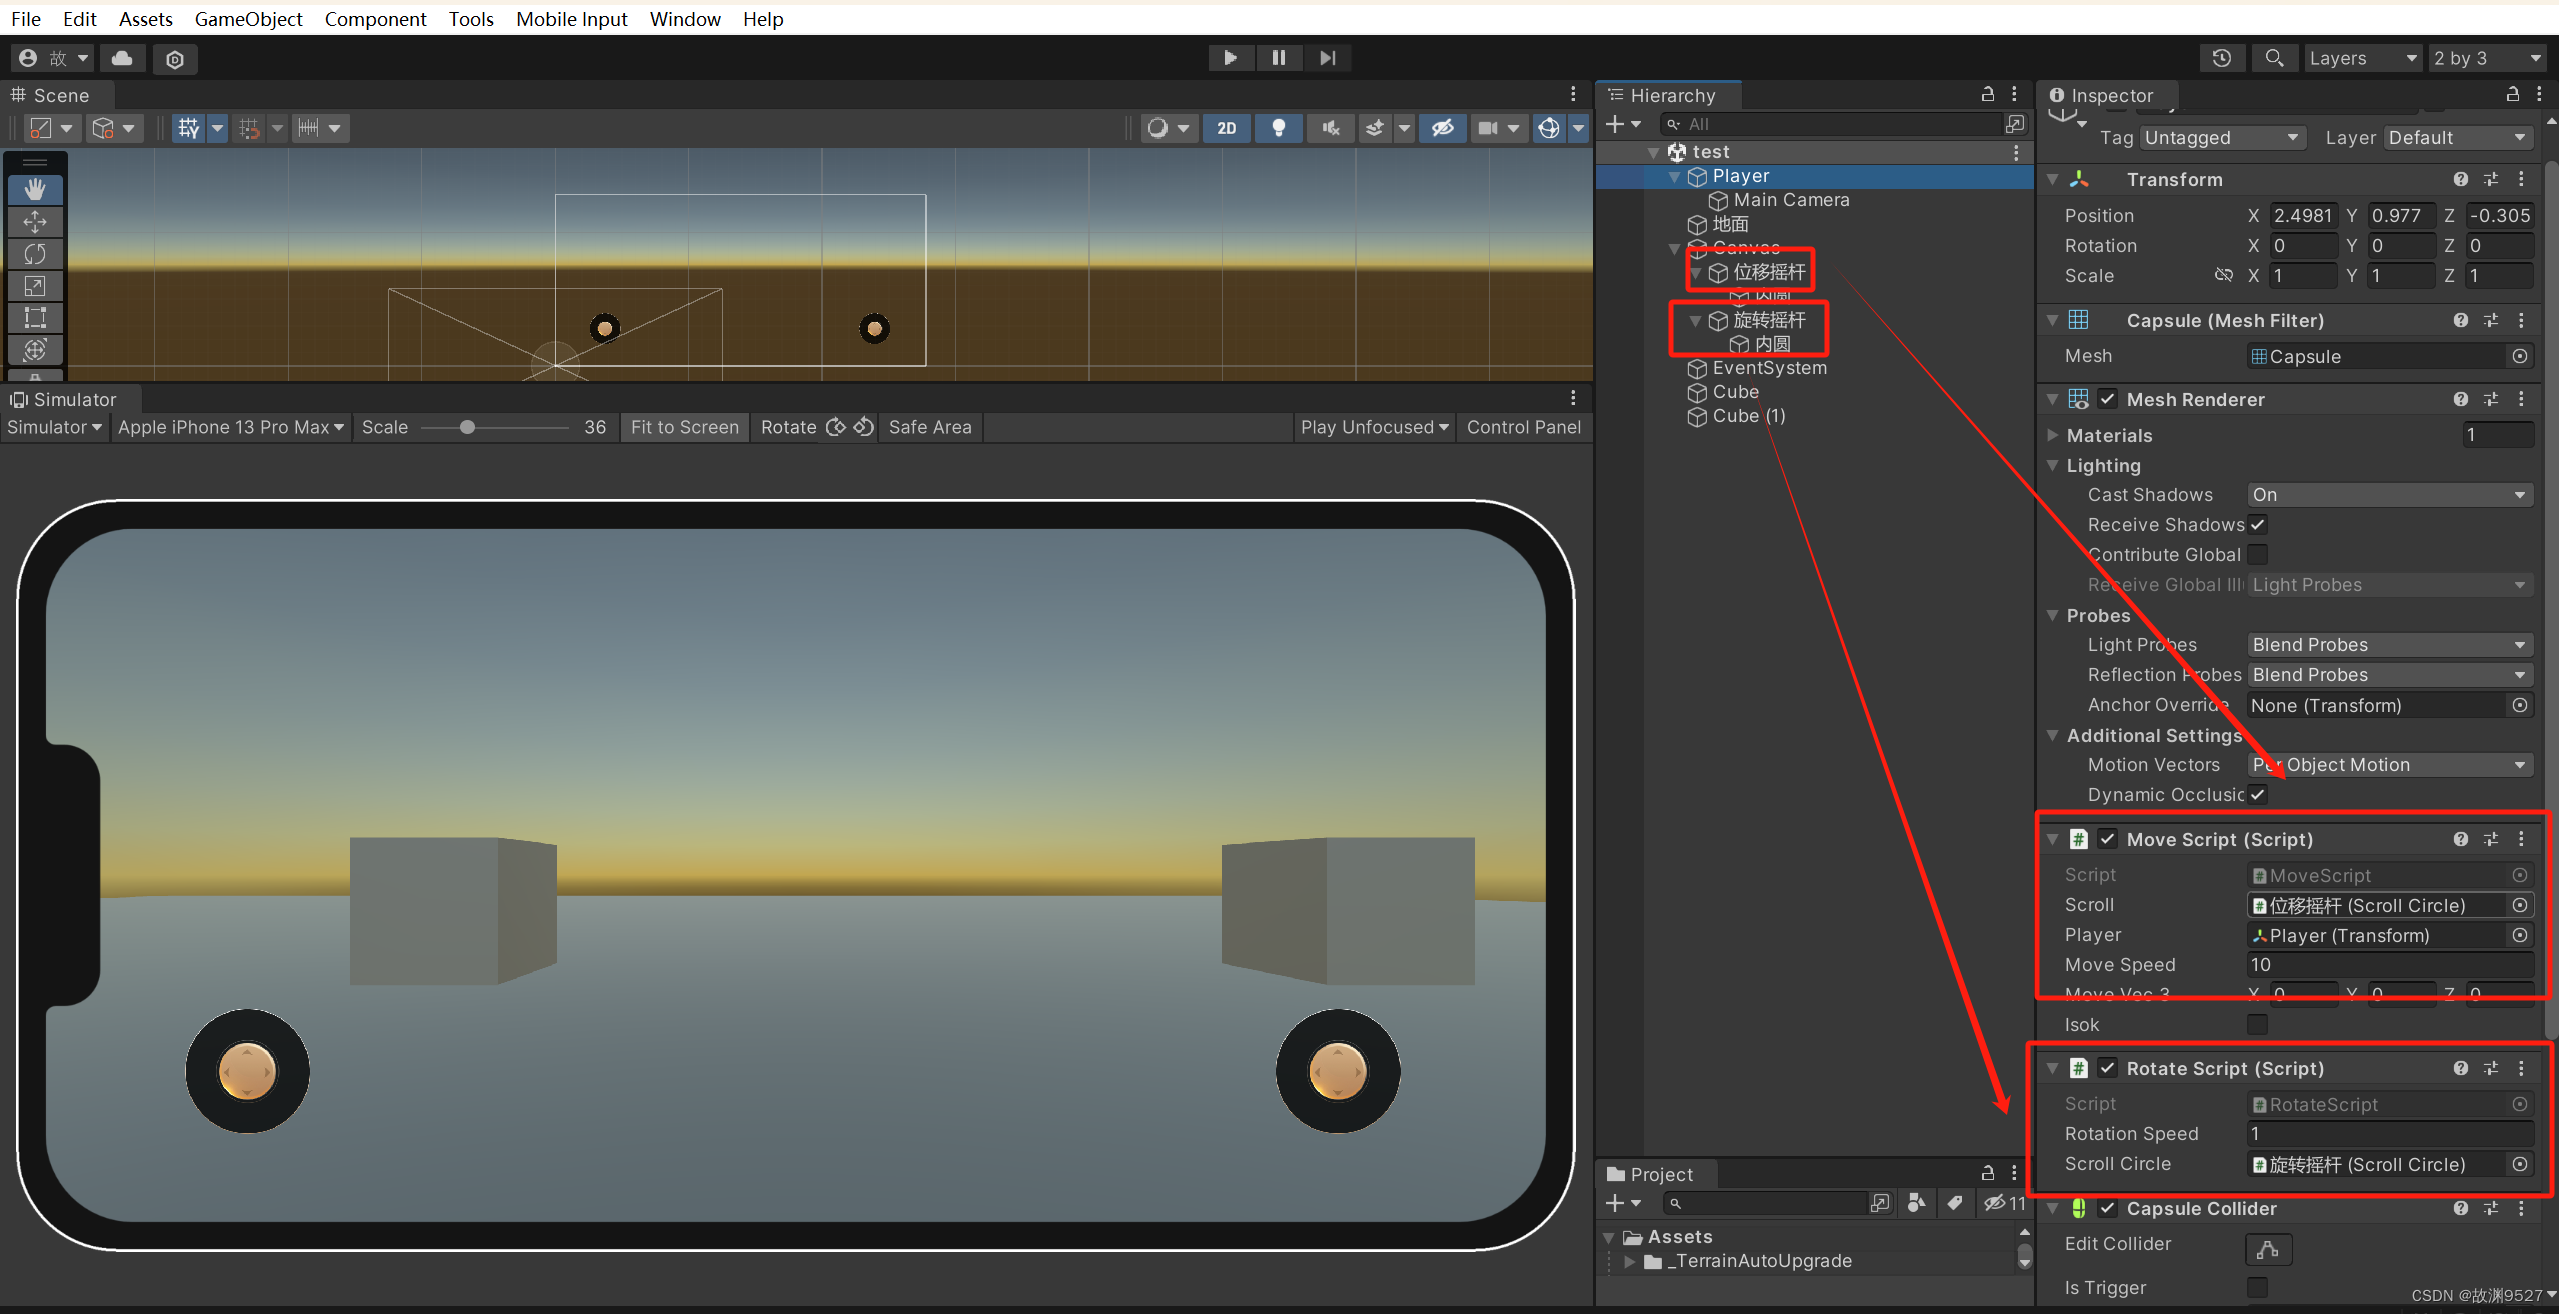
}将位移MoveScript脚本挂在Player上,并且像我这样设置
这时候运行场景会发现摇杆没用,其实这不是摇杆没用,只是我们脚本写了限制条件,只有手指才能触发摇杆,如果有不需要这个判定的可以删除
但是这时候我们又想测试怎么办,很简单,我们找到game下拉框,选择Simulator
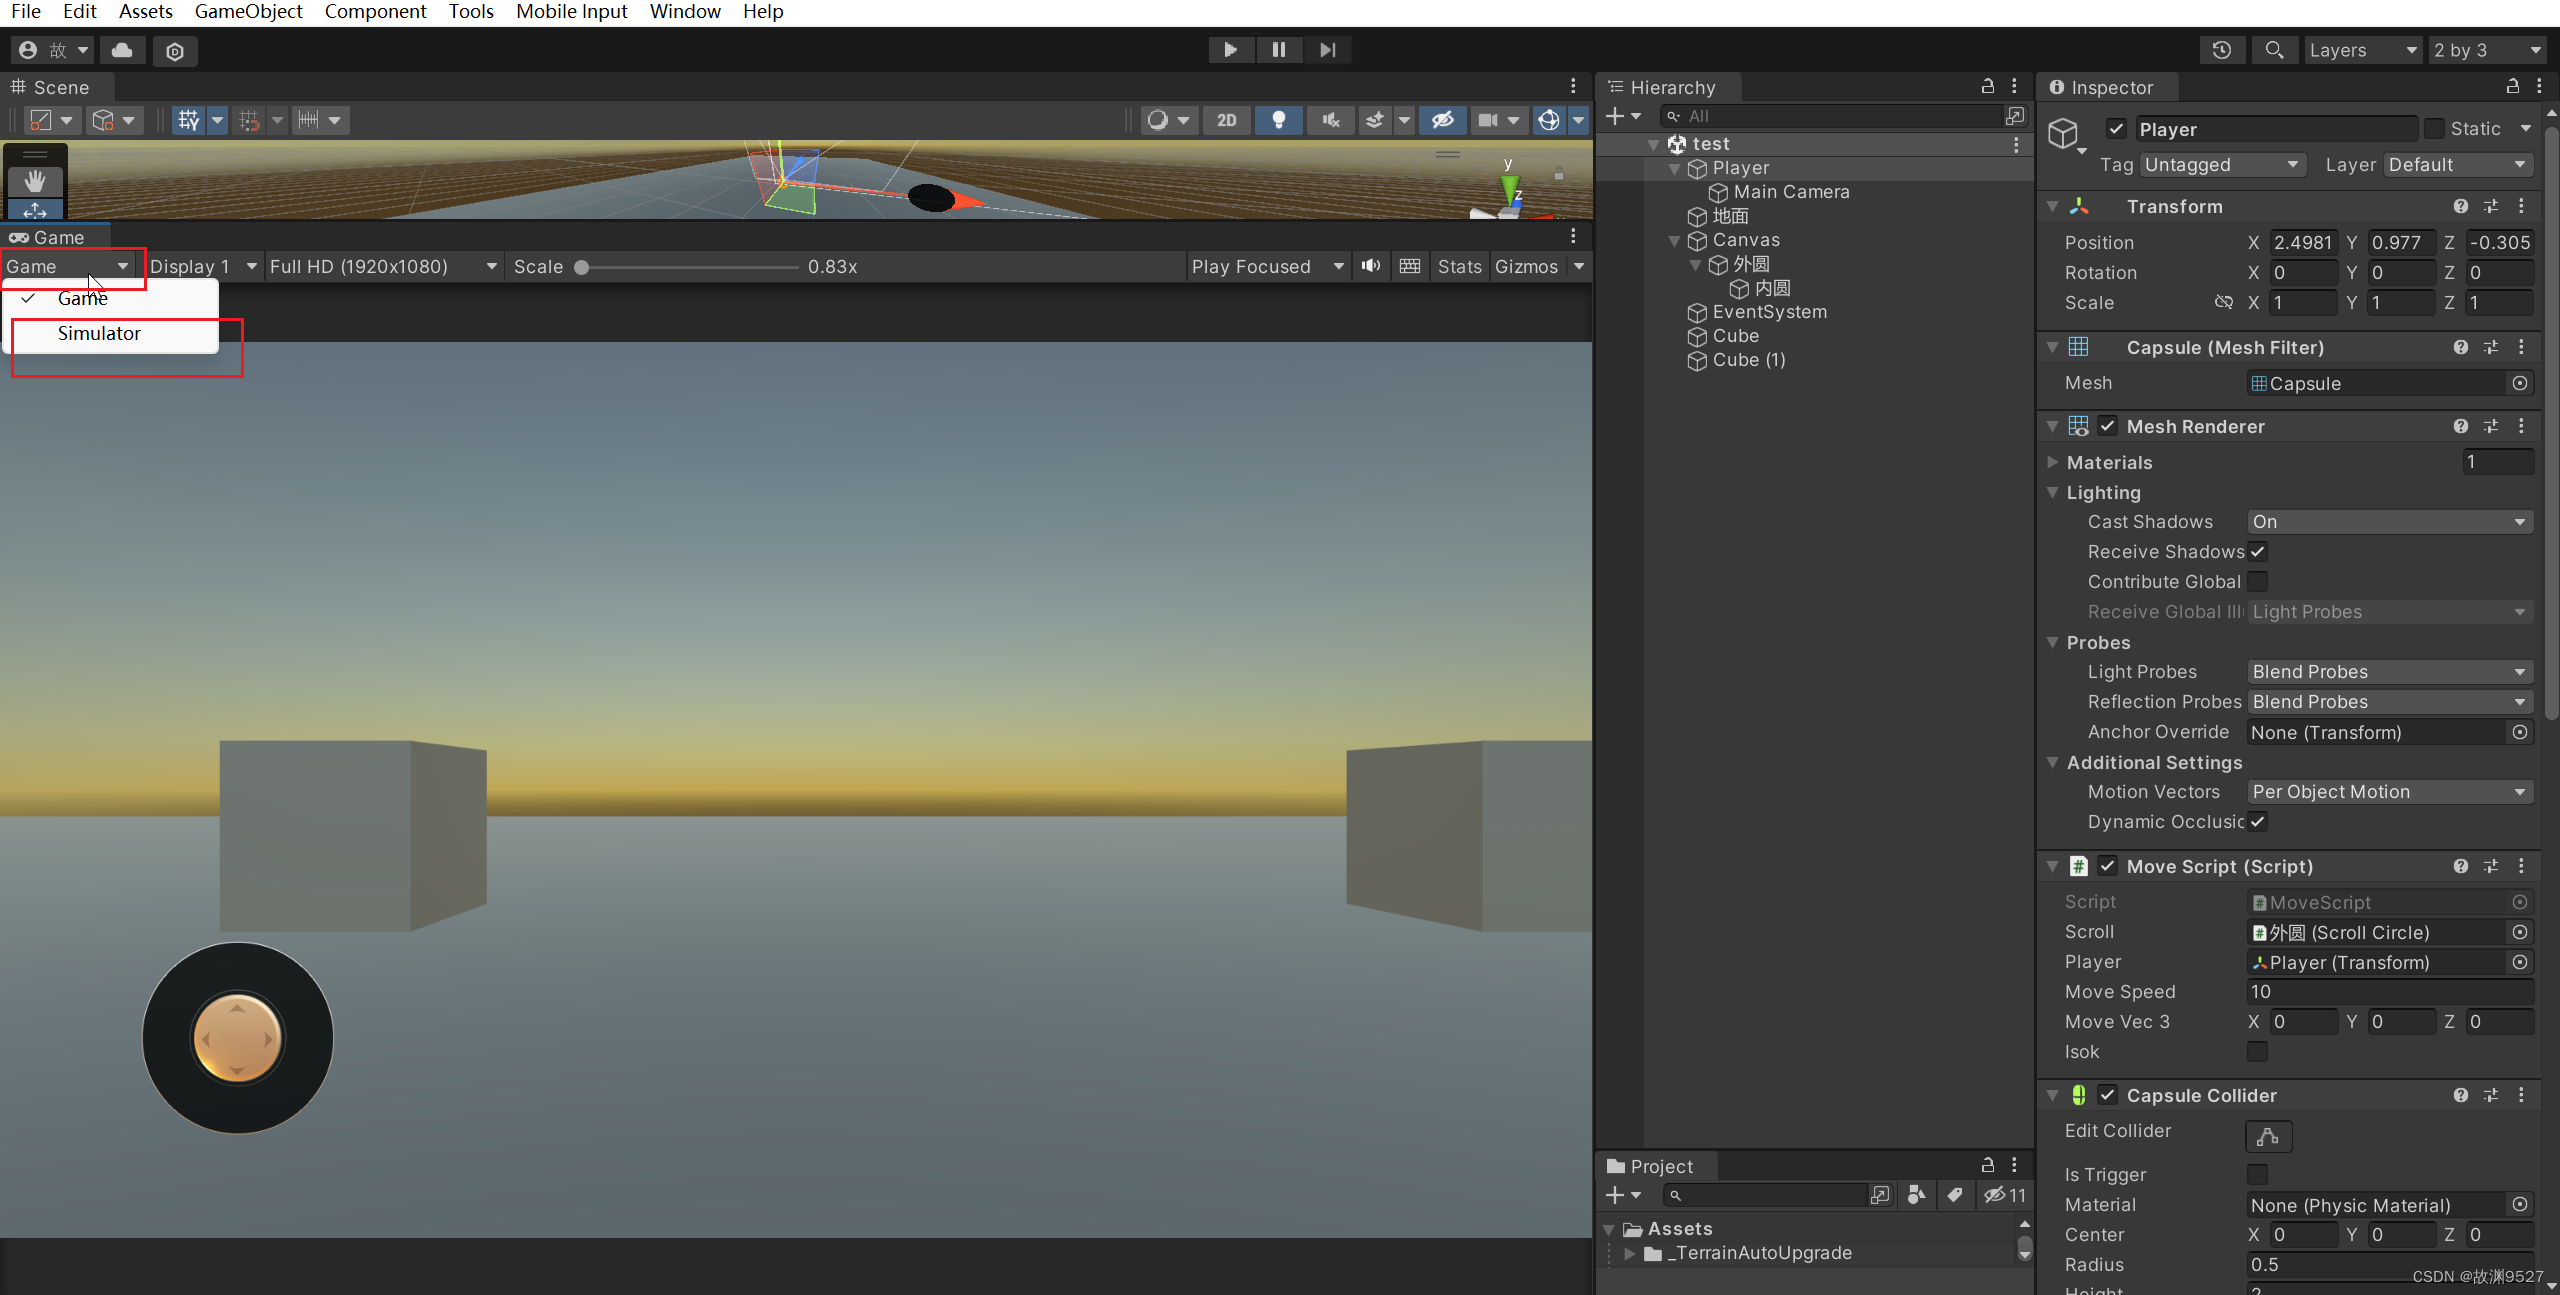
窗口就会变成这样:
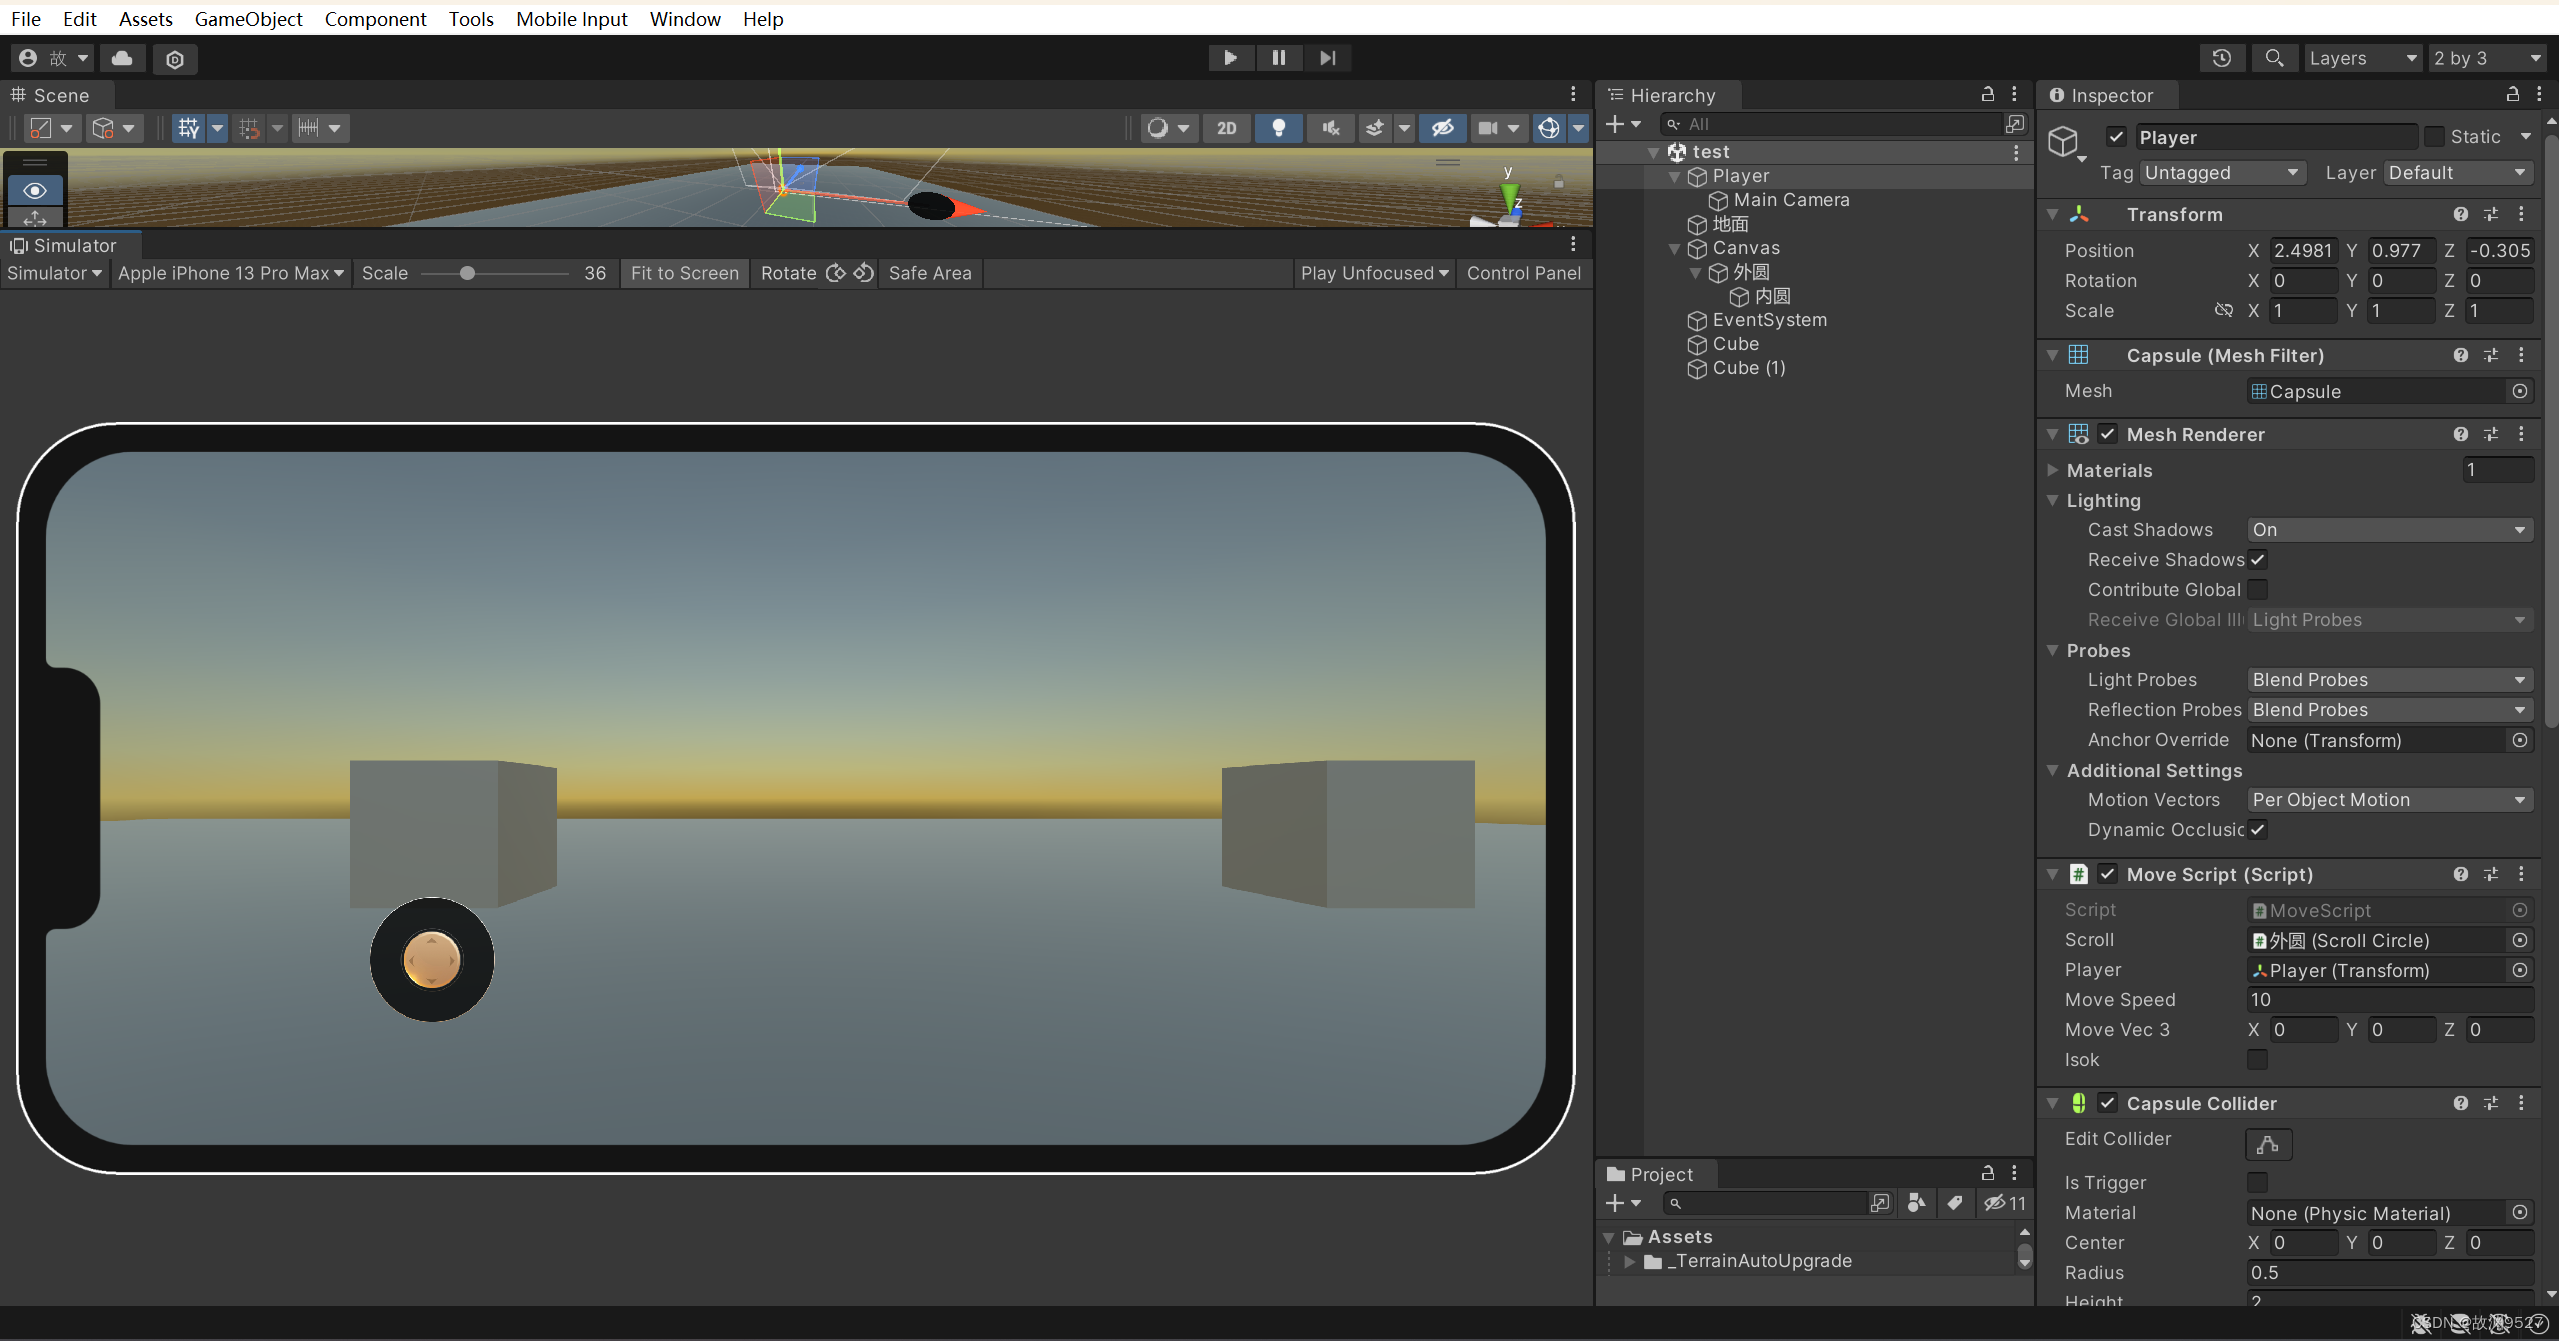
然后选择你想测试的机型

选择好后再运行场景,会发现我们的摇杆有用了,还记得我们的MoveScript脚本吗,里面我们写了两个交互,一个是摇杆,一个是键盘控制,当我们的视图选择了Simulator后,能够生效的只有摇杆,因为这个是模拟手机的过程,当我们视图选择Game后,我们则回到了键盘控制,这时按下wasd才会生效
2、旋转
新建RotateScript脚本
using System.Collections;
using System.Collections.Generic;
using UnityEngine;
using UnityEngine.EventSystems;

public class RotateScript : MonoBehaviour
{
    public float rotationSpeed = 1f;
    private Vector2 lastTouchPosition;
    [SerializeField] ScrollCircle ScrollCircle;
    private void Update()
    {

        if (Input.touchCount == 0)
        {
            //鼠标的旋转
        }
        else
        {
            Rotaes2();
        }
    }
    /// <summary>
    /// 摇杆旋转
    /// </summary>
    void Rotaes()
    {
        float x = ScrollCircle.output.x;
        float xRotationAngle = x * 50 * Time.deltaTime;
        Vector3 xRotationAxis = transform.up;
        transform.Rotate(xRotationAxis, xRotationAngle, Space.World);
    }

    /// <summary>
    /// 手指旋转
    /// </summary>
    void Rotaes2()
    {
        Touch touch;
        if (Input.touchCount == 1)
        {
            touch = Input.GetTouch(0);
        }
        else
        {
            touch = Input.GetTouch(Input.touchCount - 1);
        }
        if (touch.phase == TouchPhase.Began)
        {
            lastTouchPosition = touch.position;
        }
        else if (touch.phase == TouchPhase.Moved)
        {
            Vector2 delta = touch.position - lastTouchPosition;
            transform.Rotate(Vector3.up, delta.x * rotationSpeed, Space.World);
            lastTouchPosition = touch.position;
        }
    }
}
然后我们将脚本拖给Player
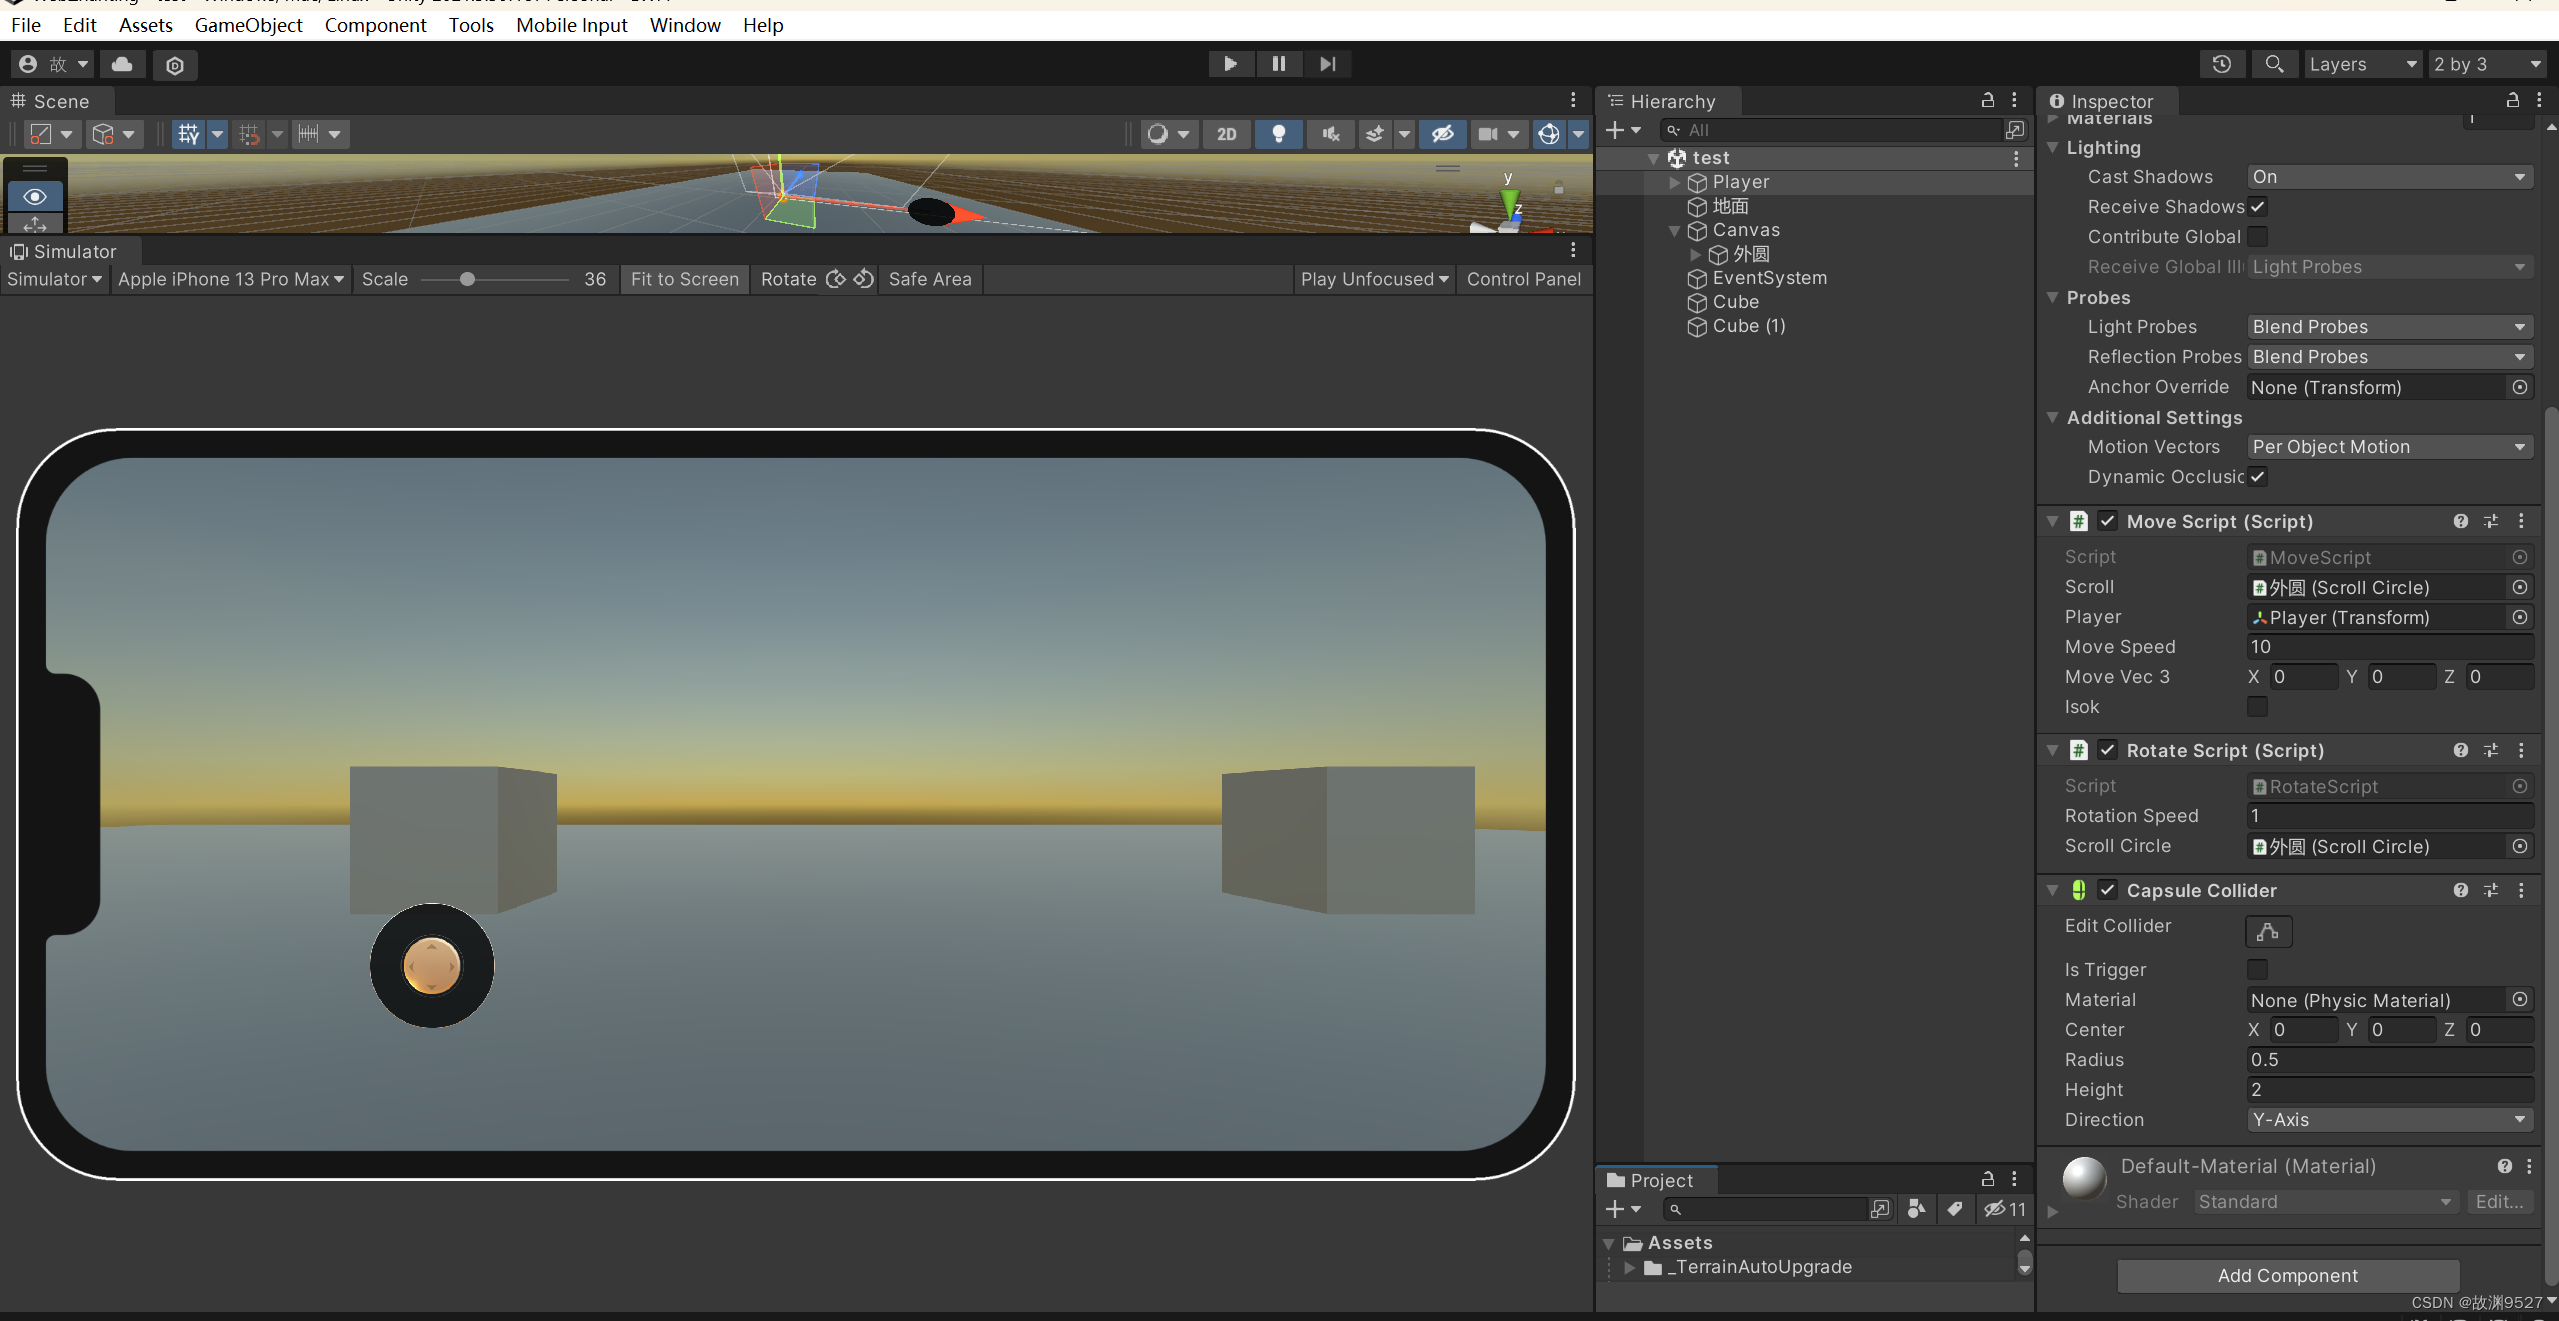
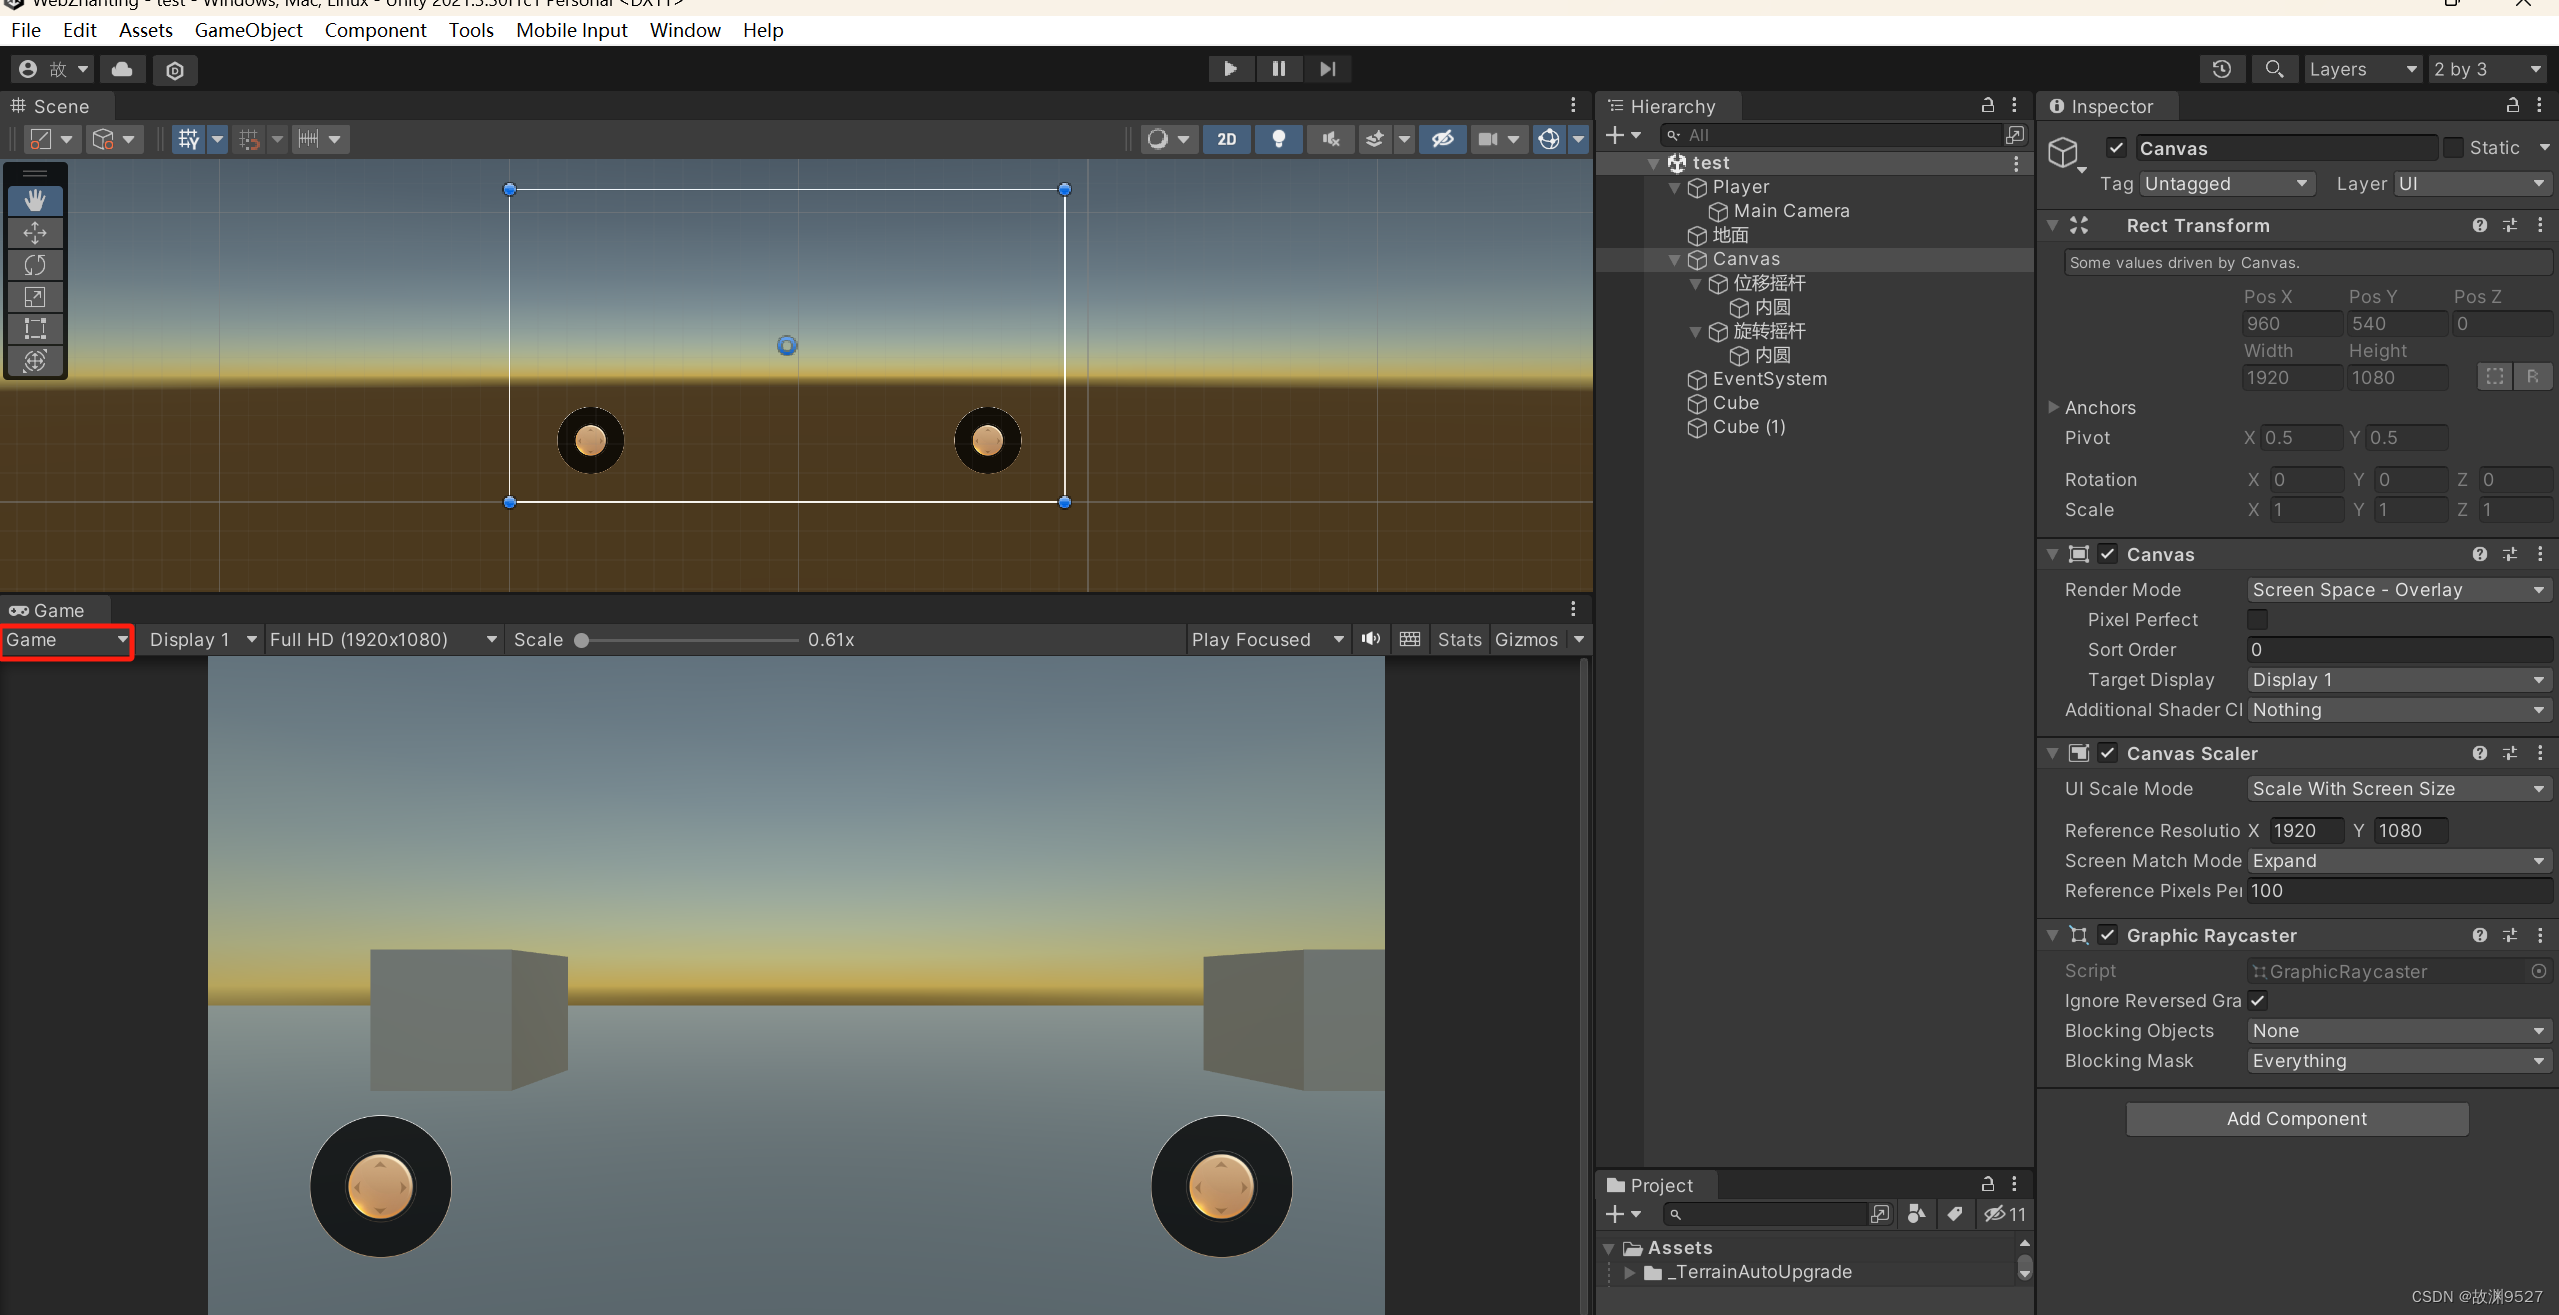
运行场景时,我们成功了,修改场景,将摇杆复制一份出来,作为旋转的摇杆:

打开RotateScript脚本,将方法修改一下
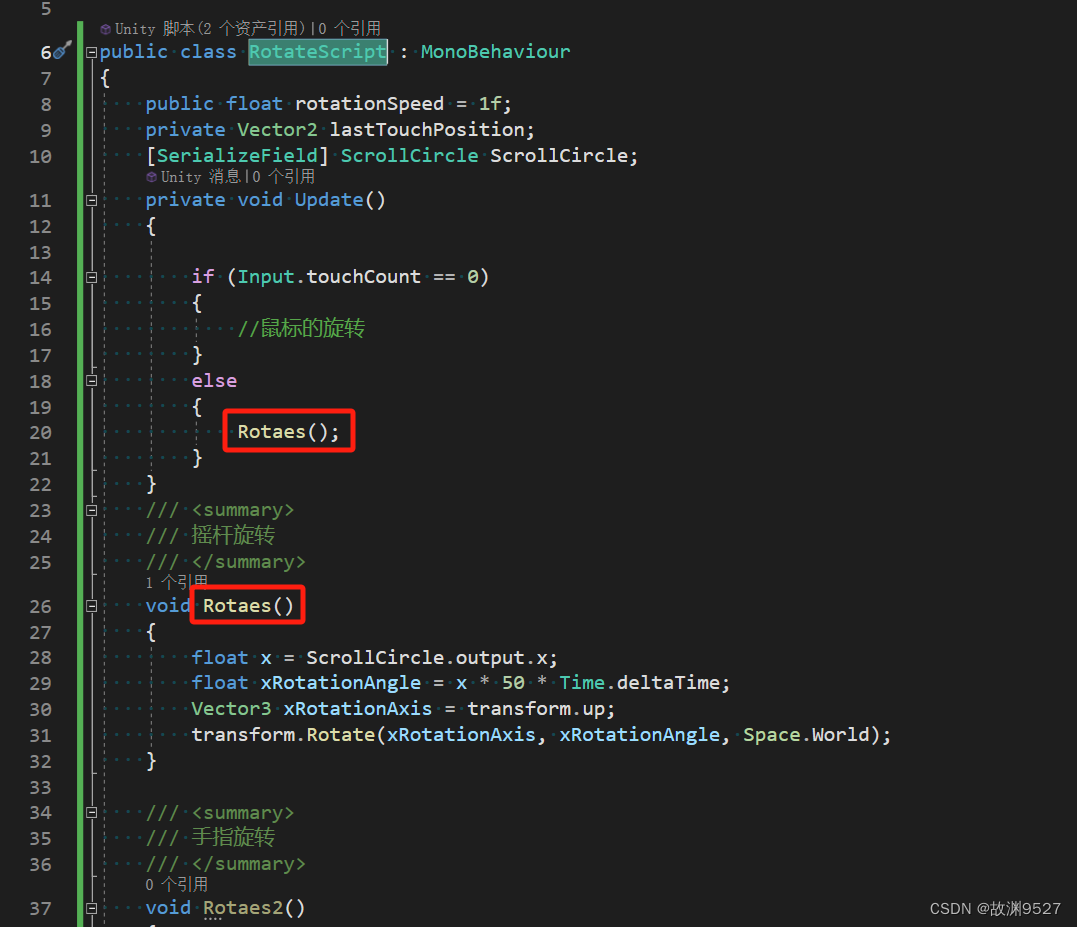
然后把旋转摇杆拖给RotateScript脚本
运行场景,我们的摇杆也有用了,这两者的共存本文暂时不写,因为涉及UI交互的判定,需要根据实际情况去修改
接下来我们把鼠标旋转给补上,修改RotateScript脚本
using System.Collections;
using System.Collections.Generic;
using UnityEngine;
using UnityEngine.EventSystems;

public class RotateScript : MonoBehaviour
{
    public float rotationSpeed = 1f;
    private Vector2 lastTouchPosition;
    [SerializeField] ScrollCircle ScrollCircle;
    private void Update()
    {

        if (Input.touchCount == 0)
        {
            //鼠标的旋转
            MouseRotate();
        }
        else
        {
            Rotaes();
        }
    }
    void MouseRotate()
    {
        if (Input.GetMouseButton(0))
        {
            float mouseX = Input.GetAxis("Mouse X");
            float mouseY = Input.GetAxis("Mouse Y");
            float xRotationAngle = mouseX * rotationSpeed;
            float yRotationAngle = mouseY * rotationSpeed;
            transform.Rotate(Vector3.up, xRotationAngle, Space.World);
            transform.Rotate(Vector3.right, -yRotationAngle, Space.Self);
        }
    }
    /// <summary>
    /// 摇杆旋转
    /// </summary>
    void Rotaes()
    {
        float x = ScrollCircle.output.x;
        float xRotationAngle = x * 50 * Time.deltaTime;
        Vector3 xRotationAxis = transform.up;
        transform.Rotate(xRotationAxis, xRotationAngle, Space.World);
    }

    /// <summary>
    /// 手指旋转
    /// </summary>
    void Rotaes2()
    {
        Touch touch;
        if (Input.touchCount == 1)
        {
            touch = Input.GetTouch(0);
        }
        else
        {
            touch = Input.GetTouch(Input.touchCount - 1);
        }
        if (touch.phase == TouchPhase.Began)
        {
            lastTouchPosition = touch.position;
        }
        else if (touch.phase == TouchPhase.Moved)
        {
            Vector2 delta = touch.position - lastTouchPosition;
            transform.Rotate(Vector3.up, delta.x * rotationSpeed, Space.World);
            lastTouchPosition = touch.position;
        }
    }
}
回到场景中,将视图切换为Game,运行
至此,本文结束,我们下次见!


 4547
4547


 被折叠的 条评论
为什么被折叠?
被折叠的 条评论
为什么被折叠?
 到【灌水乐园】发言


