http://blog.csdn.net/qq_26787115/article/details/53078951
Android音频处理——通过AudioRecord去保存PCM文件进行录制,播放,停止,删除功能
音频这方面很博大精深,我这里肯定讲不了什么高级的东西,最多也只是一些基础类知识,首先,我们要介绍一下Android他提供的录音类,实际上他有两个,一个是MediaRecorder,还有一个就是我们今天要用到的AudioRecord,那他们有什么区别呢?
一.区别
MediaRecorder和AudioRecord都可以录制音频,区别是MediaRecorder录制的音频文件是经过压缩后的,需要设置编码器。并且录制的音频文件可以用系统自带的Music播放器播放。
而AudioRecord录制的是PCM格式的音频文件,需要用AudioTrack来播放,AudioTrack更接近底层。
PCM可能更加可以理解为音频的源文件
二.优缺点
主要是实现边录边播以及对音频的实时处理,这个特性让他更适合在语音方面有优势
优点:语音的实时处理,可以用代码实现各种音频的封装
缺点:输出是PCM格式文件,如果保存成音频文件,是不能够被播放器播放的,所以必须先写代码实现数据编码以及压缩
已经集成了录音、编码、压缩等,支持少量的录音音频格式,大概有,aac,amr,3gp等
优点:集成,直接调用相关接口即可,代码量小
缺点:无法实时处理音频;输出的音频格式不是很多,例如没有输出mp3格式文件
三.准备工作
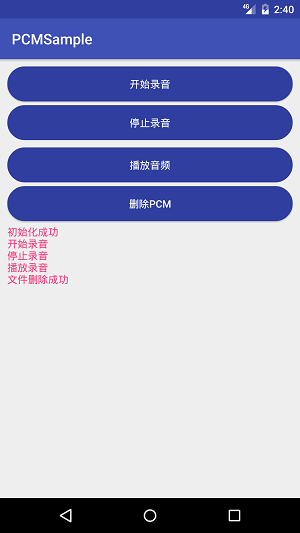
我们要实现的是一个实时的去录音,播放,停止等功能的测试案例,那我们肯定要准备点什么,比如说,我这里先创建一个项目——PCMSample
然后写个布局
layout_main.xml
<?xml version="1.0" encoding="utf-8"?>
<LinearLayout
    xmlns:android="http://schemas.android.com/apk/res/android"
    android:layout_width="match_parent"
    android:layout_height="match_parent"
    android:orientation="vertical"
    android:padding="10dp">

    <Button
        android:id="@+id/startAudio"
        android:layout_width="match_parent"
        android:layout_height="wrap_content"
        android:background="@drawable/button_bg"
        android:text="开始录音"
        android:textColor="@android:color/white"/>

    <Button
        android:id="@+id/stopAudio"
        android:layout_width="match_parent"
        android:layout_height="wrap_content"
        android:layout_marginBottom="10dp"
        android:layout_marginTop="5dp"
        android:background="@drawable/button_bg"
        android:enabled="false"
        android:text="停止录音"
        android:textColor="@android:color/white"/>

    <Button
        android:id="@+id/playAudio"
        android:layout_width="match_parent"
        android:layout_height="wrap_content"
        android:background="@drawable/button_bg"
        android:enabled="false"
        android:text="播放音频"
        android:textColor="@android:color/white"/>

    <Button
        android:id="@+id/deleteAudio"
        android:layout_width="match_parent"
        android:layout_height="wrap_content"
        android:layout_marginTop="5dp"
        android:background="@drawable/button_bg"
        android:text="删除PCM"
        android:textColor="@android:color/white"/>

    <ScrollView
        android:id="@+id/mScrollView"
        android:layout_width="match_parent"
        android:layout_height="0dp"
        android:layout_marginTop="5dp"
        android:layout_weight="1">

        <TextView
            android:id="@+id/tv_audio_succeess"
            android:layout_width="wrap_content"
            android:layout_height="wrap_content"
            android:text="初始化完成...."
            android:textColor="@color/colorAccent"/>

    </ScrollView>


</LinearLayout>
- 1
- 2
- 3
- 4
- 5
- 6
- 7
- 8
- 9
- 10
- 11
- 12
- 13
- 14
- 15
- 16
- 17
- 18
- 19
- 20
- 21
- 22
- 23
- 24
- 25
- 26
- 27
- 28
- 29
- 30
- 31
- 32
- 33
- 34
- 35
- 36
- 37
- 38
- 39
- 40
- 41
- 42
- 43
- 44
- 45
- 46
- 47
- 48
- 49
- 50
- 51
- 52
- 53
- 54
- 55
- 56
- 57
- 58
- 59
- 60
- 61
- 62
- 63
- 64
可以预览一下
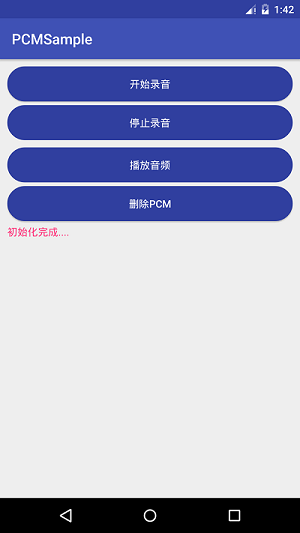
这里我给按钮加了一个扁平的效果,实际上写了一个xml,很简单
<?xml version="1.0" encoding="utf-8"?>
<selector xmlns:android="http://schemas.android.com/apk/res/android">

    <item android:state_pressed="true">
        <shape>
            <corners android:radius="30dp"/>
            <solid android:color="@color/colorPrimary"/>
        </shape>
    </item>

    <item android:state_pressed="false">
        <shape>
            <corners android:radius="30dp"/>
            <solid android:color="@color/colorPrimaryDark"/>
        </shape>
    </item>

</selector>
- 1
- 2
- 3
- 4
- 5
- 6
- 7
- 8
- 9
- 10
- 11
- 12
- 13
- 14
- 15
- 16
- 17
- 18
好的,回到正题,我们这里有四个按钮,分别是开始。停止,播放,和删除,我们就是要实现这四个功能,在此之前,我们还需要做的事情就是添加权限,因为我们要录音和写内存卡文件,所有需要这两个权限即可
<uses-permission android:name="android.permission.RECORD_AUDIO" />
<uses-permission android:name="android.permission.WRITE_EXTERNAL_STORAGE" />
这里初始化什么的就不说了,我们直接进入正题
四.开始录音
开始录音的话,这里,我们定义一个变量isRecording去控制,这样就比较好结束了,而且要注意的是,录音是不能放在UI线程的,你懂的,所以我们可以写一个开始录音的方法
public void StartRecord() {
Log.i(TAG,"开始录音");
int frequency = 16000;
int channelConfiguration = AudioFormat.CHANNEL_CONFIGURATION_MONO;
int audioEncoding = AudioFormat.ENCODING_PCM_16BIT;
file = new File(Environment.getExternalStorageDirectory().getAbsolutePath() + "/reverseme.pcm");
Log.i(TAG,"生成文件");
if (file.exists())
file.delete();
Log.i(TAG,"删除文件");
try {
file.createNewFile();
Log.i(TAG,"创建文件");
} catch (IOException e) {
Log.i(TAG,"未能创建");
throw new IllegalStateException("未能创建" + file.toString());
}
try {
OutputStream os = new FileOutputStream(file);
BufferedOutputStream bos = new BufferedOutputStream(os);
DataOutputStream dos = new DataOutputStream(bos);
int bufferSize = AudioRecord.getMinBufferSize(frequency, channelConfiguration, audioEncoding);
AudioRecord audioRecord = new AudioRecord(MediaRecorder.AudioSource.MIC, frequency, channelConfiguration, audioEncoding, bufferSize);
short[] buffer = new short[bufferSize];
audioRecord.startRecording();
Log.i(TAG, "开始录音");
isRecording = true;
while (isRecording) {
int bufferReadResult = audioRecord.read(buffer, 0, bufferSize);
for (int i = 0; i < bufferReadResult; i++) {
dos.writeShort(buffer[i]);
}
}
audioRecord.stop();
dos.close();
} catch (Throwable t) {
Log.e(TAG, "录音失败");
}
}
- 1
- 2
- 3
- 4
- 5
- 6
- 7
- 8
- 9
- 10
- 11
- 12
- 13
- 14
- 15
- 16
- 17
- 18
- 19
- 20
- 21
- 22
- 23
- 24
- 25
- 26
- 27
- 28
- 29
- 30
- 31
- 32
- 33
- 34
- 35
- 36
- 37
- 38
- 39
- 40
- 41
- 42
- 43
- 44
- 45
- 46
- 47
- 48
首先,这里我们了解一下采样率,编码,音频流等基本的概念,剩下的大多是读写流的操作了,我们通过创建一个AudioRecord去写pcm文件,定义一个while循环,用我们刚才定义的isRecording控制,所以,我们的点击事件就
        case R.id.startAudio:
                Thread thread = new Thread(new Runnable() {
                    @Override
                    public void run() {
                        StartRecord();
                        Log.e(TAG,"start");
                    }
                });
                thread.start();
                printLog("开始录音");
                ButtonEnabled(false, true, false);
                break;
这里要注意一下thread.start();开启线程,同时打印出log,具体代码如下
private void printLog(final String resultString) {
tv_audio_succeess.post(new Runnable() {
@Override
public void run() {
tv_audio_succeess.append(resultString + "\n");
mScrollView.fullScroll(ScrollView.FOCUS_DOWN);
}
});
}
这里,我为了防止ANR,所以控制了一下按钮的焦点
private void ButtonEnabled(boolean start, boolean stop, boolean play) {
startAudio.setEnabled(start);
stopAudio.setEnabled(stop);
playAudio.setEnabled(play);
}
好的,我们运行一下
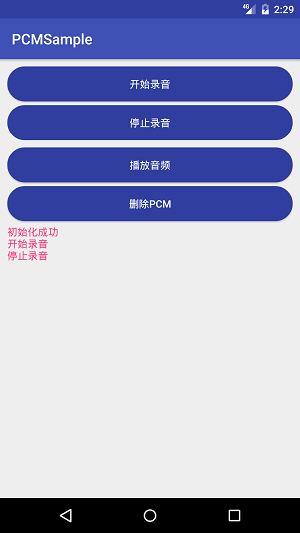
看起来没什么变化,但是你去内存卡中就会发现多了一个pcm文件
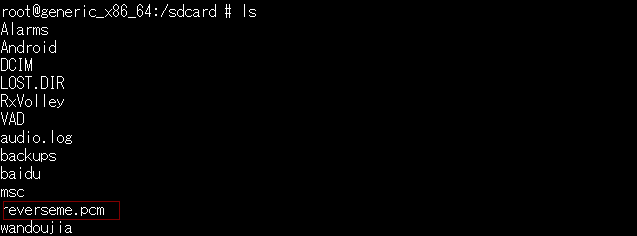
当然,你只是点击启动录音是不会生成这个pcm文件的,你需要点击停止停止录音的按钮
五.停止录音
停止录音很简单,我们控制通过改变写入流就好了
            case R.id.stopAudio:
                isRecording = false;
                ButtonEnabled(true, false, true);
                printLog("停止录音");
                break;
这样才会生成PCM
六播放音频
现在有了PCM我们可以试着去播放了,写一个播放的方法
public void PlayRecord() {
if(file == null){
return;
}
int musicLength = (int) (file.length() / 2);
short[] music = new short[musicLength];
try {
InputStream is = new FileInputStream(file);
BufferedInputStream bis = new BufferedInputStream(is);
DataInputStream dis = new DataInputStream(bis);
int i = 0;
while (dis.available() > 0) {
music[i] = dis.readShort();
i++;
}
dis.close();
AudioTrack audioTrack = new AudioTrack(AudioManager.STREAM_MUSIC,
16000, AudioFormat.CHANNEL_CONFIGURATION_MONO,
AudioFormat.ENCODING_PCM_16BIT,
musicLength * 2,
AudioTrack.MODE_STREAM);
audioTrack.play();
audioTrack.write(music, 0, musicLength);
audioTrack.stop();
} catch (Throwable t) {
Log.e(TAG, "播放失败");
}
}
- 1
- 2
- 3
- 4
- 5
- 6
- 7
- 8
- 9
- 10
- 11
- 12
- 13
- 14
- 15
- 16
- 17
- 18
- 19
- 20
- 21
- 22
- 23
- 24
- 25
- 26
- 27
- 28
- 29
- 30
正如上面所说,我们播放需要用到AudioTrack,调用他的play方法以及设置一些参数即可
七.删除音频
删除音频只需要删除这个pcm文件就行
private void deleFile() {
if(file == null){
return;
}
file.delete();
printLog("文件删除成功");
}
这就是大致的录音逻辑,虽然看起来很简单,但是这正是现在很多语音和音频的最基础部分,特别是语音,如果你从事语音的工作,我相信你会感谢我的!
好了,最后放上完整的代码:
MainActivity
package com.liuguilin.pcmsample;
import android.media.AudioFormat;
import android.media.AudioManager;
import android.media.AudioRecord;
import android.media.AudioTrack;
import android.media.MediaRecorder;
import android.os.Bundle;
import android.os.Environment;
import android.support.v7.app.AppCompatActivity;
import android.util.Log;
import android.view.View;
import android.widget.Button;
import android.widget.ScrollView;
import android.widget.TextView;
import java.io.BufferedInputStream;
import java.io.BufferedOutputStream;
import java.io.DataInputStream;
import java.io.DataOutputStream;
import java.io.File;
import java.io.FileInputStream;
import java.io.FileOutputStream;
import java.io.IOException;
import java.io.InputStream;
import java.io.OutputStream;
public class MainActivity extends AppCompatActivity implements View.OnClickListener {
public static final String TAG = "PCMSample";
private boolean isRecording = false;
private Button startAudio;
private Button stopAudio;
private Button playAudio;
private Button deleteAudio;
private ScrollView mScrollView;
private TextView tv_audio_succeess;
private File file;
@Override
protected void onCreate(Bundle savedInstanceState) {
super.onCreate(savedInstanceState);
setContentView(R.layout.activity_main);
initView();
}
private void initView() {
mScrollView = (ScrollView) findViewById(R.id.mScrollView);
tv_audio_succeess = (TextView) findViewById(R.id.tv_audio_succeess);
printLog("初始化成功");
startAudio = (Button) findViewById(R.id.startAudio);
startAudio.setOnClickListener(this);
stopAudio = (Button) findViewById(R.id.stopAudio);
stopAudio.setOnClickListener(this);
playAudio = (Button) findViewById(R.id.playAudio);
playAudio.setOnClickListener(this);
deleteAudio = (Button) findViewById(R.id.deleteAudio);
deleteAudio.setOnClickListener(this);
}
@Override
public void onClick(View v) {
switch (v.getId()) {
case R.id.startAudio:
Thread thread = new Thread(new Runnable() {
@Override
public void run() {
StartRecord();
Log.e(TAG,"start");
}
});
thread.start();
printLog("开始录音");
ButtonEnabled(false, true, false);
break;
case R.id.stopAudio:
isRecording = false;
ButtonEnabled(true, false, true);
printLog("停止录音");
break;
case R.id.playAudio:
PlayRecord();
ButtonEnabled(true, false, false);
printLog("播放录音");
break;
case R.id.deleteAudio:
deleFile();
break;
}
}
private void printLog(final String resultString) {
tv_audio_succeess.post(new Runnable() {
@Override
public void run() {
tv_audio_succeess.append(resultString + "\n");
mScrollView.fullScroll(ScrollView.FOCUS_DOWN);
}
});
}
private void ButtonEnabled(boolean start, boolean stop, boolean play) {
startAudio.setEnabled(start);
stopAudio.setEnabled(stop);
playAudio.setEnabled(play);
}
public void StartRecord() {
Log.i(TAG,"开始录音");
int frequency = 16000;
int channelConfiguration = AudioFormat.CHANNEL_CONFIGURATION_MONO;
int audioEncoding = AudioFormat.ENCODING_PCM_16BIT;
file = new File(Environment.getExternalStorageDirectory().getAbsolutePath() + "/reverseme.pcm");
Log.i(TAG,"生成文件");
if (file.exists())
file.delete();
Log.i(TAG,"删除文件");
try {
file.createNewFile();
Log.i(TAG,"创建文件");
} catch (IOException e) {
Log.i(TAG,"未能创建");
throw new IllegalStateException("未能创建" + file.toString());
}
try {
OutputStream os = new FileOutputStream(file);
BufferedOutputStream bos = new BufferedOutputStream(os);
DataOutputStream dos = new DataOutputStream(bos);
int bufferSize = AudioRecord.getMinBufferSize(frequency, channelConfiguration, audioEncoding);
AudioRecord audioRecord = new AudioRecord(MediaRecorder.AudioSource.MIC, frequency, channelConfiguration, audioEncoding, bufferSize);
short[] buffer = new short[bufferSize];
audioRecord.startRecording();
Log.i(TAG, "开始录音");
isRecording = true;
while (isRecording) {
int bufferReadResult = audioRecord.read(buffer, 0, bufferSize);
for (int i = 0; i < bufferReadResult; i++) {
dos.writeShort(buffer[i]);
}
}
audioRecord.stop();
dos.close();
} catch (Throwable t) {
Log.e(TAG, "录音失败");
}
}
public void PlayRecord() {
if(file == null){
return;
}
int musicLength = (int) (file.length() / 2);
short[] music = new short[musicLength];
try {
InputStream is = new FileInputStream(file);
BufferedInputStream bis = new BufferedInputStream(is);
DataInputStream dis = new DataInputStream(bis);
int i = 0;
while (dis.available() > 0) {
music[i] = dis.readShort();
i++;
}
dis.close();
AudioTrack audioTrack = new AudioTrack(AudioManager.STREAM_MUSIC,
16000, AudioFormat.CHANNEL_CONFIGURATION_MONO,
AudioFormat.ENCODING_PCM_16BIT,
musicLength * 2,
AudioTrack.MODE_STREAM);
audioTrack.play();
audioTrack.write(music, 0, musicLength);
audioTrack.stop();
} catch (Throwable t) {
Log.e(TAG, "播放失败");
}
}
private void deleFile() {
if(file == null){
return;
}
file.delete();
printLog("文件删除成功");
}
}
- 1
- 2
- 3
- 4
- 5
- 6
- 7
- 8
- 9
- 10
- 11
- 12
- 13
- 14
- 15
- 16
- 17
- 18
- 19
- 20
- 21
- 22
- 23
- 24
- 25
- 26
- 27
- 28
- 29
- 30
- 31
- 32
- 33
- 34
- 35
- 36
- 37
- 38
- 39
- 40
- 41
- 42
- 43
- 44
- 45
- 46
- 47
- 48
- 49
- 50
- 51
- 52
- 53
- 54
- 55
- 56
- 57
- 58
- 59
- 60
- 61
- 62
- 63
- 64
- 65
- 66
- 67
- 68
- 69
- 70
- 71
- 72
- 73
- 74
- 75
- 76
- 77
- 78
- 79
- 80
- 81
- 82
- 83
- 84
- 85
- 86
- 87
- 88
- 89
- 90
- 91
- 92
- 93
- 94
- 95
- 96
- 97
- 98
- 99
- 100
- 101
- 102
- 103
- 104
- 105
- 106
- 107
- 108
- 109
- 110
- 111
- 112
- 113
- 114
- 115
- 116
- 117
- 118
- 119
- 120
- 121
- 122
- 123
- 124
- 125
- 126
- 127
- 128
- 129
- 130
- 131
- 132
- 133
- 134
- 135
- 136
- 137
- 138
- 139
- 140
- 141
- 142
- 143
- 144
- 145
- 146
- 147
- 148
- 149
- 150
- 151
- 152
- 153
- 154
- 155
- 156
- 157
- 158
- 159
- 160
- 161
- 162
- 163
- 164
- 165
- 166
- 167
- 168
- 169
- 170
- 171
- 172
- 173
- 174
- 175
- 176
- 177
- 178
- 179
- 180
- 181
- 182
- 183
- 184
- 185
- 186
- 187
- 188
- 189
- 190
- 191
- 192
- 193
- 194
- 195
- 196
- 197
- 198
- 199
- 200
- 201
- 202
- 203
- 204
- 205
- 206
- 207
- 208
- 209
- 210
- 211
- 212
如果你想去调试这些pcm文件做音频测试的话,我推荐使用Audacity这个软件,可以看到,我直接点击左上角的file-导入-源文件,然后设置16K
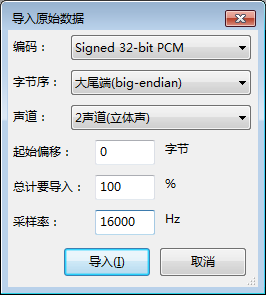
这样就可以调试了
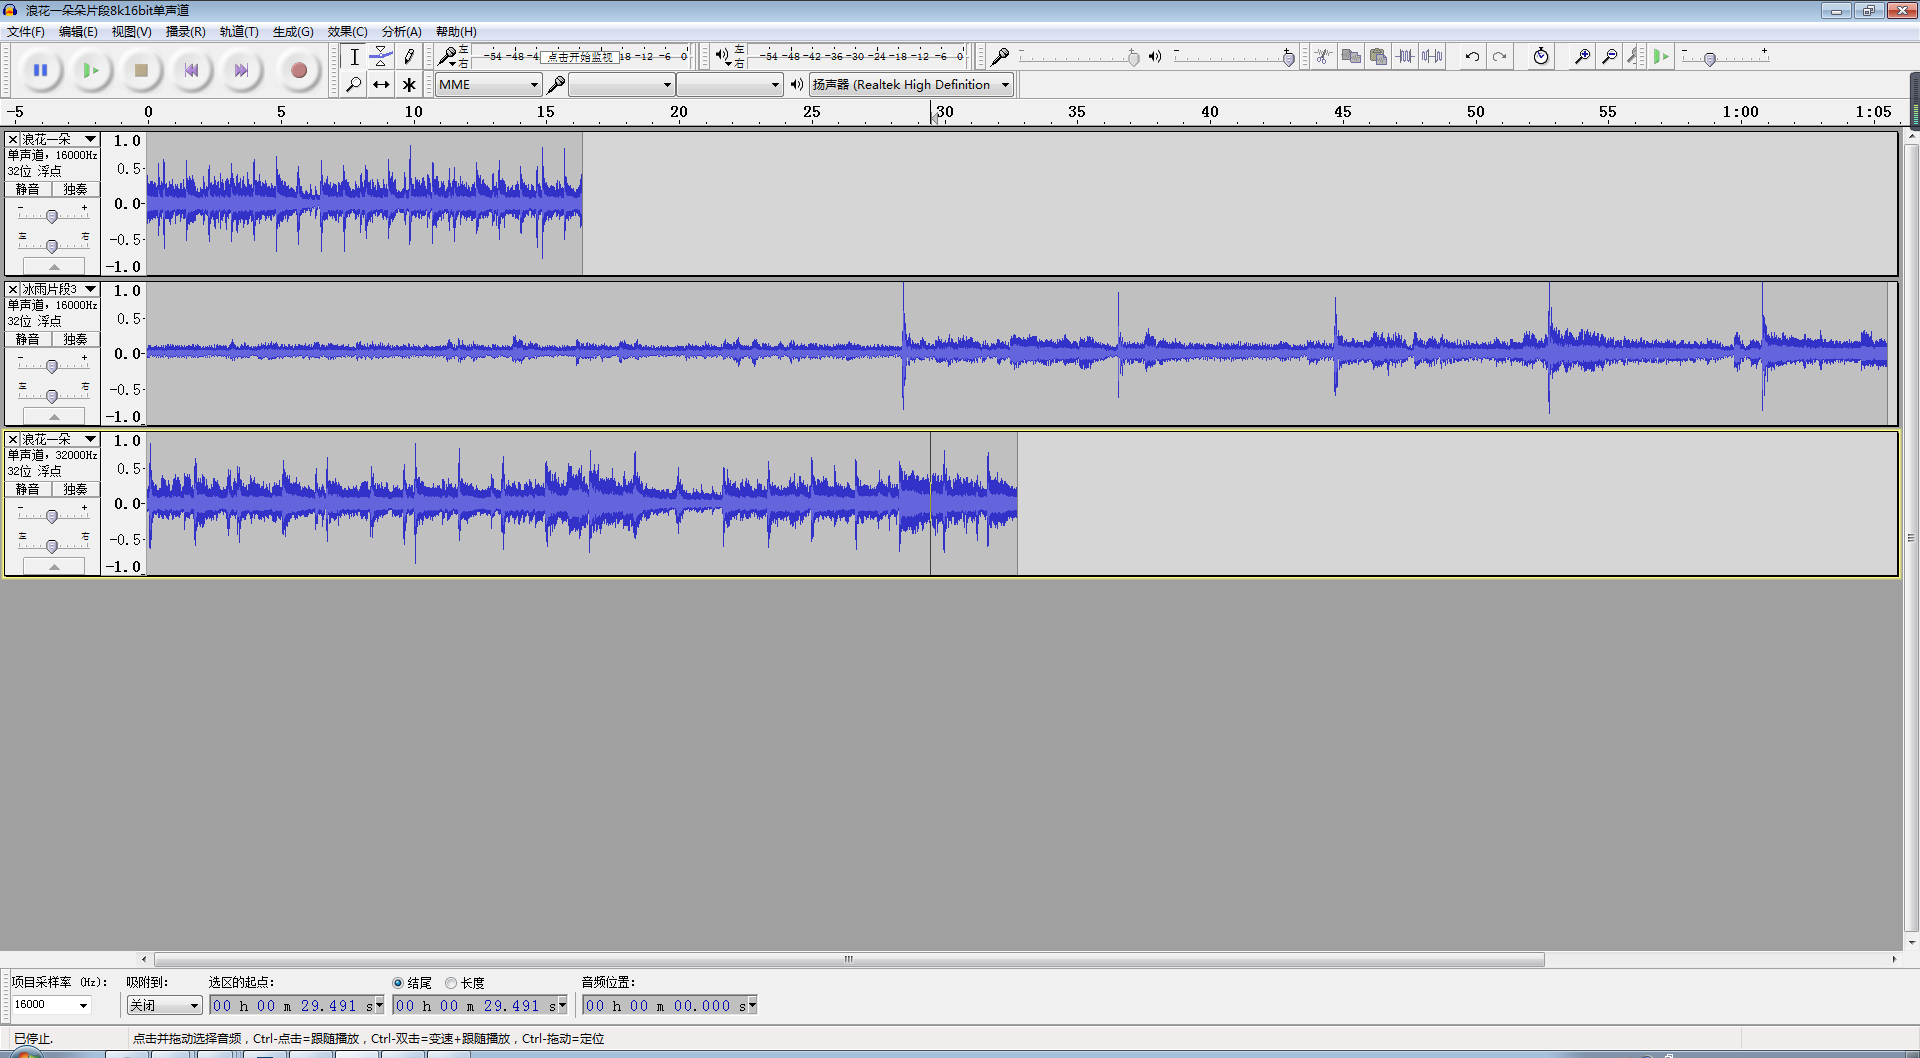
最后,放一张完整的截图
嗯,这篇文章就到这里,还是有些基础了,希望下次能给大家带来高深点的文章吧,有兴趣的加群:555974449


 606
606

 被折叠的 条评论
为什么被折叠?
被折叠的 条评论
为什么被折叠?
 到【灌水乐园】发言


