


 文章介绍了TinyRenderer的基本概念和实现,包括如何从零开始构建一个渲染器,以及如何读写TGA图像文件。重点讲解了使用Bresenham算法来绘制线段的过程,讨论了精度问题和性能优化策略。
1图形学
图形学,简单来讲是将3D数据以各个视觉效果呈现在2D画布(屏幕)上;
2 TinyRenderer
TinyRenderer从零开始实现了一个渲染器;
TinyRenderer代码地址:https://github.com/ssloy/tinyrenderer
内容介绍在:https://github.com/ssloy/tinyrenderer/wiki
知乎上也有讲解TinyRenderer的系列文章:TinyRenderer从零实现(C++);
TinyRenderer将3D或2D模型数据渲染在一张tga图像上;tga的格式可以参见【数据压缩】TGA文件格式分析;
wiki里的链接代码没有CMakeLists.txt,需要自己手动创建;
CMakeLists.txt可以先这么写:
cmake_minimum_required(VERSION 3.20)
project(render)
add_definitions(-std=c++11)
include_directories(.)
file(GLOB SOURCES *.h *.cpp)
add_executable(${PROJECT_NAME} ${SOURCES})
2.1 tga文件读写相关
tgaimage.h和tgaimage.cpp文件内定义了关于tga文件的格式、读写操作;可以使用set和get接口设置或读取二维图像上的rgb值,是TinyRenderer的结果输出;
TGA_Header结构体是tga文件的格式头信息,具体内容可以看上面的tga格式的链接;
TGAColor结构体是单个像素对应的RGBA值,内部使用了union表示一个像素值,可以是4个unsigned char类型,也可以是一个unsigned char[4]数组,也可以是一个unsigned int类型;
TGAImage类中分配了一个width*height*byte_spp(每个像素的字节数)大小的data内存作为画布;
2.2 绘制点
对应课程里的Lesson 0: getting started,主要实现了绘制点功能;
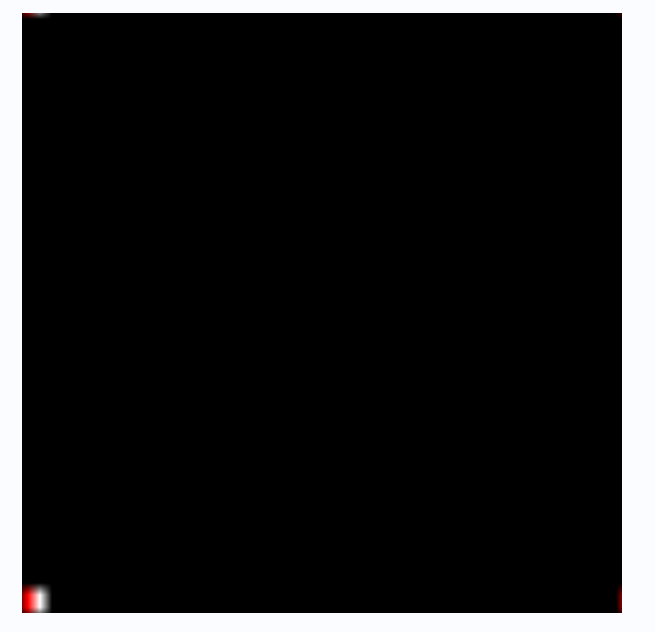
绘制点是图形学里最基本最简单的操作,使用TGAImage类的set接口设置4个二维坐标对应的像素值,在原点附近绘制4个白色和红色的点;
注意:这里将图像的左下角设置为了原点(0,0);
#include "tgaimage.h"

const TGAColor white = TGAColor(255, 255, 255, 255);
const TGAColor red   = TGAColor(255, 0,   0,   255);

int main(int argc, char** argv) {
    TGAImage image(50, 50, TGAImage::RGB);
    image.set(0, 0, red);
    image.set(0, 1, red);
    image.set(1, 0, white);
    image.set(1, 1, white);

    image.flip_vertically();

    image.write_tga_file("output.tga");
    return 0;
}
结果如下:
2.3 绘制线段
对应课程里的Lesson 1: Bresenham’s Line Drawing Algorithm;
主要内容是,在绘制点的基础上,绘制一组连续的点组成一条线段;
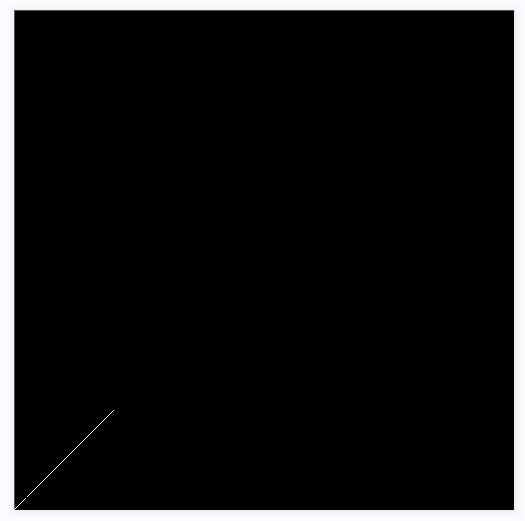
首先使用set设置了一组白色的点;
const TGAColor white = TGAColor(255, 255, 255, 255);
const TGAColor red   = TGAColor(255, 0,   0,   255);

void line(int x0, int y0, int x1, int y1, TGAImage& image, TGAColor color);

int main(int argc, char** argv) {
    TGAImage image(500, 500, TGAImage::RGB);

    line(0, 0, 100, 100, image, white);
    image.flip_vertically();
    image.write_tga_file("output.tga");
    return 0;
}

void line(int x0, int y0, int x1, int y1, TGAImage& image, TGAColor color) {
    for (float t = 0.; t < 1.; t += .01) {
        int x = x0 + (x1 - x0) * t;
        int y = y0 + (y1 - y0) * t;
        image.set(x, y, color);
    }
}
这里line函数由于没有考虑到浮点型小数在转换为int类型的精度丢失,造成了下面图像中缺失某些点;且line函数是按照0.01步进绘制点,会有精度不足的情况,但是如果把精度加大,又会造成循环次数过多的问题;
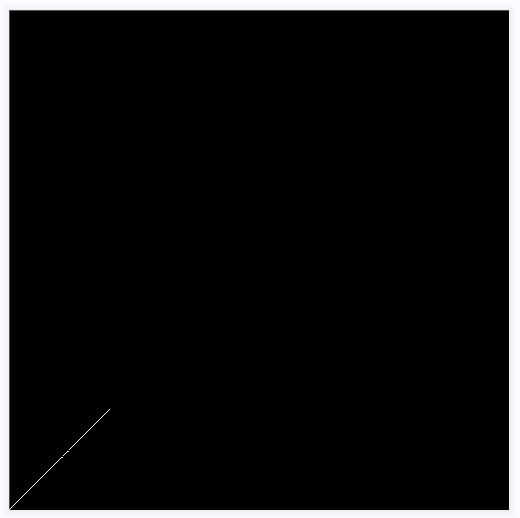
也可以按照直线的斜截式方程,计算每个X对应的Y坐标,设置(X,Y)坐标下的像素;不过图形学里一般是使用t,表示从X0向X1方向的时间点或者比例,一般t在0到1范围内,即表示X是从X0到X1范围内;
void line(int x0, int y0, int x1, int y1, TGAImage& image, TGAColor color) {
    for (int x = x0; x <= x1; x++) {
        float t = (x - x0) / (float)(x1 - x0);
        int y = y0 * (1. - t) + y1 * t;
        image.set(x, y, color);
    }
}
根据相似三角形,可以根据t在X0X1上的比例,计算得到y的值;这里仍然有精度的丢失,可以看到结果中图像直线上的缺角;同时,line函数中,X0必须小于等于X1,如果X0大于X1,就不会绘制线段了;
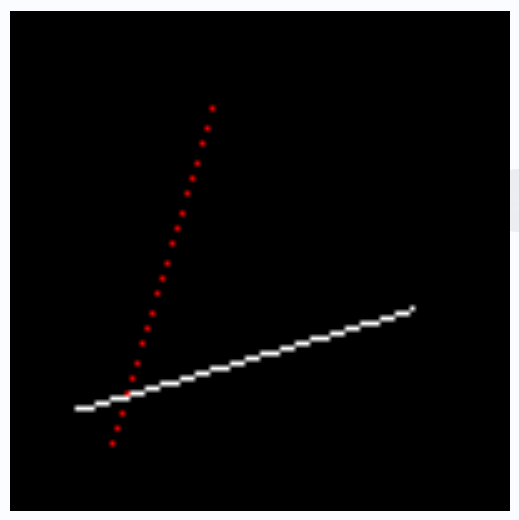
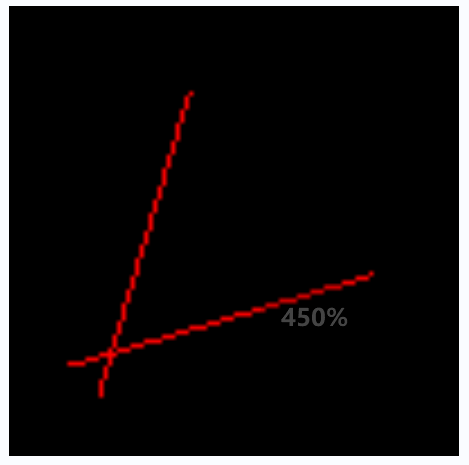
绘制三条线段:
line(13, 20, 80, 40, image, white);
line(20, 13, 40, 80, image, red);
line(80, 40, 13, 20, image, red);
结果如下:只绘制出了前两条线段,第三条线段没有绘制出来;
第一条线段看着正常,第二条线段就有点离散;因为在X方向上的距离小于在Y方向上的距离,每次X方向上步进1,Y方向步进就会大于1,造成了线段不连续;
改进:
判断线段在X方向上的距离和Y方向上的距离,如果Y方向上距离大于X方向上的距离,则点的X和Y互换,且标记steep为true;
如果X0大于X1,就互换X0和X1,Y0和Y1,永远使用较小的X开始遍历;
在set时,如果steep为true,就x和y互调;
void line(int x0, int y0, int x1, int y1, TGAImage& image, TGAColor color) {
    bool steep = false;
    if (std::abs(x0 - x1) < std::abs(y0 - y1)) {
        std::swap(x0, y0);
        std::swap(x1, y1);
        steep = true;
    }
    if (x0 > x1) { // make it left−to−right
        std::swap(x0, x1);
        std::swap(y0, y1);
    }
    for (int x = x0; x <= x1; x++) {
        float t = (x - x0) / (float)(x1 - x0);
        int y = y0 * (1. - t) + y1 * t;
        if (steep) {
            image.set(y, x, color);
        }
        else {
            image.set(x, y, color);
        }
    }
}
仍然是绘制出了两条线段,是因为第一条线段和第二条线段是同一条,后面绘制的红色线段把之前绘制的白色线段覆盖了;
绘制线段永远都是连续的,下一个绘制位置,应该在当前点(x,y)后的三个点位置,即(x+1,y)、(x+1,y-1)、(x+1,y+1),由于向上或者向下是有斜率k控制的,所以只需要关注两个点即可,是绘制在相同的y位置还是向上或者向下的位置;TinyRenderer从零实现(二):lesson 1 直线绘制算法里面讲的比较详细;相比之前的line函数,循环里主要工作从原来的除法和乘法变成了加法运算;
void line(int x0, int y0, int x1, int y1, TGAImage &image, TGAColor color) {
    bool steep = false;
    if (std::abs(x0-x1)<std::abs(y0-y1)) {
        std::swap(x0, y0);
        std::swap(x1, y1);
        steep = true;
    }
    if (x0>x1) {
        std::swap(x0, x1);
        std::swap(y0, y1);
    }
    int dx = x1-x0;
    int dy = y1-y0;
    float derror = std::abs(dy/float(dx));
    float error = 0;
    int y = y0;
    for (int x=x0; x<=x1; x++) {
        if (steep) {
            image.set(y, x, color);
        } else {
            image.set(x, y, color);
        }
        error += derror;
        if (error>.5) {
            y += (y1>y0?1:-1);
            error -= 1.;
        }
    }
}
为了进一步优化性能,则需要去掉0.5浮点运算和浮点除法;则将derror扩大2*dx倍,则相关联变量的比较和累加也要扩大2*dx倍,才能保证比较布尔运算的正确性;
则,原来的std::abs(dy/float(dx))就变成了std::abs(dy)*2,error>.5变成了error>dx,error -= 1.变成了error -= 2*dx;不会影响图像的正确性;
void line(int x0, int y0, int x1, int y1, TGAImage& image, TGAColor color) {
    bool steep = false;
    if (std::abs(x0 - x1) < std::abs(y0 - y1)) {
        std::swap(x0, y0);
        std::swap(x1, y1);
        steep = true;
    }
    if (x0 > x1) {
        std::swap(x0, x1);
        std::swap(y0, y1);
    }
    int dx = x1 - x0;
    int dy = y1 - y0;
    float derror = std::abs(dy)*2;
    float error = 0;
    int y = y0;
    for (int x = x0; x <= x1; x++) {
        if (steep) {
            image.set(y, x, color);
        }
        else {
            image.set(x, y, color);
        }
        error += derror;
        if (error > dx) {
            y += (y1 > y0 ? 1 : -1);
            error -= 2*dx;
        }
    }
}
2.4 绘制三角面
对应课程里的Lesson 2: Triangle rasterization and back face culling;
主要内容是,绘制一个三角形并填充颜色,是在点、线的基础上,绘制面;
在该节中,引入了几何结构2D点(向量)、3D点(向量),可以对这些向量进行归一化处理以及运算操作等等;
geometry.h内容如下:
template <class t> struct Vec2 {
    union {
        struct {t u, v;};
        struct {t x, y;};
        t raw[2];
    };
    Vec2() : u(0), v(0) {}
    Vec2(t _u, t _v) : u(_u),v(_v) {}
    inline Vec2<t> operator +(const Vec2<t> &V) const { return Vec2<t>(u+V.u, v+V.v); }
    inline Vec2<t> operator -(const Vec2<t> &V) const { return Vec2<t>(u-V.u, v-V.v); }
    inline Vec2<t> operator *(float f)          const { return Vec2<t>(u*f, v*f); }
    t operator [](int pos) const { return raw[pos]; }
    float norm() const { return std::sqrt(x * x + y * y); }
    Vec2<t>& normalize(t l = 1) { *this = (*this) * (l / norm()); return *this; }
    template <class > friend std::ostream& operator<<(std::ostream& s, Vec2<t>& v);
};

template <class t> struct Vec3 {
    union {
        struct {t x, y, z;};
        struct { t ivert, iuv, inorm; };
        t raw[3];
    };
    Vec3() : x(0), y(0), z(0) {}
    Vec3(t _x, t _y, t _z) : x(_x),y(_y),z(_z) {}
    inline Vec3<t> operator ^(const Vec3<t> &v) const { return Vec3<t>(y*v.z-z*v.y, z*v.x-x*v.z, x*v.y-y*v.x); }
    inline Vec3<t> operator +(const Vec3<t> &v) const { return Vec3<t>(x+v.x, y+v.y, z+v.z); }
    inline Vec3<t> operator -(const Vec3<t> &v) const { return Vec3<t>(x-v.x, y-v.y, z-v.z); }
    inline Vec3<t> operator *(float f)          const { return Vec3<t>(x*f, y*f, z*f); }
    inline t       operator *(const Vec3<t> &v) const { return x*v.x + y*v.y + z*v.z; }
    float norm () const { return std::sqrt(x*x+y*y+z*z); }
    Vec3<t> & normalize(t l=1) { *this = (*this)*(l/norm()); return *this; }
    template <class > friend std::ostream& operator<<(std::ostream& s, Vec3<t>& v);
};

typedef Vec2<float> Vec2f;
typedef Vec2<int>   Vec2i;
typedef Vec3<float> Vec3f;
typedef Vec3<int>   Vec3i;

template <class t> std::ostream& operator<<(std::ostream& s, Vec2<t>& v) {
    s << "(" << v.x << ", " << v.y << ")\n";
    return s;
}

template <class t> std::ostream& operator<<(std::ostream& s, Vec3<t>& v) {
    s << "(" << v.x << ", " << v.y << ", " << v.z << ")\n";
    return s;
}
修改line函数,将之前的xy坐标的方式,修改为传入Vec2的参数:
void line(Vec2i p0, Vec2i p1, TGAImage& image, TGAColor color) {
    bool steep = false;
    if (std::abs(p0.x - p1.x) < std::abs(p0.y - p1.y)) {
        std::swap(p0.x, p0.y);
        std::swap(p1.x, p1.y);
        steep = true;
    }
    if (p0.x > p1.x) {
        std::swap(p0, p1);
    }
    int dx = p1.x - p0.x;
    int dy = p1.y - p0.y;
    float derror = std::abs(dy)*2;
    float error = 0;
    int y = p0.y;
    for (int x = p0.x; x <= p1.x; x++) {
        if (steep) {
            image.set(y, x, color);
        }
        else {
            image.set(x, y, color);
        }
        error += derror;
        if (error > dx) {
            y += (p1.y > p0.y ? 1 : -1);
            error -= 2*dx;
        }
    }
}
绘制三角形函数triangle,其实就是绘制了组成三角形的三根线段:
void triangle(Vec2i t0, Vec2i t1, Vec2i t2, TGAImage& image, TGAColor color) {
line(t0, t1, image, color);
line(t1, t2, image, color);
line(t2, t0, image, color);
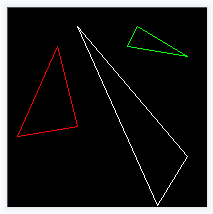
}在画布上绘制三个空心的三角形:
const TGAColor white = TGAColor(255, 255, 255, 255);
const TGAColor red   = TGAColor(255,   0,   0, 255);
const TGAColor green = TGAColor(0,   255,   0, 255);

int main(int argc, char** argv) {
    TGAImage image(200, 200, TGAImage::RGB);

    Vec2i t0[3] = { Vec2i(10, 70),   Vec2i(50, 160),  Vec2i(70, 80) };
    Vec2i t1[3] = { Vec2i(180, 50),  Vec2i(150, 1),   Vec2i(70, 180) };
    Vec2i t2[3] = { Vec2i(180, 150), Vec2i(120, 160), Vec2i(130, 180) };

    triangle(t0[0], t0[1], t0[2], image, red);
    triangle(t1[0], t1[1], t1[2], image, white);
    triangle(t2[0], t2[1], t2[2], image, green);

    image.flip_vertically();
    image.write_tga_file("output.tga");
    return 0;
}
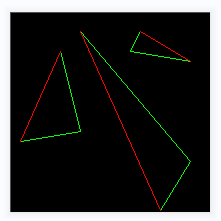
将三角形的三个顶点按照Y坐标从小到大排序,三个值只需要比较交换三次就能排序完成;将三条三段颜色修改为Y方向上跨度最大线段为红色,其余两条颜色为绿色;
由于排序和交互后,t0.y<t1.y<t2.y;则t0->t2的线段为红色,其余两条为绿色;代码如下:
void triangle(Vec2i t0, Vec2i t1, Vec2i t2, TGAImage& image, TGAColor color) {
    if (t0.y > t1.y) std::swap(t0, t1);
    if (t0.y > t2.y) std::swap(t0, t2);
    if (t1.y > t2.y) std::swap(t1, t2);
    line(t0, t1, image, green);
    line(t1, t2, image, green);
    line(t2, t0, image, red);
}
给三角形涂色,其实就是按照线扫描的方式,一行一行给坐标设置RGB值;此时的三角形中已经按照Y的大小进行了排序,那么依次从Y最小值到Y最大值遍历,每个Y值对应的X范围,即和两条线段的交点的X范围,就是要绘制的范围;根据t1的Y值,将三角形分为两部分,一部分在Y值的上方,另一部分在Y值的下方;
此时算法并不考虑性能问题,以实现功能为主:
void triangle(Vec2i t0, Vec2i t1, Vec2i t2, TGAImage& image, TGAColor color) {
    // sort the vertices, t0, t1, t2 lower−to−upper (bubblesort yay!)
    if (t0.y > t1.y) std::swap(t0, t1);
    if (t0.y > t2.y) std::swap(t0, t2);
    if (t1.y > t2.y) std::swap(t1, t2);
    int total_height = t2.y - t0.y;
    for (int y = t0.y; y <= t1.y; y++) {
        int segment_height = t1.y - t0.y + 1;
        float alpha = (float)(y - t0.y) / total_height;
        float beta = (float)(y - t0.y) / segment_height; // be careful with divisions by zero
        Vec2i A = t0 + (t2 - t0) * alpha;
        Vec2i B = t0 + (t1 - t0) * beta;
        if (A.x > B.x) std::swap(A, B);
        for (int j = A.x; j <= B.x; j++) {
            image.set(j, y, color); // attention, due to int casts t0.y+i != A.y
        }
    }
    for (int y = t1.y; y <= t2.y; y++) {
        int segment_height = t2.y - t1.y + 1;
        float alpha = (float)(y - t0.y) / total_height;
        float beta = (float)(y - t1.y) / segment_height; // be careful with divisions by zero
        Vec2i A = t0 + (t2 - t0) * alpha;
        Vec2i B = t1 + (t2 - t1) * beta;
        if (A.x > B.x) std::swap(A, B);
        for (int j = A.x; j <= B.x; j++) {
            image.set(j, y, color); // attention, due to int casts t0.y+i != A.y
        }
    }
}
绘制三角形两部分的代码部分逻辑基本上是一致的,只是在Y相关内容上有差别;如果要合并为一个循环,那么就得每次循环中增加判断,即判断当前Y是处于那个三角形部分;
void triangle(Vec2i t0, Vec2i t1, Vec2i t2, TGAImage& image, TGAColor color) {
    if (t0.y == t1.y && t0.y == t2.y) return;

    if (t0.y > t1.y) std::swap(t0, t1);
    if (t0.y > t2.y) std::swap(t0, t2);
    if (t1.y > t2.y) std::swap(t1, t2);

    int total_height = t2.y - t0.y;

    for (int i = 0; i < total_height; i++) {
        bool second_half = i > t1.y - t0.y || t1.y == t0.y;
        int segment_height = second_half ? t2.y - t1.y : t1.y - t0.y;
        float alpha = (float)i / total_height;
        float beta = (float)(i - (second_half ? t1.y - t0.y : 0)) / segment_height;
        Vec2i A = t0 + (t2 - t0) * alpha;
        Vec2i B = second_half ? t1 + (t2 - t1) * beta : t0 + (t1 - t0) * beta;
        if (A.x > B.x) std::swap(A, B);
        for (int j = A.x; j <= B.x; j++) {
            image.set(j, t0.y + i, color);
        }
    }
}
至此,面绘制的功能已经实现了,当场景中有成千上万个三角形要绘制时,如何提高性能也是一个关键点;图形学里一般都会使用并行计算提高计算效率;绘制实心三角形如何提高性能呢?
按照CUDA的思路,绘制三角形就是对三角形边上和内部的像素点进行判断,是否处于三角形上;可以使用大量的线程分别处理每个像素点的计算;按照这个思路走下去,即可以找到三角形的AABB包围盒,只对包围盒内的像素点进行计算,就会节省大量的线程资源;
实现逻辑是:
找到三角形的AABB包围盒;
包围盒内的点是否在三角形内,如果在三角形内,则设置RGB值;
这部分内容在TinyRenderer从零实现(三):lesson 2 三角形光栅化和背面剔除中相关知识点讲的特别清楚,不懂的可以去看看;
完整代码如下:
Vec3f barycentric(Vec2i* pts, Vec2i P) {
Vec3f u = Vec3f(pts[2][0] - pts[0][0], pts[1][0] - pts[0][0], pts[0][0] - P[0]) ^ Vec3f(pts[2][1] - pts[0][1], pts[1][1] - pts[0][1], pts[0][1] - P[1]);
/* `pts` and `P` has integer value as coordinates
so `abs(u[2])` < 1 means `u[2]` is 0, that means
triangle is degenerate, in this case return something with negative coordinates */
if (std::abs(u.z) < 1) return Vec3f(-1, 1, 1);
return Vec3f(1.f - (u.x + u.y) / u.z, u.y / u.z, u.x / u.z);
}
void triangle(Vec2i* pts, TGAImage& image, TGAColor color) {
Vec2i bboxmin(image.get_width() - 1, image.get_height() - 1);
Vec2i bboxmax(0, 0);
Vec2i clamp(image.get_width() - 1, image.get_height() - 1);
for (int i = 0; i < 3; i++) {
bboxmin.x = std::max(0, std::min(bboxmin.x, pts[i].x));
bboxmin.y = std::max(0, std::min(bboxmin.y, pts[i].y));
bboxmax.x = std::min(clamp.x, std::max(bboxmax.x, pts[i].x));
bboxmax.y = std::min(clamp.y, std::max(bboxmax.y, pts[i].y));
}
Vec2i P;
for (P.x = bboxmin.x; P.x <= bboxmax.x; P.x++) {
for (P.y = bboxmin.y; P.y <= bboxmax.y; P.y++) {
Vec3f bc_screen = barycentric(pts, P);
if (bc_screen.x < 0 || bc_screen.y < 0 || bc_screen.z < 0) continue;
image.set(P.x, P.y, color);
}
}
}
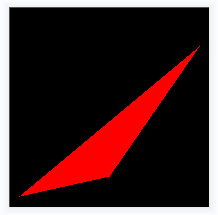
int main(int argc, char** argv) {
TGAImage frame(200, 200, TGAImage::RGB);
Vec2i pts[3] = { Vec2i(10,10), Vec2i(100, 30), Vec2i(190, 160) };
triangle(pts, frame, TGAColor(255, 0, 0, 255));
frame.flip_vertically(); // to place the origin in the bottom left corner of the image
frame.write_tga_file("framebuffer.tga");
return 0;
}结果如下:


 704
704

 被折叠的 条评论
为什么被折叠?
被折叠的 条评论
为什么被折叠?
 到【灌水乐园】发言


