


通用步骤
- 读论文,了解该注意力的针对问题,有针对性地选择注意力模块。
- 找代码,下载代码。
- 在tasks.py文件下导入代码模块,并对修改部分代码。
- 重新创建yaml文件,在其中添加注意力机制模块。
- 测试文件是否可行,参数是否错误。
- 在训练中调用添加了注意力机制的yaml文件,进行训练使用。
CBAM注意力
-
论文链接 : https://arxiv.org/abs/1807.06521
-
源码
虽然我这还是放上了源码,但是在yolov8的代码中,是包括了CBAM的源码的。具体位置在.\ultralytics-main\ultralytics\nn\modules\conv.py 文件中
class CBAM(nn.Module):
    """Convolutional Block Attention Module."""

    def __init__(self, c1, kernel_size=7):  # ch_in, kernels
        super().__init__()
        self.channel_attention = ChannelAttention(c1)
        self.spatial_attention = SpatialAttention(kernel_size)

    def forward(self, x):
        """Applies the forward pass through C1 module."""
        return self.spatial_attention(self.channel_attention(x))
-
在task.py文件中导入CBAM模块
和上文的EMA注意机制一样,是属于只需要传递一个参数c1的模块。task.py文件在.\ultralytics-main\ultralytics\nn\tasks.py路径下

-
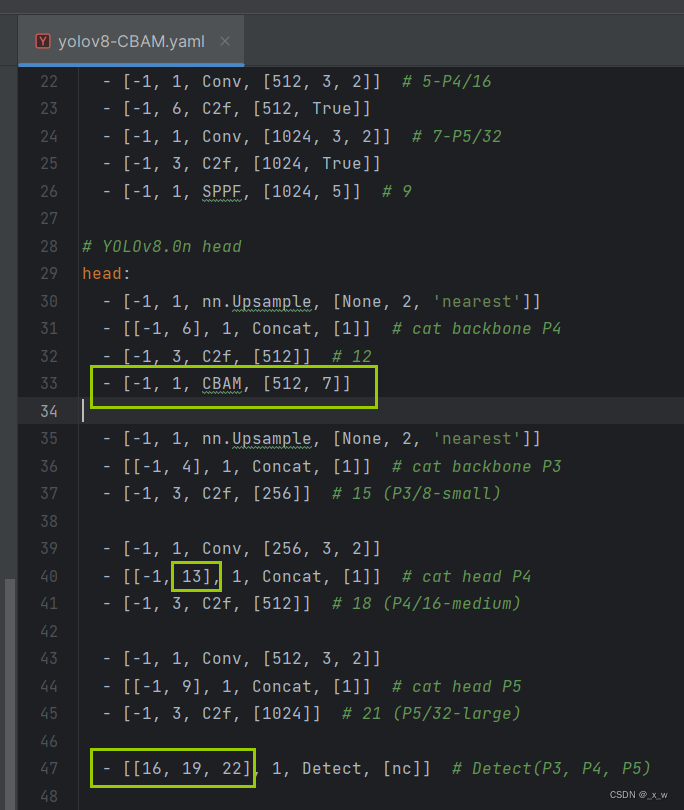
创建yolov8-CBAM.yaml文件
在.\ultralytics-main\ultralytics\models\v8路径下创建,将yolov8.yaml的代码复制粘贴到yolov8-ema.yaml文件中并在其中添加注意力机制模块代码。
-
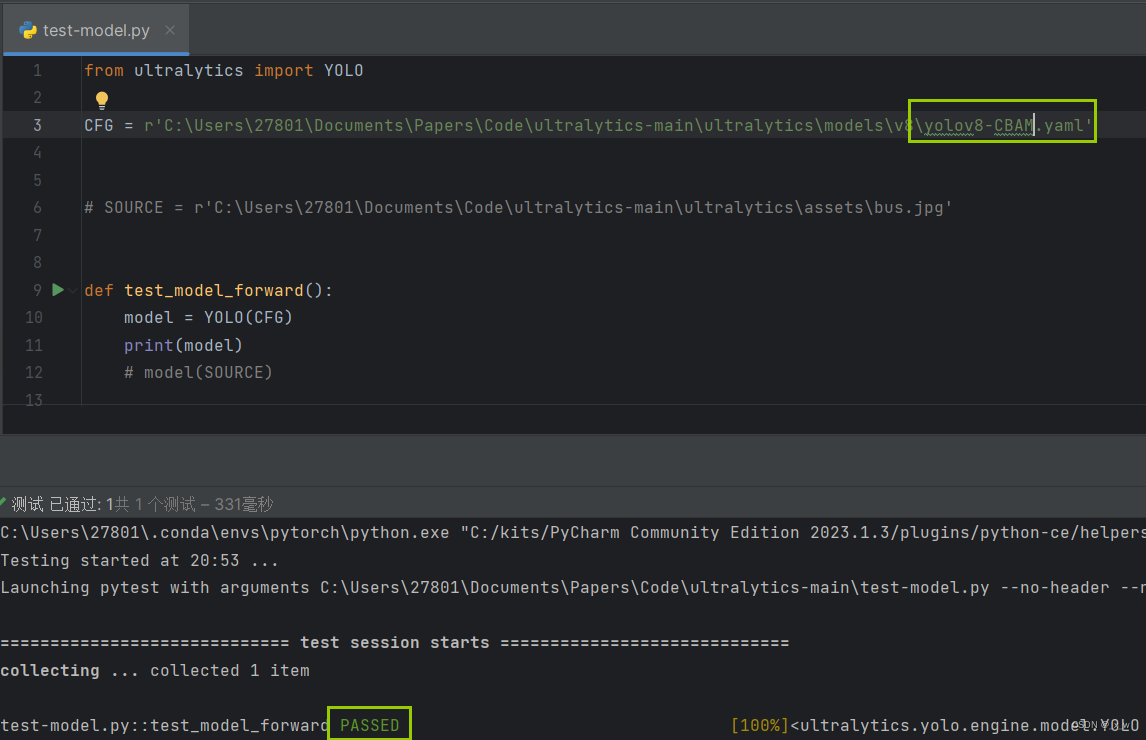
测试yaml文件可行性
在目录.\ultralytics-main下创建文件test-model.py,在变量CFG中指定刚刚yaml文件的绝对路径或相对路径,执行python文件,若为pass,则表明添加成功;否则,需要查看报错做出对应的修改。
-
进行训练使用
在替换原始的yaml模型文件,改新创建的yaml文件用于模型训练即可。
ECA注意力
- 论文链接 : https://arxiv.org/abs/1910.03151
- 源码
将代码命名为ECA.py文件,放在.\ultralytics-main\ultralytics\nn路径下。(这个路径和命名都可以随意按自己的想法,主要涉及到在task.py文件中的导入)。另外,ECA模块和CBAM、EMA一样是只需要传一个参数的情况。
import torch
from torch import nn
import math

class ECA(nn.Module):
    def __init__(self, in_channels, gamma=2, b=1):
        super(ECA, self).__init__()
        self.in_channels = in_channels
        self.fgp = nn.AdaptiveAvgPool2d((1, 1))
        kernel_size = int(abs((math.log(self.in_channels, 2) + b) / gamma))
        kernel_size = kernel_size if kernel_size % 2 else kernel_size + 1
        self.con1 = nn.Conv1d(1,
                              1,
                              kernel_size=kernel_size,
                              padding=(kernel_size - 1) // 2,
                              bias=False)
        self.act1 = nn.Sigmoid()

    def forward(self, x):
        output = self.fgp(x)
        output = output.squeeze(-1).transpose(-1, -2)
        output = self.con1(output).transpose(-1, -2).unsqueeze(-1)
        output = self.act1(output)
        output = torch.multiply(x, output)
        return output
-
导入task.py文件,并加入相关代码
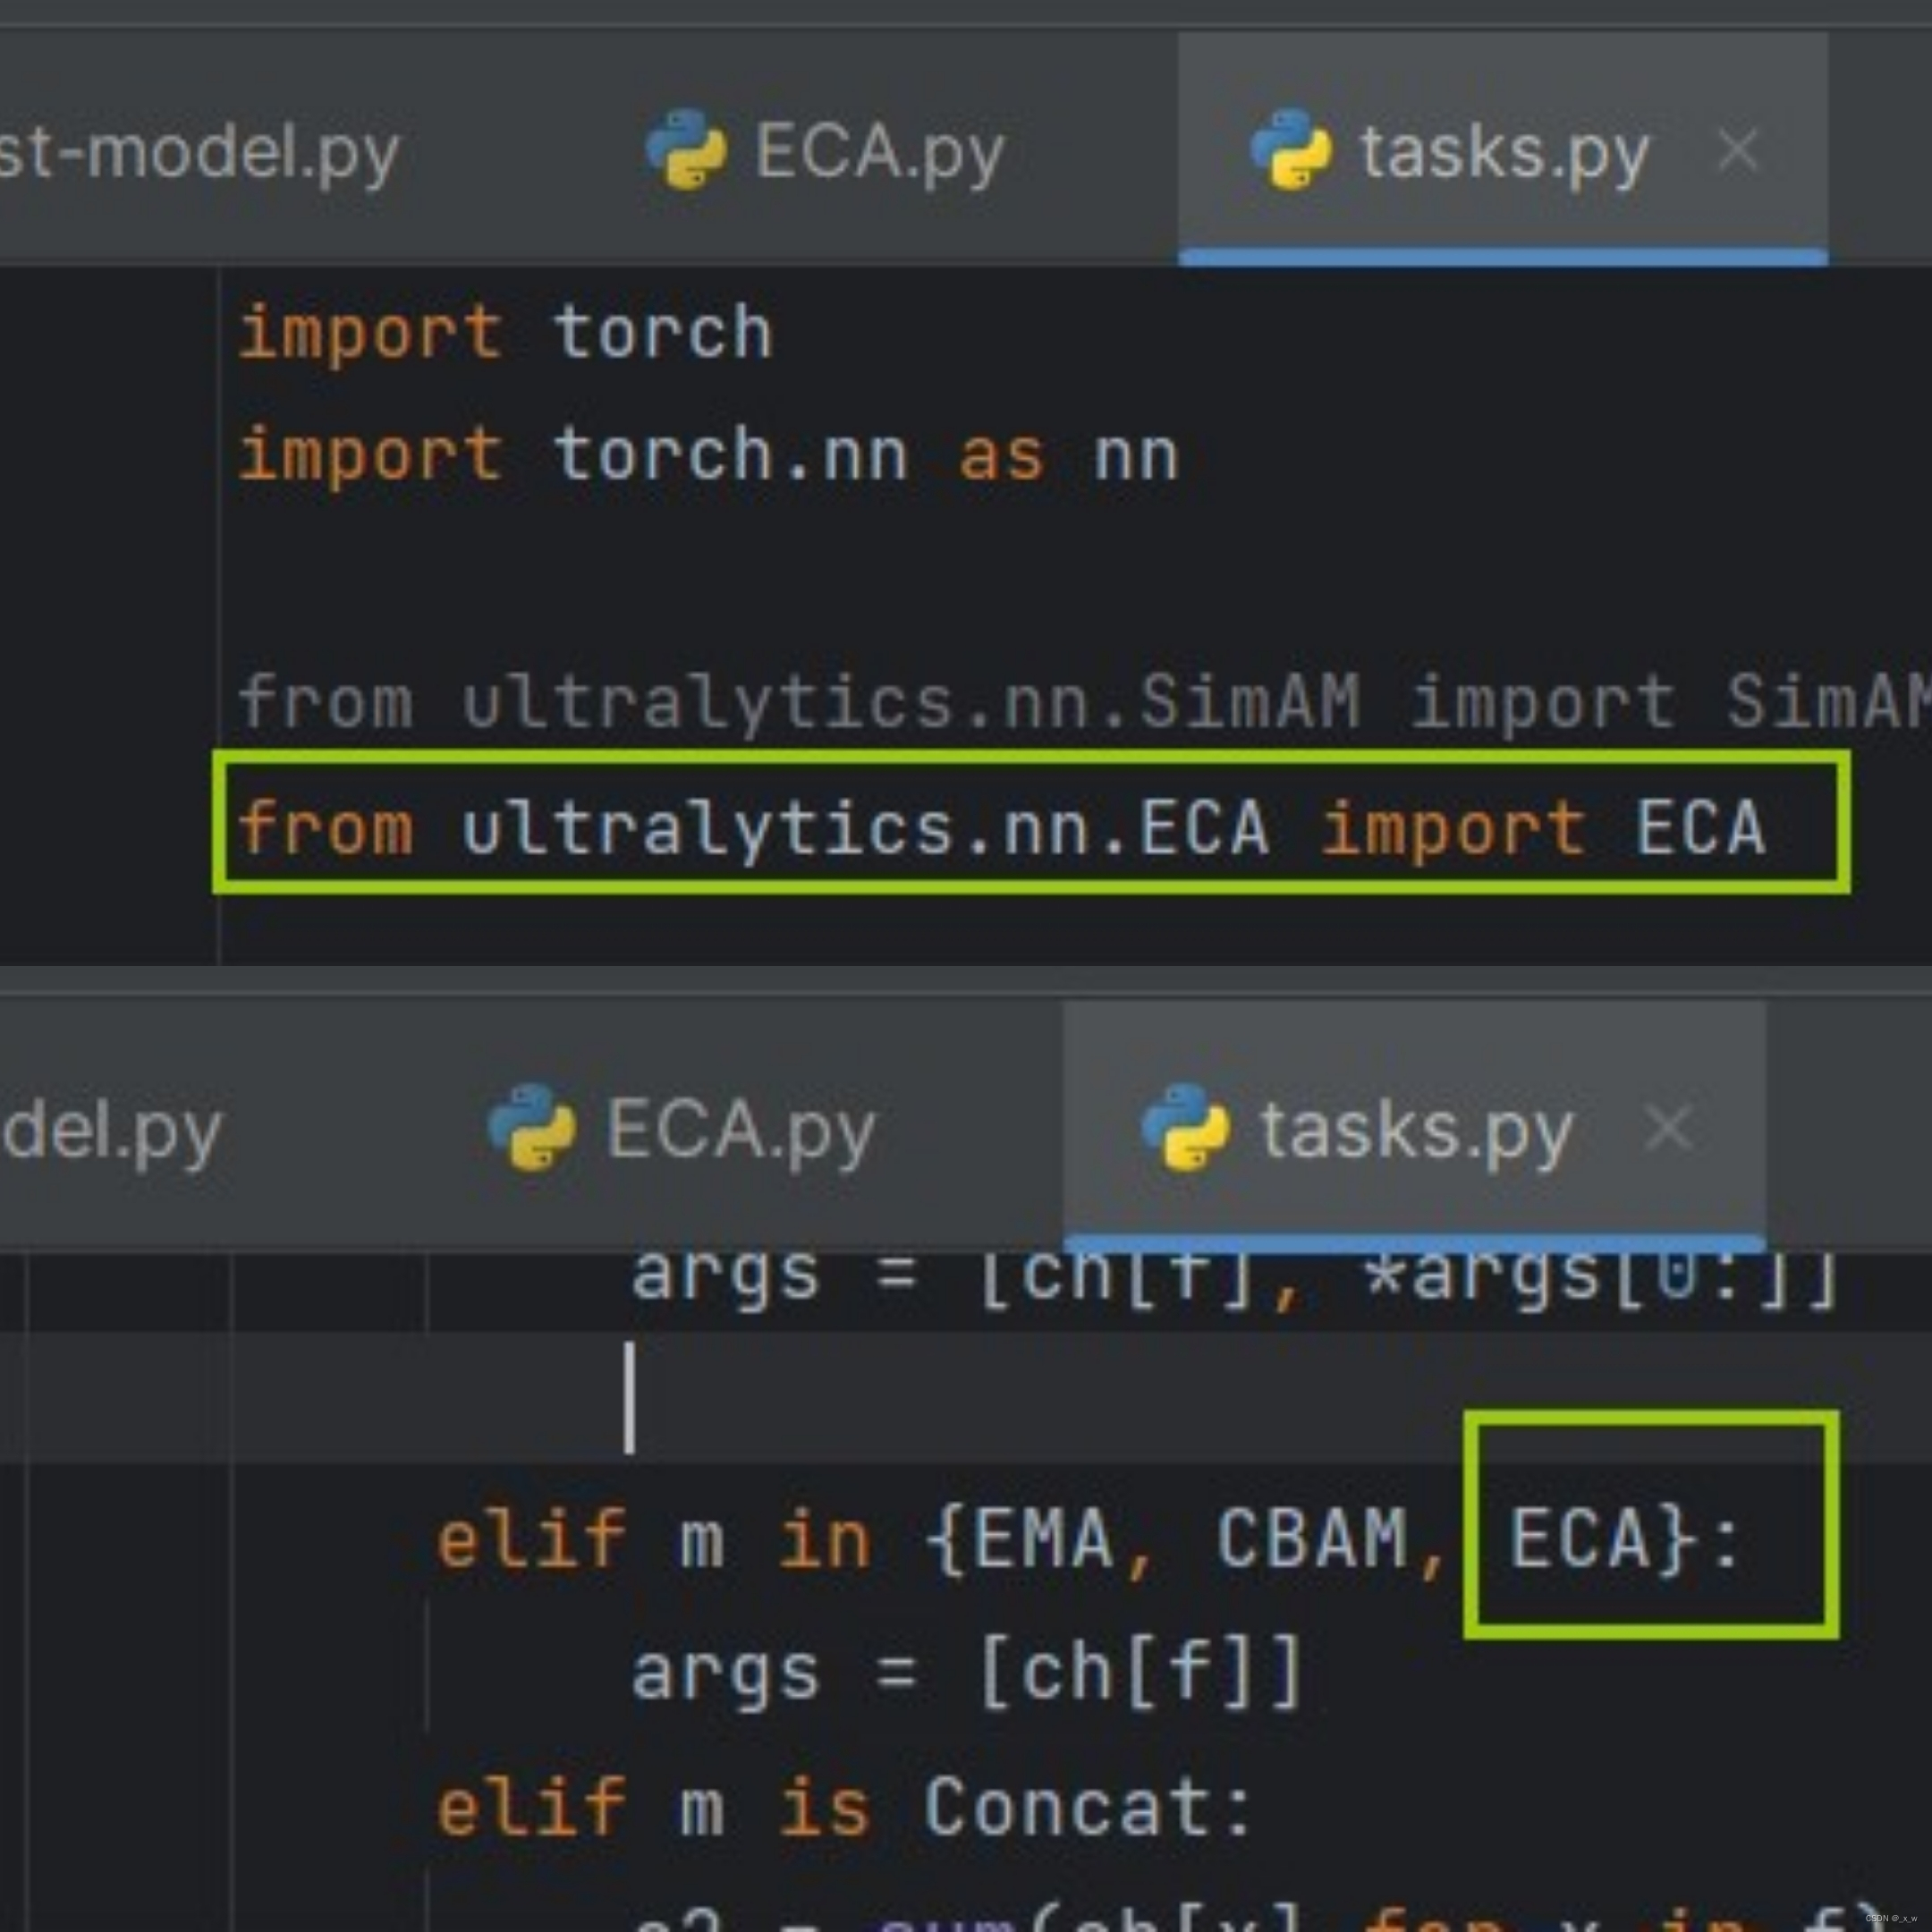
-
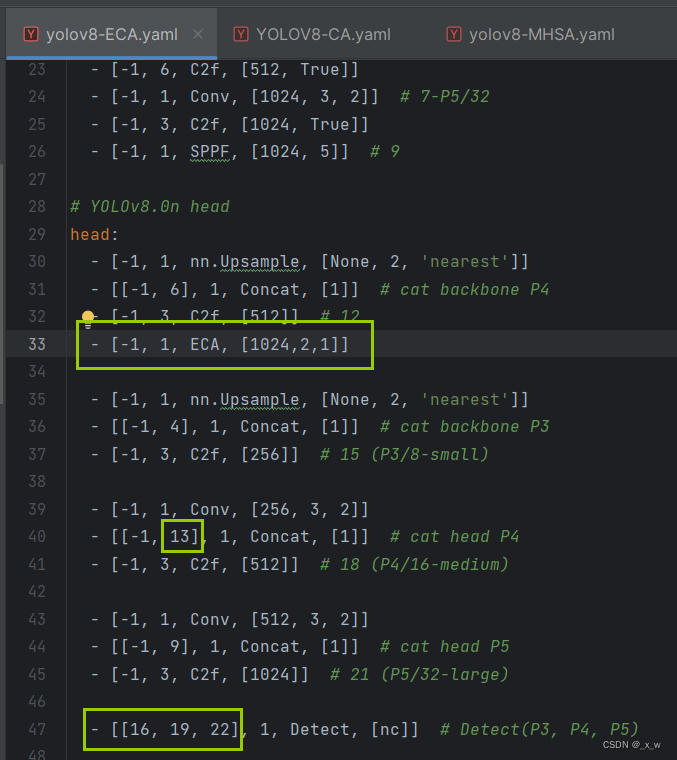
创建对应的yaml文件
-
测试yaml文件可行性
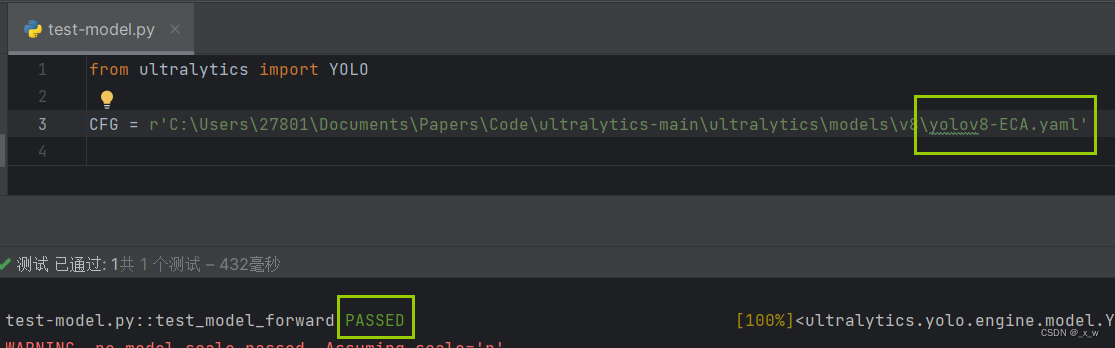
-
用于模型训练
在替换原始的yaml模型文件,改新创建的yaml文件用于模型训练即可。
CA注意力
- 论文链接 : https://arxiv.org/abs/2103.02907
- 源码
import torch
import torch.nn as nn
class h_sigmoid(nn.Module):
    def __init__(self, inplace=True):
        super(h_sigmoid, self).__init__()
        self.relu = nn.ReLU6(inplace=inplace)

    def forward(self, x):
        return self.relu(x + 3) / 6


class h_swish(nn.Module):
    def __init__(self, inplace=True):
        super(h_swish, self).__init__()
        self.sigmoid = h_sigmoid(inplace=inplace)

    def forward(self, x):
        return x * self.sigmoid(x)


class CA(nn.Module):
    def __init__(self, inp, reduction=32):
        super(CA, self).__init__()
        self.pool_h = nn.AdaptiveAvgPool2d((None, 1))
        self.pool_w = nn.AdaptiveAvgPool2d((1, None))

        mip = max(8, inp // reduction)

        self.conv1 = nn.Conv2d(inp, mip, kernel_size=1, stride=1, padding=0)
        self.bn1 = nn.BatchNorm2d(mip)
        self.act = h_swish()

        self.conv_h = nn.Conv2d(mip, inp, kernel_size=1, stride=1, padding=0)
        self.conv_w = nn.Conv2d(mip, inp, kernel_size=1, stride=1, padding=0)

    def forward(self, x):
        identity = x

        n, c, h, w = x.size()
        x_h = self.pool_h(x)
        x_w = self.pool_w(x).permute(0, 1, 3, 2)

        y = torch.cat([x_h, x_w], dim=2)
        y = self.conv1(y)
        y = self.bn1(y)
        y = self.act(y)

        x_h, x_w = torch.split(y, [h, w], dim=2)
        x_w = x_w.permute(0, 1, 3, 2)

        a_h = self.conv_h(x_h).sigmoid()
        a_w = self.conv_w(x_w).sigmoid()

        out = identity * a_w * a_h

        return out
-
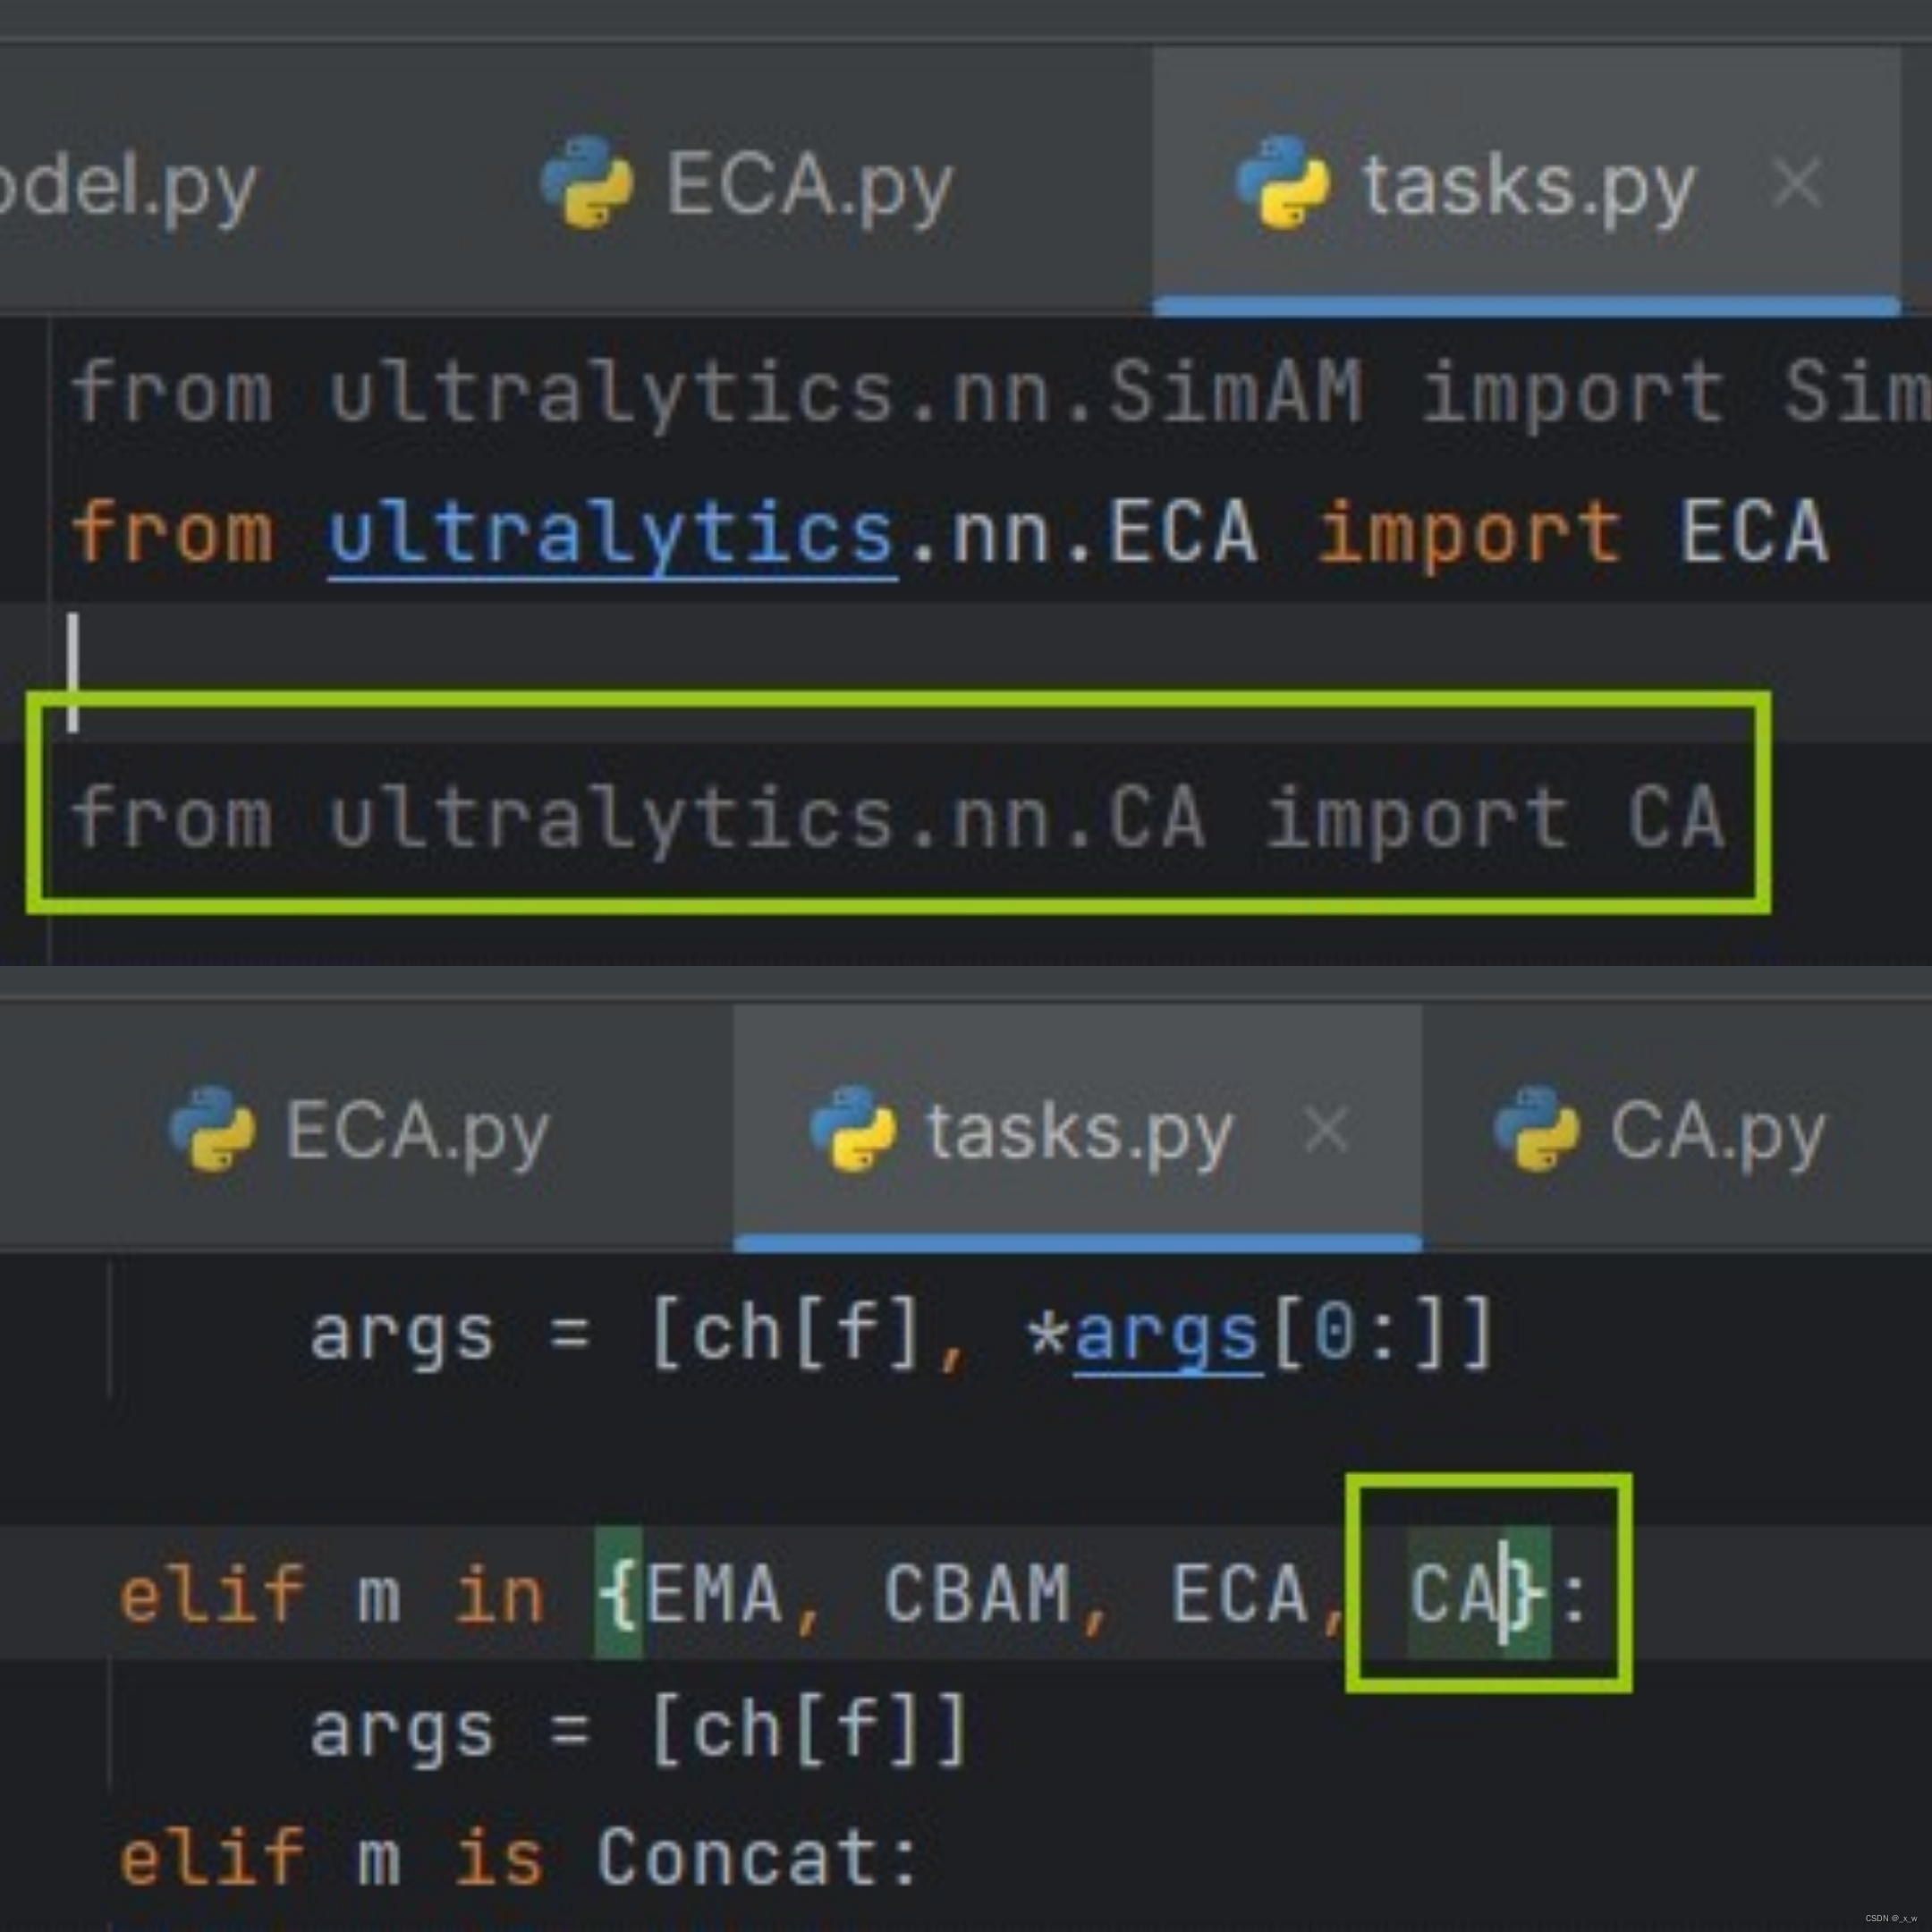
导入task.py文件,并加入相关代码
-
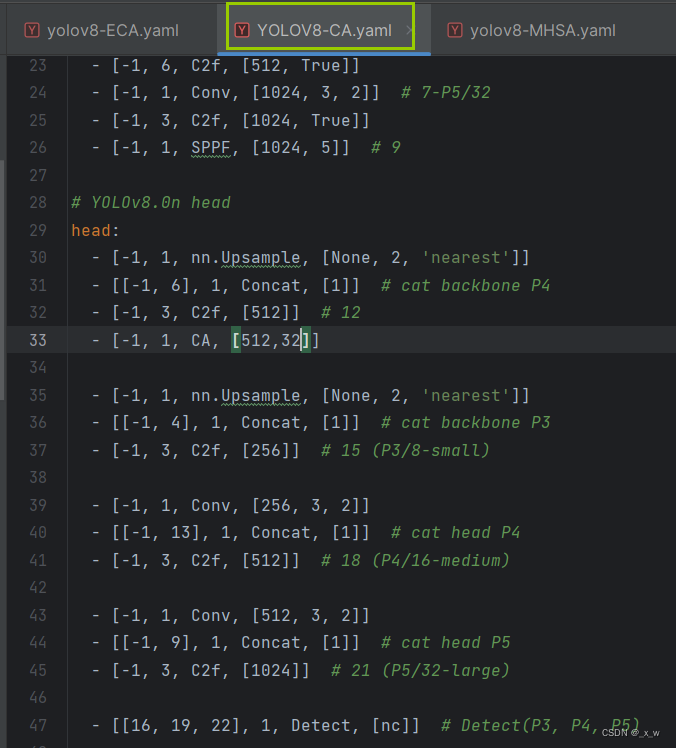
创建对应的yaml文件
-
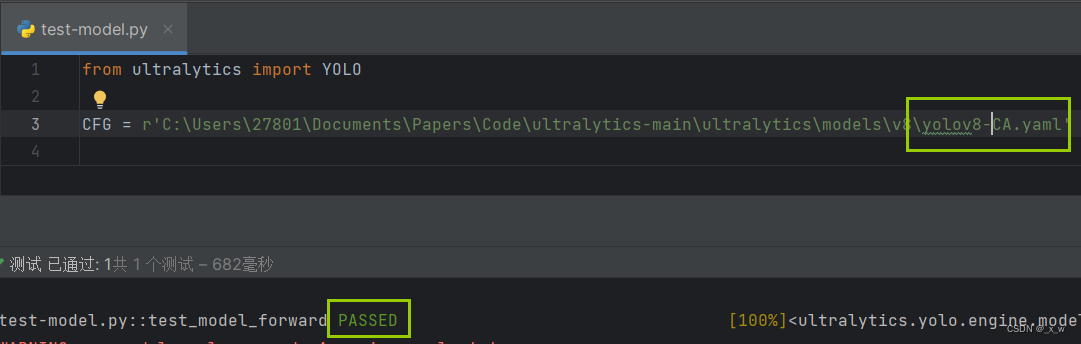
测试yaml文件可行性
-
用于模型训练
在替换原始的yaml模型文件,改新创建的yaml文件用于模型训练即可。
MHSA注意力
- 论文链接 : https://proceedings.neurips.cc/paper/2017/file/3f5ee243547dee91fbd053c1c4a845aa-Paper.pdf
- 源码
import torch
import torch.nn as nn


class MHSA(nn.Module):
    def __init__(self, n_dims, width=14, height=14, heads=4, pos_emb=False):
        super(MHSA, self).__init__()

        self.heads = heads
        self.query = nn.Conv2d(n_dims, n_dims, kernel_size=1)
        self.key = nn.Conv2d(n_dims, n_dims, kernel_size=1)
        self.value = nn.Conv2d(n_dims, n_dims, kernel_size=1)
        self.pos = pos_emb
        if self.pos:
            self.rel_h_weight = nn.Parameter(torch.randn([1, heads, (n_dims) // heads, 1, int(height)]),
                                             requires_grad=True)
            self.rel_w_weight = nn.Parameter(torch.randn([1, heads, (n_dims) // heads, int(width), 1]),
                                             requires_grad=True)
        self.softmax = nn.Softmax(dim=-1)

    def forward(self, x):
        n_batch, C, width, height = x.size()
        q = self.query(x)
        print('q shape:{}'.format(q.shape))
        q = q.view(n_batch, self.heads, C // self.heads, -1)
        k = self.key(x).view(n_batch, self.heads, C // self.heads, -1)
        v = self.value(x).view(n_batch, self.heads, C // self.heads, -1)
        print('q shape:{},k shape:{},v shape:{}'.format(q.shape,k.shape,v.shape))  #1,4,64,256
        content_content = torch.matmul(q.permute(0, 1, 3, 2), k)  # 1,C,h*w,h*w
        # print("qkT=",content_content.shape)
        c1, c2, c3, c4 = content_content.size()
        if self.pos:
            # print("old content_content shape",content_content.shape) #1,4,256,256
            content_position = (self.rel_h_weight + self.rel_w_weight).view(1, self.heads, C // self.heads, -1).permute(
                0, 1, 3, 2)  # 1,4,1024,64

            content_position = torch.matmul(content_position, q)  # ([1, 4, 1024, 256])
            content_position = content_position if (
                    content_content.shape == content_position.shape) else content_position[:, :, :c3, ]
            assert (content_content.shape == content_position.shape)
            # print('new pos222-> shape:',content_position.shape)
            # print('new content222-> shape:',content_content.shape)
            energy = content_content + content_position
        else:
            energy = content_content
        attention = self.softmax(energy)
        out = torch.matmul(v, attention.permute(0, 1, 3, 2))  # 1,4,256,64
        out = out.view(n_batch, C, width, height)
        return out
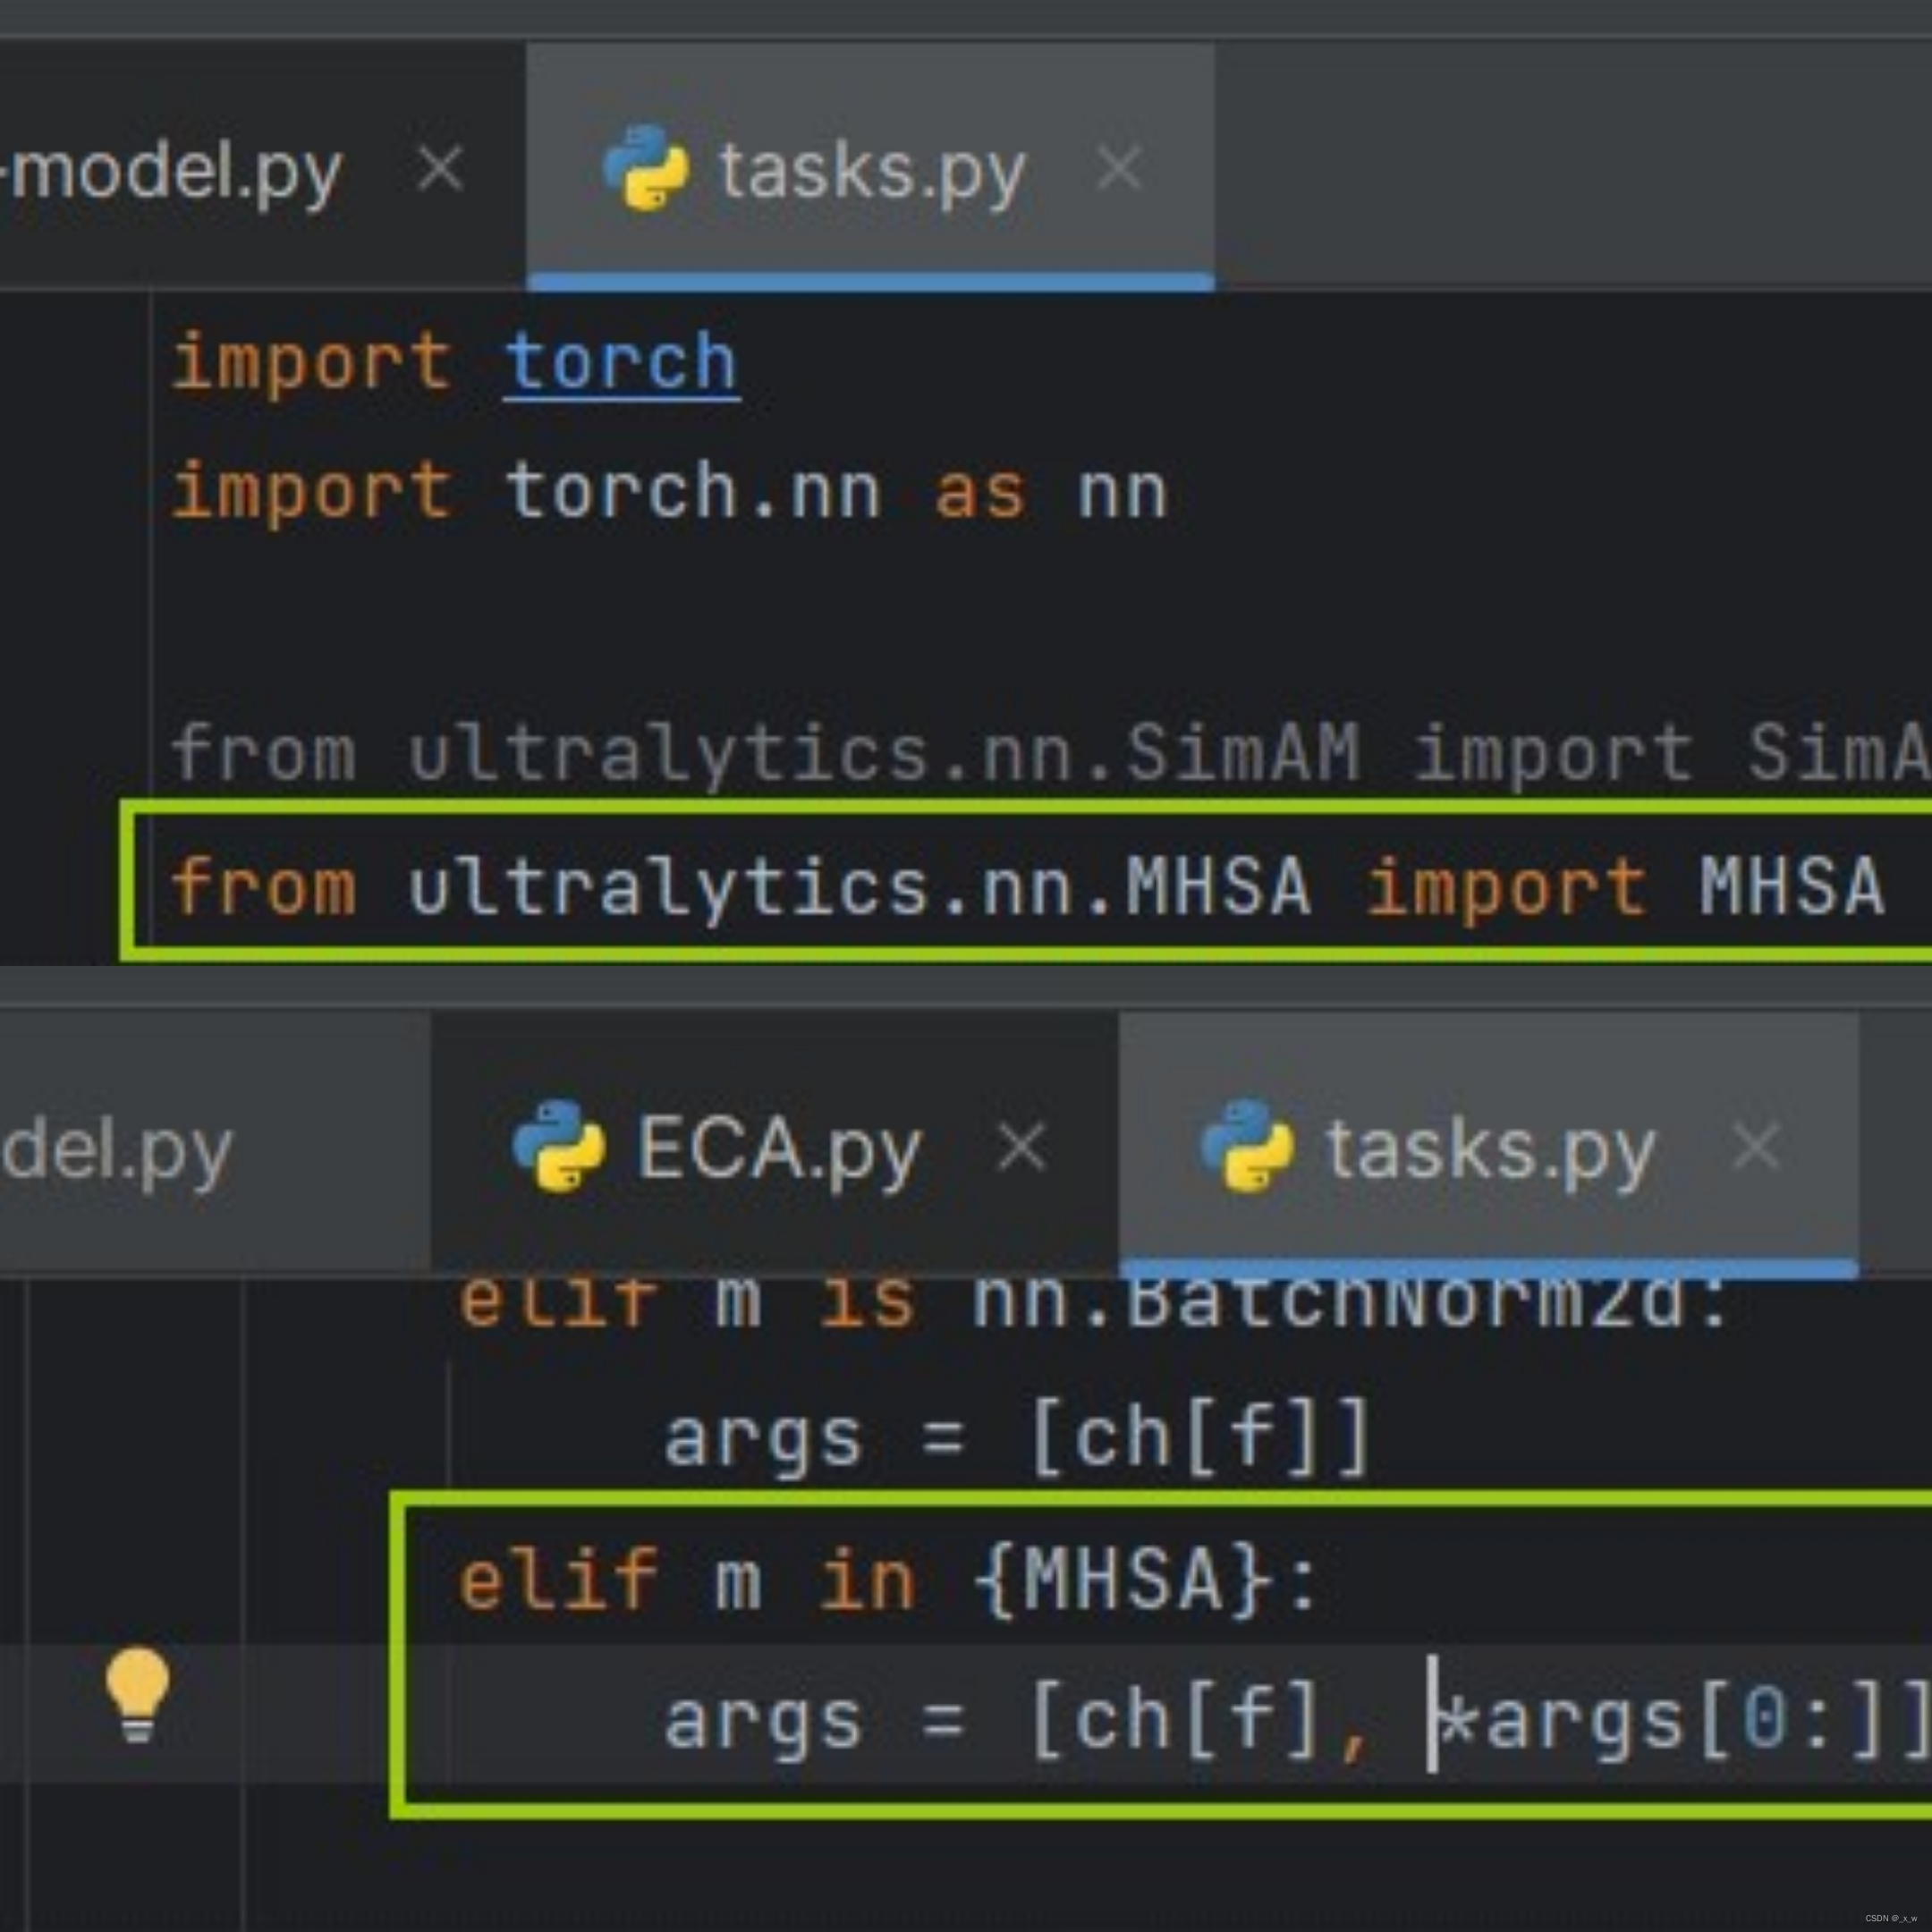
- 导入task.py文件,并加入相关代码
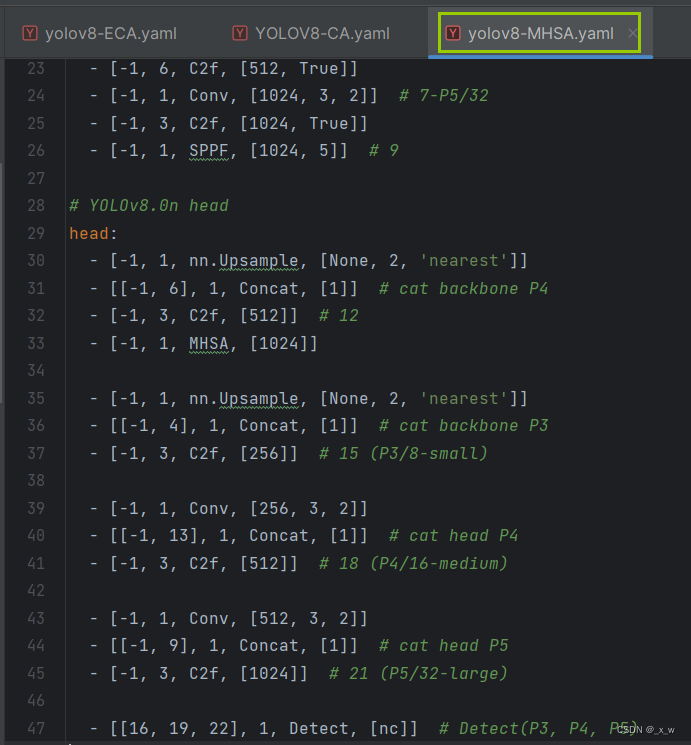
- 创建对应的yaml文件
- 测试yaml文件可行性

- 用于模型训练
在替换原始的yaml模型文件,改新创建的yaml文件用于模型训练即可。
如果你觉得这篇文章对你有所启发的话,期待你的点赞、收藏和打赏,对我创作的支持!!!


 600
600

 被折叠的 条评论
为什么被折叠?
被折叠的 条评论
为什么被折叠?
 到【灌水乐园】发言


