


提要
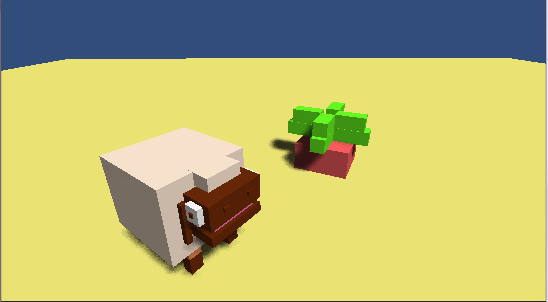
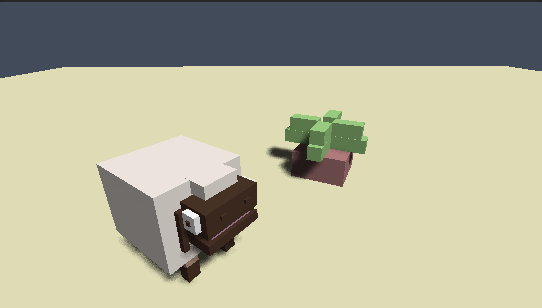
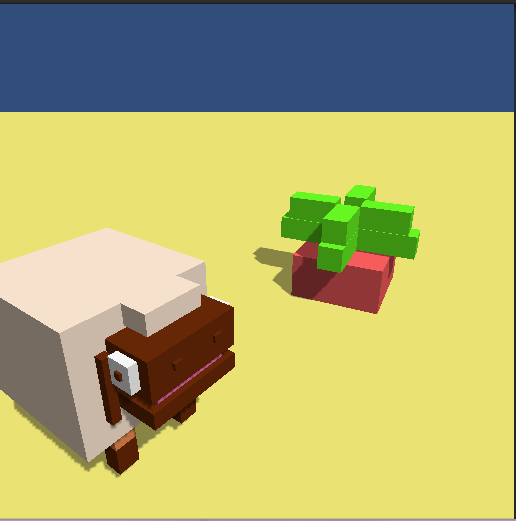
所谓post effects,就是后处理,在渲染的流水线中属于最后的阶段,处理的对象是由场景生成的一张图片。常见的后处理效果有HDR,Motion Blur等,通过对屏幕空间的后处理,可以很方便的调整游戏整体的风格。下面是要用到的场景。
Unity的ShaderLab内建变量
为了编程方便,Shaderlab中内建了一些变量,可以在Shader中直接引用。
这里要用到的 _SinTime - 时间的的正弦函数。
更多的内置变量可以参考这里 ShaderLab built-in values
基本步骤
主要思路就是首先1)将摄像机的RenderTexture传递到Shder里面,Shader在GPU中进行计算,然后2)再将处理后的图片传递回来。
第一步需要用C#脚本来处理,第二步要自己创建Shader。
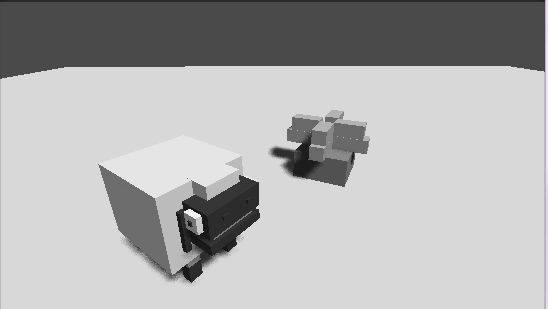
灰度
创建脚本
TestRenderImage.cs
using UnityEngine;
using System.Collections;

[ExecuteInEditMode]
public class TestRenderImage : MonoBehaviour
{

	#region Variables
	public Shader curShader;
	public float grayScaleAmout = 1.0f;
	private Material curMaterial;

	Material material
	{
		get
		{
			if(curMaterial == null)
			{
				curMaterial = new Material(curShader);
				curMaterial.hideFlags = HideFlags.HideAndDontSave;
			}
			return curMaterial;
		}
	}
	#endregion
	// Use this for initialization
	void Start () {
		if(!SystemInfo.supportsImageEffects)
		{
			enabled = false;
		}

		if(!curShader && !curShader.isSupported)
		{
			enabled = false;
		}
	}

	// Update is called once per frame
	void Update () {
		grayScaleAmout = Mathf.Clamp(grayScaleAmout, 0.0f, 1.0f);
	}

	void OnRenderImage(RenderTexture source, RenderTexture target)
	{
		if(curShader != null)
		{
			material.SetFloat("_LuminosityAmount", grayScaleAmout);
			Graphics.Blit(source, target, material);
			Debug.Log("OnRenderImage: " + grayScaleAmout);
		}
		else
		{
			Graphics.Blit(source, target);
		}
	}

	void OnDisable()
	{
		if(curMaterial)
		{
			DestroyImmediate(curMaterial);
		}
	}
}
由于要使用Shader,在程序中动态地创建了一个纹理。
OnRenderImage是Unity内建的回调函数,在所有渲染完成后被调用,来渲染图片的后期处理效果。
在代码中,主要是改变Shader中的_LuminosityAmount变量。
Graphics.Blit函数用于拷贝源纹理到目的渲染纹理。
这主要是用于实现图像效果。
Blit设置dest到激活的渲染纹理,在材质上设置source作为_MainTex属性,并且绘制一个全屏Quad。
将脚本拖拽到MainCamera上面。
接下来创建一个Shader,内容如下
Shader "Custom/GrayScale" {
	Properties {
		_MainTex ("Base (RGB)", 2D) = "white" {}
		_LuminosityAmount ("GrayScale Amount", Range(0.0, 1)) = 1.0
	}
	SubShader {
		Pass
		{
			CGPROGRAM
			#pragma vertex vert_img
			#pragma fragment frag
			#pragma fragmentoption ARB_precision_hint_fastest
			#include "UnityCG.cginc"

			uniform sampler2D _MainTex;
			fixed _LuminosityAmount;

			fixed _NumPixelH;
			fixed _NumPixelV;

			fixed4 frag(v2f_img i) : COLOR
			{
				//Get the colors from the RenderTexture and the uv's
				//from the v2f_img struct
				fixed4 renderTex = tex2D(_MainTex, i.uv);

				//Apply the Luminosity values to our render texture
				float luminosity = 0.299 * renderTex.r + 0.587 * renderTex.g + 0.114 * renderTex.b;
				fixed4 finalColor = lerp(renderTex, luminosity, _LuminosityAmount);
				return finalColor;
			}

			ENDCG
			}
	}
	FallBack "Diffuse"
}
拖拽到刚才的脚本上,调节面板上的参数,就可以得到黑白程度不同的效果。
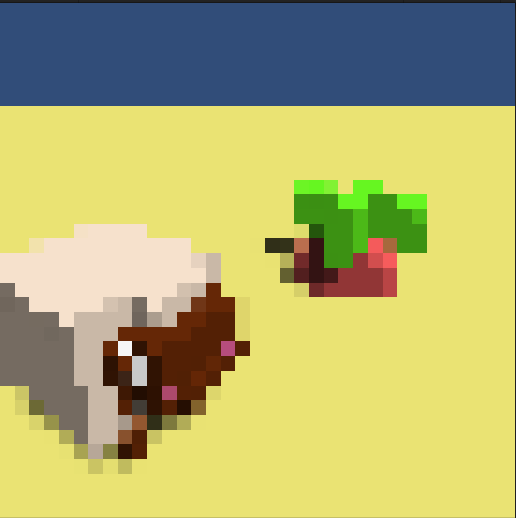
像素画
这个效果能够将3D场景直接转换成像素风。
直接看Shader
Shader "Custom/Pixelize" {
	Properties {
		_MainTex ("Base (RGB)", 2D) = "white" {}
		_NumPixel ("Pixel Count", Range(10, 200)) = 50
	}
	SubShader {
		Pass
		{
			CGPROGRAM
			#pragma vertex vert_img
			#pragma fragment frag
			#pragma fragmentoption ARB_precision_hint_fastest
			#include "UnityCG.cginc"
			uniform sampler2D _MainTex;

			fixed _NumPixel;

			fixed4 frag(v2f_img i) : COLOR
			{
				float stepSize = 1.0 / _NumPixel;
				float2 fragment = float2(stepSize * floor(i.uv.x * _NumPixel), stepSize * floor(i.uv.y * _NumPixel));
				fixed4 finalColor = tex2D(_MainTex, fragment);
				return finalColor;
			}

			ENDCG
			}
	}
	FallBack "Diffuse"
}
在C#中修改_NumPixel变量就可以得到不同程度像素风格的图片了。

渲染深度
首先要将相机的深度图传递到shader中去。在shader中,只要申明
sampler2D _CameraDepthTexture变量就可以对相机的深度图进行引用。
还需要在脚本的Update函数中加入
Camera.main.depthTextureMode = DepthTextureMode.Depth;最后贴一下Shade代码
Shader "Custom/DepthEffect" {
	Properties {
		_MainTex ("Base (RGB)", 2D) = "white" {}
		_DepthPower("DepthPower", range(1,5)) = 0.2
	}
	SubShader {
		Pass
		{
			CGPROGRAM
			#pragma vertex vert_img
			#pragma fragment frag
			#pragma fragmentoption ARB_precision_hint_fastest
			#include "UnityCG.cginc"
			uniform sampler2D _MainTex;
			fixed _DepthPower;
			sampler2D _CameraDepthTexture;

			fixed4 frag(v2f_img i) : COLOR
			{
				float d = UNITY_SAMPLE_DEPTH(tex2D(_CameraDepthTexture, i.uv.xy));
				d = pow(Linear01Depth(d), _DepthPower);
				return d;
			}
		ENDCG
		}
	}
	FallBack "Diffuse"
}
运行结果

将Post effects融入到Game Play
游戏中常常会用到老电影的效果,思路其实就是图层的叠加。

shader代码
Shader "Hidden/OldFilmEffectShader"
{
Properties
{
_MainTex ("Base (RGB)", 2D) = "white" {}
_VignetteTex ("Vignette Texture", 2D) = "white"{}
_ScratchesTex ("Scartches Texture", 2D) = "white"{}
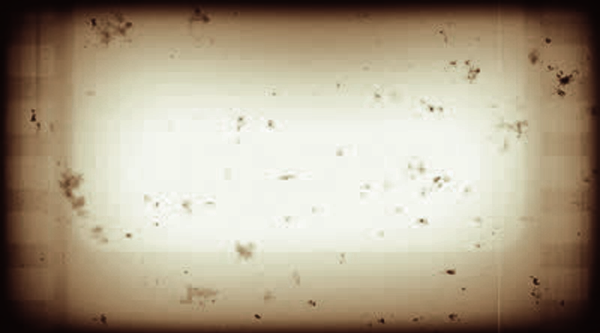
_DustTex ("Dust Texture", 2D) = "white"{}
_SepiaColor ("Sepia Color", Color) = (1,1,1,1)
_EffectAmount ("Old Film Effect Amount", Range(0,1)) = 1.0
_VignetteAmount ("Vignette Opacity", Range(0,1)) = 1.0
_ScratchesYSpeed ("Scratches Y Speed", Float) = 10.0
_ScratchesXSpeed ("Scratches X Speed", Float) = 10.0
_dustXSpeed ("Dust X Speed", Float) = 10.0
_dustYSpeed ("Dust Y Speed", Float) = 10.0
_RandomValue ("Random Value", Float) = 1.0
_Contrast ("Contrast", Float) = 3.0
_distortion ("Distortion", Float) = 0.2
_cubicDistortion ("Cubic Distortion", Float) = 0.6
_scale ("Scale (Zoom)", Float) = 0.8
}
SubShader
{
Pass
{
CGPROGRAM
#pragma vertex vert_img
#pragma fragment frag
#pragma fragmentoption ARB_precision_hint_fastest
#include "UnityCG.cginc"
uniform sampler2D _MainTex;
uniform sampler2D _VignetteTex;
uniform sampler2D _ScratchesTex;
uniform sampler2D _DustTex;
fixed4 _SepiaColor;
fixed _VignetteAmount;
fixed _ScratchesYSpeed;
fixed _ScratchesXSpeed;
fixed _dustXSpeed;
fixed _dustYSpeed;
fixed _EffectAmount;
fixed _RandomValue;
fixed _Contrast;
float _distortion;
float _cubicDistortion;
float _scale;
float2 barrelDistortion(float2 coord)
{
// Inspired by SynthEyes lens distortion algorithm
// See http://www.ssontech.com/content/lensalg.htm
float2 h = coord.xy - float2(0.5, 0.5);
float r2 = h.x * h.x + h.y * h.y;
float f = 1.0 + r2 * (_distortion + _cubicDistortion * sqrt(r2));
return f * _scale * h + 0.5;
}
fixed4 frag(v2f_img i) : COLOR
{
//Get the colors from the RenderTexture and the uv's
//from the v2f_img struct
half2 distortedUV = barrelDistortion(i.uv);
distortedUV = half2(i.uv.x, i.uv.y + (_RandomValue * _SinTime.z * 0.005));
fixed4 renderTex = tex2D(_MainTex, i.uv);
//Get the pixels from the Vignette Texture
fixed4 vignetteTex = tex2D(_VignetteTex, i.uv);
//Process the Scratches UV and pixels
half2 scratchesUV = half2(i.uv.x + (_RandomValue * _SinTime.z * _ScratchesXSpeed),
i.uv.y + (_Time.x * _ScratchesYSpeed));
fixed4 scratchesTex = tex2D(_ScratchesTex, scratchesUV);
//Process the Dust UV and pixels
half2 dustUV = half2(i.uv.x + (_RandomValue * (_SinTime.z * _dustXSpeed)),
i.uv.y + (_RandomValue * (_SinTime.z * _dustYSpeed)));
fixed4 dustTex = tex2D(_DustTex, dustUV);
// get the luminosity values from the render texture using the YIQ values.
fixed lum = dot (fixed3(0.299, 0.587, 0.114), renderTex.rgb);
//Add the constant color to the lum values
fixed4 finalColor = lum + lerp(_SepiaColor, _SepiaColor +
fixed4(0.1f,0.1f,0.1f,1.0f), _RandomValue);
finalColor = pow(finalColor, _Contrast);
//Create a constant white color we can use to adjust opacity of effects
fixed3 constantWhite = fixed3(1,1,1);
//Composite together the different layers to create finsl Screen Effect
finalColor = lerp(finalColor, finalColor * vignetteTex, _VignetteAmount);
finalColor.rgb *= lerp(scratchesTex, constantWhite, (_RandomValue));
finalColor.rgb *= lerp(dustTex.rgb, constantWhite, (_RandomValue * _SinTime.z));
finalColor = lerp(renderTex, finalColor, _EffectAmount);
return finalColor;
}
ENDCG
}
}
FallBack off
}
barrelDistortion用于产生一个镜头的畸变。公式的来由:
If (u,v) are the coordinates of a feature in the undistorted perfect image plane, then (u', v') are the coordinates of the feature on the distorted image plate, ie the scanned or captured image from the camera. The distortion occurs radially away from the image center, with correction for the image aspect ratio (image_aspect = physical image width/height), as follows:
r2 = image_aspect*image_aspect*u*u + v*v
f = 1 + r2*(k + kcube*sqrt(r2))
u' = f*u
v' = f*v
The constant k is the distortion coefficient that appears on the lens panel and through Sizzle. It is generally a small positive or negative number under 1%. The constant kcube is the cubic distortion value found on the image preprocessor's lens panel: it can be used to undistort or redistort images, but it does not affect or get computed by the solver. When no cubic distortion is needed, neither is the square root, saving time.
其他部分的解释参考参考中的文章。
参考
UnityShaders and Effects Cookbook
【Unity Shaders】游戏性和画面特效——创建一个老电影式的画面特效
Lens Distortion White Paper - https://www.ssontech.com/content/lensalg.html


 6384
6384

 被折叠的 条评论
为什么被折叠?
被折叠的 条评论
为什么被折叠?
 到【灌水乐园】发言


