


水体交互
水体交互效果在游戏中是一个很常见的需求,这里简单实现一个可交互的水体。
本篇文章主要是介绍水体交互的实现思路,水体的渲染这里就不再详细介绍,网上很多关于水体的渲染方法很多,可以自己百度、Google了解一下,这里不会过多提及。
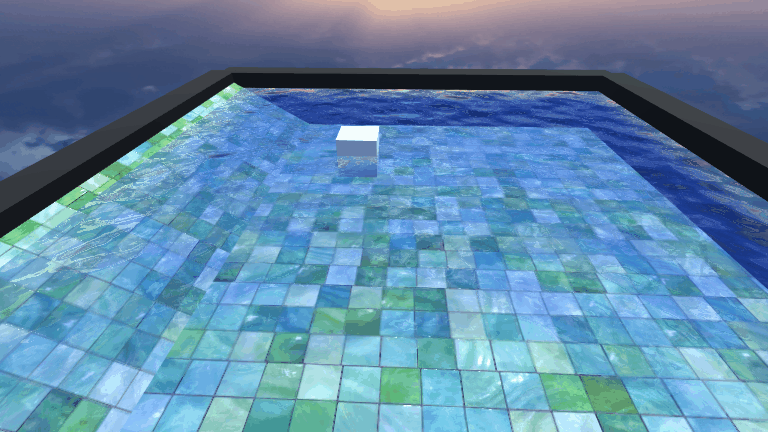
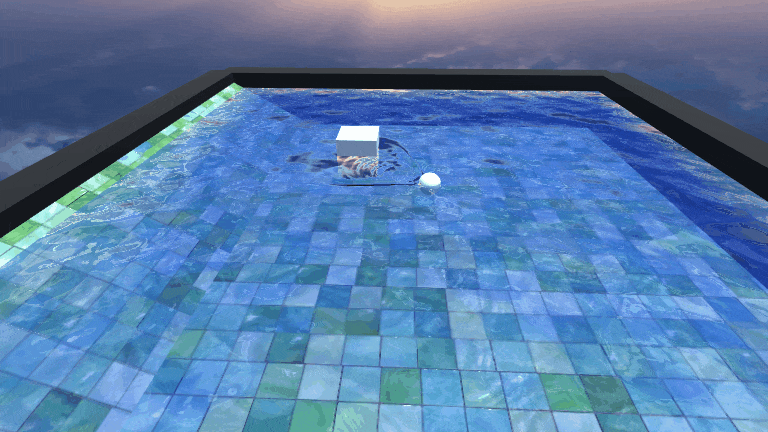
效果图。
先放一张最终的GIF效果图!

实现思路
原理其实非常简单,就是通过粒子系统不断发射带有波纹法线贴图的面片,然后把这些法线渲染一张RenderTexture传输到Water Shader中,然后和Water Normal 叠加即可形成水波效果。
实现步骤可以简单分为:
- 简单的水体渲染
- 渲染水波法线RT
- 叠加法线
一、简单的水体渲染
这里的水体渲染采用简单的法线干扰实现,参考冯乐乐女神的《Unity Shader入门精要》里的水体渲染。
水的效果:
这里深水和潜水区的过渡是直接用场景深度值和水面深度值做差值, 差值越接近0,就越接近浅滩区。
获取场景深度图需要开启 DepthModel: GetComponent<Camera>().depthTextureMode = DepthTextureMode.Depth;
Shader代码:
//frag:

float2 screenPos = i.screenPos.xy/i.screenPos.w;
// 获取屏幕深度
half existingDepth01 = tex2Dproj(_CameraDepthTexture, UNITY_PROJ_COORD(i.screenPos)).r;
half existingDepthLinear = LinearEyeDepth(existingDepth01);
half depthDifference = existingDepthLinear - i.screenPos.w;
// 深水和潜水颜色做插值
half waterDepthDifference01 = saturate(depthDifference / _DepthMaxDistance);
float4 waterColor = lerp(_ShallowColor, _DeepColor, waterDepthDifference01);
二、渲染水波法线的RenderTexture
1.首先在场景创建一个Camera,该Camera只渲染特定的Layer,即水波法线,Culling Mask 设置为WaterWave,Clear Flags设置为Slid Color,Background设置为黑色,并且位置旋转都设置为和MainCamer一致。并且创建一个RenderTexture,拖拽到Target Texture上。
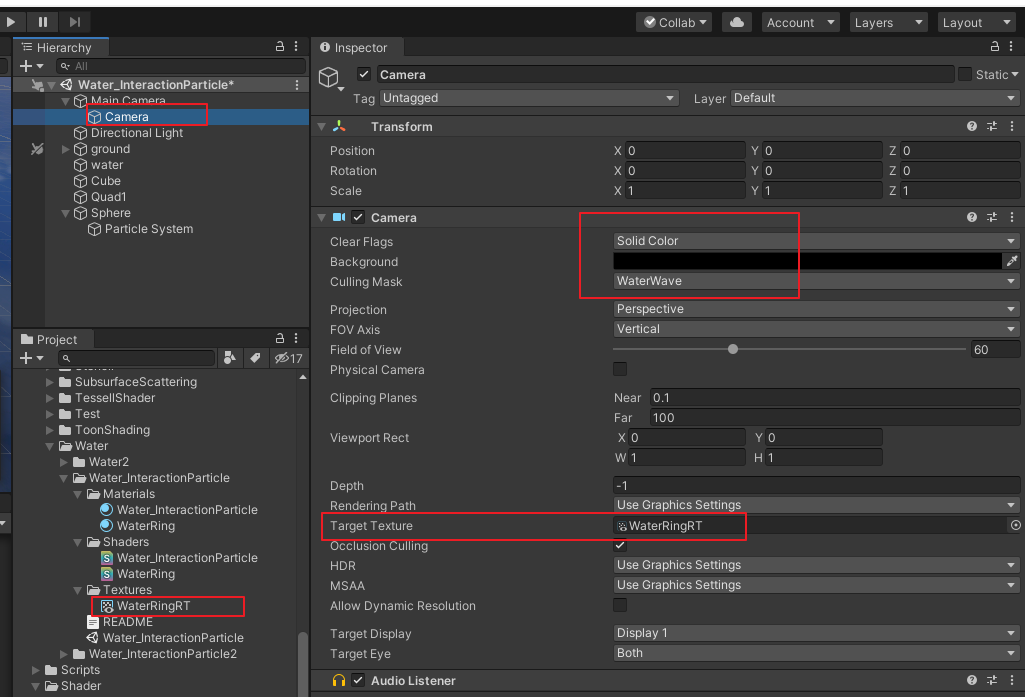
2.创建一个Shader,命名为WaterRing,该Shader用于渲染水波法线。
3.继续创建一个粒子系统,材质Shader设置为刚才创建的WaterRing Shader,并且该粒子的Layer需要修改为WaterWave。
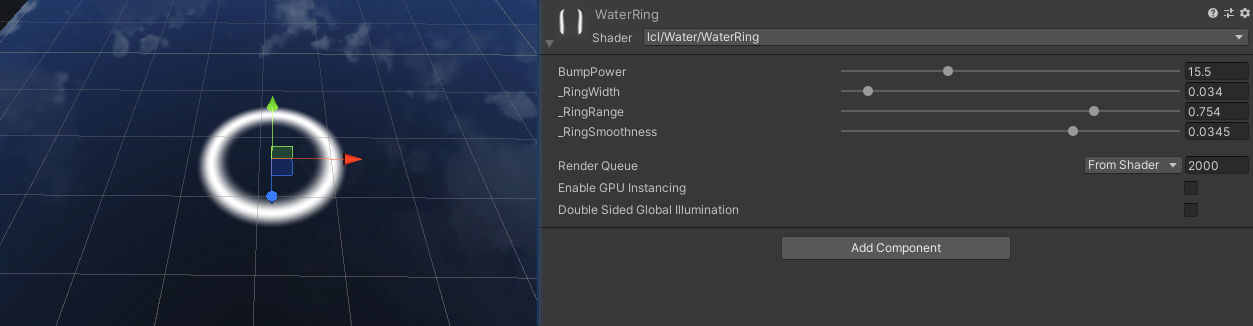
水波法线渲染:
水波法线的Shader可以非常简单,直接渲染一张环状的法线贴图即可。
但是这里为了可以更方便的调整水波法线的一些细节就采用动态计算的方式来渲染。
这里计算法线是通过ddx ddy的方式来计算,为了得到法线首先肯定需要知道高度差,那么我们可以先渲染一个环状的高度图,
这里就可以通过两个smoothstep相减得到一个较为平滑的环状高度。
效果如下:
Shader代码:
fixed doubleSmoothstep(float4 uv)
{
    float dis = distance(uv, 0.5);
    float halfWidth = _RingWidth * 0.5;
    float range = _RingRange;
    float smoothness = _RingSmoothness;
    float threshold1 = range - halfWidth;
    float threshold2 = range + halfWidth;

    float value = smoothstep(threshold1, threshold1 + smoothness, dis);
    float value2 = smoothstep(threshold2, threshold2 + smoothness, dis);

    return value - value2;
}

fixed4 frag(v2f i) : SV_Target
{
    fixed normalCenter = doubleSmoothstep(i.uv);
	return fixed4(normalCenter,normalCenter,normalCenter,1);
}
有了高度差就可以计算出法线了:
Shader代码:
float normalCenter = doubleSmoothstep(i.uv);
// 波纹法线
float color0 = doubleSmoothstep(i.uv + half4(-1, 0, 0, 0) * 0.004);
float color1 = doubleSmoothstep(i.uv + half4(1, 0, 0, 0) * 0.004);
float color2 = doubleSmoothstep(i.uv + half4(0, -1, 0, 0) * 0.004);
float color3 = doubleSmoothstep(i.uv + half4(0, 1, 0, 0) * 0.004);

float2 ddxy = float2(color0 - color1, color2 - color3);
float3 normal = float3((ddxy * _BumpPower), 1.0);
normal = normalize(normal);
float4 finalColor = float4((normal * 0.5 + 0.5) * normalCenter * i.color.a, normalCenter * i.color.a);
return finalColor;
这里通过ddx ddy得到了法线后,需要把法线从[-1,1]映射到[0,1]范围(normal * 0.5 + 0.5)。
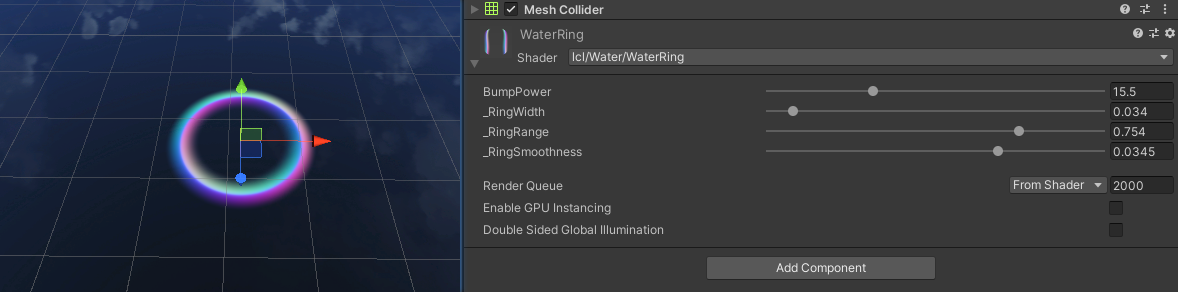
此时我们就可以通过参数动态调整该环状法线的宽度、强度、范围。
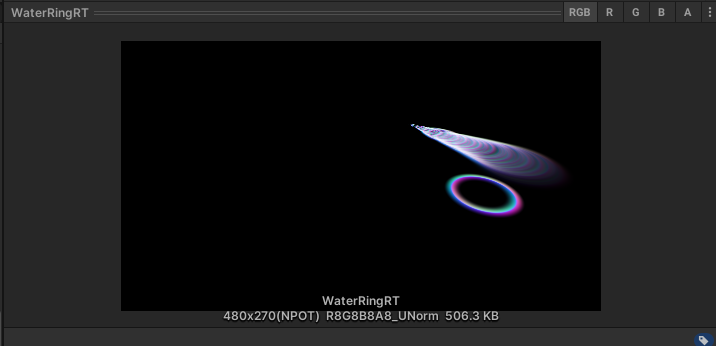
最后把该材质赋值给粒子,并且通过调整粒子参数使粒子随着生命周期逐渐变大、顶点色的A通道也跟随生命周期变化来控制透明度和强度。
此时如果不出意外的话可以看到RT是这样的。
三、叠加法线
最后一步就是把之前渲染得到的RT传递到Water Shader中,通过屏幕坐标采样得到水波法线,然后把值从[0,1]映射到[-1,1]范围(normal * 2-1),然后和水的法线叠加即可。
屏幕坐标可以由ComputeGrabScreenPos计算得到。
Shader代码:
float4 ringColor = tex2D(_RingTex, screenPos);
float3 ringNormal = UnpackNormal(ringColor).rgb;
ringNormal = mul(float3x3(i.TtoW0.xyz,i.TtoW1.xyz,i.TtoW2.xyz),ringNormal);
ringNormal = normalize(ringNormal) * ringColor.a * _RingPower;
// float3 normal = BlendNormals(ringNormal,waterNormal);
float3 normal = normalize(waterNormal+ringNormal);
效果如下:
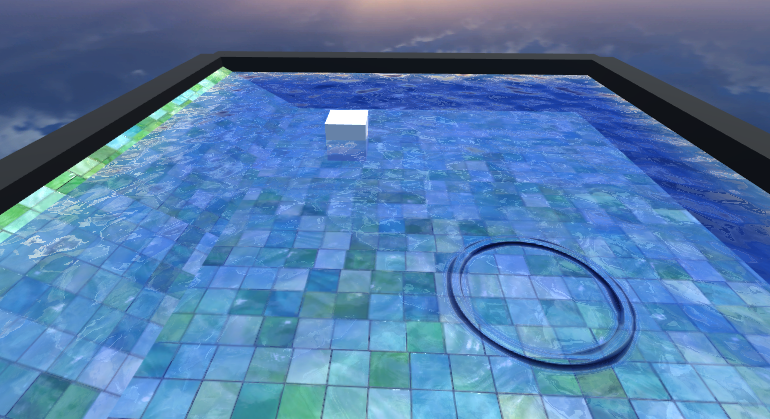
最后再结合粒子即可实现一个动态的水波扩散的效果。


 1万+
1万+


 被折叠的 条评论
为什么被折叠?
被折叠的 条评论
为什么被折叠?
 到【灌水乐园】发言


