


UE使用流渲染技术的主要原因是为了提高渲染效率和降低成本。流渲染技术可以将渲染任务分配到多个计算节点上进行并行处理,从而加快渲染速度。同时,流渲染技术还可以将渲染任务分配到云端进行处理,减少本地计算机的负担,降低成本。此外,流渲染技术还可以实现实时渲染,让用户可以在编辑器中实时预览场景效果,提高工作效率。一直以来UE在前端的展示都是使用基于webrtc实时音视频传输的流渲染技术。但目前基于UE的云渲染对于大部分人来说部署都是一个大问题,从服务器选择、UE PixelStreaming的学习都是一个很大的门槛,并且由于UE的云渲染的服务器成本过高,需要服务器具备动态的弹性伸缩能力。
腾讯应用云渲染依托腾讯丰富的 边缘计算节点、灵活的 GPU 虚拟化技术、稳定低延时的音视频串流能力,帮助您将应用客户端云化,使得用户无需下载应用包体,仅需打开视频画面即可操作体验云上应用。同时,应用云渲染提供云 API + 全端 SDK,满足您的用户在各类终端以及业务场景下的需要,解决的不仅仅是UE的云渲染问题,从理论上来讲,满足所有云端无法前端直接渲染的需要(由于是针对大部分的需要三维渲染的大体量软件,没有对某一种平台做针对性的优化,也限制了某些功能的使用)。
应用云渲染的使用步骤
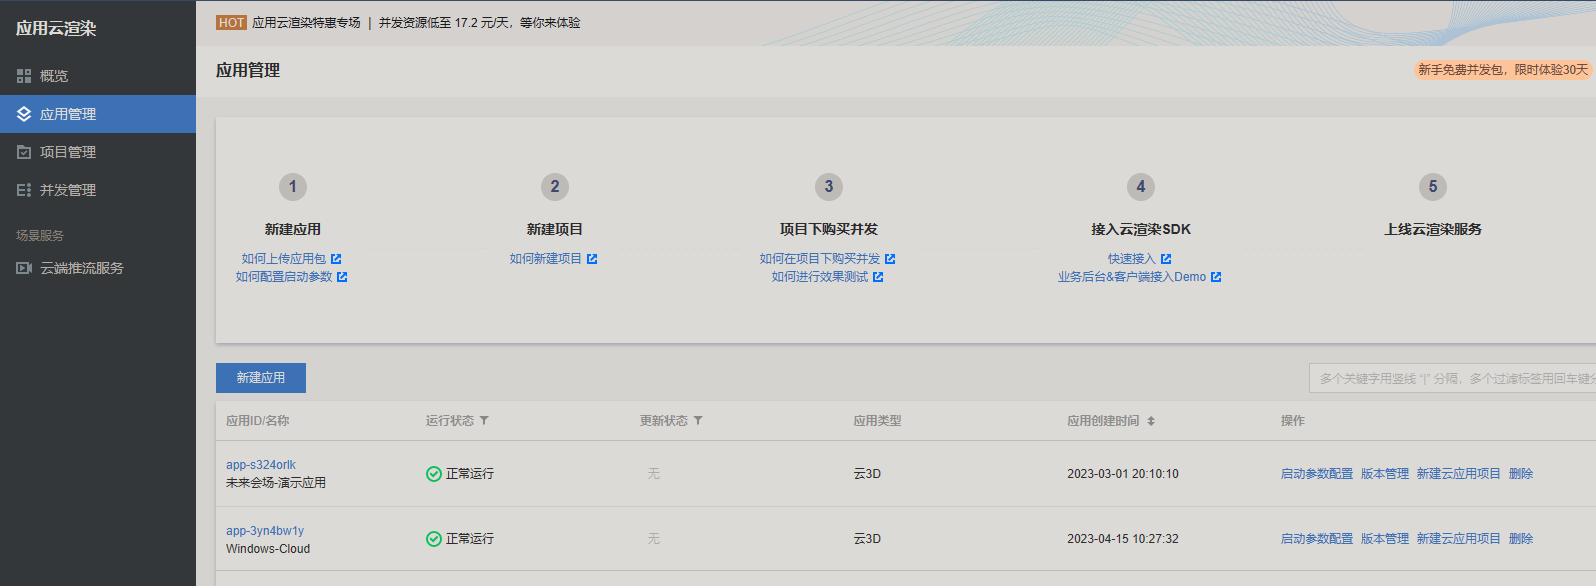
1. 进入腾讯云的应用云渲染https://cloud.tencent.com/product/car
模块申请使用,审核通过之后进行云渲染控制台。对于第一次使用的用户来说,里面默认有一个免费的应用(未来场景-演示应用),提供了两路免费的并发包(演示应用法无法修改成自己的应用)
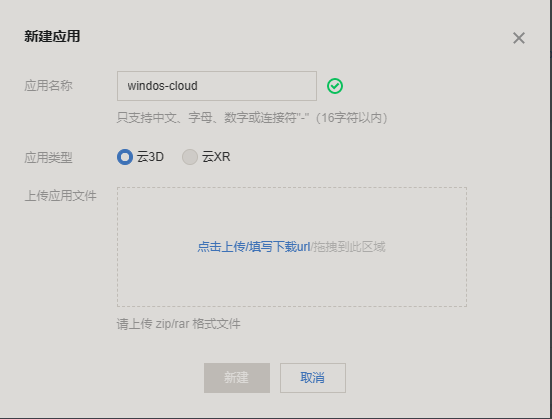
2.上传自己的应用
目前这个应用只能支持windows的三维应用程序,支持上传zip/rar压缩包,上传过程有点长,我1.6G的UE应用程序,上传花费了大概半个多小时(所以程序最好经过比较严格的测试,不然这个时间花费的还是有点长的)。
上传完成之后需要配置启动参数。
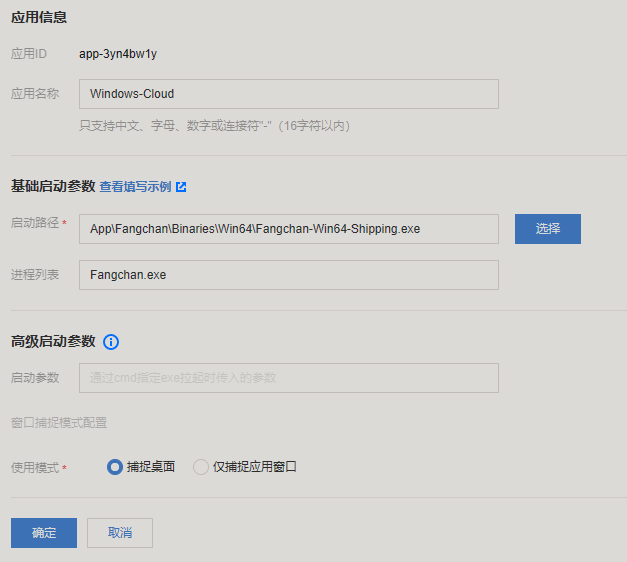
- 启动路径最好是等应用上传完成之后等后台完全解压完成之后再去选择,最好不要自己写路径,很可能写错。
- 启动参数很好理解,就是我们使用一个exe时我们自己带的一的命令行参数(UE自己带的云渲染参数就不需要使用了,因为这不是使用的UE自带的云渲染插件)
- 通使用模式可以看出,云渲染是通过捕捉云服务器的桌面来的,并没有与某种应用程序绑定。仅捕捉应用窗口,本质上就是获取到windows中那个窗口的信息,然后进行渲染绑定(https://cloud.tencent.com/document/product/1547/72369)
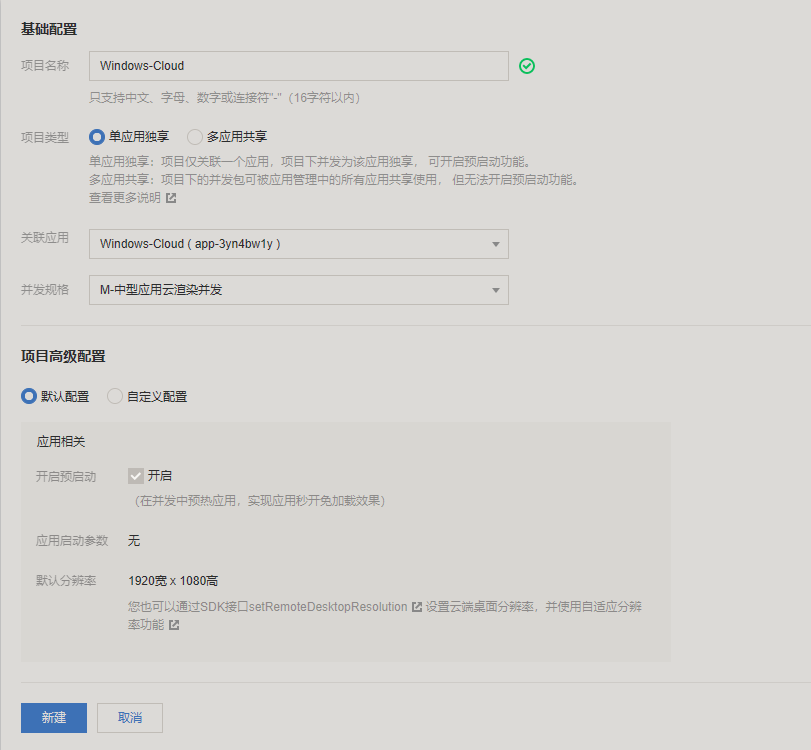
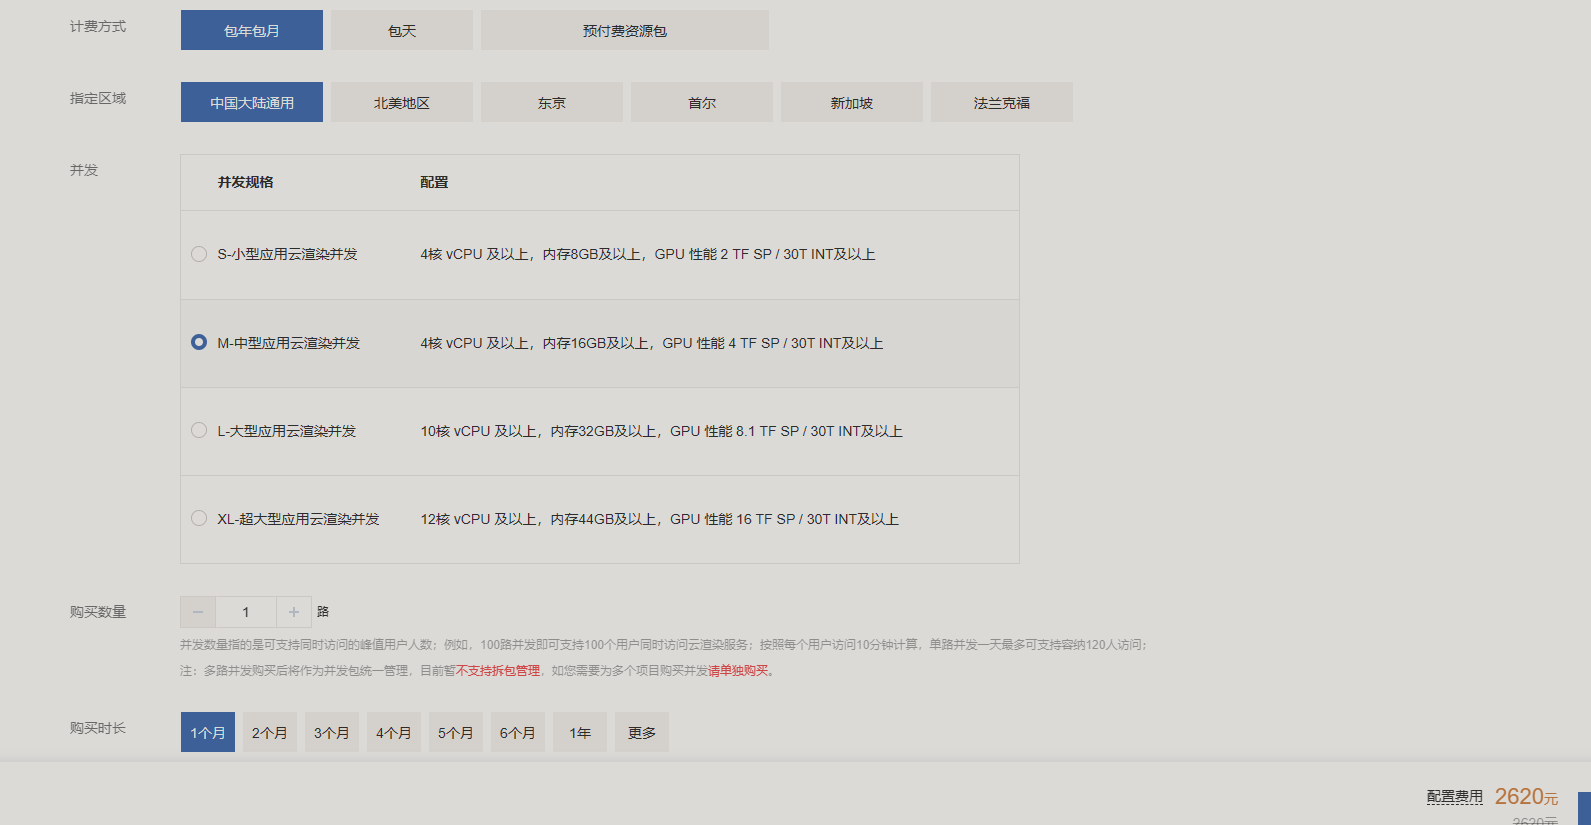
3. 创建项目
创建项目设置项目类型,关联应用,并发规格(与后面需要购买的并发包要一致,否则无法使用)
4. 为项目分配并发包
一路就是一个并发包,如果有300路就要购买三百个并发包,如果是100个并发包,没有优惠的情况下,一个月需要26万(可以跟腾讯云客户申请优惠)。包天的费用更高。如果只是测试可以有优惠,大概1路第一个月中型的服务器只要500块
购买完成之后为项目分配并发包即可。
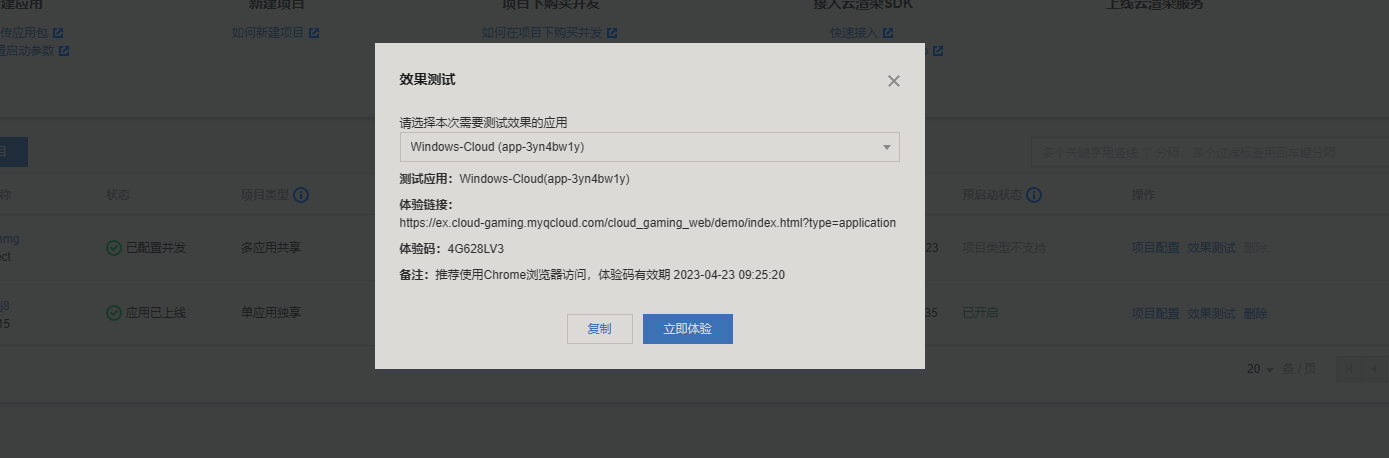
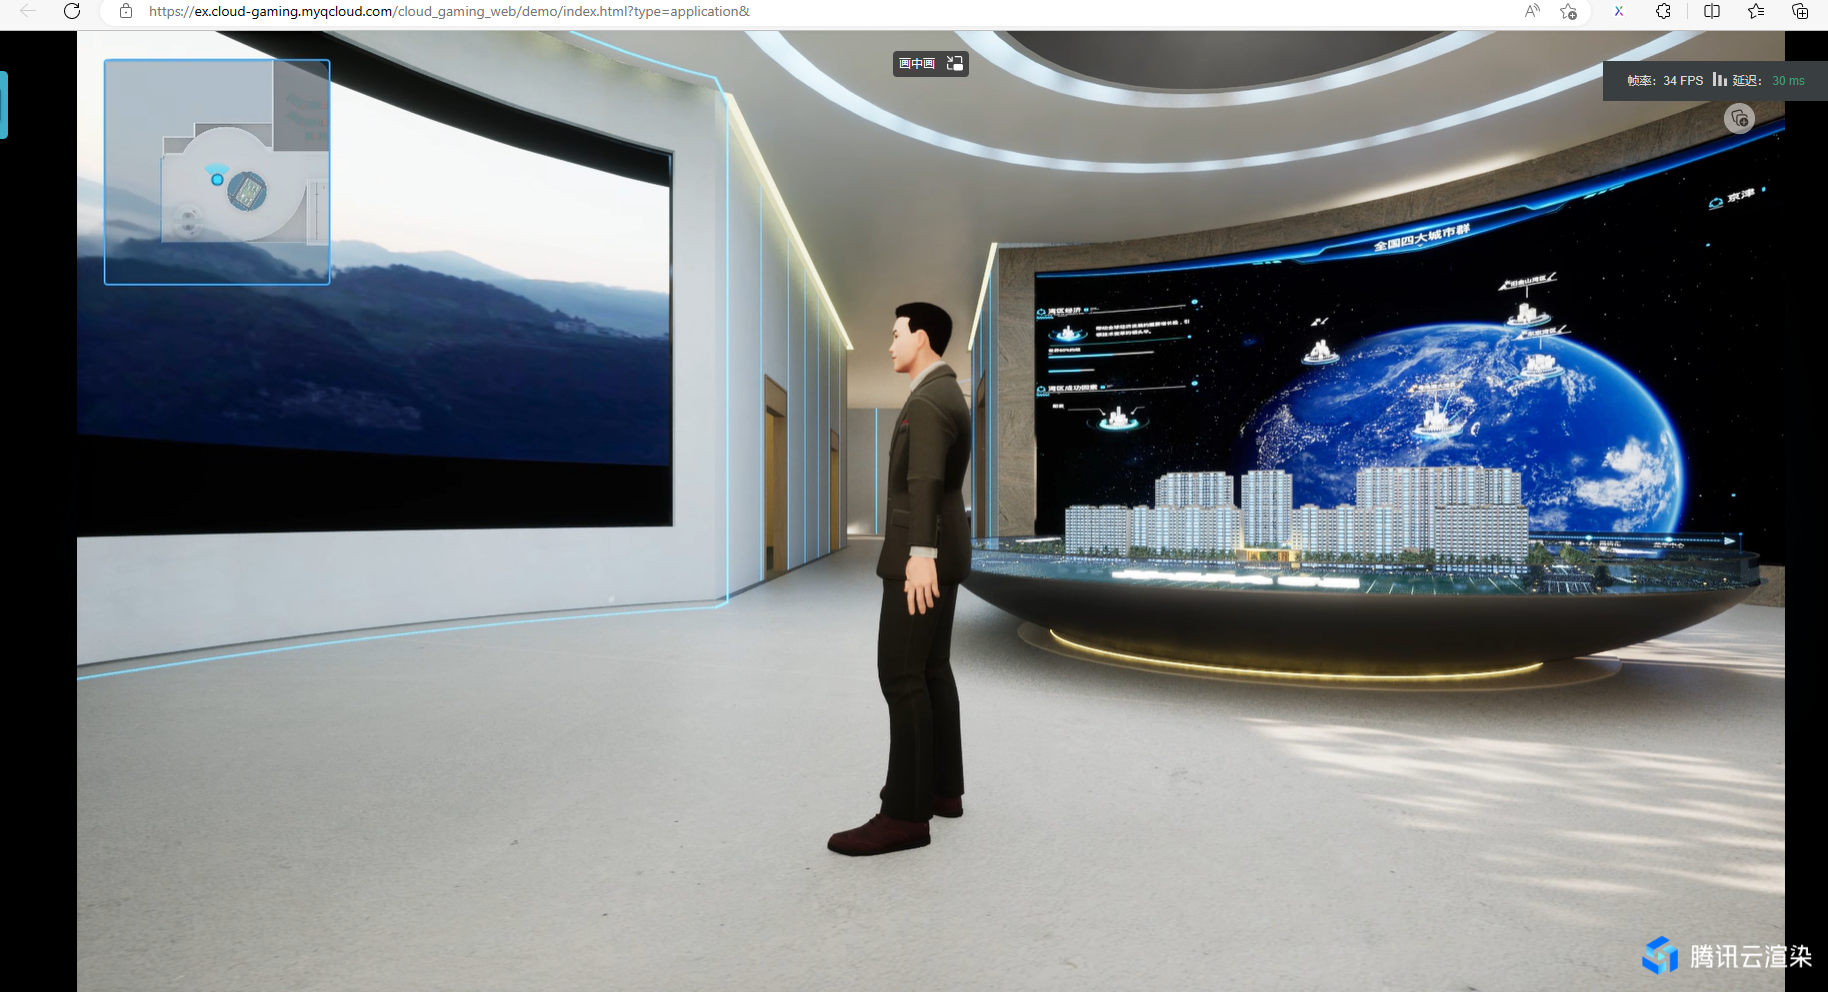
5. 效果测试
每次效果测试生成一个体验码
使用应用云渲染API
效果测试完成之后,我们需要使用官方提供的API来构建自己的前后端调度,这样才能使用自己的域名及自定义自己的页面。具体文档可参考https://cloud.tencent.com/document/product/1547/72707
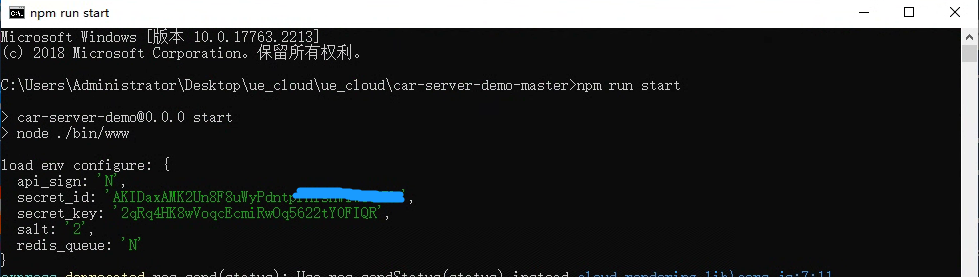
1. 构建后端
业务后台必须部署无法省略,从官方下载后端部署程序之后(nodejs后端),需要提供腾讯云帐号的 SecretId 和 SecretKey(可在 控制台API 密钥管理中获取),为了您的财产和服务安全,该信息需要在后台处理。另外您也需要业务后台来管理用户会话,完成用户排队等功能。部署后启动。
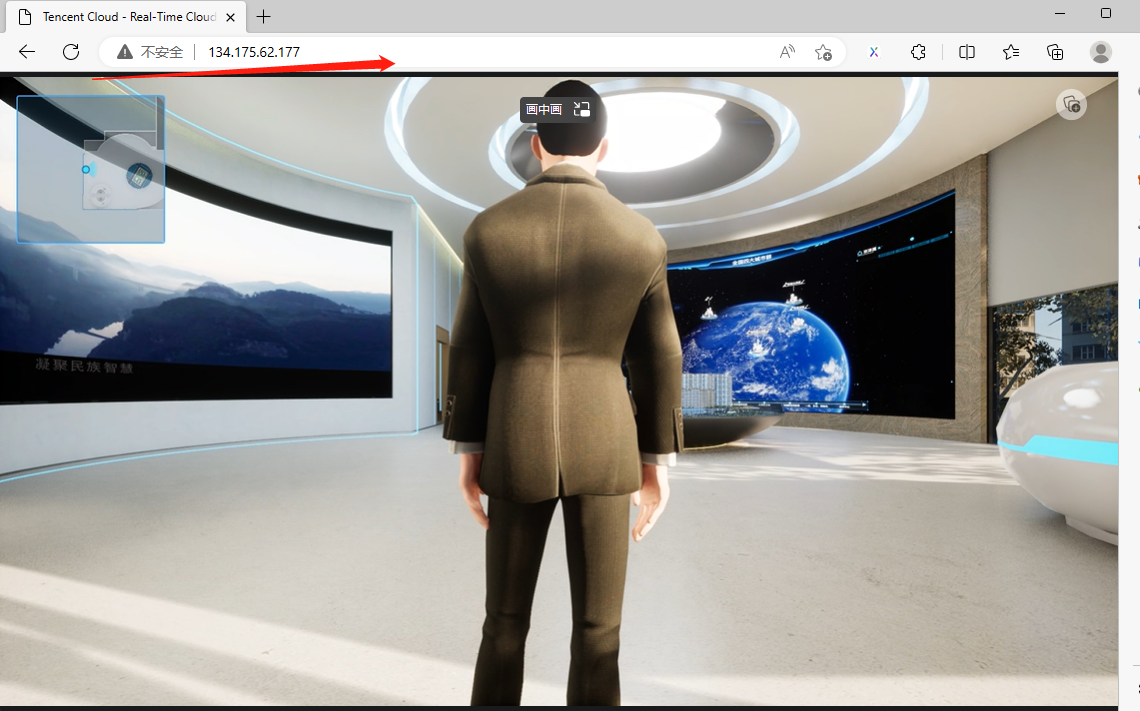
构建前端
从github中下载代码,根据文档进行配置,编写一个简单的demo
<!doctype html>
  <html>

  <head>
  <meta charset="utf-8" />
  <meta name="apple-mobile-web-app-capable" content="yes" />
  <meta name="viewport" content="width=device-width,initial-scale=1,maximum-scale=1,user-scalable=0" />
  <title>Tencent Cloud - Real-Time Cloud Rendering - CAR - demo</title>
  <style>
  * {
    padding: 0;
margin: 0;
}

html,
  body {
  width: 100%;
  height: 100%;
  overflow: hidden;
  font-family: 'SimHei', 'Microsoft YaHei', 'Arial', 'sans-serif';
}

#demo-container {
  width: 100%;
  height: 100%;
}

#plugin-point {
  position: absolute;
  left: 100px;
  bottom: 150px;
  width: 0px;
  height: 0px;
}
</style>
  </head>

  <body>
  <div id="demo-container">
  <div id="mount-point"></div>
  <div id="plugin-point"></div>
  </div>
  <script type="text/javascript" src="index.js"></script> //我把第三方库TCGSDK的js文件单独放在同目录下了
  <script type="text/javascript" src="joystick.js"></script>
  <script type="text/javascript" src="https://cdn.bootcdn.net/ajax/libs/axios/0.26.1/axios.min.js"></script>
  <!-- <script type="text/javascript" src="https://cdnjs.cloudflare.com/ajax/libs/axios/0.21.1/axios.min.js"></script> -->
  <script>

  //自定义生成USERID。
  const getPassword = (legnth) => {
  // 定义一个空数组保存我们的密码
  let passArrItem = [];

  // 定义获取密码成员的方法
  const getNumber = () => Math.floor(Math.random() * 10); // 0~9的数字
  const getUpLetter = () => String.fromCharCode(Math.floor(Math.random() * 26) + 65); // A-Z
  const getLowLetter = () => String.fromCharCode(Math.floor(Math.random() * 26) + 97); // a-z

  // 将获取成员的方法保存在一个数组中方便用后面生成的随机index取用
  const passMethodArr = [getNumber, getUpLetter, getLowLetter];

  // 随机index
  const getIndex = () => Math.floor(Math.random() * 3);

  // 从0-9,a-z,A-Z中随机获取一项
  const getPassItem = () => passMethodArr[getIndex()]();

  Array(legnth - 3).fill('').forEach(() => {
    passArrItem.push(getPassItem());
  })

  const confirmItem = [getNumber(), getUpLetter(), getLowLetter()];

  // 加上我们确认的三项,从而使生成的密码,大写字母、小写字母和数字至少各包含一个
  passArrItem.push(...confirmItem);

  // 转为字符串返回
  return passArrItem.join('');
}

const StartProject = async () => {
  const url = 'http://134.175.62.177:4100/StartProject'; // 这个是自己的业务后端的地址.

  // For more information on other optional parameters, see the document of the `ApplyConcurrent` API.
  const { data } = await axios.post(url, {
    ProjectId: 'cap-nfkjzrj8',
    UserId: getPassword(8), // Random UserId
    ClientSession: TCGSDK.getClientSession(),
  });

  console.log('%c StartProject res', 'color: blue; font-size: 14px', data);

  const { Code, SessionDescribe: { ServerSession } } = data;

  if (Code === 0) {
    TCGSDK.start(ServerSession);
  } else {
    // Process the request exception
  }
}

  // For two-finger touch, record the position of the last touch point to facilitate coordinate calculation.
  let lastX = null;
  let lastY = null;

  // For more information on the SDK lifecycle, visit https://ex.cloud-gaming.myqcloud.com/cloud_gaming_web/docs/index.html.
  TCGSDK.init({
  appid: 1317511421,
  mount: 'mount-point',
  debugSetting: {
  showLog: true,
  },
  // Connected successfully.
  onConnectSuccess: async (res) => {
  console.log('onConnectSuccess', res);

  // // Add joystick
  // const j = new CloudGamingPlugin.joystick({
  //   zone: document.querySelector('#plugin-point'),
  // });
  },
  // The network was disconnected or the user was kicked out.
  onDisconnect: (res) => {
  console.log('onDisconnect', res);
  },
  onWebrtcStatusChange: (res) => {
  console.log('onWebrtcStatusChange', res);
  },
  // The user touched the mobile client to simulate an instruction sent on a PC.
  onTouchEvent: async (res) => {
  // console.log('onTouchEvent', res);
  // The code for a single-finger touch operation
  if (res.length === 1) {
  const { id, type, pageX, pageY } = res.pop();
  // console.log('onTouchEvent', id, type, pageX, pageY);
  TCGSDK.mouseMove(id, type, pageX, pageY);
  if (type === 'touchstart') {
  TCGSDK.sendRawEvent({ type: 'mouseleft', down: true });
  }
  if (type === 'touchend' || type === 'touchcancel') {
  TCGSDK.sendRawEvent({ type: 'mouseleft', down: false });
  }
  }
  // The code for a two-finger pinch zoom operation. Here, the two fingers simulate a mouse scroll wheel event on a PC.
  if (res.length === 2) {
  const [{ pageX: oneX, pageY: oneY }, { pageX: twoX, pageY: twoY }] = res;

  const currentX = Math.ceil(Math.abs(oneX - twoX));
  const currentY = Math.ceil(Math.abs(oneY - twoY));
  // `lastX` and `lastY` indicates the previous position and can be defined globally like this: `let lastX = null, lastY = null`.
  lastX ||= currentX;
  lastY ||= currentY;

  if (lastX && currentX - lastX < 0 && lastY && currentY - lastY < 0) {
  TCGSDK.sendRawEvent({ type: 'mousescroll', delta: 1 });
  lastX = currentX;
  lastY = currentY;
  }

  if (lastX && currentX - lastX > 0 && lastY && currentY - lastY > 0) {
  TCGSDK.sendRawEvent({ type: 'mousescroll', delta: -1 });
  lastX = currentX;
  lastY = currentY;
  }
  }
  },
  onInitSuccess: async (res) => {
  console.log('%c onInitSuccess', 'color: red', res);

  await StartProject();
  }
  });

  </script>
  </body>

  </html>
UE云渲染和腾讯云渲染的优缺点
1. UE云渲染优缺点
- 基于官方提供的像素流插件实现,可灵活根据需要在自己的服务器中部署,成本是一次性投入。
- 支持UE和前端页面的交互,可定制化程度高。
- 没有一套成熟简单的服务器部署方式,对于大规模服务器的配置也是一个比较大的麻烦,对于服务器选型也是一个比较大的问题。
2. 腾讯云应用云渲染
- 部署简单,动态分配,稳定,不容易出现网络问题。
- 不仅仅是UE部署,是更为通用的三维渲染部署
- 长期使用费用很高
- 不支持私有化部署,对于保密性比较高的单位不太适合
- 不支持与三维内部程序进行交互,需要单独自己实现。


 1306
1306


 被折叠的 条评论
为什么被折叠?
被折叠的 条评论
为什么被折叠?
 到【灌水乐园】发言


