


 本文介绍了图像处理中常见的五种噪声模型:高斯噪声、泊松噪声、瑞利噪声、爱尔兰(伽马)噪声和均匀噪声,通过Python代码展示了如何在图像上模拟这些噪声。最后提到中值滤波用于去除椒盐噪声。后续将探讨低通滤波算法。
前言
在学习图像滤波算法之前,我们需要了解图像的复原与重建是什么,以及常见的几种噪声模型。
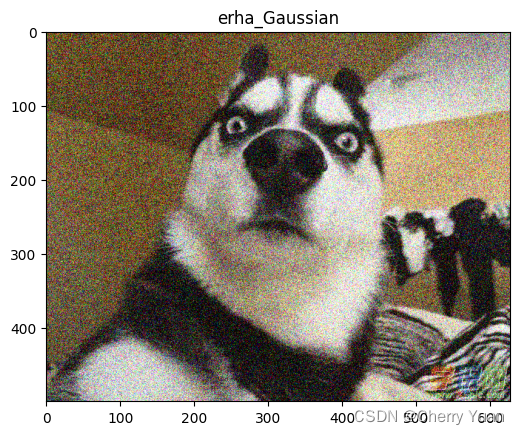
高斯噪声
#高斯噪声
import numpy as np
import matplotlib.pyplot as plt
from PIL import Image

a = Image.open("erha.jpg")

a = np.array(a)

a_img = np.uint8(a)
plt.imshow(a_img,cmap="brg")
plt.show()

h,w,c = a_img.shape

noise = np.random.normal(0,50,size=a_img.size).reshape(h,w,c)

a = a + noise

a = np.clip(a,0,255)

img_Gaussian = np.uint8(a)

# img_Gaussian = Image.fromarray(img_Gaussian)

# img_Gaussian.save("erha_Gaussian.png")

plt.title("erha_Gaussian")
plt.imshow(img_Gaussian,cmap="brg")
plt.show()

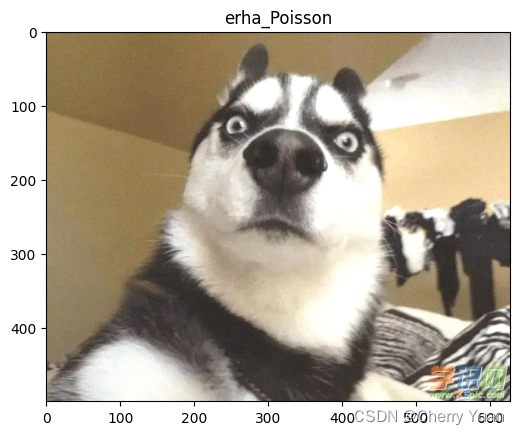
泊松噪声
#泊松噪声
import numpy as np
import matplotlib.pyplot as plt
from PIL import Image

a = Image.open("erha.jpg")

a = np.array(a)

a_img = np.uint8(a)
plt.imshow(a_img,cmap="brg")
plt.show()

h,w,c = a_img.shape

noise = np.random.poisson(lam=40,size=a_img.size).reshape(h,w,c)

a = a + noise

a = np.clip(a,0,255)

img_Gaussian = np.uint8(a)

# img_Gaussian = Image.fromarray(img_Gaussian)

# img_Gaussian.save("erha_Gaussian.png")

plt.title("erha_Gaussian")
plt.imshow(img_Gaussian,cmap="brg")
plt.show()

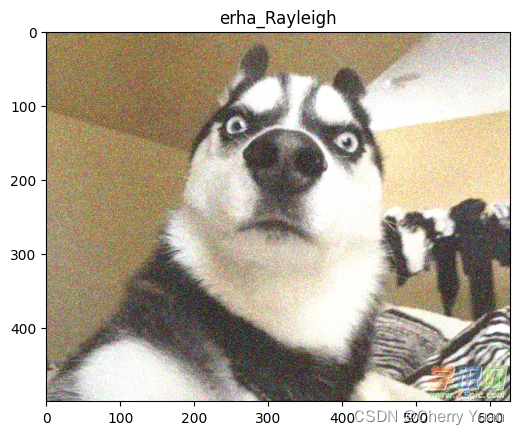
瑞利噪声
#瑞利噪声
import numpy as np
import matplotlib.pyplot as plt
from PIL import Image

a = Image.open("erha.jpg")

a = np.array(a)

a_img = np.uint8(a)
plt.imshow(a_img,cmap="brg")
plt.show()

h,w,c = a_img.shape

noise = np.random.rayleigh(scale=40,size=a_img.shape)
# noise = np.random.rayleigh(a_img,size=a_img.shape)

a = a + noise

a = np.clip(a,0,255)

img_Gaussian = np.uint8(a)

# img_Gaussian = Image.fromarray(img_Gaussian)

# img_Gaussian.save("erha_Gaussian.png")

plt.title("erha_Gaussian")
plt.imshow(img_Gaussian,cmap="brg")
plt.show()

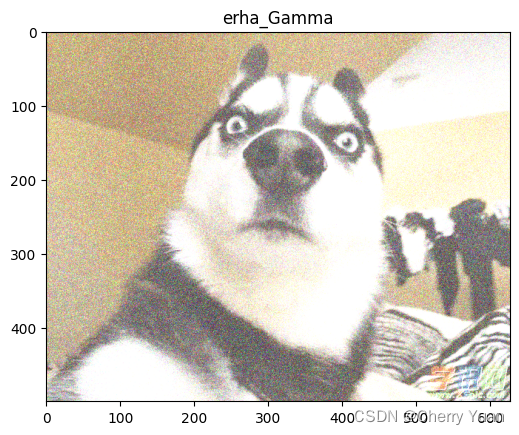
爱尔兰(伽马)噪声
#爱尔兰(伽马)噪声
import numpy as np
import matplotlib.pyplot as plt
from PIL import Image

a = Image.open("erha.jpg")

a = np.array(a)

a_img = np.uint8(a)
plt.imshow(a_img,cmap="brg")
plt.show()

h,w,c = a_img.shape

noise = np.random.gamma(shape=10,scale=10,size=a_img.shape)
# noise = np.random.rayleigh(a_img,size=a_img.shape)

a = a + noise

a = np.clip(a,0,255)

img_Gaussian = np.uint8(a)

# img_Gaussian = Image.fromarray(img_Gaussian)

# img_Gaussian.save("erha_Gaussian.png")

plt.title("erha_Gaussian")
plt.imshow(img_Gaussian,cmap="brg")
plt.show()

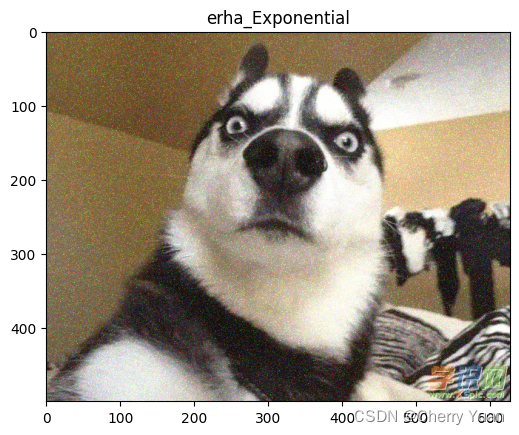
指数噪声
#指数噪声(指数的英文是exponent,幂)
import numpy as np
import matplotlib.pyplot as plt
from PIL import Image

a = Image.open("erha.jpg")

a = np.array(a)

a_img = np.uint8(a)
plt.imshow(a_img,cmap="brg")
plt.show()

h,w,c = a_img.shape

noise = np.random.exponential(scale=20,size=a_img.shape)
# noise = np.random.rayleigh(a_img,size=a_img.shape)

a = a + noise

a = np.clip(a,0,255)

img_Gaussian = np.uint8(a)

# img_Gaussian = Image.fromarray(img_Gaussian)

# img_Gaussian.save("erha_Gaussian.png")

plt.title("erha_Gaussian")
plt.imshow(img_Gaussian,cmap="brg")
plt.show()

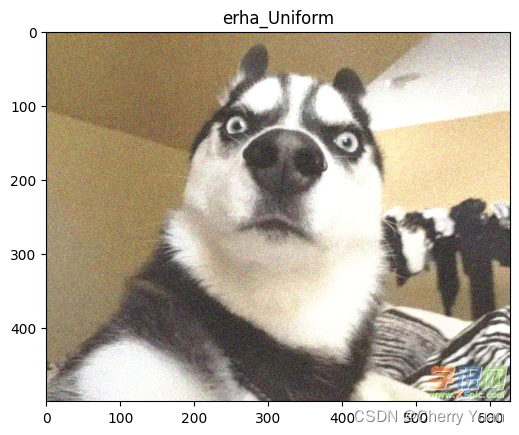
均匀噪声
#均匀噪声(均匀的英文是uniform、regular、even,此处是uniform)
import numpy as np
import matplotlib.pyplot as plt
from PIL import Image

a = Image.open("erha.jpg")

a = np.array(a)

a_img = np.uint8(a)
plt.imshow(a_img,cmap="brg")
plt.show()

h,w,c = a_img.shape

noise = np.random.uniform(low=20,high=80,size=a_img.shape)
# noise = np.random.rayleigh(a_img,size=a_img.shape)

a = a + noise

a = np.clip(a,0,255)

img_Gaussian = np.uint8(a)

# img_Gaussian = Image.fromarray(img_Gaussian)

# img_Gaussian.save("erha_Gaussian.png")

plt.title("erha_Gaussian")
plt.imshow(img_Gaussian,cmap="brg")
plt.show()

椒盐噪声
椒盐噪声(salt and pepper,盐=白色,椒=黑色):椒盐噪声是数字图像中的常见噪声,一般是由图像传感器、传输信道及解码处理等产生的黑白相见的亮暗点噪声,椒盐噪声常由图像切割产生。椒盐噪声是指两种噪声:盐噪声(salt noise)及椒噪声(pepper noise)。
对于灰度图来说,盐噪声一般是白色噪声,椒噪声一般是黑色噪声,前者高灰度噪声,后者属于低灰度噪声,一般两种噪声同时出现,呈现在图像上就是黑白杂点。图像去除脉冲干扰及椒盐噪声最常用的算法是中值滤波,图像模拟添加椒盐噪声是通过随机获取像素值点并设置为高亮点来实现的。其公式如下:
p
(
z
)
=
{
P
s
z
=
z
k
−
1
P
p
z
=
0
1
−
(
P
s
+
P
p
)
z
=
V
p(z) = \begin{cases} P_s & z = z^k - 1 \\ P_p & z = 0 \\ 1 - (P_s + P_p) & z = V \end {cases}
p(z)=⎩
⎨
⎧PsPp1−(Ps+Pp)z=zk−1z=0z=V
#椒盐噪声
import numpy as np
import random
import matplotlib.pyplot as plt
from PIL import Image

def sp_noise(image, prob):
    # 添加椒盐噪声
    # prob:噪声比例
    output = np.zeros(image.shape, np.uint8)
    thres = 1 - prob  # 1 - 信噪比,得到非噪声数据的比例
    if len(image.shape) == 2:
        for i in range(image.shape[0]):
            for j in range(image.shape[1]):
                rdn = random.random()
                if rdn < prob:  #小于噪声比,置0,表示胡椒噪声
                    output[i][j] = 0
                elif rdn > thres:#大于 1 - 噪声比,置255,表示盐粒噪声
                    output[i][j] = 255
                else:
                    output[i][j] = image[i][j]
    elif len(image.shape) == 3:
        for k in range(image.shape[2]):
            for i in range(image.shape[0]):
                for j in range(image.shape[1]):
                    rdn = random.random()
                    if rdn < prob:  #小于噪声比,置0,表示胡椒噪声
                        output[i][j][k] = 0
                    elif rdn > thres:#大于 1 - 噪声比,置255,表示盐粒噪声
                        output[i][j][k] = 255
                    else:
                        output[i][j][k] = image[i][j][k]

    return output

img = Image.open("erha.jpg")
img = np.array(img)

plt.title("img_origin")
plt.imshow(img,cmap="brg")
plt.show()

img_sp = sp_noise(img, 0.05)

plt.title("img_sp_noise")
plt.imshow(img_sp,cmap="brg")
plt.show()


结语
接下来,准备学习低通滤波算法吧!


 25万+
25万+

 被折叠的 条评论
为什么被折叠?
被折叠的 条评论
为什么被折叠?
 到【灌水乐园】发言


