


SVG 简单入门
一、工具神器
1.免费的矢量图标网址
https://www.svgrepo.com/
https://fontawesome.com/v6/search?o=r&m=free
2.免费的矢量编辑、增强网站(高清处理)
https://vectr.com/


3.SVG转PNG批量处理网站
https://cloudconvert.com/svg-to-png
4.POI矢量图标库
https://labs.mapbox.com/maki-icons/editor/
二、绘制图标
以下介绍FGMA工具绘制SVG方法
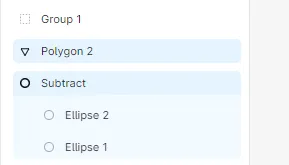
1.基础形状

2.导入SVG文件,直接拖入
3.非组的情况下,可以多选矢量图形进行矢量计算
4.格式刷快捷键
Ctrl+Alt+C/V(复制粘贴格式)
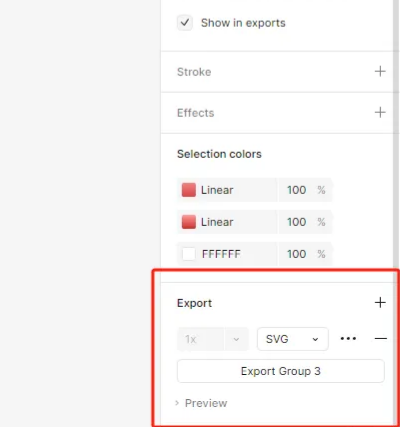
5.成组导出,设置导出格式,注意去除多余形状内容
三、SVG代码编写
1.拼接
SVG代码可以将多个SVG拼接并设置渐变样式,参考以下代码:
其中,第二个图形成组化,并通过translate(34,28)实现偏移
  <!-- 第一个图形 -->
<svg width="100" height="123" viewBox="0 0 100 123" fill="none" xmlns="http://www.w3.org/2000/svg">
<path fill-rule="evenodd" clip-rule="evenodd" d="M64.5141 97.8609C85.0501 91.6414 100 72.5666 100 50C100 22.3858 77.6142 0 50 0C22.3858 0 0 22.3858 0 50C0 72.5666 14.9499 91.6414 35.4859 97.8609L50 123L64.5141 97.8609ZM90 50C90 72.0914 72.0914 90 50 90C27.9086 90 10 72.0914 10 50C10 27.9086 27.9086 10 50 10C72.0914 10 90 27.9086 90 50Z" fill="url(#paint0_linear_1971_10684)"/>
<circle cx="50" cy="50" r="40" fill="white"/>
  <!-- 第二个图形 -->
  <g transform="translate(34,28)"> <!-- 调整第二个图形的位置 -->
    <path d="M3.21053 0.894737L0.263157 17.1053C-0.168338 19.4779 5.51389 20.5861 5.42105 23L4.68421 42.1579C4.57103 45.1032 7.63158 45.1053 7.63158 45.1053C7.63158 45.1053 10.6921 45.1032 10.5789 42.1579L9.8421 23C9.74956 20.5902 14.9511 19.5197 15 17.1053L12.0526 0.894737H10.5789L11.3158 12.6842L9.10526 14.1579L8.36842 0.894737H6.89474L6.15789 14.1579L3.94737 12.6842L4.68421 0.894737H3.21053ZM28.2632 0.894737C26.0927 0.894737 22.4739 2.82497 21.0271 5.7187C19.8213 7.88914 19.4211 12.7379 19.4211 15.6316V23C19.4211 25.4115 22.6363 25.9474 23.8421 25.9474L22.3684 42.1579C22.1017 45.0932 25.3158 45.1053 25.3158 45.1053C25.3158 45.1053 28.2632 45.1053 28.2632 42.1579V0.894737Z" fill="url(#paint0_linear_1971_10661)"/>
  </g>
  <defs>
    <!-- 第一个图形的渐变 -->
    <linearGradient id="paint0_linear_1971_10684" x1="50" y1="0" x2="50" y2="123" gradientUnits="userSpaceOnUse">
      <stop stop-color="#FF9A9A"/>
      <stop offset="1" stop-color="#C92929"/>
    </linearGradient>
    <!-- 第二个图形的渐变 -->
    <linearGradient id="paint0_linear_1971_10661" x1="21.2105" y1="0" x2="21.2105" y2="44.0526" gradientUnits="userSpaceOnUse">
      <stop stop-color="#F38282"/>
      <stop offset="1" stop-color="#D44040"/>
    </linearGradient>
  </defs>
</svg>
2.设置阴影
通过设置阴影滤镜filter="url(#filter0_d_1984_10799)来实现阴影效果
<svg width="120" height="141" viewBox="0 0 120 141" fill="none" xmlns="http://www.w3.org/2000/svg">
  <g filter="url(#filter0_d_1984_10799)">
    <path d="M57 124C56.2 124 55.4 123.851 54.6 123.553C53.8 123.255 53.1 122.857 52.5 122.361C37.9 109.543 27 97.6449 19.8 86.6673C12.6 75.6857 9 65.4255 9 55.8866C9 40.9822 13.826 29.1083 23.478 20.265C33.126 11.4217 44.3 7 57 7C69.7 7 80.874 11.4217 90.522 20.265C100.174 29.1083 105 40.9822 105 55.8866C105 65.4255 101.4 75.6857 94.2 86.6673C87 97.6449 76.1 109.543 61.5 122.361C60.9 122.857 60.2 123.255 59.4 123.553C58.6 123.851 57.8 124 57 124Z" fill="url(#paint0_radial_1984_10799)"/>
  </g>
  <defs>
    <!-- 增加滤镜区域以确保阴影显示 -->
    <filter id="filter0_d_1984_10799" x="-20" y="-20" width="160" height="180" filterUnits="userSpaceOnUse" color-interpolation-filters="sRGB">
      <feFlood flood-opacity="0" result="BackgroundImageFix"/>
      <feColorMatrix in="SourceAlpha" type="matrix" values="0 0 0 0 0 0 0 0 0 0 0 0 0 0 0 0 0 0 127 0" result="hardAlpha"/>
      <feOffset dx="3" dy="5"/> <!-- 阴影偏移 -->
      <feGaussianBlur stdDeviation="12"/> <!-- 模糊度 -->
      <feComposite in2="hardAlpha" operator="out"/>
      <feColorMatrix type="matrix" values="0 0 0 0 0 0 0 0 0 0 0 0 0 0 0 0 0 0 0.25 0"/>
      <feBlend mode="normal" in2="BackgroundImageFix" result="effect1_dropShadow_1984_10799"/>
      <feBlend mode="normal" in="SourceGraphic" in2="effect1_dropShadow_1984_10799" result="shape"/>
    </filter>
    <!-- 渐变色 -->
    <radialGradient id="paint0_radial_1984_10799" cx="0" cy="0" r="1" gradientUnits="userSpaceOnUse" gradientTransform="translate(57 39) rotate(32.9052) scale(80.9938 80.9938)">
      <stop stop-color="#FF9A9A"/>
      <stop offset="1" stop-color="#C92929"/>
    </radialGradient>
  </defs>
</svg>
SVG 中的阴影效果(特别是 feDropShadow 和 feGaussianBlur)在不同的浏览器中可能有不同的兼容性,尤其是在某些旧版浏览器或者某些特定的渲染引擎中,效果可能不如预期
如果出现阴影失效 可能是以下
- 滤镜应用问题
使用了 feOffset 和 feGaussianBlur 来实现阴影效果,但它们可能没有正确应用于图形。如果图形未正确与滤镜进行绑定或者滤镜属性没有正确解析,阴影效果会消失。
A.确保 filter 是正确引用的。
B.确保滤镜区域(x, y, width, height)覆盖整个图形。 - 滤镜区域大小 (x, y, width, height)
如果 filter 区域(即 x, y, width, height)设置得过小,阴影可能会被裁剪掉。因此,可以调整 filter 的区域,确保它足够大以适应图形和阴影。
我们可以将 filter 的区域设置得比图形更大一点,确保阴影能够显示。 - SVG 渲染问题
有时不同的浏览器(尤其是 IE 和 Safari)可能不完全支持某些特性。为了确保广泛的兼容性,确保使用现代浏览器(如 Chrome 或 Firefox)进行测试。


 1385
1385

 被折叠的 条评论
为什么被折叠?
被折叠的 条评论
为什么被折叠?
 到【灌水乐园】发言


