


摘要:
上次介绍了_thread(多线程)的基础讲解,这次将结合UART(串口)开进行开发应用讲解。串口在日常的设计中是一个非常常见的东西,所以熟练掌握是基本知识。下面,就来介绍一下关于串口与_thread 结合的一个小程序。下面是所需要准备的东西。
硬件设计:
- Rasspberry Pi Pico开发板(应用Micropython开发)
- USB转TTL开发板
- 软连线
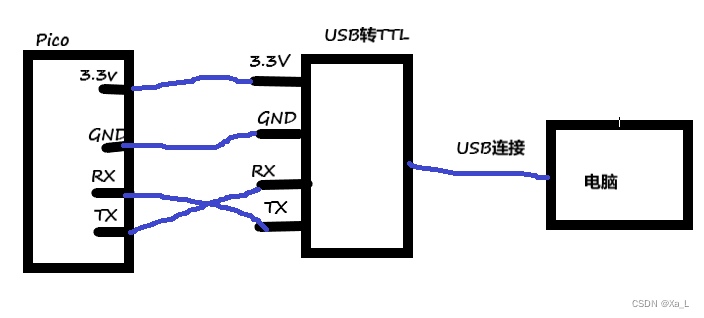
上面显示了其连线示意图。
演示代码:
思路:当程序运行时,在串口发送字符,其显示温度,若不发送字符时,其显示时间参数,时间参数显示在程序行窗口。
import _thread
import machine
import utime
from machine import UART,Pin,ADC

temp = ADC(4)
uart = UART(0,baudrate = 115200,bits = 8,parity = None,stop = 1,tx = Pin(0),rx = Pin(1))
led = Pin(25,Pin.OUT)
gLock = None

//温度显示
def temperate():

    read_temp_voltage = temp.read_u16()*3.3/65535
    temperature = 27-(read_temp_voltage-0.706)/0.001721
    uart.write('Temperature {}\n'.format(temperature))

//显示时间
def data():
    print(utime.localtime())

def main():
    print('---------Start Progarm-----------\n')
    utime.sleep(1)
    print('-----请输入任意字符,以显示温度----\n')
    while True:
        gLock = _thread.allocate_lock()
        gLock.acquire()
        if uart.any() :
             print('Echo String:{}'.format(uart.readline().decode()))
             _thread.start_new_thread(temperate,())
             utime.sleep(2)
             led.value(1)
        else:
             print('------当前时间为如下所示-------')
             _thread.start_new_thread(data,())
             utime.sleep(2)
        gLock.release()

if __name__ == '__main__':
    main()
示例结果:

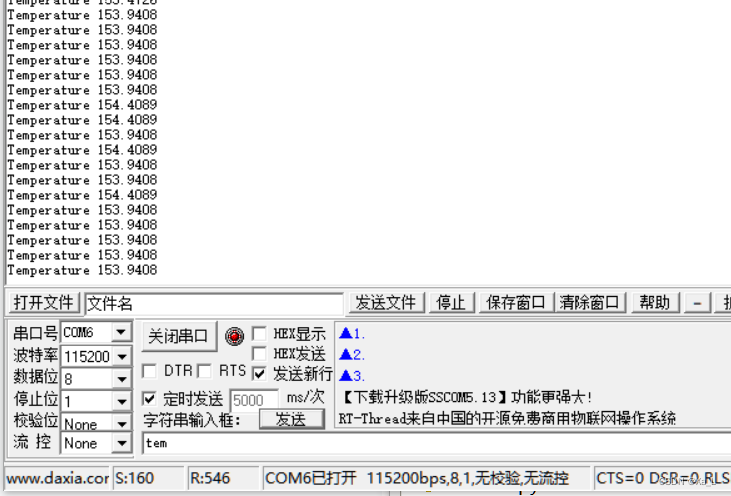
我们在串口软件中输入任意字符,都将会引发进程,从而调用温度显示模块,从而将温度显示在串口界面。
当我们串口不发送字符时,我们会得到以下结果,其只进行线程2的调用,即只显示时间。

技术交流
欢迎转载、收藏、有所收获点赞支持一下!


 1079
1079

 被折叠的 条评论
为什么被折叠?
被折叠的 条评论
为什么被折叠?
 到【灌水乐园】发言


