


大家好!
我是: Aimo_皑墨
我来介绍一下这个插件!
描述: 插件一般用于触控设备的使用如(安卓手机,平板)等触控设备
GitHub 下载地址: https://github.com/AimoTvT/UITouch/archive/refs/heads/5.0.zip
虚幻商城: 后续可能上架
教程视频地址: 未完成
使用方法: 演示项目: 第三人称项目模版
手动安装插件
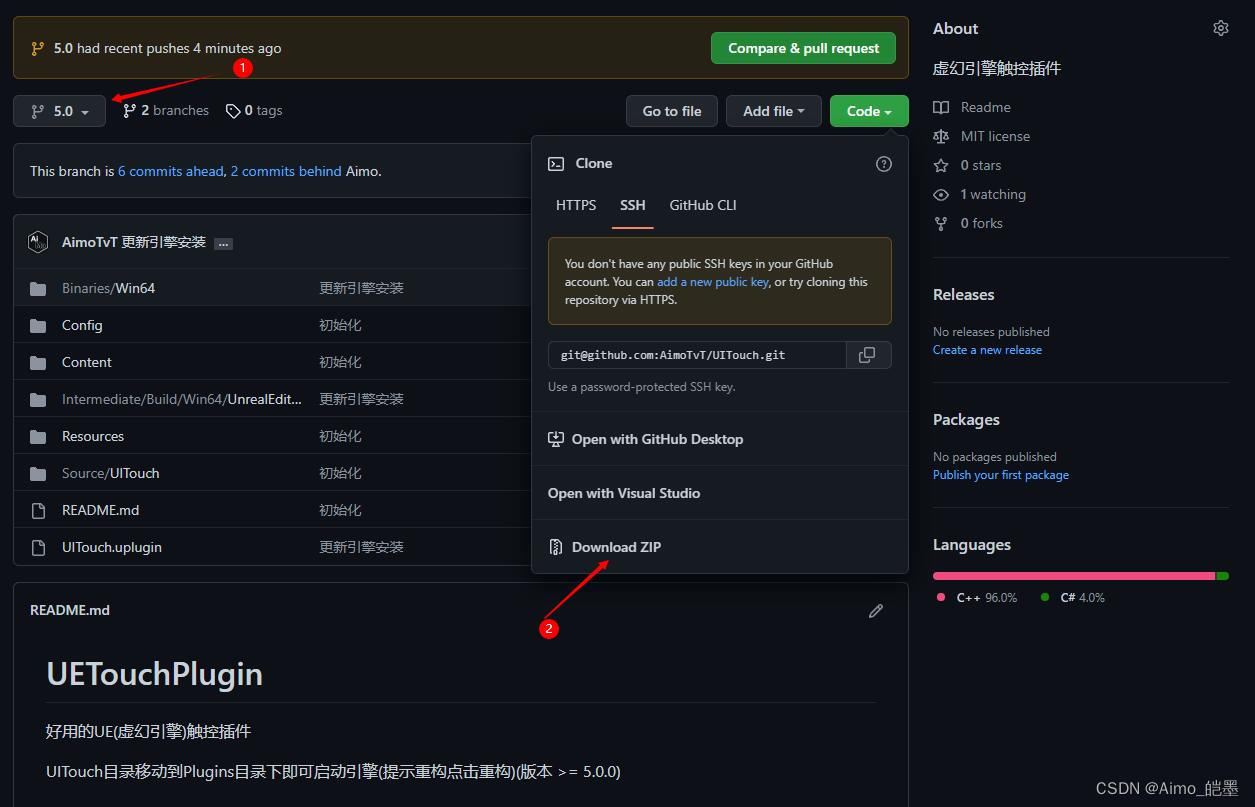
- 1.选择好自己的版本
- 2.点击 DownloadZip 下载(和网络地区可能影响下载速度)
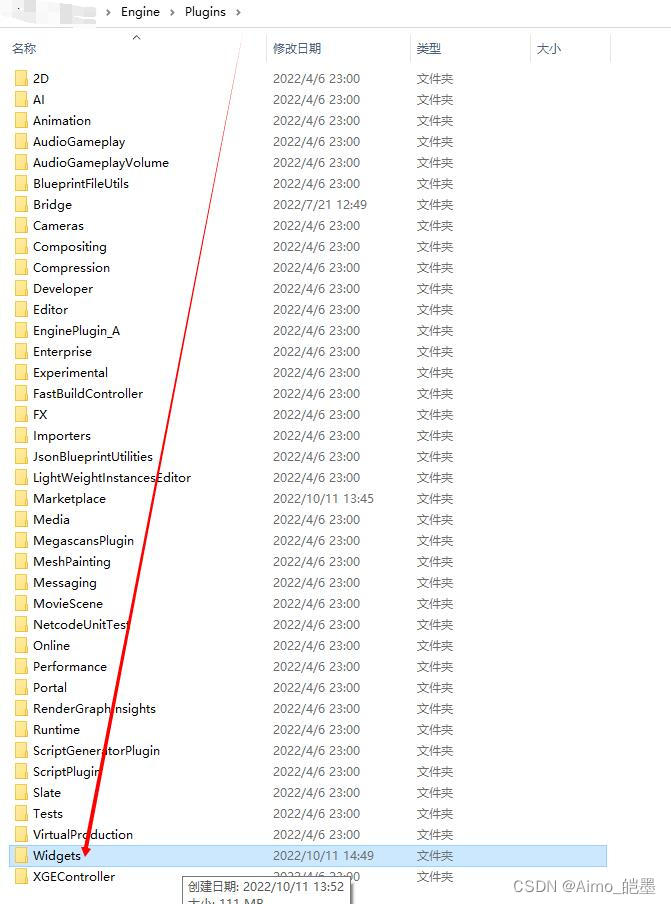
找到引擎文件夹里引擎\Engine\Plugins…路径下创建 Widgets 文件夹
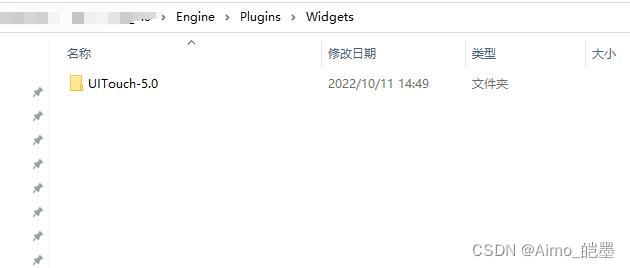
下载的解压包内的 UITouch 文件解压/复制到 引擎\Engine\Plugins\Widgets 目录下
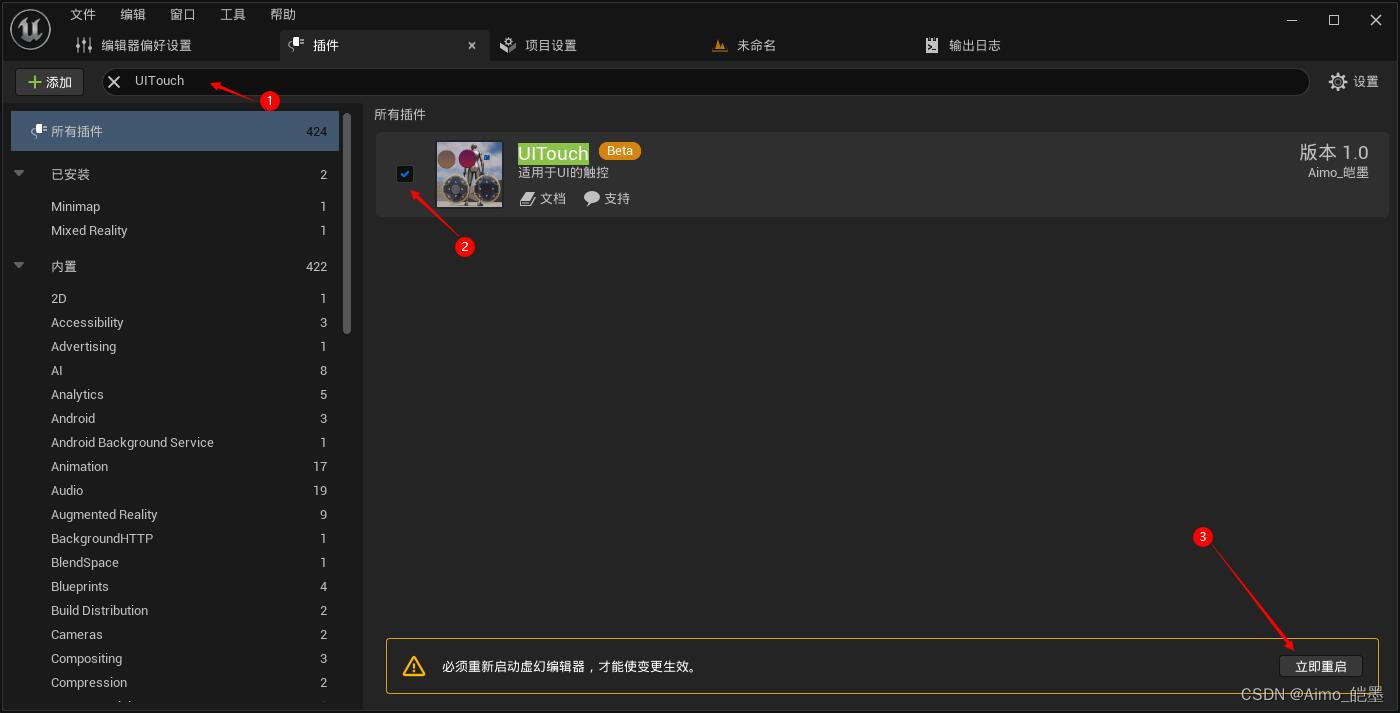
然后启动任意版本项目,找到在菜单栏->编辑->插件 1.搜索 UITouch 2.点击勾选(如果提示实验/测试点击 Yes 或是) 3.点击立即重启引擎
插件测试
电脑上测试选择,点击高级
 最低0.47元/天 解锁文章


 3279
3279


 被折叠的 条评论
为什么被折叠?
被折叠的 条评论
为什么被折叠?
 到【灌水乐园】发言


