


6D位姿估计–BlenderProc合成数据集
制作真实数据集难以在短时间内获得大量数据,采用合成的方式可以弥补这一不足。
环境搭建
- 使用conda创建bop虚拟环境并激活
conda create --name bop python=3.8
conda activate bop
- 安装bop工具
git clone https://github.com/thodan/bop_toolkit.git
cd bop-toolkit
pip install -r requirements.txt -e .
- 安装blenderproc
git clone https://github.com/DLR-RM/BlenderProc

cd BlenderProc
pip install -e .
数据集制作
- 在BOP官网上下载以下两个文件
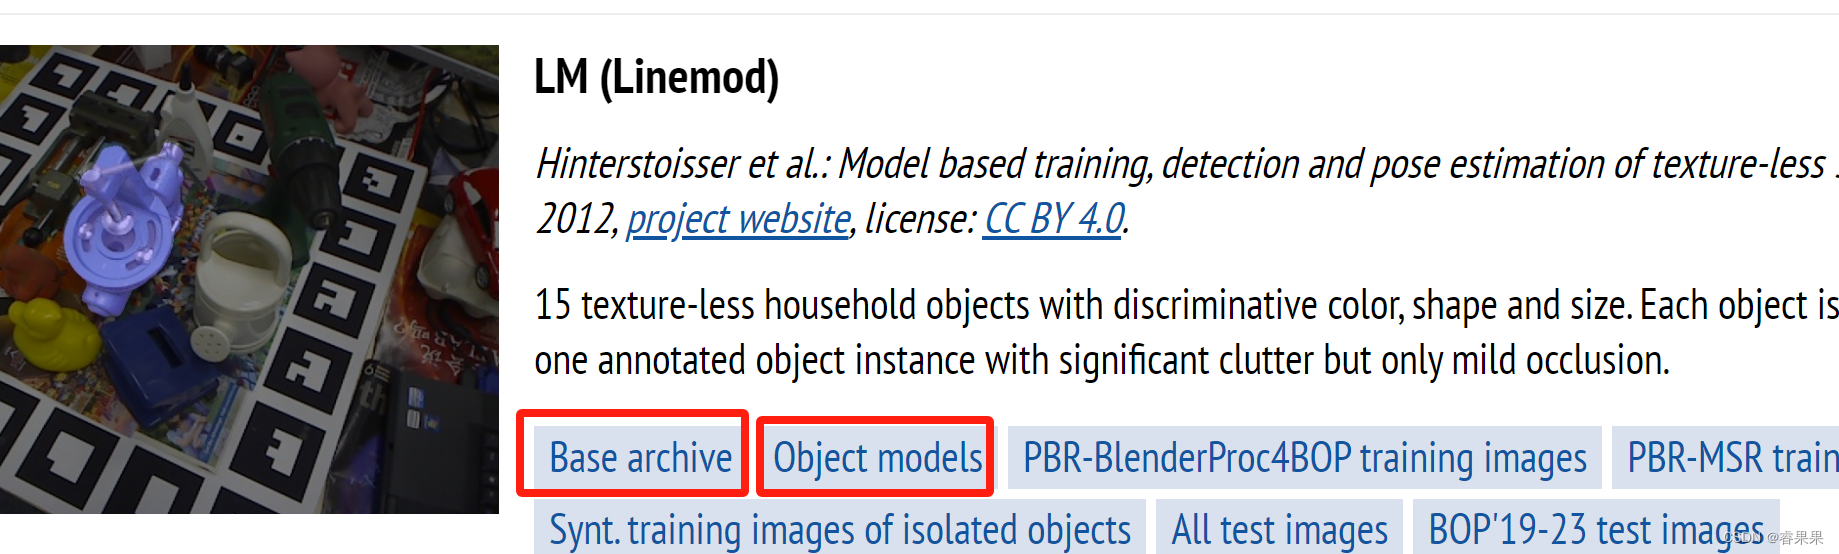
- 将lm_base.zip移动到BlenderProc目录,并解压,然后将
lm_models.zip放到刚解压出来的lm目录中并解压,得到lm目录如下:
.
├── camera.json
├── dataset_info.md
├── models
├── models_eval
└── test_targets_bop19.json
- 准备场景贴图,在BlenderProc目录新建backgrouns文件夹并运行
blenderproc download cc_textures ./backgrounds
这会在 ./backgrounds中下载很多场景贴图材料,下载一些就可以ctrl+c中断了,不然会下载很多。
- 生成数据集
blenderproc run examples/datasets/bop_challenge/main_lm_upright.py .. ./backgrounds ./output --num_scenes=20
参数含义:
parser.add_argument('bop_parent_path', help="Path to the bop datasets parent directory")
parser.add_argument('cc_textures_path', default="resources/cctextures", help="Path to downloaded cc textures")
parser.add_argument('output_dir', help="Path to where the final files will be saved ")
parser.add_argument('--num_scenes', type=int, default=20, help="How many scenes with 25 images each to generate")
也是运行一段时间差不多生成数量够了就可以提前终止了
但这一步第一次运行的时候会自动安装blender,以及一个相应的python虚拟环境,很费时间,不太好使,慢慢等待。
制作自己的目标物体数据集
- 将自己的ply文件放进/lm/models中,并在models_info.json中添加对应的模型信息.可以使用下面的代码获取模型信息。
from plyfile import PlyData
import os
import numpy as np
model_path = os.path.join('./Linemod_preprocessed/models/obj_01.ply')
ply = PlyData.read(model_path)
data = ply.elements[0].data
x = data['x']
y = data['y']
z = data['z']
x_size = np.max(x)-np.min(x)
y_size = np.max(y)-np.min(y)
z_size = np.max(z)-np.min(z)

print("Min X:")
print(np.min(x))
print("Min Y:")
print(np.min(y))
print("Min Z:")
print(np.min(z))
print('-----------------------------------------------------------------')
print("Size X:")
print(np.max(x)-np.min(x))
print("Size Y:")
print(np.max(y)-np.min(y))
print("Size Z:")
print(np.max(z)-np.min(z))
print('-----------------------------------------------------------------')
print("Diameter:")
print( np.sqrt(x_size**2 + y_size**2 + z_size**2) ) #直径
f = open("./Linemod_preprocessed/models/models_info.txt","w")
f.write("1: {")
f.write("diameter: {}, min_x: {}, min_y: {}, min_z: {}, size_x: {}, size_y: {}, size_z: {}".format(np.sqrt(x_size**2 + y_size**2 + z_size**2) ,np.min(x) ,np.min(y) ,np.min(z),(np.max(x)-np.min(x)) ,(np.max(y)-np.min(y)),(np.max(z)-np.min(z))))
f.write("}")
f.close()

os.rename("./Linemod_preprocessed/models/models_info.txt","./Linemod_preprocessed/models/models_info.yml")

#os.remove("compute_model_info.py")
- 替换camera.json中的相机参数为自己的相机参数
depth_scale camera.json
target_bop_objs = bproc.loader.load_bop_objs(bop_dataset_path = os.path.join(args.bop_parent_path, 'lm'), obj_ids = [1], object_model_unit = 'm')
    bproc.writer.write_bop(os.path.join(args.output_dir, 'bop_data'),
                           target_objects = sampled_target_bop_objs,
                           dataset = 'lm',
                           depth_scale = 0.001,
                           depths = data["depth"],
                           colors = data["colors"],
                           color_file_format = "JPEG",
                           ignore_dist_thres = 10)
- 生成数据集
blenderproc run examples/datasets/bop_challenge/main_lm_upright.py ..
./backgrounds ./output --num_scenes=20

(重建制作ply文件时质量太差,重建出来的瓶子很丑)
4.
cd  /bop_toolkit/scripts
python calc_gt_masks.py
python calc_gt_info.py

python gt.py
python info.py
BUG
FileNotFoundError: [Errno 2] No such file or directory: '/home/enco/bop_toolkit/BlenderProc/lm/camera.json'
创建该文件并写入自己的相机参数。
2.
FileNotFoundError: The given filepath does not exist: /home/enco/bop_toolkit/BlenderProc/lm/models/obj_000001.ply
这里需要修改main_lm_upright.py中的第16行代码,作者把代码写死了,这里需要根据自己的实际情况对obj_ids = [1]进行修改,原作者调用bop_tookit中的params.py传入这个参数的,而params.py中默认lm数据集有15个模型,另外确保ply文件命名正确。
target_bop_objs = bproc.loader.load_bop_objs(bop_dataset_path = os.path.join(args.bop_parent_path, 'lm'), obj_ids = [1], object_model_unit = 'm')
object_model_unit = 'm’是模型的单位参数,有m、cm、mm,具体查看自己的ply文件,视情况而定。
3.
sampled_target_bop_objs = list(np.random.choice(target_bop_objs, size=15, replace=False))
  File "mtrand.pyx", line 965, in numpy.random.mtrand.RandomState.choice
ValueError: Cannot take a larger sample than population when 'replace=False'
使用np.random.choice时,你试图从一个群体中抽取比群体大小更多的元素,而且是在replace=False(即无放回抽样)的情况下,在不放回抽样的情况下,抽样大小不能超过群体大小。
在相应位置修改如下:
if len(target_bop_objs) < 15:  # 检查群体大小是否小于期望的样本大小,否则不抽样
        sampled_target_bop_objs = target_bop_objs
else:
   	    sampled_target_bop_objs = list(np.random.choice(target_bop_objs, size=15, replace=False))
当然也可以修改size=15参数,但不建议修改为有放回抽样。
poi = bproc.object.compute_poi(np.random.choice(sampled_target_bop_objs, size=1, replace=False))
这一行也需要做相应的修改。
gt.py
import yaml
import json
import os
from pathlib import Path
from fnmatch import fnmatchcase
class Yaml_Interconversion_Json:
def __init__(self):
self.filePathList = []
# json文件内容转换成yaml格式
def json_to_yaml(self, jsonPath1, jsonPath2):
with open(jsonPath1, encoding="utf-8") as f1:
datas1 = json.load(f1) # 将文件的内容转换为字典形式
with open(jsonPath2, encoding="utf-8") as f2:
datas2 = json.load(f2) # 将文件的内容转换为字典形式
i = 0
new_data = {}
while (i < 100):############################################修改为生成的数据集图片数量
b = str(i)
new_data.update({i: [{'cam_R_m2c': datas1[b][0]['cam_R_m2c'], 'cam_t_m2c': datas1[b][0]['cam_t_m2c'],
'obj_bb': datas2[b][0]['bbox_obj'], 'obj_id': datas1[b][0]['obj_id']}]})
print(i)
i = i + 1
yamlDatas = yaml.dump(new_data, indent=5, sort_keys=False) # 将字典的内容转换为yaml格式的字符串
return yamlDatas
# # json文件内容转换成yaml格式
# def json_to_yaml(self, jsonPath):
# with open(jsonPath, encoding="utf-8") as f:
# datas = json.load(f)
# yamlDatas = yaml.dump(datas, indent=5, sort_keys=False)
# # print(yamlDatas)
# return yamlDatas
# 生成文件
def generate_file(self, filePath, datas):
if os.path.exists(filePath):
os.remove(filePath)
with open(filePath, 'w') as f:
f.write(datas)
# 清空列表
def clear_list(self):
self.filePathList.clear()
# 修改文件后缀
def modify_file_suffix(self, filePath1, suffix):
dirPath = os.path.dirname(filePath1)
fileName = 'gt' + suffix
newPath = dirPath + '/' + fileName
# print('{}_path:{}'.format(suffix, newPath))
return newPath
# 原json文件同级目录下,生成yaml文件
def generate_yaml_file(self, jsonPath1, jsonPath2, suffix='.yml'):
yamlDatas = self.json_to_yaml(jsonPath1, jsonPath2)
yamlPath = self.modify_file_suffix(jsonPath1, suffix)
# print('yamlPath:{}'.format(yamlPath))
self.generate_file(yamlPath, yamlDatas)
if __name__ == "__main__":
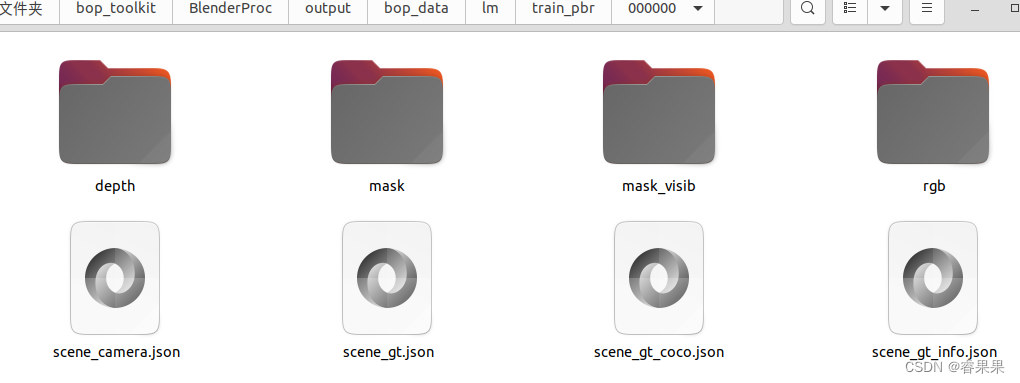
jsonPath1 = '/home/enco/bop_toolkit/BlenderProc/output/bop_data/lm/train_pbr/000000/scene_gt.json'##scene_gt.json位置
jsonPath2 = '/home/enco/bop_toolkit/BlenderProc/output/bop_data/lm/train_pbr/000000/scene_gt_info.json'##scene_gt_info.json位置
yaml_interconversion_json = Yaml_Interconversion_Json()
yaml_interconversion_json.generate_yaml_file(jsonPath1, jsonPath2)
info.py
import yaml
import json
import os
from pathlib import Path
from fnmatch import fnmatchcase


class Yaml_Interconversion_Json:
    def __init__(self):
        self.filePathList = []

    # json文件内容转换成yaml格式
    def json_to_yaml(self, jsonPath):
        with open(jsonPath, encoding="utf-8") as f1:
            datas = json.load(f1)  # 将文件的内容转换为字典形式
            i = 0
            new_data = {}
            while i < 100:#################################################################修改为生成的数据集图片数量
                b = str(i)
                new_data.update({i: {'cam_K': datas[b]['cam_K'], 'depth_scale': datas[b]['depth_scale']}})
                print(i)
                i = i + 1
            yamlDatas = yaml.dump(new_data, indent=5, sort_keys=False)  # 将字典的内容转换为yaml格式的字符串
        return yamlDatas

    #    # json文件内容转换成yaml格式
    # def json_to_yaml(self, jsonPath):
    #     with open(jsonPath, encoding="utf-8") as f:
    #         datas = json.load(f)
    #     yamlDatas = yaml.dump(datas, indent=5, sort_keys=False)
    #     # print(yamlDatas)
    #     return yamlDatas

    # 生成文件
    def generate_file(self, filePath, datas):
        if os.path.exists(filePath):
            os.remove(filePath)
        with open(filePath, 'w') as f:
            f.write(datas)

    # 清空列表
    def clear_list(self):
        self.filePathList.clear()

    # 修改文件后缀
    def modify_file_suffix(self, filePath, suffix):
        dirPath = os.path.dirname(filePath)
        fileName = 'info' + suffix
        newPath = dirPath + '/' + fileName
        # print('{}_path:{}'.format(suffix, newPath))
        return newPath

    # 原json文件同级目录下,生成yaml文件
    def generate_yaml_file(self, jsonPath, suffix='.yml'):
        yamlDatas = self.json_to_yaml(jsonPath)
        yamlPath = self.modify_file_suffix(jsonPath, suffix)
        # print('yamlPath:{}'.format(yamlPath))
        self.generate_file(yamlPath, yamlDatas)


if __name__ == "__main__":
    jsonPath = '/home/enco/bop_toolkit/BlenderProc/output/bop_data/lm/train_pbr/000000/scene_camera.json'##scene_camera.json的位置
    yaml_interconversion_json = Yaml_Interconversion_Json()
    yaml_interconversion_json.generate_yaml_file(jsonPath)


 1082
1082


 被折叠的 条评论
为什么被折叠?
被折叠的 条评论
为什么被折叠?
 到【灌水乐园】发言


